Table of Contents
Advertisement
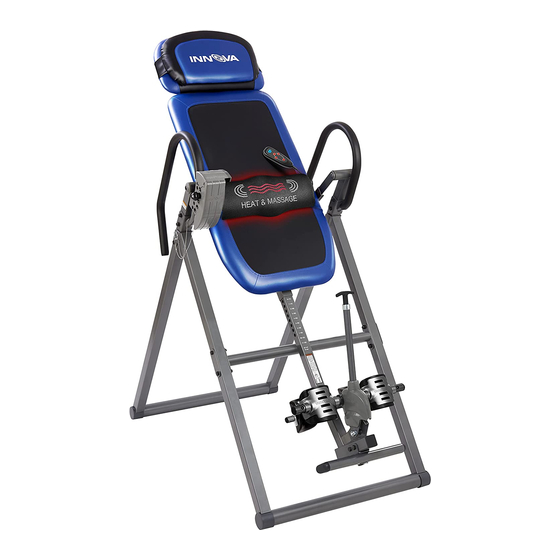
Heavy Duty Deluxe Inversion Therapy Table
BE SURE to read this manual in its ENTIRETY prior
to installing and using the inversion table.
DO NOT USE inversion table without the approval
of a licensed physician. Some medical conditions
may not be suitable for use with this product.
CAREFULLY READ all Warnings and Instructions
before using this inversion table. Misuse of this
equipment may result in serious injury.
BODY WEIGHT will put pressure on ankles while
inverting. New users are advised to start at lower
angles (15 or 30) and to wear athletic shoes.
DO NOT let children under the age of 13 use the
inversion table.
DO NOT allow children, bystanders, or pets around
while using this equipment.
DO NOT put hand or fingers inside the Protective
Cover for the Angle Selector Pin.
TO PREVENT unauthorized usage, it is strongly
recommended you purchase a lock to fasten the
Height Adjustment Tube to the Cross Bar.
KEEP BODY, clothing, and hair free of all moving
parts.
ALWAYS USE all basic safety precautions when
using any electrical products.
TIGHTEN ALL nuts, bolts, and screws BEFORE
using equipment.
LEAVE adequate space to invert.
THIS EQUIPMENT is for indoor, household and
non-institutional use only.
Questions/Comments
Innova Products Inc. is committed to providing the best quality and customer satisfaction
for all products we distribute. If you are dissatisfied with your purchase or need assistance,
please do not hesitate to contact us.
Email: support@innovaproductsinc.com
Model ITM4800
WARNING:
Owner's Manual
Note:
This product is
designed to adjust from 4'10"
to 6'6" with a Maximum
User Weight of
Images may be slightly different
from actual product.
Phone: (408) 541-1866
Monday through Friday
8:00 am – 4:00 pm Pacific Time
300 LBS
Version:180315JJ
Advertisement
Table of Contents

Related Manuals for Innova ITM4800


Summary of Contents for Innova ITM4800
- Page 1 Questions/Comments Innova Products Inc. is committed to providing the best quality and customer satisfaction for all products we distribute. If you are dissatisfied with your purchase or need assistance, please do not hesitate to contact us.
- Page 2 PRODUCT WARRANTY One-Year Limited Liability Innova Products Inc. warrants that this product will be free from defects in materials and workmanship for a period of one year from date of purchase. This warranty applies only to the original purchaser when purchase of the product is from an authorized retailer and is for personal or household use.
- Page 3 · Users can also read the condensed version of the Warnings and User’s Guidelines on the back of the Backrest Pad. · Innova Products Inc. assumes no responsibility for personal injury or property damage sustained by or through the improper use of the Inversion Table.
- Page 4 Components For Assembly STEP 1 Components STEP 3 Component Protruding Metal Piece 2/47/47A 8R/9R/11R 8L/9L/11L STEP 4 Components 10/52/53 STEP 2 Components 52/53 STEP 5 Components STEP 6 Components STEP1 STEP2 M8x50 M8x55 STEP3 STEP4 M8x20 M8x45 Hex Wrenches #5 1PC M8x45 STEP3 Wrench #13#17 2PCS...
- Page 5 Rubber Stopper and let it stand on the floor. is facing out Front Installation Guidance Video DOES NOT replace Owner’s Manual. Please be sure to read the Owner’s Manual in its entirety. https://youtu.be/72kV8tdOlC0 or search “Innova ITM4800 Installation Guide” on YouTube.com...
- Page 6 Step 2 – Handlebars Assembly Attach the Right Handlebar (6) to the Rear Base Frame (8R) using 2 Bolts (20), 2 Washers (19), and 2 Lock Nuts (21). Be sure to insert Bolts (20) from the inside of the frame. The Washers (19) and Lock Nuts (21) will be on the outside of the frame.
- Page 7 Step 3 – Pre-Installed Backrest to Base Frame Before Installation, Please NOTE: Connecting Brackets Must Point Downward Connecting Brackets (11R&11L) MUST When Attaching Pre-Installed Backrest be pointing downward and the Pre- Installed Backrest MUST be attached from below and up into the connecting brackets or the table will not invert properly.
- Page 8 Step 4 – Height Adjustment Tube and Ankle Holders Turn 90 1. Pull out the Adjustable Ankle Holding degrees Tube (5) and turn it 90 degrees and re-insert it horizontally. Make sure the holes on the Holes square tube are facing up. face UP NOTE: There is a spring pre-installed inside the tube which should not be removed.
- Page 9 Step 5 – Height Adjustment Tube & Protective Cover Assembly Pull the Height Adjustment Knob (38) and at the same time slide the Height Adjustment Tube (3) into the Backrest Support Tube (2) to your desired height number and release the Height Adjustment Knob (38).
- Page 10 Step 6 – Massage/Heat Lumbar Pad & Headrest Assembly Input Jack Adaptor Attach the Head Pillow (48) to top of the Headrest (47A) to your desired position using the strap on the Head Pillow (48). Attach the Massage/Heat Lumbar Pad (13) to lower part of the Backrest Pad (47) to your desired position using the straps on the Lumbar Pad (13).
- Page 11 SAFETY INSTRUCTIONS FOR MASSAGE/HEAT PAD PLEASE READ ALL INSTRUCTIONS BEFORE USING. WHEN USING ANY ELECTRICAL PRODUCTS, BASIC SAFETY PRECAUTIONS SHOULD ALWAYS BE FOLLOWED, INCLUDING THE FOLLOWING: · USE only for its intended use as described in the operating manual. · DO NOT use attachments not recommended by the manufacturer. ·...
- Page 12 CONTROLLER INSTRUCTIONS Connect the Power Adaptor of Heat/Massage Lumbar Pad to a suitable outlet and the indicator “POWER” light will blink and go into standby mode. Press the “POWER” button to start the massage function. The power indicator light will stop blinking and the massage Press the "HEAT"...
- Page 13 PREPARING TO INVERT 1: INVERSION ANGLE AND HEIGHT SETTING SELECT INVERSION ANGLE Familiarize yourself with the Angle Selector Pin located on the Right Side of the Inversion Table. The positioning of the pin will determine the degree of the inversion. The 6 selections are: 15 - Slight Inversion 30 - Moderate Inversion...
- Page 14 PREPARING TO INVERT 2: SECURING YOUR ANKLES WARNING: ALWAYS WEAR ATHLETIC SHOES WITH TOP LACES TO HELP SECURE YOUR ANKLES IN THE INVERSION TABLE AND FOR FOOT PROTECTION WHILE EXERCISING. ALWAYS MAKE SURE THAT THE U-SHAPE HOLDERS ARE SECURED SNUGLY AGAINST YOUR ANKLES AND THAT THE ANKLE HOLDING ADJUSTMENT KNOB IS FULLY TIGHTENED AND LOCKED INTO PLACE BEFORE YOU USE THE INVERSION TABLE.
- Page 15 HOW TO INVERT NOTE: Body weight will put pressure on ankles while inverting. New users are advised to start at lower angles (15 or 30) and to wear athletic shoes. To be able to invert smoothly and easily, you will need to find your personal center of gravity.
- Page 16 STORAGE & MAINTENANCE Remove Safety Pin (26) from the tip of the Base Frame (8&9). Pull up on the Handlebars (6/7) to fold the Base Frame (8&9). Re-insert Safety Pin into the hole near the tip of the Base Frame (9). Be sure to leave the Base Frame (8&9) wide enough to remain stable or secure it to a wall to prevent tipping.
- Page 17 Frequently Asked Questions (FAQs) 1. How can I tell which is the Right Base Frame (8/9R) vs. Left Base Frame (8/9L)? There is a Warning sticker on the Right Front Base Frame (9R). There is also a protruding metal piece on the Right Connecting Bracket (11R). In this manual, Right indicates the right side while using the inversion table, not facing it.
- Page 18 Parts Listing Part# Description QTY Part# Description Bottom Tube Base Frame End Caps Backrest Support Tube Hexagonal Bolt-M8x65mm Height Adjustment Tube Square End Cap-Height Adjustment Footrest Rubber Stopper Adjustable Ankle Holding Tube EVA Space Pad Right Handlebar Round End Caps-Ankle Tube Left Handlebar Ankle Holding Adjustment Knob Base Frame - Rear - Left...
- Page 19 Exploded View...
- Page 20 2) PC Code for your item (front page of this manual) 3) Part number or installation step number in question https://youtu.be/72kV8tdOlC0 or search “Innova ITM4800 Installation Guide” Installation Guidance Video DOES NOT replace Owner’s Manual. Please be sure to read the Owner’s Manual in its entirety.
Need help?
Do you have a question about the ITM4800 and is the answer not in the manual?
Questions and answers
Where can I get a replacement power adapter
You can find a replacement power adapter for the Innova ITM4800 on Desertcart. The Innov Power Adapter is specifically designed for Innova Health & Fitness Inversion Tables, including models ITM4800 and ITM5900.
This answer is automatically generated
Where can i find replacement parts