Table of Contents

Subscribe to Our Youtube Channel
Related Manuals for Belkin F5U104


Summary of Contents for Belkin F5U104
- Page 1 P73162-A-F5U104-man.qxd 8/15/01 2:40 PM Page 1 USB Direct Connect User Manual P73162-A F5U104...
-
Page 2: Table Of Contents
P73162-A-F5U104-man.qxd 8/15/01 Table of Contents 1. Introduction ...1 2. Technical Specifications ...1 3. Package Contents ...2 4. Device Layout...2 5. Network Topology ...3 6. Windows ® 98 Instructions...6 7. Windows ® Me Instructions ...11 8. Windows ® 2000 Instructions...16 9. Ready to Share...23 10. -
Page 3: Introduction
P73162-A-F5U104-man.qxd 8/15/01 1. Introduction Thank you for purchasing the Belkin USB Direct Connect. The USB Direct Connect provides a convenient way to connect stand-alone PCs and gain the benefits of networking without having to install network cards. Two or more USB-equipped computers can share programs, files, peripheral equipment, and more. -
Page 4: Package Contents
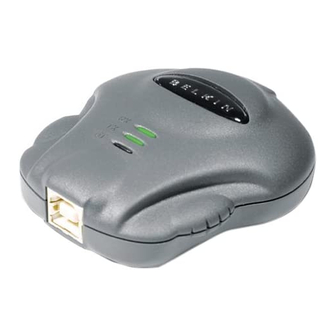
P73162-A-F5U104-man.qxd 8/15/01 2:40 PM Page 2 3. Package Contents • USB Direct Connect Device • Two (2) 6’/2m USB A/B Device Cables • User Manual • Software Installation CD 4. Device Layout There are three activity status lights: Rx=Receive, Tx=Transmit,... -
Page 5: Network Topology
P73162-A-F5U104-man.qxd 8/15/01 5. Network Topology The USB Direct Connect can be used to connect two or more computers. There is a maximum distance limit between computers (or hosts) of 10 meters (32 feet). This limit is due to the USB cable length maximum of 5 meters (16 feet). - Page 6 P73162-A-F5U104-man.qxd 8/15/01 2:40 PM Page 4 5. Network Topology (continued) Daisy-Chain Configuration You can configure your computer network by “daisy-chaining” the computers together. The advantage to this configuration is the distance in which you can place computers apart in your small office or home.
- Page 7 P73162-A-F5U104-man.qxd 8/15/01 2:40 PM Page 5 5. Network Topology (continued) How NOT to connect a USB Direct Connect PCs must never be connected together in such a way that any two PCs in the network have more than one connection to each other.
-
Page 8: Windows 98 Instructions
P73162-A-F5U104-man.qxd 8/15/01 6. Windows 98 Instructions for the Belkin USB Direct Connect 1. Insert the installation disk into the computer and, with the supplied cable, attach the Direct Connect to the computer. The “Add New Hardware Wizard” will start. Click “Next”. - Page 9 P73162-A-F5U104-man.qxd 8/15/01 6. Windows 98 Instructions for the Belkin USB Direct Connect (continued) 5. Click “Finish”. 6. On your desktop, you will now see a program called “NETSETUP”. Double-click on the icon to start the setup program. 7. Choose “Typical Installation (Recommended for most users.)”...
- Page 10 P73162-A-F5U104-man.qxd 8/15/01 6. Windows 98 Instructions for the Belkin USB Direct Connect (continued) 12. In the “IP Address” dialog box, the first two boxes must contain 192 and 168. The third box can be anything you would like, but it must be the same on every computer.
- Page 11 P73162-A-F5U104-man.qxd 8/15/01 6. Windows 98 Instructions for the Belkin USB Direct Connect (continued) Note: If the files Windows needs are already located on your hard drive, then Windows does not prompt you to specify the location of the files it needs, and continues with the installation.
- Page 12 P73162-A-F5U104-man.qxd 8/15/01 6. Windows 98 Instructions for the Belkin USB Direct Connect (continued) 17. If the “Enter Network Password” window does not appear when your PC restarts, right-click on “Network Neighborhood” and select “Properties”. Under “Primary Network Logon”, select “Client for Microsoft Networks”...
-
Page 13: Windows Me Instructions
The “Add New Hardware Wizard” will start. Select “Search for the best driver for your device. (Recommended)”. Click “Next”. 2. The “Add New Hardware Wizard” will find the Belkin USB Direct Connect and inform you that it has finished installing the drivers. Click “Finish”. - Page 14 P73162-A-F5U104-man.qxd 8/15/01 2:40 PM Page 12 7. Windows Me Instructions for the Belkin USB Direct Connect (continued) 9. In the “IP Address” dialog box, the first two boxes must contain 192 and 168. The third box can be anything you would like, but it must be the same on every computer.
- Page 15 P73162-A-F5U104-man.qxd 8/15/01 7. Windows Me Instructions for the Belkin USB Direct Connect (continued) 10. The following screen will appear. Make sure your driver CD is in the CD-ROM drive and click “OK”. 11. The “Select Device” dialog box will appear. Click “Have Disk”.
- Page 16 P73162-A-F5U104-man.qxd 8/15/01 7. Windows Me Instructions for the Belkin USB Direct Connect (continued) 13. The “Select Device” window will appear. Highlight the “Belkin Direct Connect Network Adapter” and click “OK”. 14. The “Select Device” window will appear. Highlight “Microsoft” and “TCP/IP”, and click “OK”.
- Page 17 P73162-A-F5U104-man.qxd 8/15/01 2:40 PM Page 15 7. Windows Me Instructions for the Belkin USB Direct Connect (continued) 16. The computer will now need to reboot. Click “Yes”. 17. Upon restart, proceed to Section 9a to enable your computer to share files.
-
Page 18: Windows 2000 Instructions
P73162-A-F5U104-man.qxd 8/15/01 8. Windows 2000 Instructions Installation and setup of the Belkin USB Direct Connect takes three main steps: • Hardware installation • Adding the Direct Connect to the system • Configuring the Direct Connect network settings Follow the steps in this section to set up your Direct Connect. - Page 19 P73162-A-F5U104-man.qxd 8/15/01 8. Windows 2000 Instructions (continued) 5. The “Found New Hardware Wizard” will indicate that the drivers for the USB Direct Connect have been located. Click “Next”. 6. The “Found New Hardware Wizard” will now tell you that Windows has finished installing the software for this device.
- Page 20 P73162-A-F5U104-man.qxd 8/15/01 8. Windows 2000 Instructions (continued) 2. The “Add/Remove Hardware Wizard” will start. Click “Next”. 3. In the next screen, select “Add/Troubleshoot a device”. Click “Next”. 4. The “Add/Remove Hardware Wizard” will search for new hardware. 5. In the next window, select “Add a new device” and click “Next”.
- Page 21 [drive letter]:\win2000, where [drive letter] is the letter of your CD-ROM drive. See the illustration below. Click “Next”. 10. In the next window, highlight “Belkin Direct Connect Network Adapter”, and click “Next”. 11. Windows will now tell you that it is ready to install the device.
- Page 22 Click once on the last “Connection” icon and wait until the description “Belkin Direct Connect Network Adapter” appears to confirm the icon is the Direct Connect-related icon. Use this method to search for the Direct Connect if the first one you tried is not the Direct Connect.
- Page 23 P73162-A-F5U104-man.qxd 8/15/01 8. Windows 2000 Instructions (continued) 3. In the “IP Address” dialog box, select “Use the Following IP Address”. In the first line, the first two spaces must contain 192 and 168. The third box can be anything you would like, but it must be the same on every computer.
- Page 24 P73162-A-F5U104-man.qxd 8/15/01 8. Windows 2000 Instructions (continued) 5. In the “Identification Changes” window, enter a computer name (for example, Computer 1). This name must be unique (different) for each computer on the network. Next, select “Workgroup” and enter a workgroup name for your network (for example, MY NETWORK).
-
Page 25: Ready To Share
P73162-A-F5U104-man.qxd 8/15/01 9. Ready to Share a. Share Files To share files between Windows 98 and Windows Me PCs, you first need to: 1. Double-click on the “My Computer” icon on your desktop. 2. Left-click on the hard drive available on your computer (e.g., C drive) to highlight it. - Page 26 2. On your desktop, right-click on “My Computer”, then left-click on “Properties”. Click on the “Device Manager” tab. The Belkin USB Direct Connect should be in the “Network Adapters” section. If Belkin USB Direct Connect is not there, or if there is a yellow question mark by it, the device is not installed properly.
-
Page 27: Troubleshooting
• Make sure the “Primary Network Logon” is set to “Client for Microsoft Networks”. • Double-click on “Belkin TCP/IP for Belkin USB Direct Connect”. Check the IP address. Make sure the third number field is the same on all PCs and the last number field is different on all PCs. - Page 28 DO NOT click “Cancel”. Either use your password or just click “OK”. 11. If you still cannot see other PCs on the network, please contact Belkin Technical Support. PROBLEM: In Windows 2000, I can see other computers but I cannot access them.
- Page 29 P73162-A-F5U104-man.qxd 8/15/01 10. Troubleshooting (continued) PROBLEM: How do I uninstall the USB Direct Connect with Windows 98 and Windows Me? Removing the USB Direct Connect from your computer is a two-step process: Step I: a. Click on the “Start” button, then go to “Settings”, then “Control Panel”.
-
Page 30: Ce Declaration Of Conformity
Belkin Components warrants this product against defects in materials and workmanship for its lifetime. If a defect is discovered, Belkin will, at its option, repair or replace the product at no charge provided it is returned during the warranty period, with transportation charges prepaid, to the authorized Belkin dealer from whom you purchased the product. - Page 31 P73162-A-F5U104-man.qxd 8/15/01 2:40 PM Page 29...
- Page 32 7 Bowen Cresent • West Gosford NSW 2250 • Australia Tel: +61 2 4372 8600 Fax: +61 (2) 4325 4277 © 2001 Belkin Components. All rights reserved. All trade names are registered trademarks of respective manufacturers listed. 2:40 PM Page 30...
Need help?
Do you have a question about the F5U104 and is the answer not in the manual?
Questions and answers