Daikin FTXN25MV1B Technical Manual
Split unit air conditioner inverter multi split cooling only & heatpump 50hz
Hide thumbs
Also See for FTXN25MV1B:
- Installation manual (156 pages) ,
- Service manual (73 pages) ,
- Installation manual (22 pages)

Related Manuals for Daikin FTXN25MV1B


Summary of Contents for Daikin FTXN25MV1B
- Page 1 R410A TECHNICAL MANUAL Split Unit Air Conditioner Inverter Multi Split Series MX-B Series — Cooling only & Heatpump [50Hz] — TM-5MSY-B-ST-A1...
-
Page 3: Table Of Contents
Table of Contents Table of Contents Nomenclature........................1 Indoor ..........................1 Outdoor ..........................2 Product Line-Up ......................3 Application Information .....................6 Operating Range ......................6 Refrigerant Circuit Diagrams ..................7 Installation Guideline .....................8 Engineering & Physical Data ...................20 Performance Data ......................23 Outline & Dimension ......................26 Wiring Diagram .........................30 Service &... -
Page 5: Nomenclature
Nomenclature Nomenclature Indoor FT(X) N 25 M V1 B Region Power Supply Symbol V1: 1 Phase 50 Hz 240V Generation/Series M: M series L: L Series Capacity Indication 25: 2,500 kW * It might differ with the actual rated capacity. Always refer to engineering &... -
Page 6: Outdoor
Nomenclature Outdoor 2 MX 45 B G X V1 Power Supply Symbol V1: 1 Phase 50 Hz 220~240V Production X: OYLM Generation Minor Changes Generation/Series Capacity Indication 45: ≈ 13,650 Btu/h [4kW] 50: ≈ 18,400 Btu/h [5.4kW] 60: ≈ 22,200 Btu/h [6.5kW] 80: ≈... -
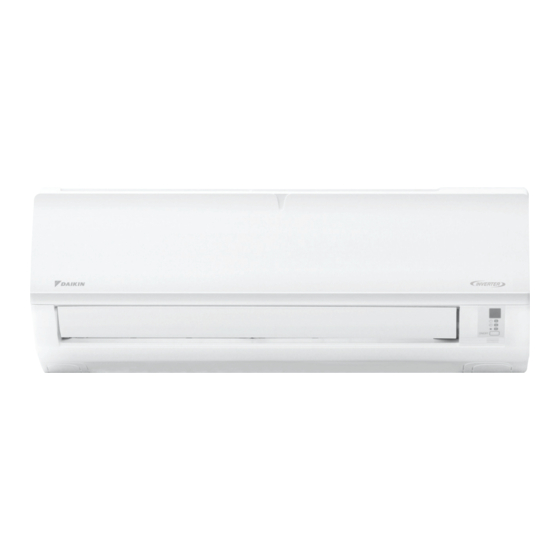
Page 7: Product Line-Up
Nomenclature Product Line-Up Indoor Unit: Wall mounted FTXN-MV1 Series Classifi cation Model FTXN25MV1B FTXN45MV1B FTXN50MV1B Indoor Unit: Ceiling Cassette FFQ-CXV1 / FCQ-EXV1 Series Classifi cation Model FFQ25CXV1 FFQ35CXV1 FFQ50CXV1... - Page 8 Nomenclature Indoor Unit: Ceiling Concealed FDMQ-C(2)XV1 Series Classifi cation Model FDMQ25C2XV1 FDMQ35CXV1 FDMQ50CXV1 Indoor Unit: Ceiling Mounted FLQ-EXV1 Series Classifi cation Model FLQ35EXV1 FLQ50EXV1...
- Page 9 Nomenclature Outdoor Unit MX-B Series Classifi cation Model 2MX45BGXV1 2MX50BGXV1 3MX60BGXV1 4MX80BGXV1...
-
Page 10: Application Information
Application Information Application Information Operating Range Ensure the operating temperature is in allowable range. Heatpump - 2MX50BGXV1 / 3MX60BGXV1 / 4MX80BGXV1 Heating Cooling Indoor DB (°C) Indoor WB (°C) Heatpump - 2MX45BGXV1 Heating Cooling Indoor DB (°C) Indoor WB (°C) The use of your air conditioner outside the range of working temperature and humidity can result... -
Page 11: Refrigerant Circuit Diagrams
Application Information Refrigerant Circuit Diagrams Model: 2MX45BGXV1 / 2MX50BGXV1 Model: 3MX60BGXV1 / 4MX80BGXV1... -
Page 12: Installation Guideline
Application Information Installation Guideline Installation of Outdoor Unit • The outdoor unit must be installed in such a way, so as to prevent short circuit of the hot discharged air or obstruction to the smooth air fl ow. Please follow the installation clearance shown in the fi gures below. -
Page 13: Installation Diagram
Application Information Installation Diagram Wall Mounted Indoor Unit Cut thermal insulation pipe to an appropriate length and wrap it with Caulk pipe 30mm or more from ceiling tape, making sure that no hole gap gap is left in the insulation with putty. - Page 14 Application Information Ceiling Cassette Drain Piping Thermal Insulation Wrap the insulated pipe with the finishing tape from bottom to top Front Panel Air Filter (behind the grille) Air Intake Grille Air Discharge Louver Preliminary Site Survey • Electrical supply and installation is to confi rm to local authority’s (e.g. National Electrical Board) codes and regulations.
-
Page 15: Unit Installation
Application Information Unit Installation 15.0 18.0 538.0 529.0 19.0 32.0 580.0 ~ 610mm (CEILING OPENING MEASUREMENT) FFQ-CXV1 • The indoor unit must be away from heat and steam sources (avoid installing it near an entrance). • Measure and mark the position for the hanging rod. Drill the hole for the angle nut on the ceiling and fi x the hanging rod. - Page 16 Application Information Ceiling Concealed Hanger Return duct Supply duct Wrap the insulated pipe with the finishing tape from bottom to top Drain Thermal insulation piping Preliminary Survey • Electrical supply and installation is to confi rm to local authority’s (e.g. National Electrical Board) codes and regulations.
- Page 17 Application Information The diagrams below show the screws position for duct work connection. Ceiling Convertible Preliminary Site Survey • Electrical supply and installation is to confi rm to local authority’s (e.g. National Electrical Board) codes and regulations. • Voltage supply fl uctuation must not exceed ± 10% of rated voltage. Electricity supply lines must be independent of welding transformers which can cause high supply fl...
- Page 18 Application Information Please ensure that the following steps are taken: • Check the gradient for drainage fl ow as recommended in Figure A. • Provide clearance for easy servicing and optimal air fl ow as shown in Figure B. • The indoor unit must be installed such that there is no short circuit of the cool discharge air with the warm return air.
- Page 19 Application Information Under Ceiling Installation Install the Suspension Bolts 1. Install the suspension bolts so that it can support the indoor unit. 2. Adjust the distance to ceiling before installation. 3. Refer to the dimension given to install the unit. Install the Indoor Unit 1.
- Page 20 Application Information Floor Standing Installation 479.0 Min 547.0 MOUNTING BRACKET 123.0 FLOOR REAR PIPING HOLE 1. Refer to the dimension as illustrated when installing the mounting bracket. 2. Determine the pipe hose position using the rear piping hole. Drill the pipe hole at the slight downward slant to the outdoor side.
-
Page 21: Refrigerant Piping
Application Information REFRIGERANT PIPING Piping Length & Elevation If the pipe is too long, both capacity and reliability of the unit will drop. As the number of bends increases, resistance to the fl ow of refrigerant system increases, thus lowering cooling capacity. As a result, the compressor may become defective. - Page 22 Application Information Piping Connection To The Units • The outdoor unit is equipped with two to four sets of fl are joints depending on O/D unit model. Refer to the table below for fl are joint size and location. Model Pipe Liquid 1/4”...
- Page 23 Application Information * The fi gures shown in the table are for information purpose only. They should be checked and selected to comply with the local/national codes of regulations. This is also subject to the type of installation and conductors used. ** The appropriate voltage range should be checked with label data on the unit.
-
Page 24: Engineering & Physical Data
Engineering & Physical Data Engineering & Physical Data Engineering Data - MX Series (R410A model) OUTDOOR UNIT 2MX45BGXV1 2MX50BGXV1 3MX60BGXV1 4MX80BGXV1 MODEL TYPE 1-to-2 1-to-3 1-to-4 13650 (4400 ~15350) 18400 (5100 ~ 21200) 22200 (3400 ~ 26100) 26100 (4100 ~ 31000) Btu/h NOMINAL COOLING CAPACITY 4000 (1300 ~ 4500) - Page 25 Engineering & Physical Data Engineering Data - FTXN-MV1 Series (R410A model) MODEL INDOOR UNIT FTXN25MV1 FTXN35MV1 FTXN50MV1 AUTO LOUVER (UP & DOWN) & GRILLE (LEFT & RIGHT) AIR DISCHARGE CONTROL LCD REMOTE CONTROL OPERATION 178 / 378 185 / 392 273 / 578 TURBO l/s / CFM...
- Page 26 Engineering & Physical Data Engineering Data - FDMQ-C(2)XV1 Series (R410A model) MODEL INDOOR UNIT FDMQ25C2XV1 FDMQ35CXV1 FDMQ50CXV1 DUCTED AIR DISCHARGE CONTROL WIRED MICROCOMPUTER REMOTE CONTROL OPERATION 118 / 250 194 / 410 269 / 570 HIGH l/s / CFM 111 / 235 175 / 370 255 / 540 AIR FLOW...
-
Page 27: Performance Data
Performance Data Performance Data Model: 2MX45BGXV1 Cooling Mode Each capacity (kW) Total capacity (kW) Total input (W) Total current (A) Combination of indoor unit * A room B room Rated Rated Rated Rated 2.50 2.50 3.00 4.03 2.90 3.80 3.50 3.50 4.00 1080... - Page 28 Performance Data Model: 3MX60BGXV1 Cooling Mode Total capacity Each capacity (kW) Total input (W) Total current (A) (kW) Combination of indoor unit * A room B room C room Rated Rated Rated Rated 2.50 2.50 3.00 4.24 2.70 3.80 3.50 3.50 3.70 3.85...
- Page 29 Performance Data Model: 4MX80BGXV1 Cooling Mode Total capacity Each capacity (kW) Total input (W) Total current (A) (kW) Combination of indoor unit * A room B room C room D room Rated Rated Rated Rated 2.50 2.50 3.00 4.24 2.70 3.80 3.50 3.50...
-
Page 30: Outline & Dimension
Outline & Dimension Outline & Dimension Outdoor Unit Model: 2MX45BGXV1 Note: Dimension in mm Outdoor Unit Model: 2MX50BGXV1 / 3MX60BGXV1 / 4MX80BGXV1 Dimension Model 2MX50/3MX60/4MX80BGXV1 Dimension Model 2MX50/3MX60/4MX80BGXV1 Note: Dimension in mm... - Page 31 Outline & Dimension Indoor Unit Model: FTXN25/35MV1 Note: Dimension in mm Indoor Unit Model: FTXN50MV1 Note: Dimension in mm...
- Page 32 Outline & Dimension Indoor Unit Model: FFQ25/35/50CXV1 Dimension Model FFQ25/35/50CXV1 Note: Dimension in mm Indoor Unit Model: FDMQ25C2XV1 / FDMQ35/50CXV1 Dimension Model FDMQ25C2XV1/ FDMQ35CXV1 1041 1002 962 1065 FDMQ50CXV1 Note: Dimension in mm...
- Page 33 Outline & Dimension Indoor Unit Model: FLQ35/50 1080.0 928.0 218.0 Note: Dimension in mm...
-
Page 34: Wiring Diagram
Wiring Diagram Wiring Diagram Outdoor Unit Model: 2MX45BGXV1 Outdoor Unit Model: 2MX50BGXV1 LED A Service monitor LED (green) Wiring error check switch LED1 - LED4 Service monitor LED (red) Priority room setting switch Forced operation ON/OFF switch Night quiet mode setting switch... - Page 35 Wiring Diagram Outdoor Unit Model: 3MX60BGXV1 Outdoor Unit Model: 4MX80BGXV1 LED A Service monitor LED (green) Wiring error check switch LED1 - LED4 Service monitor LED (red) Priority room setting switch Forced operation ON/OFF switch Night quiet mode setting switch...
- Page 36 Wiring Diagram Indoor Unit Model: FTXN25/35MV1 Indoor Unit Model: FTXN50MV1...
- Page 37 Wiring Diagram Indoor Unit Model: FFQ25/35/50CXV1 Indoor Unit Model: FDMQ25/35C2XV1...
- Page 38 Wiring Diagram Indoor Unit Model: FDMQ50CXV1 Indoor Unit Model: FLQ35EXV1...
- Page 39 Wiring Diagram Indoor Unit Model: FLQ50EXV1...
-
Page 40: Service & Maintenance
Service & Maintenance Service & Maintenance • Disconnect from main supply before servicing the air conditioner. • The unit is designed to give long life operation with minimum maintenance required. However, it should be regularly checked and the following items should be given due attention. Components Maintenance Procedures Period... -
Page 41: Air Filter
Service & Maintenance Air Filter 1. Open the front panel. • Hold the panel at the recesses on the main unit (2 recesses on right and left sides) and lift it until it stops. Recess on main unit 2. Pull out the air fi lters. •... -
Page 42: Troubleshooting
Troubleshooting Troubleshooting Fault Condition When a malfunction of the air conditioner unit is detected, immediately switch off the main power supply before proceeding with the following troubleshooting procedures. The following are common fault conditions and simple troubleshooting tips. If any other fault conditions which are not listed occur, contact your nearest local dealer. - Page 43 Troubleshooting Indicator Lights IR Signal Receiver When an infrared remote control operating signal has been transmitted, the signal receiver on the indoor unit will respond as below to confi rm acceptance of the signal transmission. ON to OFF 1 Long Beep OFF to ON 2 Short Beep Pump down/Cool force on...
- Page 44 Troubleshooting Error Code Diagnosis by Wireless Handset BRC51A61 SWING TURBO MODE QUIET SLEEP TIMER ON TIMER CANCEL CANCEL CLOCK CANCEL OFF TIMER CANCEL Diagnosis Step 1. Hold down ON TIMER CANCEL button or OFF TIMER CANCEL button for 5 seconds, a “ ”...
-
Page 45: Error Codes
Troubleshooting Error Codes Error Codes Error Description Action Normal No action. 1. Check sensor connection. 2. Check stop valve. Insuffi cient gas 3. Check for gas leak. 4. Check the EXV. 5. Check H8. 1. Check the supply voltage. 2. Check the outdoor fan by rotating with hand. DC voltage out of range 3. - Page 46 Troubleshooting Error Codes Error Description Action 1. Restart the system. 2. Replace outdoor PCB. Outdoor PCB error 3. Check to see that the unit is grounded. 4. Check power supply waveform. 1. Check installation conditions. 2. Check stop valve. 3. Check HPS connection. High pressure protection 4.
- Page 47 Troubleshooting Error Codes Error Description Action 1. Check the reactor connection. 2. Check the compressor connection. Compressor sensor system abnormality 3. Measure the resistance value between the reactor terminals. 4. Measure the resistance value between the compressor terminals. 1. Check pressure sensor connection. High pressure switch error 2.
- Page 48 Troubleshooting Error Codes Error Description Action 1. Check stop valve. 2. Check with inverter checker. 3. Check the power transistor. IPM error / IGBT error 4. Check the supply voltage. 5. Check the compressor phase. 6. Check the discharge pressure. 7.
- Page 49 Troubleshooting Outdoor LED error indication The outdoor unit LED indicates the running condition of the system: LED INDICATION Green Description NORMAL INSTALLATION ERROR ANTIFREEZE (OTHER ROOMS) HEAT SINK OVERHEAT IPM ERROR/IGBT ERROR INSUFFICIENT GAS AC INPUT OVER CURRENT COMPRESSOR START-UP ERROR COMMUNICATION ERROR (OUTDOOR CONTROL PCB AND IPM PCB) 4 WAY VALVE ERROR...
Need help?
Do you have a question about the FTXN25MV1B and is the answer not in the manual?
Questions and answers