Worx Landroid WR130E Owner's Manual
Hide thumbs
Also See for Landroid WR130E:
- User manual ,
- Installation manual (20 pages) ,
- Get started (11 pages)
Table of Contents
Advertisement
Advertisement
Table of Contents

Related Manuals for Worx Landroid WR130E


Summary of Contents for Worx Landroid WR130E
- Page 1 Owner’s Manual...
-
Page 2: Table Of Contents
ORIGINAL INSTRUCTIONS TABLE OF CONTENTS 1. Product Safety 1.1 General & Additional Safety Instruction ® 1.2 Information on the Landroid 2. Component list 3. Technical data and noise data 3.1 Technical data 3.2 Noise data 4. Control Panel ® 5. Understanding Your Landroid ®... -
Page 3: Product Safety
1. Product Safety 1.1 General & Additional Safety Instruction WARNING: Read all safety warnings and all instructions. Failure to follow the warnings and instructions may result in electric shock, fire and/or serious injury. Carefully read the instructions for the safe operation of the machine. Save all warnings and instructions for future reference. - Page 4 Recharge only with the charger specified by WORX. Do not use any charger other than that specifically provided for use with the equipment. A charger that is suitable for one type of battery pack may create a risk of fire when used with another battery pack.
-
Page 5: Information On The Landroid
® 1.2 Information on the Landroid WARNING - Robotic lawnmower can be dangerous if incorrectly used. Read through the Operator’s manual carefully and understand the content before using your robotic lawnmower. WARNING - Keep a safe distance from the machine when operating. WARNING –... -
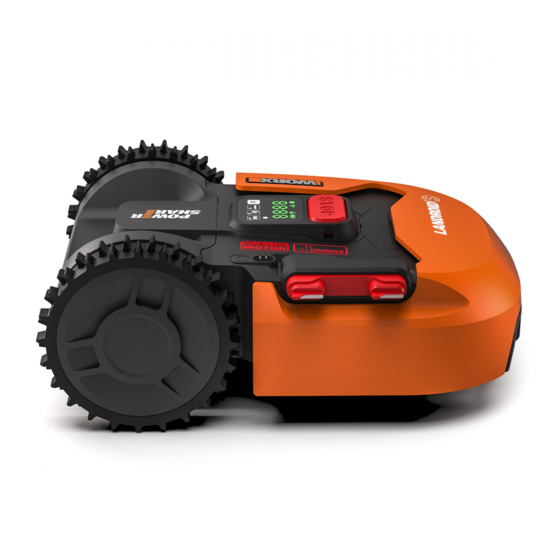
Page 6: Component List
2. Component List 12 11 8 7 6 WR130E WR131E WR130E WR131E WR141E WR144E Owner’s Manual... - Page 7 STOP BUTTON REAR DRIVING WHEEL BATTERY PACK DISPLAY LIGHT SENSOR HOME BUTTON START KEY ON/OFF KEY USB PORT 10. RAIN SENSOR 11. CHARGING STRIPS 12. CUTTING HEIGHT ADJUSTMENT KNOB 13. FRONT WHEEL 14. BLADE TURNING DISC 15. CUTTING BLADE 16. CONTACT PINS 17.
-
Page 8: Technical Data And Noise Data
Technical data and noise data 3.1 Technical data Type WR130E WR131E WR141E WR144E (100-199 - designation of machinery, representative of Robotic Lawnmower) WR130E WR131E WR141E WR144E Rated voltage Max.* No load speed 2800/min Cutting area 300m 500m Cutting diameter 18cm Cutting height 20-50mm 30-60mm... -
Page 9: Noise Data
Refer to the accessory packaging for further details. Store personnel can assist you and offer advice. ® Your Landroid can be used with other WORX functional accessories. Visit www.worx.com to learn more about these available accessory options. 3.2 Noise data... -
Page 10: Control Panel
Control panel LOCK Wi-Fi BATTERY CAPACITY WORKING TIME DISPLAY Displays the state of your setting START Starts mowing/ Selects up POWER ON/OFF ® Turns Landroid and off Confirms any setting/ Enters Wi-Fi connection HOME mode ® Sends Landroid to its charging base during operation and activates charging/Selects down... -
Page 11: Understanding Your Landroid
® Understanding Your Landroid ® Congratulations on your new purchase of Landroid and welcome to the care-free life of automatic mowing. In the ® following, we want to help you to better understand how your Landroid thinks. ® 5.1 How does my Landroid know what to mow? ®... -
Page 12: How Does My Landroid Know Where To Go
® 5.2 How does my Landroid know where to go? ® ® Your Landroid is made to work on its own. Landroid knows when it needs to go to its charging base to charge, can sense when it is raining, can stop itself if it senses a problem, and knows to stop, draw back, and turn around when it bumps into ®... -
Page 13: Cut To Edge
Only for reference Only for reference 5.3 Cut to edge (only for WR141E WR144E) Off-centered blade turning disc design provides a clean cut with narrowest distance to the boundary or wall. It helps minimize the amount and frequency of manual trimming along the boundary. ®... - Page 14 to to select the number and press to confirm. Then will be blinking, use the same method to select the number and press to confirm. Now the time setting is completed and Landroid will enter the standby page. ® 4hrs Only for reference Only for reference Standby page...
-
Page 15: How Efficiently Will My Landroid Mow The Grass
® 5.5 How efficiently will my Landroid mow the grass? Mowing times are different for every lawn depending on the factors mentioned below. Gradually adjust the time you allow ® Landroid to mow each day until you find the most suitable setting. ®... - Page 16 ® Step 1: To download the Landroid App, scan the QR code below or download it from Playstore (Google-Android), ® AppleStore (Apple-iOS) or our website www.worx.com. Step 2: Keep pressing for 3 seconds, the icon will be blinking. Use to choose the icon , then press to confirm.
-
Page 17: Boundary Wire Basics
Step 3: Enter the Landroid APP , and then follow the instructions to connect to your Wi-Fi. ® *The Serial No. can be found at the rear of Landroid as shown (See Fig. H) . ® NOTE: 1. If your Wi-Fi information changes, Landroid needs to be re-set according to Step 3. -
Page 18: Burying The Boundary Wire
Method 1: Update via USB. See below for download and installation instructions: (1) Locate the latest software version at: www.worx.com. Save the file to an empty FAT32 formatted USB (flash drive). Delete any other files on the drive and check the format. If the drive is not formatted in FAT32, please reformat the drive. -
Page 19: Maintenance
Some new features/ functions in the new version may not exist in the manual. If you found some settings not in the manual, please visit www. worx.com to download the latest manual. Maintenance ®... -
Page 20: Replace The Blades
® blades provided with your Landroid . Spare blades are also available at your nearest WORX retailer. A. Replace the Blades ® After some time, usually every season, your Landroid ’s Blades... -
Page 21: Cleaning The Contact Pins And The Charging Strips
C. Clean the contact pins and the charging strips ® Clean the contact pins located on the charging base and the charging strips located on Landroid using a cloth. Remove ® any built up grass clippings or debris around the contact pins and charge strips periodically to ensure Landroid successfully charges each time. -
Page 22: Replacing The Battery
9.5 Replacing the battery WARNING: Power off before attempting any adjustment, replacement or repair. Open the battery pack protection cover. Press down the battery ® pack release button to remove the battery pack from Landroid . (See Fig. Q) Insert a new and fully charged battery pack into the battery port. -
Page 23: Security
If the problem is not resolved, try to removing and reinstalling the battery . If the problem is still not resolved, please contact a WORX service agent for help. -
Page 24: Troubleshooting
13. Troubleshooting ® If your Landroid does not work correctly, follow the troubleshooting guide below. If the issue persists, contact your Dealer. Symptom Cause Action Check the charging base is connected The LED light on the charging properly to the power adapter and the power There is no power. - Page 25 Something is clogging in the blade Take off the blade disc and clean it. disc. Check the Blade Disc and blades, remove ® Landroid is starting to have The grass is too high and too thick. debris and foreign objects from the blades shorter run-times between and Blade Disc.
- Page 26 Environmental Protection Waste electrical products should not be disposed of with household waste. Please recycle where facilities exist. Check with your Local Authority or retailer for recycling advice. Owner’s Manual...
- Page 27 Declaration of Conformity Positec Germany GmbH Grüner Weg 10, 50825 Cologne, Germany Declare that the product, Description Robotic Lawnmower Type WR130E WR131E WR141E WR144E (100-199- designation of machinery, representative of Robotic Lawnmower) (Year, article number and month of serial number are placed on the back page. The complete serial number is clearly stated on the enclosure of lawnmower) with battery charger WA3766 / WA3750.1 / WA3755.1 and charging base WA0510 / WA4002.1 Function Cutting grass...
- Page 28 Copyright © 2018, Positec. All Rights Reserved.
Need help?
Do you have a question about the Landroid WR130E and is the answer not in the manual?
Questions and answers