Table of Contents
Advertisement
Quick Links
JUNE 2001
LE2650A
LE2650AE
Personal MiniHub
CUSTOMER
Order toll-free in the U.S. 24 hours, 7 A.M. Monday to midnight Friday: 877-877-BBOX
FREE technical support, 24 hours a day, 7 days a week: Call 724-746-5500 or fax 724-746-0746
SUPPORT
Mail order: Black Box Corporation, 1000 Park Drive, Lawrence, PA 15055-1018
INFORMATION
Web site: www.blackbox.com • E-mail: info@blackbox.com
Advertisement
Table of Contents

Related Manuals for Black Box LE2650A


Summary of Contents for Black Box LE2650A
- Page 1 Order toll-free in the U.S. 24 hours, 7 A.M. Monday to midnight Friday: 877-877-BBOX FREE technical support, 24 hours a day, 7 days a week: Call 724-746-5500 or fax 724-746-0746 SUPPORT Mail order: Black Box Corporation, 1000 Park Drive, Lawrence, PA 15055-1018 INFORMATION Web site: www.blackbox.com • E-mail: info@blackbox.com...
- Page 2 PERSONAL MINIHUB FEDERAL COMMUNICATIONS COMMISSION RADIO FREQUENCY INTERFERENCE STATEMENT This equipment generates, uses, and can radiate radio frequency energy and if not installed and used properly, that is, in strict accordance with the manufacturer’s instructions, may cause interference to radio communication. It has been tested and found to comply with the limits for a Class A computing device in accordance with the specifications in Subpart J of Part 15 of FCC rules, which are designed to provide reasonable protection...
-
Page 3: Table Of Contents
PERSONAL MINIHUB Contents Chapter Page 1. Specifications ....................3 2. Introduction....................4 2.1 Inspecting the Package and Product ...........4 2.2 Description ....................4 2.3 Features and Benefits................7 2.4 Applications...................8 3. Installation.....................10 3.1 Table-Top or Shelf Mounting ............12 3.2 Wall (or Vertical Surface) Mounting ..........12 3.3 Twisted Pair Segment Connection.............14 3.4 Up-Link Option on Port #5 (Up-Link Switch) ........15 4. -
Page 4: Specifications
Temperature: 32 to 122° F (0 to 50° C); Storage Temperature: -4 Switches — (1) uplink switch on side to 140° F (-20 to 60° C) of unit Power — LE2650A: 115 VAC, Performance — Data Rate: 10 Mbps, 60 Hz power supply,, UL ® listed, Partitioning: Enforced after 32 CSA certified;... -
Page 5: Introduction
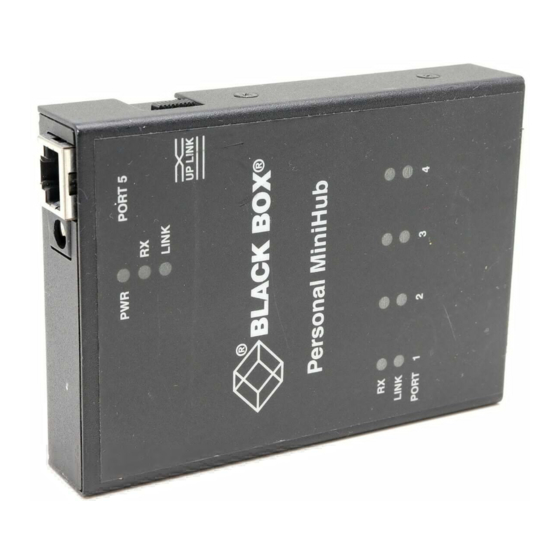
• Personal MiniHub Ethernet product and operates independently of all software. • External power supply, either 115 VAC, 60 Hz (LE2650A) or The Personal MiniHub is also well- 230 VAC, 50 Hz (LE2650AE) suited for small-to-medium sized office or lab environments (two •... - Page 6 CHAPTER 2: Introduction Fig. 2-1. Personal MiniHub. The Personal MiniHub’s small The Personal MiniHub fits easily size makes it very useful for demon- into the workplace environment. It stration situations in conference ican be mounted on a tabletop or rooms and in exhibitions where shelf, or, with the included Velcro ®...
- Page 7 PERSONAL MINIHUB Fig. 2-2. RJ-45 10BASE-T Ports. Fig. 2-3. Top View—Personal MiniHub. The Personal MiniHub includes Link and RX LEDs for each RJ-45 port, and one LED for power, located near the external power supply. Since each LED is near the port it monitors, it is easy to associate the status LED for each of the ports with the appropriate port.
-
Page 8: Features And Benefits
CHAPTER 2: Introduction The external power supply that 2.3 Features and Benefits comes with the Personal MiniHub is • Interconnect to an existing one of two types: one version for AC Ethernet network—The input power of 115 VAC, 60 Hz, and Personal MiniHub provides an one version for 230 VAC, 50 Hz. -
Page 9: Applications
PERSONAL MINIHUB • LEDs simplify network 2.4 Applications installation and maintenance— Expanding from one to four ports at The Personal MiniHub is an existing site is easy, and requires equipped with a full comple- no modification to typical building ment of LEDs to provide status wiring. - Page 10 CHAPTER 2: Introduction The Personal MiniHub may also be used as a standalone to network a local personal multi-user system such as shown in Fig. 2-5. User Port Laser Writer Fig. 2-5. Hub Used in a Standalone Network. Up to five RJ-45 user ports are available where only 10BASE-T wiring is used, and full-length Ethernet segments are supported on...
-
Page 11: Installation
PERSONAL MINIHUB 3. Installation Installation of a Personal MiniHub is a very simple procedure. First, locate an AC receptacle that is within six feet (1.8 m) of the intended hub location and plug in the external power supply (provided with the Personal MiniHub). - Page 12 CHAPTER 3: Installation The external power supply is one of two types: one version for AC input power of 115 VAC, 60 Hz, and one version for 230 VAC, 50 Hz. Examine the power supply to make sure the version you have is the right type for your AC power system.
-
Page 13: Wall (Or Vertical Surface) Mounting
PERSONAL MINIHUB 3.1 Table-Top or Shelf Mounting 3.2 Wall (or Vertical Surface) Mounting The Personal MiniHub is easily mounted on a table-top or shelf, A piece of Velcro mounting tape and has four rubber feet to provide is supplied with the unit, and may stability and keep it from scratching be used to mount a MiniHub in a finished surfaces. - Page 14 CHAPTER 3: Installation As an alternative to Velcro mounting, small brackets for mounting with screws may be used. The metal screws in each side of the case may be used to attach the brackets. Use of the optional brackets permits the Hub to be mounted in almost any desired position.
-
Page 15: Twisted Pair Segment Connection
PERSONAL MINIHUB 3.3 Twisted Pair Segment 2. Connect the other end of each network segment to the appli- Connections cable workstation or user device. The “Link” LED will be lit for Follow these steps: each port where the connection 1. Using standard 10BASE-T is made on both ends of the media, insert the plug on one segment, and where the AC... -
Page 16: Up-Link Option On Port #5, Up-Link Switch
CHAPTER 3: Installation 3.4 Up-Link Option on Port #5, Up-Link Switch For RJ-45 port #5 only, the Up-Link crossover switch on the right side of the MiniHub is used to select either a normal 10BASE-T wiring segment connection to a user device (switch in the “=”... - Page 17 PERSONAL MINIHUB cascaded units can operate together PTION SED FOR ASCADING even though there may be a full Hubs may be cascaded in order to segment of distance between them. expand networks. For example, a Based on the “four-repeater rule” MiniHub may be cascaded via its port defined by Ethernet standards, there #5 up-link into any port of another...
-
Page 18: Operation
CHAPTER 4: Operation 4. Operation This section details the various • Partitioning and re-connection— operational features of the Personal The Personal MiniHub will MiniHub, including a description automatically partition any port of the LED indicators. The Personal where 32 consecutive collisions MiniHub is fully compliant with the occur or after 6.5 milliseconds Ethernet Version 2/IEEE 802.3... -
Page 19: Troubleshooting
PERSONAL MINIHUB 5. Troubleshooting The Personal MiniHub is designed 2. Check the cables and to provide reliability and consistently connectors to make sure that they have been properly high performance in all network environments. The installation of connected and the cables/wires the Personal MiniHub is a simple have not been crimped or in some way impaired during... -
Page 20: When Calling For Assistance
However, if the occurrence of the problem. Any problem cannot be duplicated by changes to system administration Black Box, the unit will be returned procedures should all be noted as “No problem found.” in this record. -
Page 21: Shipping And Packaging Information
Do not pack the unit in styrofoam “popcorn” type If you need to ship the unit back packing material. This to Black Box, please follow these material cause instructions: electrostatic shock damage to the unit. 1. Package the unit carefully. We recommend that you use the 2. - Page 22 © Copyright 2001. Black Box Corporation. All rights reserved. 1000 Park Drive • Lawrence, PA 15055-1018 • 724-746-5500 • Fax 724-746-0746...
Need help?
Do you have a question about the LE2650A and is the answer not in the manual?
Questions and answers