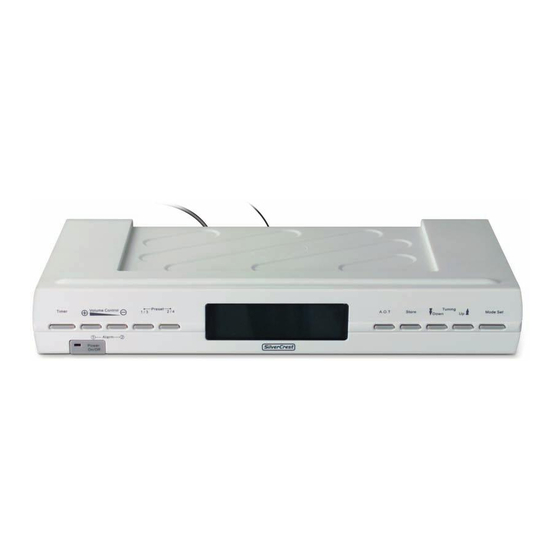
Silvercrest KH 2281 Operating Instructions Manual
Kitchen radio
Hide thumbs
Also See for KH 2281:
- Operating instructions manual (98 pages) ,
- Operating instructions manual (50 pages)
Summary of Contents for Silvercrest KH 2281
- Page 1 KITCHEN RADIO KH 2281 KITCHEN RADIO Operating instructions KOMPERNASS GMBH · BURGSTRASSE 21 · D-44867 BOCHUM www.kompernass.com ID-Nr.: KH2281-07/08-V1...
- Page 2 KH 2281...
-
Page 3: Table Of Contents
INDEX Technical data Intended Use Safety instructions Items supplied Part identification Fixing the kitchen radio beneath a wall cabinet Setting up the kitchen radio Commissioning Inserting the back-up batteries ...5 Providing mains power...5 Setting the time ...6 Setting the date...6 Switching the display lighting on and off ...6 Selecting 12 or 24 hour time display ...6 Kitchen timer...6... -
Page 4: Technical Data
KITCHEN RADIO KH2281 Technical data This appliance complies with the fundamental require- ments and other relevant prescripts of both the EMC Guidelines 2004/108/EG and the Guidelines for Low Voltage Appliances 2006/95/EG. Power supply: AC 220 - 240 V ~ 50 Hz Power consumption : 5 Watt Power consumption: Standby:... -
Page 5: Risk Of Fire
• To avoid risks, arrange for defective power plugs and/or cables to be replaced at once by qualified technicians or our Customer Service Depart- ment. • Arrange for customer service to repair or replace connecting cables and/or appliances that are not functioning properly or have been damaged. -
Page 6: Items Supplied
Important ! No liability/warranty will be considered for damage to the Kitchen Radio caused by the effects of moisture, water penetration or overheating! Items supplied Kitchen Radio KH 2281 Mounting plate 4 Screws Operating Instructions Part identification Mounting plate Retaining lever... -
Page 7: Setting Up The Kitchen Radio
Mark the four points for the drillholes with a pencil. Mark the drillhole with a mandril. Firmly secure the mounting plate supplied screws. Hold the kitchen radio slanted, with the two recesses in the retaining lugs on the mounting plate . -
Page 8: Setting The Time
Setting the time To be able to programme in the time, date, display illumination and hour-format, the radio must be switched off. MODE SET/BASS Press the button time blinks. TUNING UP/DOWN Press the button time in minute intervals. Pressing and holding the button changes the time at ten-minute intervals If a subsequent button is not pressed within ten seconds, the kitchen radio saves the setting and... -
Page 9: Setting Alarm Times (Alarms 1 And 2)
Programming the kitchen timer You can save kitchen timer periods. TIMER/ALARM MODE Press the button TUNING UP/DOWN Using the button in the desired time. STORE Press the button . In the display "T" blinks. 1/3 PRESET, 2/4 PRESET Press the button required save position. -
Page 10: Radio Operation
Radio operation Manual station selection POWER ON/OFF Press the button selected frequency is shown in the display. TUNING UP Press the button frequency. TUNING DOWN Press the button frequency. Automatic station search You can have the kitchen radio search for stations. The kitchen radio searches the frequency range until it finds a station. -
Page 11: Cleaning
If a subsequent button is not pressed within ten seconds, the kitchen radio saves the setting and switches back to time display. • To switch the function off, press the button until the indicator "OFF AOT" appears in the display. Cleaning Warning! Moisture penetrating into the appliance creates... -
Page 12: Warranty & Service
Warranty & Service You receive a 3-year warranty for this device as of the purchase date. Should you, in spite of our high quality standards, have grounds for complaint please contact our Service Hotline. In the event that processing of your complaint is not possible by telephone here you will receive •... -
Page 13: Warranty
Kitchen Radio KH2281 In order to be assured of a cost free repair procedure, contact us over the service hotline. Ensure you have your sales receipt available. Sender, please write clearly: Last name First name Street Postcode/Place Country Telephone Date/Signature Description of fault: Warranty DES Ltd... - Page 14 - 12 -...


Need help?
Do you have a question about the KH 2281 and is the answer not in the manual?
Questions and answers