
Related Manuals for NOCRY NRT-128AC


Summary of Contents for NOCRY NRT-128AC
-
Page 1: Instruction Manual
Rotary Tool Kit Instruction Manual We've worked very hard on making this manual useful, simple and understandable. Please read it carefully, and keep it safe inside your rotary tool kit for future reference. ... - Page 2 1 ...
-
Page 3: Table Of Contents
WHAT'S INSIDE THIS MANUAL THE ABC'S OF POWER TOOL SAFETY 4 Basics of your work area safety 5 Basics of electrical safety 5 Basics of personal safety 6 Basics of servicing your power tools 7 THE ABC'S OF ROTARY TOOL SAFETY 8 ... - Page 4 How to attach and use the sharpening guide 38 How to replace the motor brushes 39 CLEANING AND MAINTENANCE 39 Cleaning 39 Maintenance 40 Responsible ways of disposal 40 ROTARY TOOL LIABILITY 4 0 WARRANTY 4 1 HOW TO CONTACT NOCRY 42 3 ...
-
Page 5: The Abc's Of Power Tool Safety
the specific safety instructions relevant to your new NoCry rotary tool in the next ... -
Page 6: Basics Of Your Work Area Safety
To keep your power tools well-maintained, regularly check if any parts are ✔ misaligned, damaged or broken, or if there's anything else that might affect ... -
Page 7: Basics Of Personal Safety
Basics of electrical safety Do not modify the plugs, and make sure they match the outlet to reduce ✔ your chances on getting an electric shock. Also, adapter plugs and earthed ... -
Page 8: Basics Of Servicing Your Power Tools
pack, or before picking up or carrying the tool. Also, learn to never carry power tools with your finger on the power switch. ... -
Page 9: The Abc's Of Rotary Tool Safety
with your NoCry rotary tool to not end up crying over your medical bills, destroyed ... -
Page 10: Grinding, Cutting And Sanding Safety
protection is a must when operating your rotary tool. NoCry Work & Safety Gear and the manufacturer shall not be liable for any ... - Page 11 To avoid damaging the discs and bits, only use accessory types that are ✔ included in your rotary tool kit, and only use them for the recommended ...
-
Page 12: Polishing Safety
Polishing safety This one is pretty straightforward: Do not allow any loose portion of the ✔ polishing wheel to spin freely. Tuck away or trim any loose polishing wheel ... -
Page 13: Technical Specifications
TECHNICAL SPECIFICATIONS NoCry Rotary Tool NRT-128AC Voltage 120V ~ 60Hz Rated power 1.4 Amps No load speed 8,000-35,000 RPM Collet/Chuck diameter Ø1/8 in Weight 1.58 lb Protection class 回/II ... -
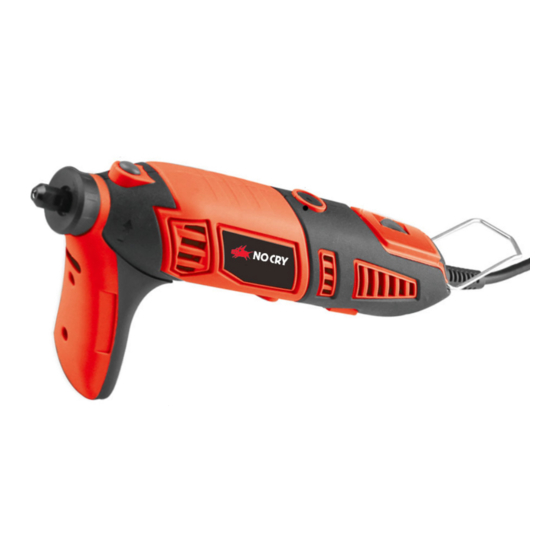
Page 14: All Rotary Tool Parts
All rotary tool parts Collet nut. Collet. Housing cap. Shaft lock. Gasket. Shaft lock button. Spring of the shaft lock. ... -
Page 15: Included Attachments & Their Purposes
INCLUDED ATTACHMENTS & THEIR PURPOSES These attachments will help you get the most from all the different accessories that come with your rotary tool kit (you can find the accessories list on pages ... - Page 16 1 ROTARY TOOL STAND The stand is used to hold the rotary tool up for maximum mobility when using the flexible ...
- Page 17 1 PIVOT LIGHT Even though you won't be using your rotary tool in dark conditions, sometimes, a little extra light is necessary for detailed work. The set-up is ...
-
Page 18: Included Accessories & Their Purposes
page, or via email to wecare@nocry.com . Carving and engraving accessories Pro tip: A useful accessory to use with these accessories is the flexible driver, which ... -
Page 19: Cutting Accessories
Cutting accessories 36 BLACK CUT-OFF DISCS, 15/16 x 1/64in These black cut-off discs cut along their edge for a nice, sharp, thin cut in tougher materials ... -
Page 20: Grinding And Sharpening Accessories
Grinding and sharpening accessories The grinding and sharpening accessories are probably among the most useful in the kit, as they are perfect for those practical, everyday money-saving DIY jobs like ... -
Page 21: Cleaning And Polishing Accessories
Cleaning and polishing accessories 2 LARGE WHITE FELT WHEELS, 1 x 1/4in Made of sturdy felt for polishing various materials from a semi-rough finish to a smooth ... -
Page 22: Sanding Accessories
1 GOLD BRASS & 1 BLACK BRISTLE BRUSH, Ø1.8in Whenever there's a need for light deburring, cleaning, polishing of silverware, jewelry, and other precious metals, these brushes are the ... - Page 23 2 BLACK SANDING DRUMS, Ø1/8in Available in two sizes, these are the ‘mandrels’ that attach the sanding bands to your rotary tool. See our tips on fitting the sanding bands on ...
-
Page 24: Drilling Accessories
Drilling accessories 3 DRILL BITS, 3/64 x 1/16in, 3/64 x 3/32in, 3/64 x 1/8in The three high-speed drill bits are ideal for getting your rotary tool to drill various materials ... -
Page 25: How To Use Your Rotary Tool
HOW TO USE YOUR ROTARY TOOL Before we begin, please remember to pull the mains plug before doing any work on the machine itself (changing accessories, service etc.). ... -
Page 26: Recommended Speed Settings For Cutting
Ceramic 5 - Copper - 6 Glass 6 - Hardwood 5 MAX Plastic - MAX Shell 5 - Softwood 5 4-5 Steel - 4-5 Stone 5 - Recommended speed settings for cutting with the cut-off discs with the HSS cutter with the cutting set ... -
Page 27: Recommended Speed Settings For Grinding And Sharpening
Recommended speed settings for grinding and sharpening with the pink & brown with the green grinding grinding stones stones Aluminum 3 3 Brass 3 3 Ceramic MAX MAX Copper 3 3 Glass - MAX Hardwood MAX - Plastic 4-5 ... -
Page 28: Recommended Speed Settings For Sanding
Plastic - - 3 Shell 4-5 - - Softwood - 3 3 Steel 4-5 3 3 Stone 4-5 3 - Recommended speed settings for sanding with sanding discs with sanding bands Aluminum 2-3 MAX Brass 2-3 MAX ... -
Page 29: How To Attach And Change Accessories With The Collet Nut Kit
Ceramic - Copper 4-5 Hardwood 6-MAX Plastic 4-6 Softwood MAX How to attach and change accessories with the collet nut kit Take your chosen accessory, the Put the accessory aside for now, and ... - Page 30 Put the collet nut with the collet on Take the accessory you had put aside, and insert it in the collet nut. the rotary tool shaft. ...
-
Page 31: How To Attach And Change Accessories Using The Chuck
How to attach and change accessories using the chuck Choose your accessory, and insert it Press down the shaft lock button, and rotate the chuck on the rotary tool ... -
Page 32: How To Fit A Cutting Or Sanding Disc
How to fit a cutting or sanding disc Loosen the small screw on top of Now you have separated the mandrel into a small screw and the ... -
Page 33: How To Fit A Felt Wheel
Use the screwdriver end of the wrench tighten the mandrel to secure the disk firmly in place, so it does not ... -
Page 34: How To Fit A Sanding Band
How to fit a sanding band Loosen (not remove) the small Take the appropriate size sanding band onto the sanding drum, and slide ... -
Page 35: How To Install The Flexible Driver
Choose whether you'd like to use the collet nut or the adjustable chuck for attaching the mandrel to your rotary tool, and set it up accordingly. The ... -
Page 36: How To Attach An Accessory To The Flexible Driver
How to attach an accessory to the flexible driver Take the adjustable chuck nut and Instead of holding down the shaft lock button, insert the L-pin into the ... -
Page 37: How To Set Up The Rotary Tool Stand
How to set up the rotary tool stand 1 Your rotary tool stand comes disassembled in the kit, so locate both of the pieces - the long metallic stick with a hook on one end (the stand), ... -
Page 38: How To Attach And Use The Cutting Set
How to attach and use the cutting set 1 Remove the housing cap from your rotary tool. You can see a picture of the housing cap & its location on page 12. ... -
Page 39: How To Attach And Use The Sharpening Guide
3 Screw the sanding/grinding guide onto the rotary tool where the housing cap would normally be. If you're having trouble recognizing the sanding/grinding guide in your rotary tool kit, flip back to page 16. 4 To change the depth of the guide, rotate the screw on the side of the ... -
Page 40: How To Replace The Motor Brushes
How to replace the motor brushes After approximately 50 hours of work time with the rotary tool, the 2 brushes in the motor will wear out. Since the brushes are carbon blocks that conduct ... -
Page 41: Maintenance
Maintenance Want some good news? There are no parts inside your rotary tool that require professional maintenance. Responsible ways of disposal Do not dispose of your rotary tool together with household waste, but ... -
Page 42: Warranty 4
the factory. If you’re not happy with your NoCry product, please contact us within ... -
Page 43: How To Contact Nocry
HOW TO CONTACT NOCRY Thank you so much for joining the NoCry community with your rotary tool kit. If you have any questions or concerns, let us know by writing an email to wecare@nocry.com We'd also love to connect with you via social media. You can find us on Instagram, ... - Page 44 If this was your response, know that at NoCry, we try to treat everyone like we'd treat our own mom. On her birthday, no less. So please let us know what went wrong by sending us an email at wecare@nocry.com . We'll be on the case right ...
Need help?
Do you have a question about the NRT-128AC and is the answer not in the manual?
Questions and answers