Table of Contents
Advertisement
Quick Links
Advertisement
Table of Contents
Troubleshooting

Subscribe to Our Youtube Channel
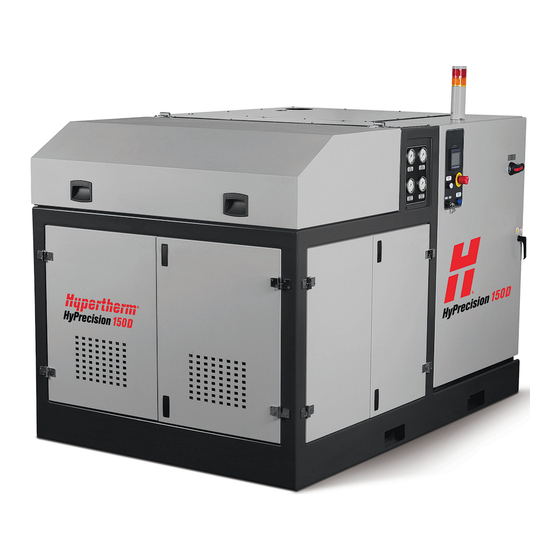
Related Manuals for Hypertherm HyPrecision 100D


Summary of Contents for Hypertherm HyPrecision 100D
- Page 1 Instruction Manual Original instructions 808310 Revision 0 | English...
- Page 2 Instruction Manual 808310 – Revision 0 English March 2014 Hypertherm Inc. Hanover, NH 03755 USA...
-
Page 3: Table Of Contents
Introduction ........................... 3 1.1 Company Overview and Contact Information ................. 3 1.2 System Overview ..........................3 1.3 Definitions ............................4 Safety............................5 2.1 General Safety ..........................5 2.2 Safety Symbols ..........................5 2.3 Operation and Maintenance Safety ....................6 2.4 Emergency Medical Treatment ......................9 Installation .......................... - Page 4 8.5 Hydraulic Tank ..........................55 8.6 Main Pump Setup ........................... 55 Specifications ........................57 9.1 Pump Requirements ........................57 9.2 Pump Capabilities .......................... 60 9.3 Orifice Combinations ........................60 9.4 Inlet Cutting Water Requirements ....................60 9.5 Water Treatment Guidelines: ......................61 9.6 Torque Specifications ........................
-
Page 5: Introduction
Customer Service Representatives are available to take your calls Monday through Friday 8:00 AM to 5:00 PM CST. If you need service after-hours Hypertherm is also on-call 24 hours a day, 7 days a week to ensure your system is up and running around the clock. -
Page 6: Definitions
1.3 Definitions LP water: Low-pressure water that is supplied to the intensifier for pressurizing. HP water: High-pressure water that is directed to the tool after being pressurized by the intensifier assembly. Coolant water: Water that is circulated through the heat exchanger for cooling the hydraulic fluid. Pump: A HyPrecision pump. -
Page 7: Safety
Although an attempt to point out most conditions was made, Hypertherm acknowledges that there are other unforeseen situations due to site variability, improper maintenance, etc. that could also potentially cause equipment damage, severe injury, or death. It is the end user’s responsibility to identify these additional hazards and take necessary steps to minimize risks. -
Page 8: Operation And Maintenance Safety
Draws attention to items of important factual or procedural significance. Failure to follow the instructions may result in equipment damage. IMPORTANT Hazardous voltage within can cause injury or death. Disconnect and lock out main power before opening the cabinet. High-pressure waterjet can cause eye injury. Wear eye protection when operating or working near the machine. -
Page 9: Maintenance Safety
Airborne contaminants or suspended particles may exist when cutting certain materials. Wear respiratory protection when these conditions are present. Maintenance Safety • Read the instructions in all sections of this manual before performing any maintenance on the pump. Important information is contained throughout this manual to minimize hazards and wear on the machine. - Page 10 High-Pressure Water System Safety Never work on any high-pressure component or loosen any high-pressure fittings without first bleeding the system to ensure that there is no high-pressure water present. Follow all instructions and safety recommendations in this manual. Always avoid contact with the stream of water. Seek immediate surgical attention if you are exposed to any high-pressure stream of fluid.
-
Page 11: Emergency Medical Treatment
Motor/Pump Assembly Safety Beware of moving equipment. Keep clothing and hands away from equipment that is operating. Always verify covers and shields are in place before starting equipment. WARNING 2.4 Emergency Medical Treatment Waterjet equipment can cause severe injury and infection. Anytime a person comes in contact with a high pressure stream of fluid, it must be reported immediately and treated. - Page 12 This card is to be carried by personnel working with high-pressure waterjet equipment. Obtain medical treatment immediately for ANY high- pressure waterjet injuries. Hypertherm Inc. 309 5th Ave NW New Brighton, MN 55112 +1 651-294-8600 This person has been working with water jetting at pressures to 60,000- psi (4,137bar) with a jet velocity of 2000fps (610 mps).
-
Page 13: Installation
Hypertherm may or may not supply the pump without any hydraulic oil in the tank. It may be the buyer's responsibility to fill the tank with the appropriate oil per instructions in the Hydraulic section of this manual. -
Page 14: Water Requirements
Water Requirements Local codes may require that a back-flow prevention valve be supplied to separate the pump from the building potable water. Consult local codes for the required type and necessity of a valve. IMPORTANT Cutting Water The water supplied to the intensifier is a crucial factor in precision waterjet cutting because of its direct effect on the service life of equipment components. -
Page 15: Electrical Requirements
WARNING Recommended Tools Most maintenance of the pump can be accomplished using standard tools. Refer to the recommended tools list in the Drawings and Parts Lists section. Contact Hypertherm to purchase replacement specialty tools for intensifier and bleed-down valve servicing. -
Page 17: Operation
The main disconnect on the electrical enclosure must be turned on in order for the pump to function. 4.2 Front Control Panel The HyPrecision 100D/150D pumps are controlled via an Operator Control Station (OCS) attached to the outside of the Electrical enclosure. The OCS monitors all fault conditions and controls the intensification process. - Page 18 Depending on the type of pump model(s) you have the layout of the gauge panel will vary. The PIERCE PRESSURE and CUT PRESSURE adjustment knobs, located on the gauge panel, are manually operated. Units with the optional analog pressure control will not have the CUT PRESSURE and PIERCE PRESSURE control knobs, which are replaced with a high precision electrical control valve.
-
Page 19: Pump Startup
4.3 Pump Startup Initial or Post-Maintenance Startup The first time you start up your pump it is important that the Pre-Startup Inspection, Motor Direction Check, and First Time Startup procedures (below) be performed to prevent serious damage to the pump components. - Page 20 The following procedure describes one method to “flush out” the HP lines. If you purchased your Hypertherm pump through an OEM, they may have their own procedure that they recommend. During this procedure, damage may occur to the on/off valve sealing parts and orifices. Make sure to have spare...
-
Page 21: Pump Operation
This flushing procedure should be followed after any replacement or service to the high-pressure lines and fittings have been performed on the pump. Make sure the pierce pressure control knob is backed out all the way, and the pump pressure is set to 10ksi or less. - Page 22 Remote Pump Operation Hypertherm HyPrecision 100D/150D Intensifier Pumps come standard with built-in functionality for remote operation. Information on wiring connections is provided in Electrical Control Panel in the Electrical System section of the manual.
- Page 23 Normal Shutdown Procedure Never leave waterjet cutting equipment turned on and unattended. After the equipment is shut down, always make sure the high-pressure water is relieved by turning on the cutting head. CAUTION Turn the cutting equipment OFF. Press the (PUMP OFF) on the pump control screen.
-
Page 25: Electrical System
Hypertherm or an electrical supply store. Remote Operation Wiring Hypertherm HyPrecision 100D/150D pumps come standard with built in functionality for REMOTE operation. The pump includes two options for external control that integrators can use: External Pressure Control and Remote Pump Control. - Page 26 RPC Operational Connections Description Wire No Voltage Type Contact Remote Controls On 6027, 5024A 24VDC Momentary, Normally Open (NO) Remote E-Stop 5024A, 5024B 24VDC Normally Closed (NC) Remote Pump On 6028, 24VDC 24VDC PLC Input, Momentary, NO Remote Pump Off 6029, 24VDC 24VDC PLC Input, Momentary, NC...
- Page 28 Connection to this E-stop is the responsibility of the integrator. One set of dry contacts are also provided on the back of the Hypertherm E-stop button. These contacts open when the Hypertherm E-stop button is activated. Remote Pump On The remote pump on input performs a sequential startup of the entire pump.
-
Page 29: Motors
IMPORTANT The main motor is the backbone of the HyPrecision 100D/150D Intensifier Pump. The motor transfers rotation through a jaw type coupling to the main pump, which is through-shafted to the gear pump. Motor Starter Circuits and Thermal Overloads Hypertherm pumps are equipped with different starter circuits depending on the size of pump and the inrush current requirements. -
Page 30: Motor Service
After verifying motor rotation, replace any covers that were removed. Main Motor Lubrication The main motor in the Hypertherm pump needs to be greased periodically. Use a good quality, moisture-resistant, polyurea-based grease such as Chevron SRI #2. Do not use lithium-based grease: mixing the OEM grease with lithium grease may result in loss of lubrication, shorter motor bearing life, and shorter motor life. -
Page 31: System Fault Detection
5.4 System Fault Detection HyPrecision 100D/150D pumps have a series of fault conditions that are constantly monitored by the PLC. External stack lights or panel lights will blink to alert the operator that a fault has occurred. If a fault condition is sensed by the control system, an alarm image will be displayed on the LCD screen. - Page 32 Shutdown I Messages Shutdown I fault conditions are severe enough to require the intensifier to shut down but will allow the motor to keep running. The red light will be flashing and one of the following images will be displayed on the LCD screen.
- Page 33 Another possible cause is excessive water demand. If an orifice has broken or plumbing is leaking water, demand may be high enough to cause the motor to overload. Hypertherm pumps are setup with protection from this scenario. Reduce water demand and reset thermal overload.
-
Page 35: Low-Pressure Water
The pump has been set up to operate with inlet water pressure of 40 to 70 psi. If you are providing incoming cutting water from a reverse osmosis system, please contact an authorized Hypertherm service representative to make sure that the boost settings are correct. The bypass relief valve has been factory set to create a boost pressure of 60 psi. - Page 36 (see picture) to avoid inlet pressures above 125 psi. The pressure relief valve is factory set to 120 psi and should not need adjustment. If either panel gauges reads over 125 psi, contact an Hypertherm service representative regarding resetting and/or servicing the pressure relief valve.
- Page 37 Inlet Cutting Water Filtration All Hypertherm HyPrecision 100D/150D pumps come with two or three water filters that remove contaminants from the cutting water. Two water gauges are located on the front panel of the pump or on either side of the filters to show the pressure before and after the filters. These gauges are used to determine the pressure drop across the filters.
-
Page 38: Cooling Water Loop (Not All Models)
6.3 Cooling Water Loop (Not all Models) The cooling loop consists of an inlet water valve to turn on the cooling water. The electronic solenoid valve (if applicable) will automatically turn on the cooling water any time the motor is running. Models without an electronic solenoid valve will have to be controlled manually using a ball valve. -
Page 39: High-Pressure Water
7 High-Pressure Water 7.1 High-Pressure Water Overview The high-pressure (HP) water system increases the relatively low-pressure water inlet up to 60,000 psi (4,137 bar). Maximum flow rates and orifice diameters are provided in the Specifications section of this manual. The High-Pressure Assembly consists of the following four (4) major components: Intensifier The Intensifier assembly contains three major subsections or cylinders. -
Page 40: Intensifier
HP cylinder should be changed at the first opportunity. This section will provide the basic information needed do in-house replacements and service on the high-pressure ends for the HyPrecision 100D/150D pumps. For any questions and all other service needs please contact 0.15"service representative. - Page 41 Removing Old HP Seals Remove the high-pressure tubing and inlet water quick-disconnects from the appropriate end of the intensifier. Remove the four 1 in. nuts from the studs by using a cross pattern to gradually unload the high-pressure end cap from the high-pressure cylinder.
- Page 42 Installing New HP Seals Parts Needed: • Seal replacement tools. • Seal kit: 4 HP seals with O-rings, 4 hoops, 1grease packet, bronze seal backup. Place the HP cylinder on the spacer tool, then insert the spacer tube, basket, and LP poppet Place the locating ring and seal guide on the end of the cylinder.
-
Page 43: Check Valve Assembly
Reinstalling the High-Pressure Ends Push the HP cylinder onto the plunger. Place the HP end cap over the studs and make sure it guides smoothly onto the check valve body making sure to not unseat the O-rings on the check valve body. - Page 44 Weep Hole Leakage (See previous figure) • Weep Hole #1 (10) leakage means that the inlet fitting needs to be tightened into the output adapter. • Weep Hole #2 (11) leakage means that the output adapter needs to be tightened into the check valve body.
- Page 45 Check Valve Lapping Instructions During use, the check valve body face (1) becomes worn from the action of the LP poppet. It may be indented from repeated poppet impact or have erosion tracks. This deformation will affect the sealing properties of this part. Periodically inspect this surface and if necessary use the lapping procedure to return it to a flat and near mirror finish.
-
Page 46: Hydraulic Seal Housing
7.5 Hydraulic Seal Housing Removing the hydraulic seal housing provides access to the rod seal. If oil is observed in the seal area during HP seal replacement, the rod seal should be replaced. With the HP cylinder removed, slide the seal housing removal tool over the exposed seal-housing diameter and into the groove. -
Page 47: Hydraulic Center Section
7.6 Hydraulic Center Section The hydraulic center section houses the piston and the plungers. This section describes the service of this area with the HP cylinders removed and the center section removed from the pump. Hydraulic Center Section Disassembly Unscrew the eight bolts in the back of the manifold that connect it to the end caps. With the HP cylinders removed, loosen but do not remove the four 7/8 in. - Page 48 Special tools are required to load the new seal on the piston and load the new piston/seal assembly into the hydraulic cylinder. Contact an authorized Hypertherm service representative for further information regarding this procedure. Plunger Bearing The plunger bearing may become worn and may lose its precision fit relative to the plunger.
-
Page 49: Intensifier Cycling
7.7 Intensifier Cycling Under normal operating conditions, the intensifier is designed to cycle smoothly in both directions at the same speed. Leaks or HP component failures will cause the intensifier to overstroke in one or both directions. Severe overstroking can cause a fault condition and/or a pump shutdown. An arrow on the display screen will indicate the direction of overstroke. -
Page 50: Pump Bleed-Down Valve
Intensifier Overstroking in One Direction This indicates a problem inside the intensifier, specifically the LP poppet or HP check valve area. Verify that the inlet water is connected to the intensifier. Look for leaking from either end of the HP cylinder. Replace HP seals if necessary. -
Page 51: Attenuator
The intensifier is now ready for use. Turn pump on and check for any leakage. 7.9 Attenuator Hypertherm pumps are equipped with an attenuator with a volume of either 1 liter or 2 liters depending on the size pump. The 1-liter attenuator uses 3/8 in. HP fittings. The 2-liter attenuator uses 9/16 in. male x 3/8 in. female inlet adapters on either end to connect to the 3/8 in. -
Page 52: High-Pressure Plumbing Weep Holes
7.11 High-Pressure Plumbing Weep Holes Weep holes throughout the HP water system relieve the water seepage from any leaking components (for example, see Check Valve Assembly). Seepage from any of the holes indicates a faulty component, loose connection, or damaged seat. Failure to correct the cause may result in damage to the mating fittings. -
Page 53: Hydraulic
Please reference chapter 9 for specific pump requirements. Adding New Hydraulic Oil Hypertherm intensifier pumps require Castrol Hyspin 32 or Hyspin 46 Hydraulic oil. To add new oil, follow this procedure: Verify that the ball valve on the bottom of the hydraulic tank is closed. - Page 54 150ºF. See the Low-Pressure Water section for instructions on adjusting the water-modulating valve for water/oil cooled units. Air/oil cooled units should not need any adjustment. If you are having chronic overheating conditions with an air/oil cooler contact a Hypertherm service representative for further instruction.
-
Page 55: Control Manifold
Some HyPrecision pumps may be available with electronic pressure compensation. The following control manifold sections refer to pumps that do not have this option. For systems equipped with electronic pressure compensation contact Hypertherm for information on adjusting the pressure. -
Page 56: Oil Filter
8.4 Heat Exchanger HyPrecision 100D/150D pumps are equipped with a water/oil heat exchanger and a gear pump. The gear pump is located on the end of the main motor and is part of the “Kidney Loop” system used for cooling the hydraulic oil. -
Page 57: Hydraulic Tank
Inlet suction strainers to prevent contamination from reaching the main PCVD pump and the gear pump or kidney loop system. 8.6 Main Pump Setup Contact Hypertherm if the main hydraulic pump needs to be replaced. Detailed setup information is available upon request. -
Page 59: Specifications
9 Specifications The following specifications describe the requirements and capabilities of the AS-Series pumps. 9.1 Pump Requirements 50hp 60hp 75hp 100hp 150hp (37kW) (45kW) (56kW) (75kW) (112kW) Frequency (Hz) Pump Power Voltage (V) 230/460 230/460 Current (I) 135/67 175/100 Main C.B. Rating (I) Physical Width 80in (2.03m) - Page 60 50hp 60hp 75hp 100hp 150hp (37kW) (45kW) (56kW) (75kW) (112kW) Frequency (Hz) Max. Inlet Water Pressure 115 psi (7.72 bar) (See LP Water section) 70°F (21°C) Max. Inlet Temp. Min. Inlet Temp. 40°F (4.4°C) Min. Inlet 2 gpm (7.6 lpm) 2.5 gpm (9.5 lpm) 4 gpm (15.1 lpm) 5 gpm (18.9 lpm)
- Page 61 Pump Factory Settings Hydraulic Pump 3200 psi (220 bar) Pressure Limit Cut Pressure Factory Set to Minimum Pressure for Startup. Set Point Adjust per startup operating instructions in this manual. Pierce Factory Set to Minimum Pressure for Startup. Pressure Adjust per startup operating instruction in this manual. Set Point Utility Hook-Ups (located at rear of pump) Cooling In...
-
Page 62: Pump Capabilities
9.2 Pump Capabilities 50hp 60hp 75hp 100hp 150hp (37kW) (45kW) (56kW) (75kW) (112kW) Frequency (Hz) Max. Continuous 60,000 psi (4137 bar) Output Pressure Min. Output 8,000 psi (552 bar) Pressure Max. Output Flow gpm (lpm) (4.16) (4.92) (6.05) (3.79) (4.54) (5.68) (7.95) (8.33) -
Page 63: Water Treatment Guidelines
TDS > 250 ppm RO System available through Poor Quality Water TDS removal Hypertherm Silica > 15 ppm Do not treat to 5 ppm or less: Water of this high of purity is overly aggressive and will damage stainless steel components. -
Page 64: Torque Specifications
9.6 Torque Specifications This specification chart applies to all fasteners used to make hydraulic and high-pressure connections. This includes hydraulic flange fittings, proximity switch to end cap, hydraulic manifold to end cap, one- inch intensifier nuts, and intensifier center-section cap screws. Torque values are for lubricated Grade 8 fasteners. -
Page 65: Maintenance And Troubleshooting
The following pages contain Parts and Service Contact Information, Maintenance Guidelines, a Scheduled Maintenance Chart, Troubleshooting guide, and a Maintenance Log. 10.1 Parts and Service Contact Information Hypertherm, Inc. 309 5th Ave NW New Brighton, MN 55112 Toll Free:... - Page 66 Scheduled Maintenance Chart The following maintenance intervals are based on 4,000 hour per year operation. Less hours of use will increase maintenance interval length. Inspect all cables and plugs for damage Check safety circuits Grease motor bearings Inspect fittings and hose for damage Adjust cooling water flow Check inlet water pressure Inlet water filters...
-
Page 67: Troubleshooting
The following troubleshooting chart lists symptoms, possible causes, and recommended solutions for troubleshooting the HyPrecision 100D/150D Intensifier Pumps. If you have corrected the fault condition and still receive a fault message, reset the pump by pressing the FAULT RESET button on the front control panel. - Page 68 Motor Fault Fuse in the control has blown. A short in a device on the PLC output Check the devices on the PLC outputs to determine what caused may have failed causing the fuse to the fuse to blow. If it is a failed solenoid, usually you will see blow.
- Page 69 Intensifier Operation Intensifier does not cycle. On/Off valve for cutting head is off. Turn cutting head on. Intensifier is disabled. Enable intensifier at display. Defective shift valve or end of Replace if necessary. travel proximity switch. One of the indicator pins is hung up Disassemble and repair.
- Page 70 High-Pressure Cylinder and Check Tube Bronze backups have short life. Worn plunger bearing. Replace plunger bearing. Cylinder end drips and is hot. Check for crack at end of HP Replace HP seals and hoops and HP cylinder if necessary. cylinder. Check valve is hot and HP cylinder end drips.
-
Page 71: Maintenance Log
10.4 Maintenance Log PUMP MODEL__________________ SERIAL NO.____________________ Problem found and work performed Date:______ Initials ________ Hours:______ Date:______ Initials ________ Hours:______ Date:______ Initials ________ Hours:______ Date:______ Initials ________ Hours:______ Date:______ Initials ________ Hours:______ Date:______ Initials ________ Hours:______ Date:______ Initials ________ Hours:______ Date:______ Initials ________... - Page 72 PUMP MODEL__________________ SERIAL NO.____________________ Problem found and work performed Date:______ Initials ________ Hours:______ Date:______ Initials ________ Hours:______ Date:______ Initials ________ Hours:______ Date:______ Initials ________ Hours:______ Date:______ Initials ________ Hours:______ Date:______ Initials ________ Hours:______ Date:______ Initials ________ Hours:______ Date:______ Initials ________ Hours:______ Date:______ Initials...
-
Page 73: Document Revisions
11 Document Revisions This table contains a list of current revisions and the date in which they were revised/updated. Check with your local Hypertherm support personnel to verify that you have the latest revision. Document Approved Description of change Date Revision Rev. -
Page 75: Drawings And Parts Lists
12 Drawings and Parts Lists... -
Page 77: Controls Manual
13 Controls Manual...
Need help?
Do you have a question about the HyPrecision 100D and is the answer not in the manual?
Questions and answers