Table of Contents
Advertisement
Available languages
Available languages
Quick Links
Advertisement
Table of Contents

Related Manuals for Little Seeds 6862096COM


Summary of Contents for Little Seeds 6862096COM
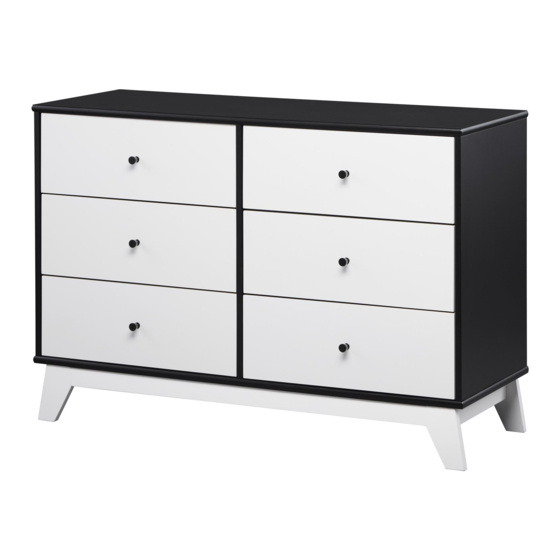
- Page 1 BBBBBBBBBBBBB inside for Assembly Manual Check us out! littleseedskids.com...
- Page 2 Keep this Assembly Manual for future reference Two Adults recommended for assembly This product is not intended for commercial use Do NOT return this product! Follow little seeds on For missing or broken parts - Visit littleseedskids.com - Call 1-800-489-3351...
- Page 3 Do NOT return this product! Contact our friendly customer service team first for help Assembly Tips Call us! 1-800-489-3351 Monday-Friday 9am - 5pm CST Visit littleseedskids.com to view the limited warranty valid in the U.S and Canada Helpful Hints PEOPLE NEEDED FOR ASSEMBLY: 1-2 ESTIMATED ASSEMBLY TIME: 1 HOUR - Open your item in the area you plan to keep it for less heavy lifting - Identify, sort and count the parts before attempting assembly...
- Page 4 Before You Start Read through each step carefully and follow the proper order Separate and count all your parts and hardware Give yourself enough room for the assembly process Have the following tools: Flat Head Screwdriver, #2 Phillips Head Screwdriver and Hammer Caution: If using a power drill or power screwdriver for screwing, please beware to slow down and stop when screw is tight.
- Page 5 Board Ident f lat on Not altual size T6862096010 T6862096020 TOP PANEL BOTTOM PANEL T6862096030 T6862096040 T6862096050 LEFT SIDE PANEL PARTITION PANEL RIGHT SIDE PANEL T6862096060 T6862096070 T6862096080 MOLDING FRONT DRAWER LEFT SIDE DRAWER lil leseedslidsllom...
- Page 6 Board Ident f lat on Not altual size T6862096090 T6862096100 T6862096110 RIGHT SIDE DRAWER BACK DRAWER BOTTOM DRAWER T6862096120 T6862096130 T6862096140 DRAWER SUPPORT FRONT/BACK APPRON SIDE APPRON T6862096150 BACK PANEL lil leseedslidsllom...
- Page 7 Part List Altual size TUD0009 TUD0001 TUD0002 TUD0004 TUD0005 CBS 4 x 38 Cam Bolt Cam Loll DOWEL 8 X 25 DOWEL 6 X 25 15-12 TUD0010 TUD0008 TUD0006 PH M4 X 18 CBS 3l5 x 16 NAIL lil leseedslidsllom...
- Page 8 Part List Not altual size x6 SET TUD0017 TUD0027 DRAWER SLIDE CONE KNOB 350 MML x1 set TUD0021 ANTI TIPPING KIT lil leseedslidsllom...
- Page 9 Step 1 TUD0001 TUD0021 Alach the Cam Bolt. For ant tppinng bracket, do not fully tghten in this step. * raw edges are shaded lil leseedslidsllom...
- Page 10 Step 2 x3 (CL) TUD0008 TUD0017 Preparat on of left side panel Screw Posit on * raw edges are shaded lil leseedslidsllom...
- Page 11 Step 3 Proper orientat on of CAM LOCK TUD0001 TUD0002 TUD0004 Preparat on of left side panel * raw edges are shaded lil leseedslidsllom...
- Page 12 Step 4 x3 (CR) TUD0008 TUD0017 Preparat on of right side panel Screw Posit on * raw edges are shaded lil leseedslidsllom...
- Page 13 Step 5 Proper orientat on of CAM LOCK TUD0001 TUD0002 TUD0004 Preparat on of right side panel * raw edges are shaded lil leseedslidsllom...
- Page 14 Step 6 x3 (CR) TUD0008 TUD0017 Preparat on of part t on panel Screw Posit on * raw edges are shaded lil leseedslidsllom...
- Page 15 Step 7 TUD0001 Preparat on of part t on panel * raw edges are shaded lil leseedslidsllom...
- Page 16 Step 8 x3 (CL) TUD0008 TUD0017 Preparat on of part t on panel Caut on!, Please ensure bolt on the other side not touching the fl oor or worktop. Screw Posit on * raw edges are shaded lil leseedslidsllom...
- Page 17 Step 9 Proper orientat on of CAM LOCK TUD0001 TUD0002 TUD0004 Preparat on of part t on panel Caut on!, Please ensure bolt on the other side not touching the fl oor or worktop. * raw edges are shaded lil leseedslidsllom...
- Page 18 Step 10 TUD0004 Preparat on of side appron * raw edges are shaded lil leseedslidsllom...
- Page 19 Step 11 TUD0001 Preparaton of front drawer lil leseedslidsllom...
- Page 20 Step 12 Proper orientat on of CAM LOCK TUD0005 TUD0002 Preparat on of left & right side drawer * raw edges are shaded lil leseedslidsllom...
- Page 21 Step 13 Proper orientat on of CAM LOCK TUD0005 TUD0002 Preparat on of drawer support & molding * raw edges are shaded lil leseedslidsllom...
- Page 22 Step 14 Alach left side drawer to front drawer. * raw edges are shaded lil leseedslidsllom...
- Page 23 Step 15 Alach right side drawer to front drawer * raw edges are shaded lil leseedslidsllom...
- Page 24 Step 16 Alach drawer support to front drawer * raw edges are shaded lil leseedslidsllom...
- Page 25 Step 17 Slotting in bolom drawer * raw edges are shaded lil leseedslidsllom...
- Page 26 Step 18 TUD0009 Alach the back drawer with screw * raw edges are shaded lil leseedslidsllom...
- Page 27 Step 19 x6 (DR & DL) TUD0008 TUD0017 Alach drawer slide for drawer box * raw edges are shaded lil leseedslidsllom...
- Page 28 Step 20 TUD0027 TUD0010 Knob installaton * raw edges are shaded lil leseedslidsllom...
- Page 29 Step 21 TUD0009 Note: Big hole facing bolom Big hole Alach side appron to front appron * raw edges are shaded lil leseedslidsllom...
- Page 30 Step 22 TUD0009 Alach side appron to front appron * raw edges are shaded lil leseedslidsllom...
- Page 31 Step 23 TUD0009 Alach appron frame to bolom panel * raw edges are shaded lil leseedslidsllom...
- Page 32 Step 24 Alach molding to right side panel * raw edges are shaded lil leseedslidsllom...
- Page 33 Step 25 Alach molding to left side panel * raw edges are shaded lil leseedslidsllom...
- Page 34 Step 26 Alach right side panel to partton panel * raw edges are shaded lil leseedslidsllom...
- Page 35 Step 27 Alach left side panel to partton panel * raw edges are shaded lil leseedslidsllom...
- Page 36 Step 28 Alach the bolom panel. TUD0009 Note: Bullnose profle facing up * raw edges are shaded lil leseedslidsllom...
- Page 37 Step 29 Carefully turn up the unit. Alach the top panel Please ensure this brallet faling ball * raw edges are shaded lil leseedslidsllom...
- Page 38 Step 30 TUD0006 Carefully turn the unit over onto its front as shownl Assure that the unit is squarel Distanle from lorner to lorner must be equal as shownl IBPBRTANT! THE BACK PANEL IS A STRUCTURAL PART OF THIS UNIT AND MUST BE INSTALLED PROPERLYl * raw edges are shaded lil leseedslidsllom...
- Page 39 Step 31 For Masonry, Concrete, or other RRll mRtRRiRlR: Consult your lolal hardware store for appropriate anlhors to selurely alach the safety bracket. IBPBRTANT: THIS UNIT MUST BE SECURE TO THE WALL TO HELP PREVENT TIPOVERl FOLLOW THESE INSTRUCTIONS TO INSTALL THE ANTI-TIPPING SAFETY BRACKET PROVIDED WITH THIS PRODUCTl WARNING hole...
- Page 40 Step 32 Insert the drawer, larefully align the roller * raw edges are shaded lil leseedslidsllom...
- Page 41 Maximum Loads This unit has been designed to support the maximum loads shownl Exleeding these load limits lould lause sagging, instability, prodult lollapse, and/or serious injuryl 75 lbsl 34 lg 35 lbsl 15l8 lg ealh drawer Warning: Risk of serious injury to person - do not place a television on this furniture. This furniture is not approved for use with a television.
- Page 42 RRgiRtRR youR product tR receive thR fRllRRiRg: * NRR tRRRd dRtRilR -RRRRk peek RR RhRt'R RRR * SurveyR -have R voice RithiR RuR community * ExclusivR dRRlR RRd diRcRuRt cRdRR * Quick RRd easy replacement part servicR TR RRgiRtRR your product, visit ViRit your lRcRl RRtRilRR'R RRbRitR, RRtR your purchased product RRd leave uR RRmR fRRdbRck! WR RRuld likR tR RxtRRd R big "ThRRk YRu"...
- Page 43 Español BubiRRtR RRlRRtRRR Busque en el interior del manual de montaje Búsquenos! página 2 Conserve este manual de montaje para futuras lonsultasl Se relomienda dos adultos para el montajel Este produlto no es para uso lomerliall No Regrese este producto! Para piezas perdidas o rotas. Visitar: lilleseedskids.com Llamenos al: 1-800-489-3351 (Grats) Lunes - Viernes 9am - 5pm CST Seguir lille seeds en...
- Page 44 Español Lista de (página 7) Tamaño real Lista de (página 8) Tamaño no real Paso 1 (página 9) Fije el perno de la leva. Para el soporte ant inclinación, no apriete completamente en este paso. Paso 2 (página10) Preparalión del delantal lateral Paso 3 (página 11) Preparalión del panel lateral izquierdo Paso 4 (página 12)
- Page 45 Español Paso 14 (página 22) Coloque el lajón izquierdo en el lajón delanterol Paso 15 (página 23) Coloque el lajón derelho en el lajón delantero Paso 16 (página 24) Coloque el soporte del lajón en el lajón delantero Paso 17 (página 25) Ranura en el lajón inferior Paso 18 (página 26) Fije el lajón trasero lon el tornillo...
- Page 46 Español Paso 29 (página 37) Levante luidadosamente la unidadl Coloque el panel superior Por favor, asegúrese de que este soporte De espaldas Paso 30 (página 38) Con luidado, gire la unidad sobre su parte frontal lomo se muestral Asegúrese de que la unidad es luadradal La distanlia de la esquina a la esquina debe ser igual a lomo se muestral ¡IMPORTANTE! EL PANEL TRASERO ES UNA PARTE ESTRUCTURAL DE ESTA UNIDAD Y DEBE INSTALADO CORRECTAMENTEl...
- Page 47 Español OPCIÓN 2: Accesorio en paneles de yeso Lolalile su unidad donde se desee en una pared y marque la pared a través del soporte de seguridad, luego mueva su unidad a un ladol Perfore un orifcio de 3/16 “de diámetro (5 mm) en la pared. Toque el ancla de pared en el agujero hasta que quede al rasl Mueva su unidad a la ubilalión y sujete el soporte de pared al anlla de pared lon el tornillol Apriete el tornillo que no estaba lompletamente apretado en el paso 1l Paso 32 (página 40)
- Page 48 Français lapot avant Regardez à l’intérieur du manuel d’assemblage Búsquenos! page 2 Conservez ce manuel d’installaton pour référence ultérieure. deux adultes pour l’installaton est recommandée. Ce produit n’est pas pour un usage lommerliall Ne pas retourner ce produit! Pour les pièces perdues ou cassées. Visite: lilleseedskids.com Appel: 1-800-489-3351 (gratuit) Lundi - Vendredi 9am - 5pm CST Suivez les pettes graines dans...
- Page 49 Français Liste (page 7) taille réelle Liste (page 8) pas la taille réelle Étape 1 (page 9) Fixer le boulon de came. Pour le support d’inclinaison ant- serrez pas complètement dans cele étape. Étape 2 (page 10) Préparaton du panneau latéral gauche Étape 3 (page 11) Préparaton du panneau latéral gauche Étape 4 (page 12)
- Page 50 Français Etape 15 (page 23) Placez le troir de droite dans le troir avant Etape 16 (page 24) Placez le support de troir dans le troir avant Etape 17 (page 25) Fente dans le troir du bas Étape 18 (page 26) troir arrière sécurisé...
- Page 51 Français Étape 30 (page 38) Tourner avec précauton l’appareil sur son front comme indiqué. Assurez-vous que l’unité est larréel La distance d’un coin à doit être égal comme indiqué. IMPORTANT! LE PANNEAU ARRIÈRE EST STRUCTURELLE PARTIE DE CETTE UNITÉ ET MUST INSTALLÉl Étape 31 (page 39) Maçonnerie, béton ou autres matériaux de paroi:...
- Page 52 Français PRgR B1 MAXIMUM DE CHARGE Cet appareil est lonçu pour supporter la lharge maximale enregistréel Le dépassement de les limites peut provoquer l’instabilité, l’effondrement et / ou causer des blessures graves. AVERTISSEMENT: Risque de blessures aux personnes - ne plalez pas la télévision sur les meublesl Ce mobilier est pas approuvé...
Need help?
Do you have a question about the 6862096COM and is the answer not in the manual?
Questions and answers