Table of Contents
Advertisement
Manufacturing Revision Level: Rev. A
www.braunability.com/international
Phone: +1 574 946 6153
403906 Rev. B
January
2019
Owner Manual
International
Inboard Lift
E Series
Solid Platform
Public Use
Wheelchair Lifts
631 West 11th Street, Winamac, IN 46996, USA
Original Instructions
ISO 9001:2015
Fax: +1 574 946 4670
Advertisement
Table of Contents

Related Manuals for BraunAbility EDEC08S86132L


Summary of Contents for BraunAbility EDEC08S86132L
- Page 1 Inboard Lift E Series Solid Platform Public Use Wheelchair Lifts Manufacturing Revision Level: Rev. A www.braunability.com/international ISO 9001:2015 631 West 11th Street, Winamac, IN 46996, USA Phone: +1 574 946 6153 Fax: +1 574 946 4670 403906 Rev. B January...
- Page 2 Warranty Consult your local BraunAbility dealer regarding warranty policy. ® www.braunability.com/international Model No. Serial No. War. Card 07.ai OWNER'S WARRANTY REGISTRATION XXXXXXXXXX XX-XXXXX PURCHASED FROM OWNER DATE INSTALLED NAME ADDRESS CITY TELEPHONE STATE TO VALIDATE WARRANTY REGISTRATION CARDS MUST BE RETURNED TO THE BRAUN CORPORATION.
-
Page 3: Table Of Contents
Contents Installation and Service Safety ............2, 3 Lift Operation Safety ............... 4-6 Specifications ..................7 Lift Terminology .................. 8 Lift Installation Position Lift ................. 9, 10 Secure Lift ................11 Power Cable and Ground Cable ........12-13 Platform Angle Adjustment ............. 14 Tower Microswitch Adjustment .......... -
Page 4: Installation And Service Safety
Installation and Service Safety Safety Symbols SAFETY FIRST! Know That ..The information contained in W ARNING C AUTION this manual and supplements (if included), is provided for your This symbol indicates This symbol indicates use and safety. Familiarity with important safety in- important information proper installation, operation,... - Page 5 Disconnect the power cable at the battery prior to servicing. Never modify (alter) a BraunAbility lift. Replacement parts must be BraunAbility authorized replacements. Never install screws or fasteners (other than factory equipped). Whenever replacing a hydraulic cylinder or seals, lower platform fully.
-
Page 6: Lift Operation Safety
Lift Operation Safety Safety Symbols SAFETY FIRST! Know That ..The information contained in W ARNING C AUTION this manual and supplements (if included), is provided for your This symbol indicates This symbol indicates use and safety. Familiarity with important safety in- important information proper installation, operation, formation regarding a... - Page 7 Engage vehicle parking brake before operating lift. not fully understood, contact BraunAbility Provide adequate clearance outside the vehicle to accom- immediately. Failure modate the lift before opening lift door(s) or operating lift. to do so may result in serious bodily injury Inspect lift before operation.
- Page 8 (certified) service personnel. Replace missing, worn or illegible decals. Never modify (alter) a BraunAbility lift. Do not use accessory devices not authorized by BraunAbility. Do not remove any guards or covers. Keep clear of any hydraulic leak. Failure to follow these safety precautions may result in serious bodily injury and/or property damage.
-
Page 9: Specifications
The lift has been packaged to prevent damage from the effects of normal humidity, vibration, and shock. Maximum Power Lift Lift Load Capacity Requirement Weight Model EDEC08S86132L 400kg (880lbs) 12 VDC 136.8kg (301lbs) EDEC08S74105L 400kg (880lbs) 12 VDC 120.6kg (266lbs) Page 7... -
Page 10: Lift Terminology
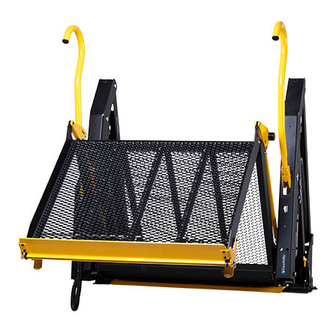
Latch Foot (2) Inboard Right (Front) Left (Rear) Outboard Front Inboard BraunAbility wheelchair lifts provide a The lift must be installed, operated, (of vehicle) (driver's side) method of boarding and exiting applicable and maintained as detailed in this motor vehicles. BraunAbility wheelchair manual. -
Page 11: Lift Installation
Lift Installation Position Lift Align Align (Parallel) (Parallel) Center lift in door opening Vertical Arm Vertical Arm must clear must clear door opening. door opening. Lift towers and vertical arms must be parallel (aligned) with vertical sides of door jamb and perpendicular (90˚) Figure A to the vehicle floor. - Page 12 Lift Installation Position Lift Alignment: Side-to-Side Alignment: See Figure A on previous page. The lift vertical arms and platform should be perpendicular Minimum 12 mm (90°) to the vehicle floor and parallel Clearance (aligned) with the vertical sides of door jamb.
-
Page 13: Secure Lift
Lift Installation Secure lift Figure E 1. Drill two mounting holes 5. Install remaining mounting W ARNING (holes 6 and 7). bolts. Check for obstruc- 2. Temporarily secure lift using 6. Tighten mounting bolts 1 tions such as gas two mounting bolts (holes 6 through 8 per sequence lines, wires, exhaust, and 7). -
Page 14: Power Cable And Ground Cable
Lift Installation Power Cable and Ground Cable 36513 OEM (+) Cable OEM (-) Cable Floor Grommet: 1. Drill 28.5mm diameter grommet access hole. Lead Cable Check under the vehicle for obstructions. 2. Insert grommet. Secure grommet with two Circuit Protection self-tap screws. - Page 15 Lift Installation Power Cable and Ground Cable 9/32” Diameter Pilot Hole Battery to Frame Ground Cable POS. 4 Gauge (21.1mm2) NEG. (not supplied) 5/16-18 x 3/4” Thread Cutting Screw 5/16” External Tooth Star Washer Ground Cable Mounting Hardware Detail Figure H Grommet Pump Mounted Ground Cable...
-
Page 16: Platform Angle Adjustment
Lift Installation Platform Angle Adjustment Figure I 36514 Lowering Sequence Requirements 1. The outboard end (toe) of the platform must contact Barrier the ground first to ensure the spring-loaded outer barrier unfolds fully. See Heel Figure I. Ground Level Platform heel Barrier must 2. -
Page 17: Tower Microswitch Adjustment
Lift Installation Tower Microswitch Adjustment Figure K W ARNING Improper microswitch adjustment may TOWER TOWER result in serious bodily injury and/or 32942 property damage. TOWER TOWER 36514 32942 TOWER TOWER Left (rear) pump lift depicted. Right Review adjustment 32942 (front) pump lift is a mirrored image. procedures below and adjust as needed only. -
Page 18: Installer Verification
Installer Verification Compatibility between the lift and the vehicle The installer shall confirm the compatibility between the lift and the vehicle. Static Test Deformation The unladen platform is positioned mid-way between ground level and vehicle floor level and measurements are taken of the height of the platform and its angular attitude relative to the vehicle floor. A load of 500 kg is applied to the platform and subsequently removed. - Page 19 Installer Verification Dynamic Test With 400 kg applied to the platform, verify that the lift is able to operate throughout its full range of normal lifting and lowering. 1. Lower platform to the ground. 2. Place 400 kg at center of platform. 3.
-
Page 20: Lift Operation Safety
Lift Operation Safety Safety Symbols SAFETY FIRST! Know That ..The information contained in W ARNING C AUTION this manual and supplements (if included), is provided for your This symbol indicates This symbol indicates use and safety. Familiarity with important safety in- important information proper installation, operation, formation regarding a... - Page 21 Engage vehicle parking brake before operating lift. not fully understood, contact BraunAbility Provide adequate clearance outside the vehicle to accom- immediately. Failure modate the lift before opening lift door(s) or operating lift. to do so may result in serious bodily injury Inspect lift before operation.
- Page 22 (certified) service personnel. Replace missing, worn or illegible decals. Never modify (alter) a BraunAbility lift. Do not use accessory devices not authorized by BraunAbility. Do not remove any guards or covers. Keep clear of any hydraulic leak. Failure to follow these safety precautions may result in serious bodily injury and/or property damage.
-
Page 23: Lift Operating Instructions
Lift Operating Instructions 36514 Before lift operation, park the Vehicle Doors and Vehicle Manual Door(s): Open manual vehicle on a level surface, Interlocks: Transit vehicle doors fully and secure in full away from traffic. Place the lift doors and interlocks vary. open position before operating vehicle transmission in “Park”... - Page 24 Lift Operating Instructions Before lift operation, park on transmission in “Park” and en- to the Manual Operating Instruc- a level surface, away from ve- gage the parking brake. Vehicle tions to manually operate lift. hicular traffic. Place the vehicle engine must be running. Refer OPEN DOOR(S) AND SECURE 36514 TO UNFOLD PLATFORM:...
- Page 25 Lift Operating Instructions Notice: Roll stop must be fully unfolded (ramp position) until the entire wheelchair (or standee) has crossed the roll stop. See Photos E and F. TO LOAD PASSENGER: 1. Read Notices below! Load passenger onto platform and lock wheelchair brakes.
-
Page 26: Manual Operating Instructions
Manual Operating Instructions 36514 Release Valve approximate 1.5 mm intervals maximum Valve Tightening 3 Nm Specification: minimum Once valve seats 2 Nm (stops), tighten 2 to 3 Nm as shown. seats (stops) Release Valve Notice: Close backup pump release valve securely before operating electric pump. - Page 27 Manual Operating Instructions To Unfold Platform (Out): Up (To Raise): Using hand pump handle (Photo B): Using hand pump handle: a. Place slotted end of pump handle onto 1. Close hand pump valve (place slotted release valve and turn clockwise to close end of pump handle onto release valve securely.
-
Page 28: Maintenance And Lubrication
Maintenance and Lubrication Lubrication Diagram Parallel Arm Lift-Tite Latch Tower Pivot Points ™ (2 Latches - 2 Points) Pivot Pin Bearings (16) Lift-Tite Latch Dampening Spring ™ (2 springs - 4 Points) Hydraulic Cylinder Pivot Bushings (8) 3645 Parallel Arm Pivot Pin Bearings (16) Handrail Pivot Pins (2) Inner Roll Stop Lever... - Page 29 Maintenance and Lubrication Schedule 36512 36513 36514 Proper maintenance is necessary to ensure contaminants which W ARNING safe, trouble-free lift operation. Inspecting the lift could result in wear for any wear, damage or other abnormal condi- or damage to com- Maintenance and tions should be a part of the transit agency daily ponents.
- Page 30 Maintenance and Lubrication Schedule Correct, replace damaged parts and/or Inspect outer barrier latch feet for proper opera- relubricate tion, positive securement and detached or missing torsion springs Correct as needed. Inspect lift for wear, damage or any abnormal Cycles condition Correct as needed.
- Page 31 Maintenance and Lubrication Schedule Perform all procedures listed in previous section also Hydraulic Fluid (Pump) - Check level. Use Braun 32840-QT (Exxon Univis HVI 26) ® Note: Fluid should be changed if there is hydraulic fluid (do not mix with Dextron III visible contamination.
- Page 32 Maintenance and Lubrication Schedule 2. Open pump module manual relief valve. 3. Disconnect power from lift. Lift 4. Capture and recycle hydraulic fluid. Disposal Procedure 5. Disassemble lift and recycle components. Refer to exploded views in manual. Page 30...
-
Page 33: Declaration Of Conformity
Product Certificate Autoadapt AB Declaration of Conformity Issued by Autoadapt Safety Centre in Stenkullen, Sweden. Manufacturer: The Braun Corporation Address: 631 West 11th Street, Winamac, IN 46996 United States Authorized Representative and Importer into EU: Manufacturer: Autoadapt AB Address: Åkerivägen 7, 443 61 Stenkullen, Sweden Telephone: +46 302 254 00 E-mail:... - Page 34 January 2019 Braun® is a registered trademark of BraunAbility® All illustrations, descriptions and speci cations in this document are based on the latest product information available at the time of publication. The Braun Corporation reserves the right to make changes at any time without notice.
Need help?
Do you have a question about the EDEC08S86132L and is the answer not in the manual?
Questions and answers