Table of Contents
Advertisement
GUIDA ALL'INSTALLAZIONE
Installation GUIDE
INSTALLATIONSANLEITUNG
NOTICE D'INSTALLATION
GUÍA PARA LA INSTALACIÓN
GUIA DE INSTALAÇÃO
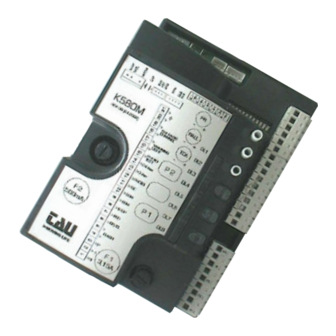
K580M
Quadro di comando per motoriuttore T-ONE5, T-ONE8, T-ONEXL e MASTER20QR/QM
Control panel for T-ONE5, T-ONE8, T-ONEXL and MASTER20QR/QM gearmotor
Steuerplatine für den getriebemotor T-ONE5, T-ONE8, T-ONEXL und MASTER20QR/QM
Logique de commande pour motoréducteur T-ONE5, T-ONE8, T-ONEXL et MASTER20QR/QM
Panel de mandos para motorreductor T-ONE5 , T-ONE8, T-ONEXL y MASTER20QR/QM
Quadro de comando para motorredutor T-ONE 5, T-ONE8, T-ONEXL e MASTER20QR/QM
IT - Istruzioni originali
Via Enrico Fermi, 43 - 36066 Sandrigo (VI) Italia
Tel +39 0444 750190 - Fax +39 0444 750376
info@tauitalia.com - www.tauitalia.com
K580M
1
Advertisement
Table of Contents

Summary of Contents for tau K580M
- Page 1 INSTALLATIONSANLEITUNG NOTICE D’INSTALLATION GUÍA PARA LA INSTALACIÓN GUIA DE INSTALAÇÃO K580M Quadro di comando per motoriuttore T-ONE5, T-ONE8, T-ONEXL e MASTER20QR/QM Control panel for T-ONE5, T-ONE8, T-ONEXL and MASTER20QR/QM gearmotor Steuerplatine für den getriebemotor T-ONE5, T-ONE8, T-ONEXL und MASTER20QR/QM Logique de commande pour motoréducteur T-ONE5, T-ONE8, T-ONEXL et MASTER20QR/QM...
- Page 2 SCHEMA CABLAGGIO K580M / K580M WIRING DIAGRAM / SCHALTPLAN DER K580M Dip-switches 9 10 11 12 SENS 9 10 11 12 SENS 500mA K580M 3,15A K580M...
- Page 3 SCHÉMA CÂBLAGE K580M / ESQUEMA DEL CABLEADO K580M / ESQUEMA ELÉCTRICO K580M Antenna Gate open warning light max. 3W 2nd radio Photocells channel 1 2 3 4 5 Photocell TX Photocell RX - 24 Vac 0 Vac Photocell (N.C.) Fixed safety edge...
- Page 4 MANUFACTURER’S DECLARATION OF INCORPORATION (in accordance with European Directive 2006/42/EC App. II.B) Manufacturer: TAU S.r.l. Address: Via E. Fermi, 43 36066 Sandrigo (Vi) ITALY Declares under its sole responsibility, that the product: Electronic control unit designed for automatic movement of:...
- Page 5 Important information: Disconnect the panel from the power supply before opening it. The K580M control unit has been designed to control an electromechanical gear motor for automating gates and doors of all kinds. Any other use is considered improper and is consequently forbidden by current laws.
- Page 6 (10=Common); SENSITIVE 10 - 11 EDGE NOTE: if a resistive sensitive edge is connected, set dip- switch no. 12 to ON; If a ixed safety edge with NC contact is connected, set dip- switch no. 12 to OFF; K580M...
- Page 7 WARNING: with the trimmer at maximum, the obstacle detection is disabled!! Automatic closing time adjustment from 5 to 120 seconds. T.C.A. Dip switch after opening, the gate automatically closes when the delay set on the AUTOMATIC T.C.A. trimmer expires. CLOSING automatic closing disabled. K580M...
- Page 8 If the obstacle detection function (which can be set through trimmers FR and SENS) gets activated during an opening manoeuvre, the gate closes approx. 20 cm., if it is activated during a closing ma- noeuvre, the gate opens fully. WARNING: the control panel logics may interpret mechanical friction as an obstacle. K580M...
- Page 9 2 lashes: photo-test error; Disable photo-test (dip-switch 6 OFF), check the operation of the photocells and their connection; 5 lashes: no encoder signal (only with dip 11 ON); Check wiring, check encoder by TEST-ENCODER (optional); K580M...
- Page 10 T-4RP and K-SLIM-RP (V 4.X). CANCELLING CODES FROM RADIO CONTROL DEVICES 1_ keep button P1 pressed for 3 seconds in order to cancel all the associated transmitters; 2_ LED DL8 lashes slowly to indicate that the cancellation mode has been activated; K580M...
- Page 11 Invert the position of dip-switch No. 10 after having turned off the power to the control unit. GUARANTEE: GENERAL CONDITIONS TAU guarantees this product for a period of 24 months from the date of purchase (as proved by the sales document, receipt or invoice).


Need help?
Do you have a question about the K580M and is the answer not in the manual?
Questions and answers