
Related Manuals for Zanussi ZOD35661WK


Summary of Contents for Zanussi ZOD35661WK
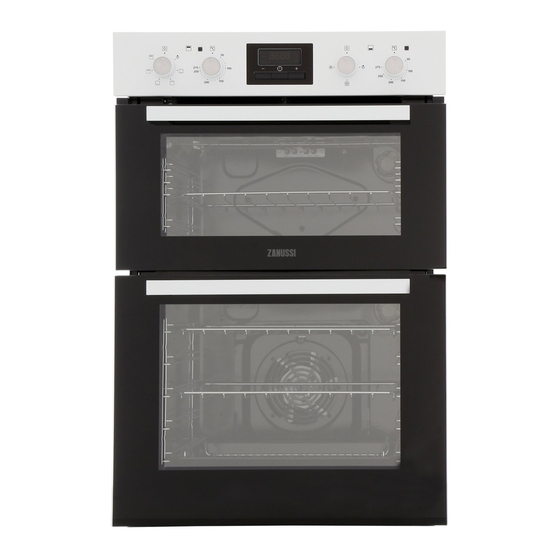
- Page 1 User Manual GETTING STARTED? EASY. ZOD35661WK ZOD35661XK EN User Manual Built-In Double Oven...
-
Page 2: Safety Information
SAFETY INFORMATION Before the installation and use of the appliance, carefully read the supplied instructions. The manufacturer is not responsible for any injuries or damages that are the result of incorrect installation or usage. Always keep the instructions in a safe and accessible location for future reference. -
Page 3: Safety Instructions
Before carrying out any maintenance, disconnect the appliance • from the power supply. Ensure that the appliance is switched off before replacing the • lamp to avoid the possibility of electric shock. Do not use a steam cleaner to clean the appliance. •... -
Page 4: Internal Lighting
• The electrical installation must have an isolation • Use a deep pan for moist cakes. Fruit juices device which lets you disconnect the appliance cause stains that can be permanent. from the mains at all poles. The isolation device •... -
Page 5: Product Description
• Use original spare parts only. • Disconnect the appliance from the mains supply. DISPOSAL • Cut off the mains electrical cable close to the appliance and dispose of it. WARNING! Risk of injury or • Remove the door catch to prevent children or suffocation. -
Page 6: Before First Use
DISPLAY A. Clock functions B. Timer The display works only with the main C. Clock function oven. BEFORE FIRST USE WARNING! Refer to Safety chapters. Preheat the two ovens. Heat up one oven at a time. Set the functions listed below, if applicable. -
Page 7: Top Oven Functions
TOP OVEN FUNCTIONS Oven function Application Light To turn on the lamp without a cooking function. Conventional To bake and roast food on one shelf position. Cooking (Top / Bottom Heat) Top Heat To brown bread, cakes and pastries. To finish cooked dishes. Bottom Heat To bake cakes with crispy bottom and to preserve food. -
Page 8: Setting The Duration
Clock function Application TIME DELAY To combine DURATION and END function. MINUTE MINDER To set countdown time. This function has no effect on the opera- tion of the appliance. You can set the MINUTE MINDER at any time, also when the appliance is off. SETTING THE TIME. -
Page 9: Using The Accessories
CANCELLING THE CLOCK FUNCTIONS 2. Press and hold 1. Press the again and again until the The clock function goes out after some seconds. necessary function indicator starts to flash. USING THE ACCESSORIES WARNING! Refer to Safety chapters. INSERTING THE ACCESSORIES Wire shelf: Push the shelf between the guide bars of the shelf support . -
Page 10: Additional Functions
2. Put the deep pan into the oven on the necessary shelf position. ADDITIONAL FUNCTIONS COOLING FAN If you turn off the oven, the cooling fan can continue to operate until the oven cools down. When the oven operates, the cooling fan turns on automatically to keep the surfaces of the oven cool. - Page 11 Baking results Possible cause Remedy The cake sinks and be- The oven temperature is too The next time you bake, set a slightly comes soggy, lumpy or high. lower oven temperature. streaky. The baking time is too short. Set a longer baking time. You cannot decrease baking times by setting higher temperatures.
- Page 12 Food Temperature (°C) Time (min) Shelf position - Flapjack 160 - 170 25 - 30 - Shortbread 130 - 150 45 - 65 Casseroles: - Beef / Lamb 160 - 170 150 - 180 - Chicken 160 - 180 75 - 90 Convenience Foods Follow manufacturer's instructions.
-
Page 13: Defrost - Main Oven
To keep meat more succulent: For grilling in the top oven adjust the shelf position • roast lean meat in the roasting tin with the lid or to suit different thicknesses of food. use roasting bag. Always set the pan to collect the fat into the first •... -
Page 14: Care And Cleaning
Quantity Defrosting Further defrost- Food Comments (kg) time (min) ing time (min) Chicken 100 - 140 20 - 30 Put the chicken on an upturned saucer in a big plate. Turn halfway through. Meat 100 - 140 20 - 30 Turn halfway through. -
Page 15: Oven Ceiling
OVEN CEILING WARNING! Deactivate the appliance before you remove the heating element. Make sure that the appliance is cold. There is a risk of burns. Remove the shelf supports. You can fold down the heating element on the oven ceiling to clean the oven ceiling easily. 1. -
Page 16: Replacing The Lamp
1. Turn off the oven. Wait until the oven is cooled down. 2. Disconnect the oven from the mains. 3. Put a cloth on the bottom of the cavity. The back lamp The lamp glass cover is at the back of the cavity. -
Page 17: Service Data
Product number (PNC) ......... Serial number (S.N.) ......... ENERGY EFFICIENCY PRODUCT FICHE AND INFORMATION ACCORDING TO EU 65-66/2014 Supplier's name Zanussi ZOD35661WK Model identification ZOD35661XK Top oven: 106.8 Energy Efficiency Index Main oven: 95.2 Top oven: A Energy efficiency class... -
Page 18: Environmental Concerns
ZOD35661WK 50.0 kg Mass ZOD35661XK 49.5 kg EN 60350-1 - Household electric cooking When the cooking duration is longer than 30 appliances - Part 1: Ranges, ovens, steam ovens minutes, reduce the oven temperature to minimum and grills - Methods for measuring performance. - Page 20 WWW.ZANUSSI.COM/SHOP...
Need help?
Do you have a question about the ZOD35661WK and is the answer not in the manual?
Questions and answers