Table of Contents
Advertisement
Quick Links
Advertisement
Chapters
Table of Contents

Related Manuals for Samsung SHP-700


Summary of Contents for Samsung SHP-700
- Page 1 SHP-700 SAMSUNG PROJECTOR Owner's ..... Instructions AA68-00000A-00...
- Page 2 Warning! Important Safety Instructions CAUTION RISK OF ELECTRIC SHOCK DO NOT OPEN CAUTION: TO REDUCE THE RISK OF ELECTRIC SHOCK, DO NOT REMOVE COVER (OR BACK). NO USER SERVICEABLE PARTS INSIDE. REFER SERVICING TO QUALIFIED SERVICE PERSONNEL. This symbol indicates high voltage is present inside. It is dangerous to make any kind of contact with any inside part of this product.
- Page 3 Thank You for Choosing Samsung Thank you for choosing Samsung! Your new Samsung TV represents the latest in television technology. We designed it with easy-to-use on-screen menus and closed captioning capabili- ties, making it one of the best products in its class. We are proud to offer you a product that will provide convenient, dependable service and enjoyment for years to come.
- Page 4 • Protect the power cord. Power supply cords should be routed so that they won’t be walked on or pinched by objects placed on or against them. Pay particular attention to cords at plugs, convenience receptacles, and the point where they exit from the unit. •...
- Page 5 The party responsible for product compli- Install and use the equipment according to ance: the instruction manual. SAMSUNG ELECTRONICS CO., LTD America QA Lab of Samsung 3351 Michelson Drive, Suite #290, Irvine, CA92612 USA Tel) 949-975-7310 Fax) 949-922-8301...
- Page 6 Before You Begin Product Features ....10 List of Parts......12 Remote Control Buttons....14 Using the Remote Control..15...
-
Page 7: Product Features
Product Features Wide DMD (Digital Micromirror Device) Chip ■ The DMD chip provides a higher screen resolution with an aspect ratio of 16:9 which gives you the best visual experience. The optimized screen frame allows you to watch software with a 16:9 aspect ratio recorded by DVD or DTV. ※... - Page 8 Convenient Graphic User Interface (GUI) ■ The Main System composed of various color icons which allows you to control pictures simply and easily. Color Temperature Control ■ This function is used to control color temperature in order to appropriately adapt the shape of the pictures input into the projector.
-
Page 9: List Of Parts
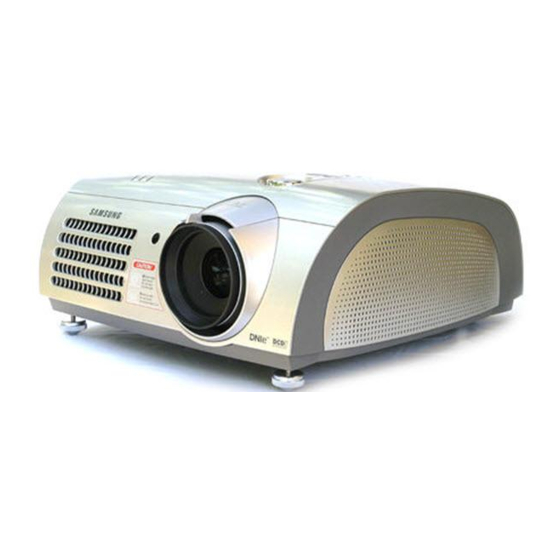
List of Parts Front Lens Shift Dial The image can be controlled (within the movable range of Power Button the lens) by turning this dial Turns the projector on the top of the projector LED Indicator Power ON/OFF. with your fingers. LAMP: This LED turns External Input on when the lamp... - Page 10 Rear Remote Control COMPOSITE DVI Input Receiver Terminal Terminal S-VIDEO Input RS-232C PC Input Terminal Port Terminal AC Power Power Input COMPONENT 1 & Input Switch 2 Input Terminals...
-
Page 11: Remote Control Buttons
Remote Control Buttons Œ Power button Turns the projector power ON/OFF. ´ LIGHT button ˇ P.SIZE button ¨ P.MODE button ˆ CUSTOM button Ø STILL button Stops the moving image (freeze frame). ∏ V.KEYS button ” INSTALL button ’ MENU button ˝... -
Page 12: Using The Remote Control
Properly Dispose of Used Batteries ● Properly dispose of used batteries due to adverse environmental effects. Package Contents ※ Please contact a Samsung service center, household appliances store, or electrical parts shop to purchase accessories and other devices separately. Remote Control,... - Page 13 Using the Remote Control in a Dark Room (Using BACK LIGHT) Press the LIGHT button on the remote control, the Back Light is turned on for about 5 seconds. LIGHT button Press the LIGHT button once again to turn the Back Light off. Inserting Batteries Press and push forward on the part of the battery cover to remove it.
-
Page 14: Table Of Contents
Connecting and Using Connecting to External Devices ..18 Installing Your Projector ....22 Powering On/Off ....23 Adjusting the Projector Feet ..24 Using the Lens Shift Dial ..24 Installing Your Projector Behind the Screen ......25 Installing Your Projector In Front of the Screen ......25 Using the Zoom and Adjusting Focus........26 Selecting an External Device..26... -
Page 15: Connecting To External Devices
Connecting to External Devices Connecting to S-VIDEO or COMPOSITE Terminals Connect to these terminals when you want to connect the projector with a video play- er, camcorder, digital satellite receiver, DVD, or cable-broadcasting receiver. Connect the COMPOSITE (or S-VIDEO) terminal of your projector and the COM- POSITE (or S-VIDEO) output terminal of the external device with a video cable. - Page 16 Connecting to COMPONENT (Y, Pb, Pr) terminals Connect to these terminals when you want to connect the projector with a DVD, DTV, digital camcorder, or digital satellite receiver. Connect the COMPONENT 1 (or COMPONENT 2) terminals of your projector and the component video output terminals of the external device with a video cable.
- Page 17 Connecting to Devices that have a DVI Terminal aConnect to the DVI terminal when you want to connect the projector with DTV, digital satellite receiver, etc. Connect the DVI input terminal of your projector and the DVI output terminal of the external device with a DVI cable.
- Page 18 Connecting to a PC Connect the PC input terminal of your projector and the Monitor output terminal of your PC with a PC (D-SUB) cable. ● Make sure to turn off your projector and PC before connecting them. After connecting the two, be sure to turn on the projector first and then the ●...
-
Page 19: Installing Your Projector
Installing Your Projector Install your projector at a right angle to the screen by adjusting the height adjustment feet. Move your projector slightly forward or backward until the screen is clear. ● Adjust the lens toward the center of the screen. The screen may be dis- torted or unclear if your projector is not installed at a right angle to the screen. -
Page 20: Powering On/Off
Powering On/Off Connect the power cord to a wall outlet after connecting your projec- tor to an external device. Press the "-" part of the switch on the back of your projector. Press the POWER button on the top of your projector or the POWER ON button on the remote control. -
Page 21: Adjusting The Projector Feet
Adjusting the Projector Feet Adjust the screen position by turning the height adjustment feet on your projector. ● The position can be adjusted within about 5 degrees from the standard position. ● The screen may be distorted when you adjust the projector height. Using the Lens Shift Dial You can move the lens up and down by turning the lens shift dial on the top of your projector with your fingers. -
Page 22: Installing Your Projector Behind The Screen
Installing Your Projector Behind the Screen You can use a translucent screen and install your projector behind the screen. In this case, the images projected are reversed. Installing Your Projector In Front of the Screen Install your projector in front of the screen. -
Page 23: Using The Zoom And Adjusting Focus
Using the Zoom and Adjusting Focus Zoom-in/out using the zoom control and Focus using the diaphragm. Zoom-in or out by turning the zoom control. Adjust the Focus by turning the diaphragm. Selecting an External Device Select the desired external device by pressing the Input button on the remote control or the Source button on your projector. -
Page 24: Editing Input Device Names
Editing Input Device Names I N P U T PROJECTOR Press the Menu button and select Input Source INPUT. Edit Name Move Enter Exit PROJECTOR I N P U T Select the Edit Name menu from the Component1 : _ _ _ _ INPUT menu. -
Page 25: Gamma Compensation
Gamma Compensation This function provides higher picture quality by brightening the dark part of picture. Press the Menu button and select Picture. Select Custom Picture using the Up(…) or Down(†) button on the Picture menu. P I C T U R E PROJECTOR Select Gamma using the Up(…) or More... -
Page 26: Setting Screen Modes
Setting Screen Modes Press the Menu button and select Picture. Select the Picture Mode menu using the Up(…) or Down(†) button while in the PICTURE menu. P I C T U R E PROJECTOR Standard Select your desired mode among Picture Mode : Custom Dynamic... -
Page 27: Customizing Screen Modes
Customizing Screen Modes Press the Menu button and select Picture. Select Custom Picture using the Up(…) or Down(†) button on the Picture menu. Select your desired item(s) among Contrast, Brightness, Sharpness, etc . . . using the Up(…) or Down(†) button while in the Custom Picture menu, and adjust it to your desired level. -
Page 28: Adjusting Color Temperature
Adjusting Color Temperature Adjusts the color temperature according to the type of image input into the projector. Press the Menu button and select Picture. Select Custom Picture using the Up(…) or Down(†) button on the Picture menu. P I C T U R E PROJECTOR Select Color Temperature using the More... -
Page 29: Image Projection Method
Image Projection Method You can view screen images in Reverse mode (image projected in reverse) or Inverse mode (image projected from the opposite side). PROJECTOR S E T U P Press the Menu button and select the Install : Rear-Celling SETUP menu. -
Page 30: Setting Up The Theater Function
Setting Up the Theater Function You can watch the screen in Theater mode by adjusting the quantity of light. PROJECTOR S E T U P Press the Menu button and select the Install : Rear-Celling SETUP menu. Light Setting : Theater Vertical Keystone Test Pattem Factory Default... - Page 31 Troubleshooting and Other Information Lamp LED Indicators ....35 Replacing the Lamp ....36 Cleaning the Air Filter ....37 Troubleshooting ......38 Specifications ......39...
-
Page 32: Lamp Led Indicators
Lamp LED Indicators Lamp LED Indicators ● The warning LED indicator notifies you when a problem occurs inside the projector. ● The TEMP LED indicator turns on when the projector generates too much heat. ● The LAMP LED indicator turns on when you should replace the lamp. Common Troubles and Actions LED Indicator Cause Symptom... -
Page 33: Replacing The Lamp
Replacing the Lamp ● Be careful not to touch the inside of the projector or the lamp gauge. ● Make sure to work only with your hands (do not insert foreign objects into the projector). ● Make sure to turn off the main power and disconnect the power cord before replacing the lamp. -
Page 34: Cleaning The Air Filter
Cleaning the Air Filter ● One air filter has been installed inside the projector to optimize operating time. ● Clean the air filter periodically using a vacuum cleaner. ● Clean the air filter every 100 hours. ● Clean the air filter more often if it is used in a dusty or smoky place. Cleaning Procedure 1. -
Page 35: Troubleshooting
Troubleshooting Symptom Action The Screen does not display. •Check whether the power cord of the projector is disconnected. •Check whether the input selection is correct. •Check whether the cables on the back of the projector are connected correctly. •Check whether the remote control batteries have run out. -
Page 36: Specifications
Specifications Model SP-H700 SP-H800 SP-Hxx Classification Panel Size 0.87" 0.87" 0.87" Resolution 1280 × 720 1280 × 720 1280 × 720 Lamp Type 250W UHP 250W UHP 250W UHP (BY PHILIPS) (BY PHILIPS) (BY PHILIPS) Life 2000Hrs 2000Hrs 2000Hrs Color Size 55mm 55mm...
Need help?
Do you have a question about the SHP-700 and is the answer not in the manual?
Questions and answers