Luma Surveillance 500 Series Quick Start Manual
Dvr surveillance recorder
Hide thumbs
Also See for 500 Series:
- Installation manual (25 pages) ,
- Installation and quick start manual (21 pages) ,
- Quick start manual (16 pages)
Table of Contents
Advertisement
Advertisement
Table of Contents

Subscribe to Our Youtube Channel
Related Manuals for Luma Surveillance 500 Series


Summary of Contents for Luma Surveillance 500 Series
-
Page 1: Web Interface
500/501 Series DVR Surveillance Recorder Web Interface Quick Start Guide... -
Page 2: Required Equipment
500/501 Series DVR Quick Start Guide Read this page before you go to the job site! For maximum control and convenience, your system should be connected to the Internet via a local network router. For installation, you must be able to access this network through a personal computer. Internet connectivity allows you to use OvrC, a powerful remote maintenance service. -
Page 3: Safety Tips
500/501 Series DVR Quick Start Guide Safety Tips Handle this device with care. The performance and lifespan of the hard drive is affected by temperature. Use this device in Do not strike or shake this device. temperatures ranging from 14–131 °F. Do not operate this device beyond its specified Handle the hard drive with care. -
Page 4: Box Contents
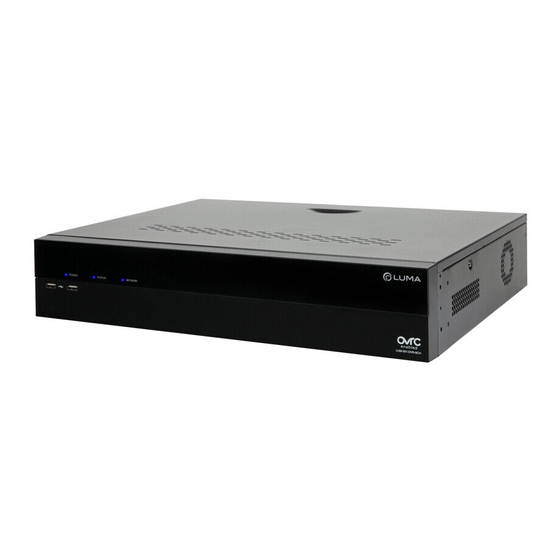
500/501 Series DVR Quick Start Guide Box Contents The following materials are included in your package: This quick-start guide The Luma DVR Extra screws for mounting an additional internal hard drive into your DVR (-8CH and -16CH only) SATA cables for connecting an additional internal hard drive in your DVR (-8CH and -16CH only) Rack ears for installing your DVR into a rack Screws for attaching the rack ears to the DVR USB mouse... -
Page 5: Set Up The Hardware
500/501 Series DVR Quick Start Guide Set Up the Hardware ß or à Optional local video monitor LCD Monitor/Flat Panel TV Camera(s) Optional AC Power USB Mouse Network Router Caution: Do not power up the DVR until these steps are complete. 1. - Page 6 Locate the DVR Run the Luma Utility. It searches the local network for all Luma Surveillance devices. If your DVR does not appear, ensure that the network connections are secure and that the unit is powered up, then click the Refresh button.
-
Page 7: Edit The Network Settings
500/501 Series DVR Quick Start Guide Edit the Network Settings If you need to change the network settings at a later date, consult the manual. Set the IP Address At the top of the right column of the Luma Utility, make a note of the IP address. - Page 8 500/501 Series DVR Quick Start Guide Start the Web Interface Get the Luma Plug-In Open your browser, type the IP address of the recorder (from page 7) into the address bar, and hit Return. Below the login window, there may be a link that reads, “Please click here to download and install the plug- in.
-
Page 9: Adjust Camera Settings
500/501 Series DVR Quick Start Guide Check the Cameras After log-in, your screen shows the live page, which should look similar to the illustration at right. If not, check the connections on your cameras and DVR, and ensure each camera is powered up. Adjust Camera Settings For cameras that have on-screen menu options to adjust their settings, you can control those menus... -
Page 10: Set Up Dynamic Dns
500/501 Series DVR Quick Start Guide Set Up Dynamic DNS This allows you to connect to your surveillance system from anywhere, via the Internet, using a web address that’s easy to remember. Click on Configure This Recorder > Network Settings > DDNS. Click the box labeled Enable DDNS, then choose a type from the DDNS Type menu. -
Page 11: Set Up Port Forwarding
500/501 Series DVR Quick Start Guide Set Up Port Forwarding Port forwarding is typically found under the Applications & Gaming section of your router. To complete port forwarding, you need: the IP address of the DVR (found under Configure this Recorder > Network Settings > TCP/IP, in the box labeled IPv4 Address), and the server and HTTP, and RTSP port addresses, which you set on page 7. -
Page 12: Change The Admin Password
500/501 Series DVR Quick Start Guide Create Users and Set Passwords Click on Configure This Recorder > User Management. Change the Admin Password Click on the admin account, then click Modify. Passwords cannot be longer than 16 characters. To ensure compatibility with the local interface, passwords can only contain numbers, letters, spaces, and the following special characters: . - Page 13 500/501 Series DVR Quick Start Guide Calibrate the System Time Click on Configure This Recorder > Device Parameters > Time Settings. Synchronize the Time Choose your time zone. North American time zones range from GMT-10:00 (Hawaii) to GMT-03:30 (Newfoundland). By default, the system uses network time protocol (NTP) to synchronize your system to Coordinated Universal Time.
-
Page 14: You're Done
500/501 Series DVR Quick Start Guide You’re Done! Your system is now operational. Next Steps Next, you’ll want to customize your system for your customer’s needs. Using the simple web interface, you can: Set protocols for remote computers for when they log in to the surveillance system. Change the cameras’... -
Page 15: Year Limited Warranty
SnapAV.com. 3-Year Limited Warranty This Luma Surveillance™ product has a 3-Year Limited Warranty. This warranty includes parts and labor repairs on all components found to be defective in material or workmanship under normal conditions of use. This warranty shall not apply to products that have been abused, modified or disassembled. - Page 16 500/501 Series DVR Quick Start Guide...
Need help?
Do you have a question about the 500 Series and is the answer not in the manual?
Questions and answers