Advertisement
Quick Links
TM
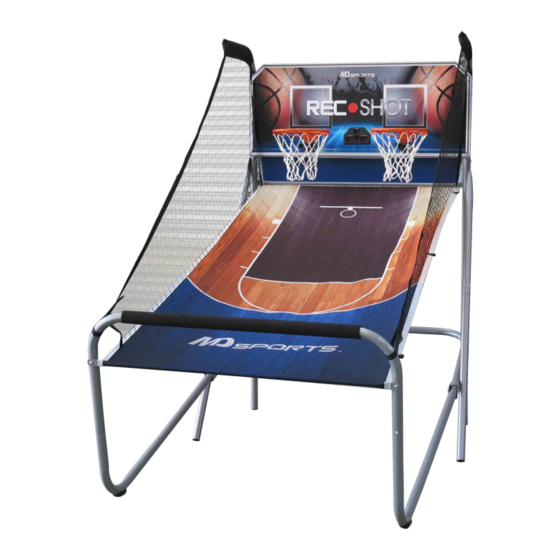
MODEL/MODELO: 1658437
SAM'S US
ASSEMBLY INSTRUCTIONS
INSTRUCCIONES DE ARMADO
ATTENTION
ATENCIÓN
DO NOT RETURN
NO DEVOLVERLO
TO THE STORE
A LA TIENDA
Contact
Contacto
MD Sports
MD Sports
Customer Service
Servicio al Cliente
Toll Free: 877-472-4296
Llamados gratuitos: 877-472-4296
* For additional resources and Frequently
* Por mayor información y Preguntas
Ask Questions, please visit us at
Frecuentes, favor visitarnos en
themdsports.com
themdsports.com
Advertisement

Related Manuals for MD SPORTS 1658437


Summary of Contents for MD SPORTS 1658437
- Page 1 MODEL/MODELO: 1658437 SAM’S US ASSEMBLY INSTRUCTIONS INSTRUCCIONES DE ARMADO ATTENTION ATENCIÓN DO NOT RETURN NO DEVOLVERLO TO THE STORE A LA TIENDA Contact Contacto MD Sports MD Sports Customer Service Servicio al Cliente Toll Free: 877-472-4296 Llamados gratuitos: 877-472-4296 * For additional resources and Frequently * Por mayor información y Preguntas...
- Page 2 Para preguntas o para piezas que no se hayan incluidos/dañadas, por favor pongase en contacto con nosotros. TIME HOME VISITOR (Continued on the next page.) (Continúe en la siguiente página.) www.themdsports.com 1658437...
-
Page 3: Tools Required
Mantener alejados a los exterior. Solo para uso en interior. necesarios area de ensamble animales domesticos No utilizar ni guardar el producto en del area de ensamble lugares humedos o mojados (Continued on the next page.) (Continúe en la siguiente página.) www.themdsports.com 1658437... - Page 4 English Español 1658437 PARTS LIST / LISTA DE PARTES Tube - 2 Tubo - 2 Tube - 3 Tubo - 3 Tube - 4 Tubo - 4 Tube - 1 Tubo - 1 Φ38x680mm Φ38x680mm Φ38x860mm Φ38x860mm Φ38x860mm Φ38x860mm Φ38x591x432mm Φ38x591x432mm...
-
Page 5: Instrucciones De Ensamblaje
English Español 1658437 PARTS LIST / LISTA DE PARTES Pasador Redes de Vuelta Locking Pin Ball Return Net Adapter Adaptador de bloqueo de Pelota 1658437 PRE-INSTALLED PARTS / PIEZAS PREINSTALADAS Cerradura de Plastic Pole Encaje de Poste Spring Lock Pole Holder... - Page 6 5. Fije los Tubo - 5 y Tubo - 6 (#5 & #6) junto usando el using the spring lock mechanism (pre - installed) as mecanismo de resorte de cerradura (pre - instalado) shown in FIG. 3. como indicado en FIG. 3. 1658437 www.themdsports.com (Continued on the next page.) (Continúe en la siguiente página.)
- Page 7 FIG. 4C, repeat this step for other side. Nota: Asegúrese que la cara de la mecanismo de Note: Make sure the spring lock mechanism is resortede cerradura está hacia abajo. face down. 1658437 www.themdsports.com (Continued on the next page.) (Continúe en la siguiente página.)
- Page 8 (#5 & #6) using Bolts (#25 ), Washers (#22) and Nuts usando Pernos (#25), Arandelas (#22) y Tuercas (#28) (#28) as shown in FIG. 5 and 5B. como se indica en FIG. 5 & 5B. 1658437 www.themdsports.com (Continued on the next page.) (Continúe en la siguiente página.)
- Page 9 (pre - installed) as Tubos - 10 (#10) usando el mecanismo de resorte de shown in FIG. 6. cerradura (pre - instalado) como mostrado en la FIG. 6. 1658437 www.themdsports.com (Continued on the next page.) (Continúe en la siguiente página.)
- Page 10 Pernos (#29) como se indica en FIG. 8. Install the Nets (#16) to the Rims (#17) as shown 13. Instale la Red (#16) al Borde (#17) como mostrado en in FIG. 8A. la FIG. 8A. 1658437 www.themdsports.com (Continued on the next page.) (Continúe en la siguiente página.)
- Page 11 Pernos (#24), Arandelas (#22) y Tuercas (#28) como se Bolts (#24), Washers (#22) and Nuts (#28) as shown indica en FIG. 9C & 9D. in FIG. 9C & 9D. 1658437 www.themdsports.com (Continued on the next page.) (Continúe en la siguiente página.)
- Page 12 Tubo - 6 (#5 & #6) e insertelos en Tubo - 5 and Tubo - 6 (#5 & #6) como se indica en FIG. 10C. Pasador de bloqueo Locking Pin 1658437 www.themdsports.com (Continued on the next page.) (Continúe en la siguiente página.)
- Page 13 Adaptor Wire (#35) to the Electronic Scorer (#14) Paleta (#15) y el Cable de Adaptador (#35) al as shown in FIG. 11 and 11A. Marcador Electrónico (#14) como se indican en FIG. 11. Y 11A. 1658437 www.themdsports.com (Continued on the next page.) (Continúe en la siguiente página.)
- Page 14 Nota: El Pasador de cerradura (#P3) debe ser removido before insertion to the new position when folded. de su posición original cuando el juego está siendo utilizado antes de la inserción a la nueva posición plegada. 1658437 www.themdsports.com (Continued on the next page.) (Continúe en la siguiente página.)
- Page 15 En el modo standby al final del juego, sin más operacio- ponytail, operations may resume. nes dentro de 60 minutos, el dispositivo se apaga automáticamente. En el modo apagado, tocando la cola de caballo, las operaciones pueden reanudar. 1658437 www.themdsports.com (Continued on the next page.) (Continúe en la siguiente página.)
- Page 16 “WiFi”, when the cell phone links WIFI, by turning contador, cuando el celular tienen WIFI conectado, on the cell phone “MD Sports” APP, you may choose prendiendo el “MD Sports” APP del celular, Ud. puede “FILES” for playing of video files or entering into “REC seleccionar “FILES”...
- Page 17 (without the card). memoria en el medidor eléctrico (sin la tarjeta de memoria). 2. Down APP (MD Sports) onto the cell phone, either Android or Apple system. 2. Descargue APP (MD Sports) en el celular, el a. The Android system is downloaded from sistema Android ó...
- Page 18 3. Mueva el interruptor del medidor eléctrico al modo “WiFi REC”. 4. Connect the cell phone to the power meter WiFi 4. Conecte el celular al medidor eléctrico WiFi “MD Basketball Game 1658437”. “MD Basketball Game 1658437”. 1658437 www.themdsports.com (Continued on the next page.)
-
Page 19: Function Keys
E. Switch for photos (no photos allowed during video) E. Interruptor para fotos (no fotos permitidas durante F. File folder grabación video) G. Memory card symbol F. Portaarchivos G. Símbolo de tarjeta de memoria 1658437 www.themdsports.com (Continued on the next page.) (Continúe en la siguiente página.) - Page 20 English Español 6. Turn the cell phone on and click “MD Sports” APP and 6. Prenda el celular y aprete “MD Sports” APP y luego then click “REC SHOT” to enter into the setting mode. aprete “REC SHOT” para entrar en el modo de programación.
- Page 21 ó fotos en la tarjeta de memoria de phone. su celular. 11. After downloading, click “PLAY” to play. 11. Luego de descargar, aprete “PLAY” para jugar. 1658437 www.themdsports.com (Continued on the next page.) (Continúe en la siguiente página.)
- Page 22 English Español 12. Click the memory card symbol to formulate 12. Aprete el símbolo de la tarjeta de memoria para the memory card. formular la tarjeta de memoria. 1658437 www.themdsports.com (The last page) (La ultima página)
Need help?
Do you have a question about the 1658437 and is the answer not in the manual?
Questions and answers