Table of Contents
Advertisement
Advertisement
Table of Contents

Related Manuals for LEXIN LX-FT4


Summary of Contents for LEXIN LX-FT4
-
Page 2: Table Of Contents
1. Introduction..................1 2. Package Contents..............2-3 3. Installation Instructions............3-6 4. General Operation Instructions..........6-7 - Powering On/Off and Charging - Pairing LX-FT4 with a Bluetooth Device 5. Controls and Functions............7-18 6. Maintenance and Care............18-19 7. Certification and Safety Approvals..........19 8. Warranty..................20 9. Waiver and General Release..........20-21... -
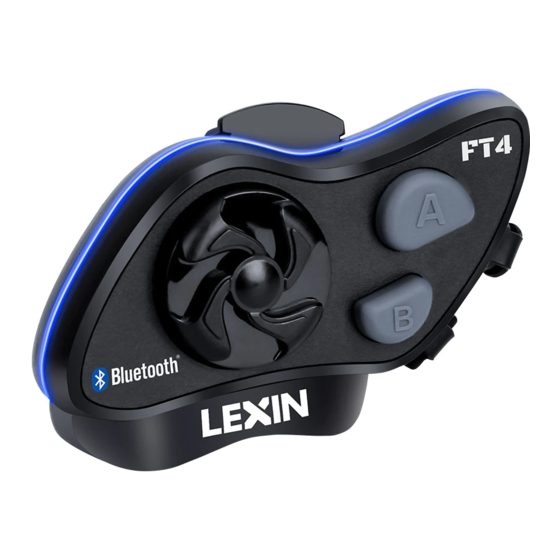
Page 3: Introduction
Bluetooth stereo wireless helmet headset(s), and is designed for installation into most open face, modular, and full-face style helmets. With the LX-FT4 you can call hands-free on your Bluetooth mobile phone, listen to music or voice instructions of GPS navigation, and activate wireless Intercom for rider-to-rider or rider-to-passenger intercom talk within a range of 2,000 meters (1.2... -
Page 4: Package Contents
How It Works 2. Package Contents... -
Page 5: Installation Instructions
• LX-FT4 Main unit • Stereo HD Speaker with Interchangeable Microphone for Open Face Helmet or Full Face Helmet • USB Charging Cable • Mounting Bracket & 3M Double Side Tape • Boom microphone Holder • Speaker Pad • Allen Wrench •... - Page 6 Note: Even though the 3M Tape mounting is provided for convenience, LEXIN recommends using the bracket mounting. The 3M Tape mounting is offered as an option that you may use at your own risk and responsibility, LEXIN does not assume any responsibility for use of it.
- Page 7 FM radio reception as well. 3.5 Mount the LX-FT4 main unit on the bracket. Attach the top first, then slide the main unit down onto the bracket until it clicks firmly into the bottom portion of the...
-
Page 8: General Operation Instructions
LED begin flashing blue and red. Follow the source devices instructions to connect. After the source device has been paired, the LX-FT4 will automatically connect when it is turned on and the Bluetooth is enabled on the source. To manually connect, simply click the Jog Dial to connect with the audio source. -
Page 9: Controls And Functions
Step 2. Put LX-FT4 main unit in Bluetooth pairing mode (see above) Step 3. Turn on or plug in the Stereo Bluetooth Adaptor Step 4. The audio source will automatically start playing through the LX-FT4 main unit when pairing is complete. - Page 10 5.3 Bluetooth Intercom Talk 5.3.1 Pairing with other LX-FT4 headsets for intercom talk Prior to pairing units for communications before riding, we strongly suggest that all existing connections be cleared from each unit. To clear existing connections, simply press and hold A button and B button together until the red LED flashes. All previous connections will be cleared from the unit.
- Page 11 LED blinking blue on both units. unit one or unit two unit one and unit two 2) Pairing three LX-FT4 headsets to talk Tips: Before pairing, please mark the different number on each LX-FT4 unit like the above photo for better understanding of operation.
- Page 12 Step 1. Pairing unit one with unit two Start with both units powered off, simultaneously hold the A button on unit one and unit two for 3 seconds until the red and blue LED of both units flash. Click the A button on either unit to pair.
- Page 13 Click the B button on either unit to pair. Once pairing starts, the LED on the unit clicked will flash only blue. When the LED is blinking blue on both units, then pairing is complete and successful. unit two or unit three unit two and unit three Step 3.
- Page 14 Step 4. Disconnect the intercom talk 4.1 To disconnect unit one and bridge unit two, click the A button or Jog Dail button on unit one, or click the A button on bridge unit two. While unit two and unit three stay connected.
- Page 15 3) Pairing four LX-FT4 headsets to talk Tip: Before pairing, please mark the different number on each LX-FT4 unit like the above photo for better understanding of operation. Step 1. Pairing unit one with unit two Start with both units powered off, press and hold the A button on unit one for 3 seconds until the LED is flashing blue and red, and then do same on unit two to enter pairing mode on both units.
- Page 16 Step 3. Pairing unit two with unit three With both units powered on, press and hold the B button on unit two for 2 seconds until the LED is flashing blue and red, then do the same on unit three to enter pairing mode on both units.
- Page 17 4.2 Connect unit three with unit four: While in standby mode, click the A button on either unit three or four. Once connected, the LED will flash 3 times in blue every 3 seconds on both units. unit three or unit four unit three and unit four 4.3 Connect bridge units two and three: While in standby mode, click the B button on either unit two or unit three to connect.
- Page 18 5.2 To disconnect unit three and unit four, click the B button or Jog Dial on unit four, or click the B button on bridge unit three. While the other three units stay connected. unit three or unit four unit three and unit four 5.3 To disconnect bridge unit two and bridge unit three, click the B button on either unit, while they stay connected with the end units, say unit two stays connected with unit one, and unit three stays connected with unit four.
- Page 19 GPS) while it is being used as an Intercom Bridge. 5.4 Universal Pairing: To enter pairing mode: Power on the LX-FT4, press and hold the B button for about 2 seconds until the LED begin flashing blue and red. Follow the other brand’s bluetooth unit instructions to enter pairing mode also.
-
Page 20: Maintenance And Care
6. Maintenance and Care The LX-FT4 should be treated with care and the following suggestions will help maintain your Warranty. 6.1. Do not use or store the device in dusty or dirty environments. Moving parts and electronic components can be damaged. -
Page 21: Certification And Safety Approvals
• CE Declaration of Conformity This product is CE marked according to the provisions of the RandTTE Directive (99/5/EC). Hereby, LEXIN declares that this product is in compliance with the essential requirements and other relevant provisions of Directive 1999/5/EC. -
Page 22: Warranty
(a) any misapplication or misuse of the Product; (b) failure of Customer to adhere to any of LEXIN’s specifications or instructions; (c) neglect of, abuse of, or accident to, the Product; or (d) any associated or complementary equipment or software not furnished by LEXIN. - Page 23 You hereby assume all risks and dangers and all responsibility for any losses and/ or damages, whether caused in whole or in part by the negligence or other conduct of others, including LEXIN. 9.5. By using the Product, you confirm that you have read this release of liability and fully understand and accept its terms and conditions.
- Page 24 WWW.LEXINMOTORCYCLE.COM tech@lexinmotorcycle.com +1 (800) 380-8248...
Need help?
Do you have a question about the LX-FT4 and is the answer not in the manual?
Questions and answers