Table of Contents
Advertisement
Quick Links
Advertisement
Table of Contents
Troubleshooting

Related Manuals for wingtra WingtraOne


Summary of Contents for wingtra WingtraOne
-
Page 2: Faq & Troubleshooting
Table of Contents Introduction Quick Start Guide WingtraOne Package Content WingtraOne Deliveries WingtraOne Image Sensor QX1 WingtraOne Image Sensor RX1 WingtraOne Image Sensor RedEdge Safety Guidelines Weather Conditions Safety Parameter Regulations Warranty Disclaimer Charging of WingtraOne Charging Acessories Charging WingtraOne Flight Batteries... - Page 3 Announcements and Release Notes Wingtra Release WingtraOne Documents...
-
Page 4: Tips And Tricks
Tip 3: Repower WingtraOne Corner cases can lead to an unexpected situation that prevents WingtraOne from taking off. In case you cannot solve your issue with tips 1 and 2, repower WingtraOne and try again. Tip 4: Submit a support request... - Page 6 WingtraOne Quick Start Guide Use WingtraOne to collect high-end aerial imagery with accurate geolocation! The following 4 video tutorials show you in 12 minutes all basic steps you need to perform before, while, and after your flight. If you are looking for more detailed information, browse the knowledge base or use the search function.
-
Page 8: Wingtraone Deliveries
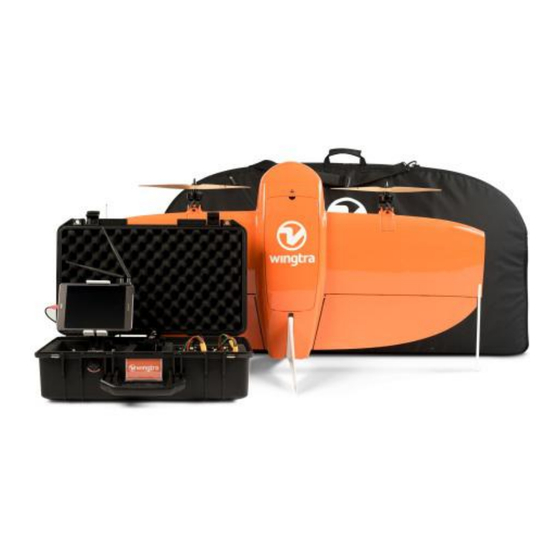
WingtraOne Deliveries Your WingtraOne is shipped with the following accessories. Pilot Box 1. Remote control (RC) 2. Tablet 3. Flight batteries (2 flight sets) 4. Telemetry 5. Charger 6. Charging cables, Wind measuring tool 7. Pitot covering tool, SD card adapter, Hex-wrench tool... - Page 9 1. Flaps 2. Middle stand 3. Propellers 4. Airspeed sensor (Pitot Tube) 5. Battery compartment 6. Ready-to-Fly button 7. Top cover - access to camera, electronics...
- Page 10 Check and Adjust Camera Settings QX1 In most cases, the default camera settings should be fine. If you want to change the settings, you have to power on WingtraOne, manually switch on the camera (press On/Off button on camera housing), open the PlayMemories app on your tablet, and connect to the camera (See the...
- Page 11 WingtraOne QX1 Test Pictures in Preflight Procedure. WingtraOne takes a series of test pictures after you press the Ready-to-Fly button during the preflight procedure to check if the camera is setup correctly, i.e. to make sure that the SD card is inserted correctly and triggering from the autopilot is possible. Listen to the camera after you press the Ready-to-Fly button. If you hear the shutter opening and closing (clicking sound) you can be sure that everything works fine.
- Page 12 Check and Adjust Camera Settings RX1R2 In most cases, the default camera settings (Mode Dial on 2) should be fine. If you want to change the settings, you have to power on WingtraOne and adjust the exposure settings.
-
Page 13: Image Quality Settings
Mode Dial to the respective setting. WingtraOne takes a series of test pictures after you press the Ready-to-Fly button during the preflight procedure to check if the camera is setup correctly, i.e. to make sure that the SD card is inserted correctly and triggering from the autopilot is possible. We recommend opening the WingtraOne cover and inspect the routine on the camera screen. -
Page 14: Wingtraone Rededge
WingtraOne RedEdge The WingtraOne RedEdge offers a multispectral image acquisition. The camera aquires 5 individual images at the same time in spectral bands of blue, green, red, red edge and near IR. For camera specifications, technical details and camera related support please refer to the Knowledge base of Micasense 1. - Page 15 5. Go to configure tab (gear tab). Set Auto-Capture Mode to Overlap. Set target altitude to flight altitude of your planned Flight Plan. Set Along-Track Overlap to frontal overlap of your planned Flight Plan. Press save Calibrate RedEdge Camera Before and after each flight the RedEdge camera needs to be calibrated with the provided reflectance tag. Only a timely calibration guarranties reliable spectral information of your covered flight area To calibrate RedEdge camera: 1.
-
Page 16: Further Information
2. Place the reflactance tag leveled onto the ground 3. Power on WingtraOne, lift it up, and hold it with camera facing downwards ~1m over the reflactance tab. Make sure to hold WingtraOne leveled and do not cover the reflectance tag with a shadow from you or the WingtraOne. -
Page 17: Weather Conditions
As a rule of thumb, wind speeds of 6m/s on ground on open fields correspond to wind speeds of ~8m/s in 10m- 20m altitude (forecast altitude) and ~10m/s in 100m altitude. WingtraOne will return home automatically if wind speeds exceed 12m/s during flight. If you fly in high... - Page 18 Defines the minimum altitude on which WingtraOne returns to home in a RTH. If current altitude is lower than the defined Minimum RTH altitude WingtraOne will climb to the set value in a loiter circle and only then fly the direct path to Home.
- Page 19 Regulations Regulations for the usage of drones differ from country to country. The limitations vary from restricted areas to a pilot license requirement. Please check the law that applies in the country you are flying. Regulations in Switzerland In Switzerland the Federal Office of Civil Aviation (FOCA) is in charge of regulations relating to drones, which can be found here. The most relevant regulations are: Do not fly over groups of people.
-
Page 20: Warranty Disclaimer
If you desire any additional features, feel free to contact us. We will give our best to improve the system according to your demands. Make sure you always operate your WingtraOne on the newest software release. Operating WingtraOne on outdated code will lead to a loss of warranty. -
Page 21: Charging Accessories
Charging Accessories Operating WingtraOne safely requires fully charged accessories. In particular the tablet running WingtraPilot and Remote Control need to be sufficiently charged to allow for monitoring WingtraOne during flight and to trigger the appropriate failsafe actions if necessary. Charging WingtraPilot Tablet The tablet can be charged at any standard USB port via the supplied USB-A to micro USB cable. -
Page 22: Charging Wingtraone Flight Batteries
Charging WingtraOne Flight Batteries The following chapter is relevant for all customers with a WingtraOne that have a serial nummer bigger than 1135. The other customers please follow the instructions of the charging chapter in the Manual 1.6. PDF Before going to the field you have to charge the flight batteries, the remote control (RC) and the tablet. The following sections describe how to charge the flight batteries. - Page 23 Charger Setup (Car Battery)
- Page 24 After powering on, WingtraOne enters a neutral state (not ready-to-fly), which is indicated by a slowly blinking Ready-to-Fly button (- - - - - -). By pressing the button, you put WingtraOne into Ready-to-Fly state, indicated by a double blinking LED (-- -- -- --).
- Page 25 Download Maps for Offline Use On the settings tab, select “Offline Maps” and “Add new set”. Navigate to the desired location, choose the right map type, zoom options (defaults of 14-18 should normally be fine), give the set a descriptive name, and download. Be patient if the tiles are not loading immediately.
-
Page 26: Create A New Flight Plan
Home, and land. Note that if you are not connected to the WingtraOne or if there is no GPS lock, Home is added to the center of the screen — where the location in WingtraPilot is set to the location of the last flight. - Page 27 On the right side (B), you can choose the desired ground sampling distance, which defines the size of a pixel on the ground. It is directly linked to the flight altitude that can be adjusted alternatively. In most cases, it is advisable to adjust the flight direction.
- Page 28 You can also adjust the minimum RTH altitude to another value than 60m. In case RTH is engaged in cruise and WingtraOne flies below the specified altitude, it will first climb to this altitude before flying back to the loiter circle and performing the planned landing. In case WingtraOne is higher than the value set here, it will return to loiter circle on current altitude before performing the planned landing.
- Page 29 Furthermore, the user mode can be changed in the General Settings tab. Please always use the Basic mode and only switch to Wingtra mode if you are told to by the Wingtra Support. In the Basic mode, you get all functionality that is needed to plan and conduct a data collection flight. There is no need to go to Wingtra mode as long as everything works fine with WingtraOne.
- Page 30 1. Set the flight direction such that the sweeps are flown perpendicularly to the wind. 2. In case you fly far away (> 1-2 km) and WingtraOne has to fly against the wind on the way back to home, RTH on 25% battery remaining is on the limit. Be prepared to trigger RTH manually earlier (e.g.
- Page 31 5. Forward and backward transition are most stable if you face forward transition into the wind. Within the specified wind bounds, WingtraOne can handle all orientations but if you have the space, orient forward transition into the wind during planning and place WingtraOne onto ground such that it does not need to turn during ascent.
-
Page 32: Preflight Checklist
1. Hardware: Distance sensor clean? Propellers not damaged and well attached? Camera lid removed? Check if the distance sensor is dusty or is covered by something (snow, tape, ...). The distance sensor is located at the tail of WingtraOne, next to the middle stand. If it is not clean or if you are not sure if it is clean, take the time to clean it with a clean blanket. - Page 33 This is an automated test. Depending on the weather and the location, it can happen that your WingtraOne does not receive GPS lock for several minutes. If GPS lock cannot be established after more than 5 minutes, try to repower WingtraOne. If you still fail to establish connection, open the battery cover and see if the cable to the GPS module is well connected.
- Page 34 WingtraPilot will ask you to upload it again, which can be done by pressing the checkpoint again. For WingtraOne ID > 1135, WingtraPilot issues a warning in case the camera SD card has insufficient storage space for the anticipated flight images of the planned mission.
- Page 35 Flight Modes and In-Flight Interactions The flight regime of WingtraOne is either hover or cruise. Hover is the vertical mode that is used during takeoff and landing, cruise is the horizontal, forward flight mode, where WingtraOne flies like a fixed-wing aircraft.
-
Page 37: Return-To-Home
Engage RTH if you realize something is wrong and you want WingtraOne to come back autonomously. If RTH is engaged, WingtraOne flies back to the planned loiter circle on its current flight altitude. If the current altitude is lower than the "minimum RTH altitude", WingtraOne will first rise to the "minimum RTH altitude"... -
Page 38: Flight Instructions
RTH can not be performed safely. When flying in Assisted Mode you won't be able to collect images. The easiest point in time to take over is when WingtraOne is hovering. In this case, WingtraOne is stabilized and it will stay at its current location. If you need to change to Assisted Mode during cruising, it is therefore advisable to immediately do a back-transition to change to hover. -
Page 39: Control Sticks
3. Navigation stick right 4. Navigation stick left 5. Engage Assisted Mode: allows you to take manual control of WingtraOne 6. Transition: performs the "transition" maneuver — switching from cruise to hover regime and vice versa (only works when flying in Assisted Mode) 7. - Page 40 Left Stick: Left & Right perform turns in the respective direction Input Result increase / decrease flight speed Right Stick: Up & Down (velocity will stay within safe boundaries) Assisted Mode - Hover Input Result Left Stick: Up & Down gain and lose altitude Input Result...
- Page 41 Right Stick: Up & Down back and forth (pitching) Input Result Right Stick: Left & Right move left and right (move aircraft along the wing) Flight Feedback WingtraPilot shows you some information which you can use to inspect your flight. A: Information about warnings, GPS quality, and remaining battery.
-
Page 43: Failsafe Scenarios
This is the most extreme failsafe, as it forces WingtraOne to perform a backtransition and land on the spot where it is at currently. It is triggered on GPS loss, or if battery voltage drops very low. It is only enforced if WingtraOne is in auto or RTH mode and not if you are in assisted mode. If it is triggered by the battery, you can take over manually by switching to Assisted Mode. - Page 45 4. Base location of your base station To acquire images and the GNSS data, you need a WingtraOne PPK drone with which you perform a normal flight. All data will be saved to the camera SD card in an organized manner, focus on your flight - WingtraOne will ensure that your data (images and GNSS data) is saved on the SD card.
- Page 46 PPK kit together. Step 4: Tutorial & Activation Process the sample map to finalize the setup and learn to process WingtraOne PPK data. Note that the provided images are thumbnails only. The sample project in full resolution is available here (4.5GB).
- Page 47 Finished! Go flying and process your first PPK projects Now that you successfully completed the WingtraOne PPK tutorial, you are ready for your first real project. Take your system to perform one or several flight(s), insert the camera SD card to your computer, select the /WingtraProjects folder on the SD card and run geotagging accordingly. For different options how to provide your base files (RINEX) and base location check out the next section.
- Page 48 Geotagging If the WingtraOne you own has ID ≤ 1135, please refer to page 61 in this manual for the geotagging procedure. For every flight mission, a folder with the project's name is created on the SD card in the "WingtraPilotProjects" folder. Both the collected images and GNSS data of the corresponding flight are saved in this project folder.
- Page 49 The results of the geotagging process are described at the bottom of this article. PPK Geotagging For PPK geotagging, you can only do it on a Windows 10 computer by using WingtraHub. Check out the PPK Chapter for information about how to install and setup WingtraHub.
- Page 50 Results of Geotagging As a result, you can find folders named after your Flight Plans in the "WingtraPilotProjects" folder. It contains the following objects: /DATA subfolder: All GNSS data available for this particular project. /IMAGES subfolder: All unmodified images for this particular project. /OUTPUT subfolder: All output data from the geotagging process.
- Page 51 Chapter. When flying with a WingtraOne without PPK the geotagging accuracy of single images is in the range of a few meters. When flying with a WingtraOne with PPK an absolute geotagging accuracy down to 1 cm can be achieved. With both options, the resulting products have a high relative accuracy, which allows to measure lengths or volumes accurately.
-
Page 52: Postprocessing Software
WingtraOne After geotagging each image file in the "TAGGED" folder of the geotagged project contains accurate geolocation information and GPS time in the EXIF tag. WingtraOne uses WGS84 coordinates with the height in meters above mean sea level (using egm96 geoid as reference). More details about the approximate orientation and pose and the data accuracy for each image can be obtained from the *.csv file created during geotagging which contains (default setting): imagename, latitude [decimal degrees],... - Page 53 Basic Maintenance Tasks of WingtraOne The WingtraOne does not need extensive maintenance in normal operation. Nevertheless it is worth to perform the following checks and tasks: Clean the optics of the camera. Use a soft dry glass cleaning cloth to wipe the lens gently. If you have interchangeable lenses make sure that both sides of the lenses are clean.
- Page 54 In the welcome menu, click on "Update the WingtraOne firmware or WingtraPilot" On the left side (A) you will see the release information of the latest Wingtra release and the information that this release hasn't been downloaded yet. The Wingtra release contains both a WingraPilot and a WingtraOne Firmware release.
- Page 55 You will be greeted by WingtraPilot with this user interface when you open it for the first time. Choose your preferred language and units for WingtraPilot. When you reach the pairing session, power on your WingtraOne by using the batteries and connect the telemetry module to your tablet.
- Page 56 Ignore orange box warnings on top of tablet screen during update process (remove them by clicking on the X). Ensure that your WingtraOne is powered off. In WingtraPilot, make sure you are in the "Settings --> Update" menu or open the welcome menu and click on "Update the WingtraOne firmware or WingtraPilot" again.
- Page 57 For version A, Connect the end of the connector which is marked with "OTG" to your tablet and the other end to the microusb port on WingtraOne (shown in the picture below). For version B, Connect the red end of the connector to your tablet and the other black end to the microusb port on WingtraOne (shown in the picture below).
-
Page 58: Troubleshooting
I get a warning about non-compatibility of WingtraPilot and Firmware versions In order to ensure safety, we introduced a check if the version of WingtraPilot and WingtraOne are compatible. In the case that the versions are not, you will be forced to update the oldest version of the two. - Page 60 Update Android OS The following instructions guarantee smooth use of WingtraPilot on the tablet. Make sure to only update the android operating system of the tablet after we advise you to do so. At the moment the tablet should be on android 7.1.
- Page 61 Send Flight Logs to Wingtra support On tablet or computer, log into support.wingtra.com and submit a support request. Describe your issue as detailed as possible, attach the zipped folder located under /WingtraFlightLogs on the SD card, and submit the request.
-
Page 63: Preflight Checklist - Troubleshooting
I get a warning "Ready to fly status command temporarily rejected" The following message appears when trying to start the flight although WingtraOne is not set up properly. Check if all preflight checks are green. If it comes together with another error message read it carefully. -
Page 64: Handling Of Wingtraone - Troubleshooting
Q: What happens if I click Ready-to-Fly button again? You should not do so. If you press Ready-to-Fly button a second time, WingtraOne will go back to neutral state (- - - - - -). This action is not recommended and you will... -
Page 65: Wingtraone 40Mp Rx1 - Troubleshooting
Check whether the EV correction dial is set to +-0 EV. Q: The images look blurry The focus is not set to infinity. To set the focus distance correctly, power on the WingtraOne. Make sure that the camera is in Manual Focus mode (see chapter) and turn the Focus Ring on the lens such that the focus indicator on the display just reaches infinity at the right edge. -
Page 66: Wingtraone 20Mp Qx1 - Troubleshooting
Option 1: Power on WingtraOne, manually switch on the camera (press On/Off button on camera housing), connect the camera to the Playmemories App via Wifi and take the camera out of the foam (you have to disconnect the violet cable) and adjust the focus manually to infinity. To do that point the camera towards a remote object and turn the focus ring clockwise (looking into the camera) for a whole turn followed by slowly turing the ring back (counterclock wise) by 5 to 10°. - Page 68 Faster geotagging on Android 7 Improved failsafe logic for high winds and low battery PPK support - WingtraOne systems with ID > 1135 are PPK capable and need to be operated on version 1.7.0 or newer, for details see the announcement. Manual 1.7 WingtraHub 1.0...
- Page 69 Changed Emergency swich logic (new: click 3 times within 2 seconds) Terminology changes (Flight Plan, Assisted Mode, Ready-to-Fly) Preflight checklist improvements Manual 1.3 Release 1.2 - February 2017 Improvements in flight behavior Improvements in WingtraPilot stability Introduced WingtraPilot on tablet Introduced new Return-to-Home logic with user defined RTH altitude Introduced in-flight replanning of landing based on wind Manual 1.2...
- Page 70 WingtraOne Documents Manual 1.7. PDF Manual 1.6. PDF WingtraOne Technical Specification Sheet Camera Specification Overview WingtraOne Support Docs...
Need help?
Do you have a question about the WingtraOne and is the answer not in the manual?
Questions and answers