Advertisement

Safety Precautions......................................................1
Product Information...................................................2
1. Applications..............................................................2
2. Available Functions....................................................2
3. Supported Systems...................................................2
4. Professional function.................................................2
5. Main features..........................................................3
6. Appearance and Key Descriptions ...........................3
Operation Instructions.................................................6
1. Connect the Tool.......................................................6
2. Diagnosis system.......................................................6
2.1 Select Control Unit... ...........................................6
2.2 Select System.....................................................7
2.3 Connect with vehicle's ECU...................................7
2.4 Function............................................................8
2.5 Read Version .....................................................8
2.6 Read Fault codes..............................................8
2.7 ERASE Fault codes........................................9
2.8 Read measuring data value...............................10
2.9 Output test.....................................................11
2.10 Basic setting.................................................11
2.11 Adaptation.....................................................12
2.12
2.13 Login the system.............................................13
2.14 System being ready.........................................14
2.15 Advanced ID ..................................................14
3. Professional function............................................ ...15
4. Setting ...................................................................20
5. The use of Upgrading software....................................22

Table of Contents

...........................................................13

Advertisement

Table of Contents
loading

Summary of Contents for Vehicletool Mini VAG505A

  • Page 1: Table Of Contents

    Table of Contents Safety Precautions…………….……….…………..…………..1 Product Information……….…………………………………..2 1. Applications……………….……….……………………….…..2 2. Available Functions…………….…..…………….……………2 3. Supported Systems……………………………….…………..2 4. Professional function.………………………………………...2 5. Main features…………………………………….……………3 6. Appearance and Key Descriptions ………………………3 Operation Instructions………………..……………………..6 1. Connect the Tool……………….………………..…………….6 2. Diagnosis system…………………..…..…………...…………6 2.1 Select Control Unit… ……………….….….…………..6 2.2 Select System.………...…..……………………..….…..7 2.3 Connect with vehicle’s ECU.………...…..……...……..7 2.4 Function………………….………….………….……..….8...
  • Page 2: Safety Precautions

    Mini VAG505A/VAG506M/VAG506/V801 Safety Precautions To prevent personal injury or damage to vehicles and/or the scan tool, read this instruction manual first and observe the following safety precautions at a minimum whenever working on a vehicle:  Always perform automotive testing in a safe environment.
  • Page 3: Product Information

    Mini VAG505A/VAG506M/VAG506/V801 Product Information 1. Applications Mini VAG505A/VAG506M/VAG506/V801 is the higher version with powerful function. It supports all cars under brand of VW, AUDI, SKODA and SEAT. With its smart appearance but powerful function, it can be conveniently used and can be run detachedly without support of PC.
  • Page 4: Main Features

    Mini VAG505A/VAG506M/VAG506/V801 Stop/Activate SBC  AUDI O2 sensor service  VW O2 Sensor service  NOTE: Only V506/V801 has the following features: Throttle adjustment  Tilt Angle sensor calibrate  5. Main features Favorable----about only 10% of that of professional tool.
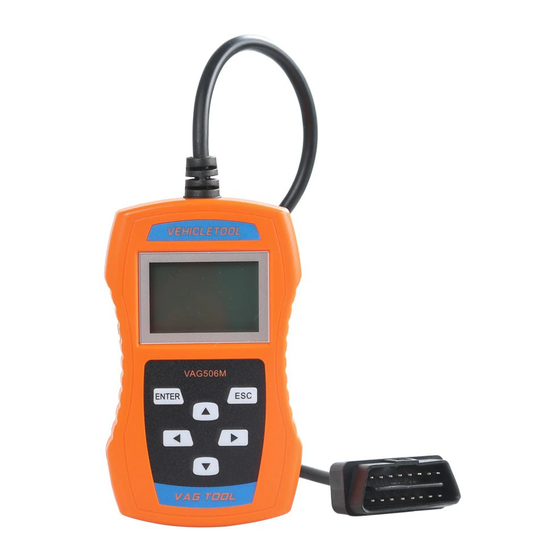
  • Page 5 Mini VAG505A/VAG506M/VAG506/V801 ⑤ UP/DOWN arrows: moves the selection pointer and scrolls up or down ⑥ LEFT/RIGHT arrows: move cursor. For V801 also to flip page ⑦ USB interface: connect to USB cable Dimensions: Length 201mm (7.9"), Width 94mm (3.70"),Height 36mm (1.74")
  • Page 6 Mini VAG505A/VAG506M/VAG506/V801 Mini VAG505A ① OBDII Connector: connect car and the scan tool ② Screen: 128*164 pixel display, Backlit LCD ③ ENTER: confirm selection and enter ④ ESC: go back to the previous screens ⑤ UP/DOWN: up and down to choose different menu, press it for 1-2 seconds to choose the number of places(move the cursor) ⑥...
  • Page 7: Operation Instructions

    Mini VAG505A/VAG506M/VAG506/V801 Operation Instructions 1. Connect the Mini VAG506/VAG506M/VAG506/V80 1.1 Turn the ignition off. 1.2 Locate the vehicle's 16-pin Data Link Connector (DLC). 1.3 Plug the OBDII connector to the vehicle’s DLC. 1.4 Turn the ignition on. Engine can be off or running.
  • Page 8: Select System

    Mini VAG505A/VAG506M/VAG506/V801 Figure 2.1 2.2 Select System With the scan tool in System screen (Figure 2.1), use UP/DOWN scroll button to select the detecting system, and press ENTER. Figure 2.2 2.3 connect with the vehicle’s ECU  If the scan tool fails to communicate with the vehicle’s ECU (Engine Control Unit), a “Fail to connect”...
  • Page 9: Function

    Mini VAG505A/VAG506M/VAG506/V801 If the “Fail to connect” message does not go away, then there might be problems for the scan tool to communicate with the vehicle. Contact your local distributor or the manufacturer’s customer service department for assistance. If it runs successfully, then the following will be displayed.
  • Page 10: Erase Fault Codes

    Mini VAG505A/VAG506M/VAG506/V801 As seen on the top right corner, the front digit is the No. of the displayed fault code, while latter digit is the number of total fault codes. If more than one DTC is found, use the [down] key to read the next page, press [up] key for the previous page.
  • Page 11: Read Measuring Data Value

    [up] and [down] keys: increase or decrease the number.  [left] and [right] keys: moves the cursor [---] and select the digit.  Mini VAG505A:Press UP/DOWN button for one to two seconds to moves the cursor [---] and select the digit. [enter] key: confirm and enter. ...
  • Page 12: Output Test

    Mini VAG505A/VAG506M/VAG506/V801 2.9 Output test. 1. Use the UP/DOWN scroll button to select [03-Output Test] from Function menu (Figure 2.4), and then press ENTER button. You can press ENTER button to test. Press ESC button to exit. If this testing is finished, you can press ENTER button to continue testing.
  • Page 13: Adaptation

    [up] and [down] keys: increase or decrease the number.  [left] and [right] keys: moves the cursor [---] and select the digit.  Mini VAG505A:Press UP/DOWN button for one to two seconds to moves the cursor [---] and select the digit.  [enter] key: confirm and enter.
  • Page 14: Coding

    Mini VAG505A/VAG506M/VAG506/V801 2.12 Coding 1. Use the UP/DOWN scroll button to select [07-Coding] from Function menu (Figure 2.4), and then press ENTER. It will display as the following. 2. All information written, press ENTER. If operation is successful, it will display as the following: 3.
  • Page 15: System Being Ready

    Mini VAG505A/VAG506M/VAG506/V801 4. Press the LEFT/RIGHT to choose the number of places, by UP/DOWN button to select the input number and press ENTER button to confirm. 5. If you login successfully. It shows as “Successfully login!” If failed, it shows as “Coding value is unacceptable!”.
  • Page 16: Professional Function

    Mini VAG505A/VAG506M/VAG506/V801 3. Professional function Use the UP/DOWN scroll button to select [Special Function] from Function menu (Figure 1.2), and then press ENTER. The tool will list all Special Function screen (Figure 3.1). Figure 3.1 1 Oil Reset 1. Use the UP/DOWN scroll button to select [Oil Reset] from Special Function (Figure 3.1), and then press ENTER button.
  • Page 17 Mini VAG505A/VAG506M/VAG506/V801 can enter the number of miles you want change.  If the function executed successfully, a ”finish” message shows on  the screen. 3.1.2 Audi 2.0T(with LED) Select [Audi 2.0T(with LED)], and then press ENTER button.  If the function executed successfully, a message of “Operation is complete,15000 km away and 365 days remained for next service”...
  • Page 18 Mini VAG505A/VAG506M/VAG506/V801 1. Use the UP/DOWN scroll button to select [Airbag Reset] from Special Function (Figure 3.1), and then press ENTER button. 2. If the scanner to successfully communicate with the car's ECU. If the scan tool fails to communicate with the vehicle’s ECU ...
  • Page 19 Mini VAG505A/VAG506M/VAG506/V801 command and will display as the following after success.  If you don’t want to force the implementation of reset command, please press [Esc] to draw out. After finishing code erasing, you can reset airbag. 3.3 Odometer 1. Use the UP/DOWN scroll button to select [Odometer] from Special Function (Figure 3.1), and then press ENTER button.
  • Page 20 Use the UP/DOWN scroll button to select [VW O2 Sensor service] from Special Function (Figure 3.1), and then press ENTER. Use the DOWN scroll button to select the next page. NOTE: MINI VAG505A and VAG50M is not support Function following. (3.7-3.8) 3.7 Throttle adjustment 1.
  • Page 21: Setting

    Mini VAG505A/VAG506M/VAG506/V801 1. Use the UP/DOWN scroll button to select [Tilt Angle sensor calibrate] from Special Function (Figure 3.1), and then press ENTER button. 2. If the scanner to successfully communicate with the car's ECU. 3. Press ENTER button, the tool will list:...
  • Page 22 Mini VAG505A/VAG506M/VAG506/V801  Use the UP/DOWN scroll button to select, press ENTER button. 4.3 Choose [Tool Self-test] at the menu. Then press [ENTER] button. The screen will display as the following. 4.3.1 Choose [Display Test] at the main menu, Press [ENTER].The screen will display the following dynamic image.
  • Page 23: The Use Of Upgrading Software

    Mini VAG505A/VAG506M/VAG506/V801 1. Install hardware drive Scanner connected to the computer via USB cable. Visit our website: www.vehicletooltech.com, download the PC software, hardware driver and scanner new version diagnostic software and DTC library. 1) Install the driver. Open the file that you download, then run it.
  • Page 24 Mini VAG505A/VAG506M/VAG506/V801 2. Select date. 3. Press “Open File” button, select the file for update. If update diagnostic soft select *.VTL file; if update DTC library, select *.DTC file. 4. Press “upgrade”, the scanner is trying to update. There will be the...
  • Page 25 Mini VAG505A/VAG506M/VAG506/V801 interface as follows. 4-1 If the update is success, the blow interface will appear. 4-2 If the update failed, the “Program error, please reprogram!” message displays, this time requests to check whether the connection and the choice of COM mouth are right or not. Proceed as follows: 1) Disconnect and reconnect the scanner using the USB cable..

This manual is also suitable for:

Mini vag506mMini vag506Mini v801

Table of Contents