Table of Contents
Advertisement
November 2018
70-0002-00
Operations Manual Includes:
Game Setup - Testing & Adjustments - Parts Information - Reference Diagrams & Schematics - Service & Troubleshooting
Jersey Jack Pinball®, 1645 Oak Street, Lakewood, New Jersey 08701 Telephone: (732) 364-9900
© Warner Bros. Entertainment Inc. All rights reserved. THE HOBBIT: AN UNEXPECTED JOURNEY, THE HOBBIT: THE DESOLATION OF SMAUG, THE HOBBIT: THE BATTLE OF THE FIVE ARMIES
and the names of the characters, items, events and places therein are trademarks of The Saul Zaentz Company d/b/a Middle-earth Enterprises under license to New Line Productions, Inc.
(s14)
Advertisement
Table of Contents

Related Manuals for Jersey Jack Pinball The Hobbit


Summary of Contents for Jersey Jack Pinball The Hobbit
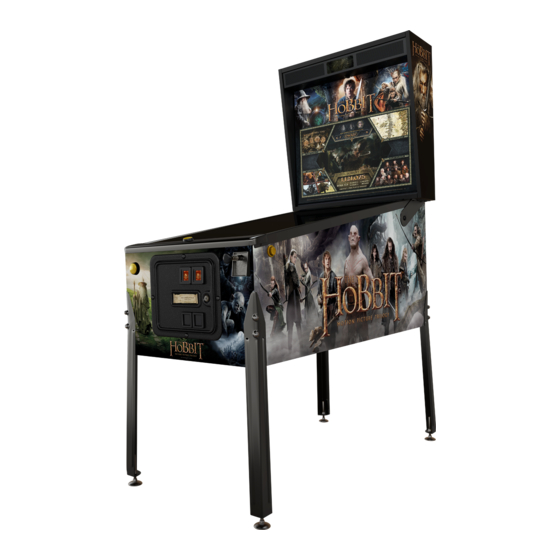
- Page 1 Jersey Jack Pinball®, 1645 Oak Street, Lakewood, New Jersey 08701 Telephone: (732) 364-9900 © Warner Bros. Entertainment Inc. All rights reserved. THE HOBBIT: AN UNEXPECTED JOURNEY, THE HOBBIT: THE DESOLATION OF SMAUG, THE HOBBIT: THE BATTLE OF THE FIVE ARMIES and the names of the characters, items, events and places therein are trademarks of The Saul Zaentz Company d/b/a Middle-earth Enterprises under license to New Line Productions, Inc.
- Page 3 Be sure to include the game serial number. For your records, write the game serial number in the manual. Serial Number Jersey Jack Pinball® reserves the rights to make modifications and improvements to its products. The specifications and parts identified in this manual are subject to change without notice.
-
Page 5: Table Of Contents
Modes - Beginning & Playing ......................................... A-16 Other Game Objectives & Mystery Awards! ..................................A-17 The Hobbit Rules Flowchart ........................................A-18 Section B - The Hobbit Menu System B.1 Menu System Basics ..........................................B-2 B.2 Tests ..............................................B-3 B.3 Settings ..............................................B-22 B.4 Audits ..............................................B-39... - Page 6 Table of Contents Section C - Game Parts Information - (continued) Hobbit Left Wire Ramp Assembly, PN: 13-2002-02 ..................................C-13 Cabinet PCB Chassis Assembly, HOB, PN: 15-5000-02 ................................. C-14 Right & Left Opto Spinner Assemblies, PN: 18-7002-01, 18-7002-02 Rollover Button Switch Assembly, PN: 18-7003-00 ..................................C-16 Hobbit Subway Assembly, PN: 31-5011-00 ....................................
- Page 7 Section C - Game Parts Information - (continued) Coil, Motor & Light Table ..........................................C-53 70-Volt Coil Locations - Above Playfield....................................... C-56 70-Volt Coil Locations - Under Playfield ....................................... C-58 20-Volt Coil Locations - Above Playfield 12-Volt Motor & Light Locations - Above Playfield ..................................C-60 20-Volt Coil Locations - Under Playfield 12-Volt Motor &...
- Page 8 Table of Contents Section D - Reference Diagrams & Schematics 5-Ball Trough Opto Receiver Board, PN: 15-0004-00 Drawing & Parts List ..........................................D-2 Schematic ..............................................D-3 Connector Pin-outs..........................................D-4 5-Ball Trough Opto Transmitter Board, PN: 15-0004-01 Drawing & Parts List ..........................................D-5 Schematic ..............................................D-6 Connector Pin-outs..........................................
- Page 9 Section D - Reference Diagrams & Schematics - (continued) Triple RGB LED Board, 1mm, PN: 15-0030-00 Drawing & Parts List ..........................................D-24 Schematic Connector Pin-outs..........................................D-25 Triple RGB LED Board, 2.5mm, PN: 15-0030-01 Drawing & Parts List ..........................................D-26 Schematic Connector Pin-outs..........................................D-27 Hobbit Arkenstone RGB LED Board, 1mm, PN: 15-0032-00 Drawing &...
- Page 10 Table of Contents Section D - Reference Diagrams & Schematics - (continued) Hobbit Smaug Controller Board, PN: 15-0035-00 Drawing & Parts List ..........................................D-72 Schematic ..............................................D-73 Connector Pin-outs..........................................D-74 Sound Amplifier Board, PN: 15-0002-00 Drawing & Parts List ..........................................D-75 Schematic ..............................................D-76 Connector Pin-outs..........................................
- Page 11 Backbox Wiring Diagram ..........................................D-112 Supply Voltage Conversion .......................................... D-113 Section E - Game Service & Troubleshooting E.1 The Hobbit Smaug Assembly Removing the Smaug Assembly ......................................E-2 Disassembling the Sculpture ......................................... E-3 Removing the Jaw Crank Link & Servo Horn ..................................E-4 Calibrating the Servo Horn ........................................
- Page 12 Table of Contents viii...
- Page 13 Section A Game Assembly & Setup Game Assembly & Setup...
- Page 14 Game Assembly & Setup A.1 Unpacking Your Hobbit Game Tools Required: Wire cutters Needle-nose pliers Using wire cutters, remove all shipping bands from the outside of the carton, noting Utility knife the side with the “TRUCK THIS SIDE ONLY” marking (see figure A1). With a utility knife Ratchet and 5/8”...
- Page 15 If you wish to save your shipping carton: If you do not wish to save your shipping carton: With the help of at least one other person, carefully tip the carton over and Using a utility knife, remove the “TRUCK THIS SIDE ONLY” side of the shipping lay it on its “TRUCK THIS SIDE ONLY”...
- Page 16 Game Assembly & Setup Locate the eight acorn-head leg bolts in the loose parts. Thread 2 leg bolts through each leg and attach it to the cabinet (see figure A5). Using a 5/8” socket and ratchet or a 5/8”wrench, tighten the bolts firmly, while maintaining pressure (in the direction of the red arrow) on each leg.
- Page 17 With the help of at least one other person, carefully tip the game onto its front Using wire cutters, cut the nylon strap holding the backbox down (CAUTION: pro- legs. Lift the rear of the cabinet and have two people support it or place it on a stur- tect your eyes and have helpers/bystanders move away! The ends of the cut strap dy support.
- Page 18 Game Assembly & Setup Locate the “L”-shaped, 5/16” hex key for the backbox Roto-Lock in the loose parts. Insert it into the hole at the base of the backbox and turn it a full 270 degrees CW (see figure A8). Note: When the Roto-Lock is in the fully locked position, the key will not turn any further in the clockwise direction.
- Page 19 4) CLOSE AND LOCK THE COIN DOOR (to prevent Your Jersey Jack Pinball® playfield is designed to rest in four distinct positions in scratching of playfield glass), then 5) slide the playfield glass off of the front of the its cabinet for game play, cleaning and maintenance.
- Page 20 Game Assembly & Setup Grasp the playfield under its bottom arch and swing it upward until the playfield support tubes underneath are fully visible (figure A12). Move the playfield to position 2 (figure A13). Pull it upward and outward until the first pair of rubber feet reach the top of the lockdown bar receiver;...
- Page 21 Move the playfield from position 2 to 3 (figure A14). Pull it upward and outward until the second pair of rubber feet in the support tubes reach the top of the lockdown Note: As shown in figure A16, the playfield can be completely removed from the cabi- bar receiver;...
- Page 22 Game Assembly & Setup A-10 Locate the plumb bob weight and nylon wing nut in the loose parts. Locate the Power up the game (the on/off switch is located under the cabinet, just behind the plumb bob tilt hanger wire and contact brackets, mounted on the inside, left sidewall of right front leg;...
-
Page 23: Hobbit Rules & Shot Maps
A.2 Hobbit Rules & Shot Maps Skill Shots Before you plunge the ball, you can use the Ring Button to choose your skill shot (below). Hint: Skill shot awards are not all necessarily equal! Plunge the ball with medium strength and try to hit the moving DWARF drop target in the upper, left portion of the playfield. -
Page 24: Smaug™ Multiball
Game Assembly & Setup A-12 Smaug™ Multiball Spell LOCK by hitting the L, O, C & K rollovers in the center of the playfield. Letters that have not yet been hit will blink on and off; letters that have been hit will remain on (no blinking). -
Page 25: Beast Multiball
Beast Multiball When the Warg inlane is lit and a ball rolls through, the Warg beast will pop up out of the playfield. Hit the creature to defeat it and knock it back down (red line, opposite). When the Orc inlane is lit and a ball rolls through, the Orc beast will pop up out of the playfield. -
Page 26: Modes - Qualifying
Game Assembly & Setup A-14 Modes - Qualifying You qualify modes (make them available to play) by making specific shots around the play- field. Each of the 31 Hobbit modes is associated with a main character (Gandalf, Bilbo Bag- gins or Radagast) or a race of characters (Elf, Dwarf or Man). Shoot the Gandalf (left) ramp to qualify Gandalf modes (orange arrow, opposite). -
Page 27: Modes - Selecting
Modes - Selecting The list of 31 Hobbit modes is shown in the center of the 27” LCD (below, left). Qualified modes are highlighted in the list. Conversely, those that have not been qualified are grayed out. The currently selected mode icon is outlined and pulsating in the list. The name and a brief description of the currently selected mode are shown on the Book LCD, mounted in the upper, right corner of the playfield (red box, opposite &... -
Page 28: Modes - Beginning & Playing
Game Assembly & Setup A-16 Modes - Beginning & Playing Shoot the Bilbo Baggins (right) ramp, when the “Mode” ramp cutout is lit (red arrow, op- posite), to begin playing the currently selected game mode. The ball will be diverted (yellow arrow, opposite) from the left wire ramp to the Windlance (in the left outlane), where it will be temporarily held. -
Page 29: Other Game Objectives & Mystery Awards
Other Game Objectives & Mystery Awards! Shoot the nine yellow stand-up targets, behind the drop targets (green arrows, opposite), the left VUK (blue arrow, opposite), the captive ball target (red arrow, opposite) and the two orbit spinners (yellow arrows, opposite) to collect all 13 Dwarf characters. Your progress will be tracked/indicated in the lower, left corner of the 27”... - Page 30 Game Assembly & Setup A-18 RU LE FLOWCHA RT Qualify Gandal f modes INTO THE FIRE Left ramp ARKENSTONE Qualify Bilbo Baggins modes Play a major Right ramp Multiball scene BARREL ESCAPE Right ramp starts MODE Left ramp changes Qualify Radagast modes currently selected mode quali ed mode...
-
Page 31: Section B - The Hobbit Menu System
Section B The Hobbit Menu System The Hobbit Menu System... -
Page 32: Menu System Basics
The Hobbit Menu System B.1 Menu System Basics The Hobbit menu system allows the user or operator of the game to test the performance of its components and assemblies, personalize its rules and track, monitor or manage its play and/or earnings. -
Page 33: Tests
Drop Target Banks, & Dragon (Smaug)) for proper operation. A specific screen will be displayed for Figure B3. Tests menu tree. each device, allowing the user to repeatedly exercise it and ensure that it is functioning correctly. The Hobbit Menu System... - Page 34 The Hobbit Menu System Matrixed Switch Test When you enter the Matrixed Switch Test, the LCD monitor will display the screen shown in figure B4. A window highlighting locations/states of switches on the game’s playfield (at right in figure B4) can be toggled on and off by pressing the Start button on the front of the cabinet. The play- field window can be moved to the center or right side of the screen by using the Up/+ or Down/- buttons.
- Page 35 The game also provides an audible response each time the state of a switch changes. To exit the Dedicated Switch Test at any time, press the Back/Escape button. Figure B5. Dedicated Switch Test screen. The Hobbit Menu System...
- Page 36 The Hobbit Menu System Single Switch Test When you enter the Single Switch Test, the LCD monitor will display the screen shown in figure B6. The entire list of dedicated and matrixed switches is shown alongside a window highlighting the location/state of the currently selected switch on the game’s playfield (at right in figure B6).
- Page 37 I/O Board connector/pin numbers. You can clear the Switch History Test listing by pressing the Enter button. To exit the Switch History Test screen at any time, press the Back/Escape button. Figure B7. Switch History Test screen. The Hobbit Menu System...
- Page 38 The Hobbit Menu System Coils Test When you enter the Coils Test, the LCD monitor will display the screen shown in figure B8. The en- tire list of coils, magnets, motors and lights is shown alongside a window highlighting the location of the currently selected device on the game’s playfield (at right in figure B8).
- Page 39 For this test, the RGB LEDs are listed in hardware order (the order that the RGB LED boards are physically connected to controller boards, under the playfield). In this regard, the Hobbit’s RGB LED string can be considered one long chain. The Ordered LED Test allows you to step through and test this entire chain, one LED at a time.
- Page 40 You can scroll through the list of LEDs using the Up/+ and Down/- buttons. For this test, the RGB LEDs are listed in logical/grouped order. The Hobbit’s RGB LED string is one long chain. The Grouped LED Test allows you to step through and test the entire string of RGB LEDs, in groups (L, O, C, and K rollovers), in logical order (words spelled in order), as they are associated on the playfield.
- Page 41 Test allows you to step through and test this entire chain, in reverse order, one LED at a time. To exit the Reverse Order LED Test at any time, press the Back/Escape button. Figure B11. Reverse Order LED Test screen. The Hobbit Menu System B-11...
- Page 42 The Hobbit Menu System B-12 All LED Test When you enter the All LED Test, the LCD monitor will display the screen shown in figure B12. The entire chain of RGB LEDs is lit at once. Initially, the LEDs are white and not flashing. You can change the color to red, green, blue and back to white by repeatedly pressing the Enter button.
- Page 43 LCD screen. Press either the Up/+ or Down/- button to toggle the GI LEDs between flashing and constant-on. To exit the GI Only Test at any time, press the Back/Escape button. Figure B13. GI Only Test screen. The Hobbit Menu System B-13...
- Page 44 The Hobbit Menu System B-14 LED And Flash Test When you enter the LED And Flash Test, the LCD monitor will display the screen shown in figure B14. All RGB LEDs and GI LEDs are lit at once. All CPU-controlled lights (spotlights, pop bumper light, etc.) are flashing.
- Page 45 The color screens allow you to test the LCD monitor’s color saturation performance, from edge to edge. The grids allow you to test image alignment on the monitor. To exit the Display Test at any time, press the Back/Escape button. Figure B15. Display Test screens. The Hobbit Menu System B-15...
- Page 46 The Hobbit Menu System B-16 Sound Test When you enter the Sound Test, the LCD monitor will display the screen shown in figure B16. The list of programmed test sounds is displayed. There are three different modes for testing sounds: RUNNING, REPEAT and MANUAL. The current mode is highlighted in green text at the top of the screen;...
- Page 47 (it will “click” and lock in place). When you close the coin door, the interlock switch actuator will be pushed back into its normal (unlocked) position. To exit the Ball Trough Test at any time, press the Back/Escape button. Figure B17. Ball Trough Test screen. The Hobbit Menu System B-17...
- Page 48 The Hobbit Menu System B-18 Pop-Up Mechanisms Test When you enter the Pop-Up Mechanisms Test, the LCD monitor will display the screen shown in figure B18. The rectangles on the screen represent the current states of the four pop-up mecha- nisms, in the center area of the playfield.
- Page 49 (it will “click” and lock in place). When you close the coin door, the interlock switch actuator will be pushed back into its normal (unlocked) position. To exit the Drop Bank Life Test at any time, press the Back/Escape button. Figure B19. Drop Bank Life Test screen. The Hobbit Menu System B-19...
- Page 50 The Hobbit Menu System B-20 Smaug Head Test When you enter the Smaug Head Test, the LCD monitor will display the screen shown in figure B20. The upper squares on the screen represent the states of the two U-shaped opto switches on the Smaug assembly, in the upper left corner of the playfield.
- Page 51 Smaug will recite a familiar game phrase, using the new limits for jaw movement. To exit the Smaug Mouth Test at any time, press the Back/Escape button. Figure B21. Smaug Mouth Test screen. The Hobbit Menu System B-21...
-
Page 52: Settings
The Hobbit Menu System B-22 B.3 Settings The Settings menu (see figure B22 for an outline) allows the user to adjust system, pricing, game, coil and high score settings, to personalize the game (home use) or optimally configure it for a location or route (commercial use). - Page 53 SUDDEN DEATH: game ends when timer reaches zero and the ball in play drains. SUDDEN TIMER: game ends when timer reaches zero and the Sudden Death Timer Figure B23. System Settings screen. reaches zero. The Hobbit Menu System B-23...
- Page 54 The Hobbit Menu System B-24 Sudden Death Timer: specify the amount of sudden death time. Game Restart: specify how the game responds to the start button being pressed in the middle of a <Pindemption® setting> 2-15: 2-15 seconds Default: 10 seconds game already in progress.
- Page 55 SOUND OFF: no replay awards Master Volume: specify the overall volume level for the game. 0-50: 0-50 level Default: 26 level Replay Percent: specify the desired replay percentage (Replay: AUTO only). 1-30: 1-30% Default: 10% The Hobbit Menu System B-25...
- Page 56 The Hobbit Menu System B-26 Replay Levels: specify the number of scoring levels for replay awards (Replay: AUTO only). These Score Award 1: specify award for achieving score level 1 (Score Award Levels: 1-4 only). Replay Scores will be set by the game. If configured, Replay Scores 2, 3 & 4 will be set at 2X, 3X &...
- Page 57 Euros (€): Euros Pounds (₤): Pounds Yen (¥): Yen Krone (kr): Krone Krona (kr): Krona Coins: coins Tokens: tokens Swipes: card swipes through a reader Bills: bills through a bill acceptor Figure B24. Pricing Settings screen. The Hobbit Menu System B-27...
- Page 58 The Hobbit Menu System B-28 Money Limit: specify the maximum amount of money the game can accept at any time. PRICING SCHEME Pricing Levels: specify the number of desired pricing levels (or tiers). $0.00: Unlimited dollar amount Default: $0.00 $0.01-$100,000.00: $0.01-$100,000.00...
- Page 59 1-100: 1-100 credits Default: 9 credits Tier 10 Cost: specify cost for pricing tier 10. $0.01-$100,000.00: $0.01-$100,000.00 Default: $10.00 Tier 10 Credits: specify the number of credits for pricing tier 10. 1-100: 1-100 credits Default: 10 credits The Hobbit Menu System B-29...
- Page 60 The Hobbit Menu System B-30 Game Settings When you enter the Game Settings menu, the LCD monitor will display the screen shown in figure B25. Settings that have been changed from factory defaults are displayed in red. Default settings are displayed in green, but only when a menu item is highlighted. Menu items that cannot be altered are displayed in gray.
- Page 61 ON: spot an Arkenstone jewel Default: OFF OFF: do not spot an Arkenstone jewel Map Difficulty: specify the map difficulty level (how quickly the spinners advance the map). 1-8: 1-8 difficulty level Default: 4 level The Hobbit Menu System B-31...
- Page 62 The Hobbit Menu System B-32 RING BUTTON Kickback Ball Saver: specify whether to use Ball Save to correct for a failed kickback attempt or not. Starting Button Relight Difficulty: specify the initial number of switch closures required, during AGGRESSIVE: cancel Ball Save if a second Default: AGGRESSIVE game play, to relight the Ring Button.
- Page 63 Extra Ball Memory: specify whether the Mystery Award Extra Ball light (if unearned) should be “remembered” from ball to ball or not. ON: remember Mystery Award Extra Ball Default: ON OFF: reset Mystery Award Extra Ball The Hobbit Menu System B-33...
- Page 64 The Hobbit Menu System B-34 DROP TARGETS This Game Settings section allows you to disable any broken or otherwise non-functional drop targets. Below are the possible options & default for each setting: YES: drop target disabled Default: NO NO: drop target enabled Disable MAN Drop Target: specify whether to disable the N drop target or not.
- Page 65 Trough: Restrict Kickout on Error: specify whether or not to restrict ball kickout and game start functions when a trough error is encountered. YES: restrict ball kickout/start functions Default: YES NO: do not restrict ball kickout/start functions Figure B26. Coil Settings screen. The Hobbit Menu System B-35...
- Page 66 The Hobbit Menu System B-36 GENERAL SLINGSHOTS Kickouts: Restrict Kickout on Error: specify whether or not to restrict ball kickouts on other devices Left Slingshot Strength: specify the firing time for the left slingshot coil. when an opto switch failure is encountered.
- Page 67 OFF: do not record high scores High Score Award: specify the award for achieving a high score during a game. FREE GAME: a free game Default: FREE GAME AUDIT: a predefined number of points Figure B27. High Score Settings screen. The Hobbit Menu System B-37...
- Page 68 The Hobbit Menu System B-38 High Score Name Length: specify the maximum number of characters a player can enter for HSTD. Default Grand Champ: specify the default Grand Champion score. 3, 11: 3 or 11 characters Default: 11 500000-1000000: 500,000-1,000,000 points Default: 500,000 points H.S.T.D.
-
Page 69: Audits
Earnings Audits Audits Game Audits - view totals for various shots made (targets hit or switches closed) and modes started and/or completed in the game. Game Audits Figure B28. Audits menu tree. The Hobbit Menu System B-39... -
Page 70: Utilities
Custom Graphic > Erase Graphic utility. Graphic Custom Graphic View Manual - display/navigate the PDF version of the Hobbit manual on the game’s LCD screen. Erase Graphic View USB Update - update the game’s software via a USB memory stick. Note: The update must be Manual downloaded from the JJP®... - Page 71 To exit the Set Clock utility, move the cursor to the position shown in Figure B30 (far left), then press the Back/Escape button. Note: The Start button moves the cursor to this position after saving the time/date. Figure B30. Set Clock utility screen. The Hobbit Menu System B-41...
- Page 72 The Hobbit Menu System B-42 Edit Message Use the Custom Message utility to enter a message that will be displayed on the LCD monitor, periodically, during the game’s attract mode. The message is entered or modified using the Edit Message utility.
- Page 73 B32. To clear the current custom message, press the Enter button. You will be prompted to hit the Start button to confirm and complete the operation. To exit the Clear Message utility at any time, press the Back/Escape button. Figure B32. Clear Message utility screen. The Hobbit Menu System B-43...
- Page 74 The Hobbit Menu System B-44 Install Graphic Use the Custom Graphic utility to install an image that will be displayed on the LCD monitor, periodically, during the game’s attract mode. The custom image is uploaded or changed using the Install Graphic utility.
- Page 75 B34. To clear the current custom graphic, press the Enter button. You will be prompted to hit the Start button to confirm and complete the operation. To exit the Erase Graphic utility at any time, press the Back/Escape button. Figure B34. Erase Graphic utility screen. The Hobbit Menu System B-45...
- Page 76 When you enter the View Manual utility, the LCD monitor will display the screen shown in figure B35. To view the Hobbit Operations Manual (this document), press the Enter button. While viewing, use the Up/+ and Down/- buttons to move from page to page; use the Enter button to zoom in on the current page.
- Page 77 Back/Escape button. When the game and monitor come back to life, verify that the delta update installed successfully by re-entering the Hobbit Menu System. The installed software version is displayed in the lower, right hand corner of most menu system screens.
- Page 78 The Hobbit Menu System B-48 Settings Backup The Settings Backup & Settings Restore utilities allow you to quickly and easily backup & restore your game’s settings, audits, reports, replay information and custom message. Your settings will be stored on a USB memory stick.
- Page 79 If a settings file for the game is found on the USB stick, its date and time will be displayed as shown in figure B38. Press the Enter button to perform the settings restore operation. To exit the Settings Restore utility, press the Back/Escape button. Figure B38. Settings Restore utility screen. The Hobbit Menu System B-49...
- Page 80 The Hobbit Menu System B-50 Burn In The Burn In utility allows you to repeatedly exercise/test virtually all of the critical devices in the Hobbit game. When you enter the utility, the game will cycle through a preset routine to simultaneously fire coils, activate magnets, run motors, flash colors on the LCD screen, play sounds, etc.
- Page 81 When you enter the Hardware Info utility, the LCD monitor will display the screen shown in figure B39. To exit the Hardware Info utility at any time, press the Back/Escape button. Figure B39. Hardware Info utility screen. The Hobbit Menu System B-51...
-
Page 82: Install Presets
The Hobbit Menu System B-52 Install Ex.Easy Install Easy Difficulty Install Presets Medium Install Hard Install Ex. Hard B.6 Install Presets Install Home Install Coin-Op Install The Install Presets menu (see figure B40 for an outline) allows the user to quickly make quantum,... -
Page 83: Reports
Charts - view charts of statistics such as games played per day, game times, game scores, etc. Coinage Reports Events Error Log - view the contents of the game’s error log. Charts System Events Error Game Events Figure B41. Reports menu tree. The Hobbit Menu System B-53... -
Page 84: Resets
The Hobbit Menu System B-54 B.8 Resets The Resets menu (see figure B42 for an outline) allows the user to quickly clear game audits/earnings information and high scores from a single menu. Clear Credits Clear Credits - clear credits from the game. - Page 85 Section C Game Parts Information Game Parts Information...
-
Page 86: Section C - Game Parts Information
Game Parts Information... -
Page 87: Lower Cabinet Assembly
Lower Cabinet Assembly 50-5007-00 Item Part Number Description Qty Drawing Item Part Number Description 10-0003-01 Cabinet Vent Hole Grill, 3" 10-0133-00 Cabinet Leg Brkt, Decal Protector 98-0002-00 Rubber Flex Latch 10-0006-00 Cabinet Leg Mtg Brkt 15-5000-02 Cabinet PCB Chassis Assy, HOB C-14 LE 42-7003-05 Cabinet Side Rail, Bronze Vein... - Page 88 Game Parts Information...
-
Page 89: Backbox Assembly
Backbox Assembly 50-5006-00 Item Part Number Description Drawing Item Part Number Description 05-2002-00 Backbox Wood 51-5033-00 Hobbit Backbox Printed Glass Assy 51-5010-01 Backbox Speaker Bar Assy C-40 30-8002-00 Backglass Top Plastic Channel, 26-15/16” 51-5011-00 Backbox Light Assy 30-8002-01 Backglass Side Plastic Channel 10-0109-00 Backbox Light Strip Mtg Brkt 30-8004-00... - Page 90 Game Parts Information...
-
Page 91: Above-Playfield Assemblies
Above-Playfield Assemblies Item Part Number Assembly Name Game Function Drawing 52-0037-00 Hobbit Bottom Arch Assembly Playfield Bottom Arch C-43 51-0025-00 Kickback Assembly, Left Mount Windlance/Kickback C-31 13-2002-02 Hobbit Left Wire Ramp Assembly, Chrome Ball Return/Windlance Feed C-13 18-7002-02 Left Opto Spinner Assembly Fili Spinner C-16 18-7002-01... - Page 92 Game Parts Information...
-
Page 93: Under-Playfield Assemblies
Under-Playfield Assemblies Item Part Number Assembly Name Game Function Drawing 51-0002-00 Left Flipper Assembly Left Flipper C-19 51-0001-00 Right Flipper Assembly Right Flipper C-18 51-0021-00 5-Ball Trough Assembly Ball Trough, VUK C-30 51-0026-00 Auto-Launch Assembly Ball Auto-Launch C-32 51-0030-00 Disappearing Post Assembly Windlance Up Post C-33 51-0003-01... - Page 94 Game Parts Information C-10 See Below...
- Page 95 Lockdown Bar Receiver Assembly, Notched 10-8001-00 Item Part Number Description 10-5029-00 Lockdown Bar Receiver Brkt Assy, Notched 10-5030-00 Lockdown Bar Receiver Lever Assy, Notched 10-0157-00 Lockdown Bar Receiver Slide Support, Notched 13-7017-00 Lockdown Bar Receiver Spring 80-1006-04 6-32 x 1/4” PPH MS, SEMS 80-0310-10 10-32 x 5/8”...
- Page 96 Game Parts Information C-12 Pop Bumper Ring & Rod Assembly 11-5004-01 Item Part Number Description 11-0005-00 Pop Bumper Ring 11-0008-00 Pop Bumper Rod 91-0006-00 6-32 Nylon Stop Nut...
- Page 97 Hobbit Left Wire Ramp Assembly 13-2002-02 Item Part Number Description 13-0008-01 Hobbit Left Wire Ramp, Chrome 51-5038-00 Windlance Diverter Assy 80-6006-04 6-32 x 1/4” PFH MS, w/Undercut 62-0011-28 Hobbit Windlance Diverter Decal 70-9002-01 Mini Coil Insulator, Fish Paper 30-0112-00 Diverter Shield, Lasered Game Parts Information C-13...
- Page 98 Game Parts Information C-14 Fasteners...
- Page 99 Cabinet PCB Chassis Assembly, HOB 15-5000-02 Item Part Number Description Item Part Number Description 10-0030-00 Electronic PCB Chassis Lid 80-2006-06 6-32 x 3/8” HWH Phillips MS, Serrated 10-5014-00 Electronic PCB Chassis 80-2006-20 6-32 x 1-1/4” HWH Phillips MS, Serrated 15-0000-01 CPU Bd, H81M-P133 80-2008-06 8-32 x 3/8”...
- Page 100 Game Parts Information C-16 Right & Left Opto Spinner Assemblies Rollover Button Switch Assembly 18-7002-01, 18-7002-02 18-7003-00 Item Part Number Description Item Part Number Description 30-0010-00 Rollover Base, Plastic 10-0068-01 Opto Spinner Tgt Assy 30-0008-13 Rollover Button, Clear 10-5013-02 Opto Spinner Mtg Brkt 18-0004-00 Rollover Button Leaf Switch 18-7021-24-06...
- Page 101 Hobbit Subway Assembly 31-5011-00 Item Part Number Description 31-0003-00 Hobbit Plastic Subway, Black 10-0146-00 Subway Opto Brkt 18-7020-08-06 Opto Pair, 8” Cable, BLU 18-5001-00 Infrared LED Assy 18-5001-01 Phototransistor Assy 92-0004-00 #4 Flat Washer 93-0000-00 1/8” x 7/32” Semi-Tubular Rivet, TH Game Parts Information C-17...
- Page 102 Game Parts Information C-18 Right Flipper Assembly, 51-0001-00 Right Flipper Assembly, Mod-LL, 51-0001-13 Part Number Description 10-5001-00 Flipper Base Plate, Right (-00, Right) 10-5001-13 Flipper Base Plate, Right, Mod-LL (-13, Upper Right) 51-5018-00 Flipper Crank & Link Assy, Right 30-9003-00 Flipper Link 11-0003-00 Flipper Plunger...
- Page 103 Left Flipper Assembly 51-0002-00 Part Number Description 10-5002-00 Flipper Base Plate, Left 51-5018-01 Flipper Crank & Link Assy, Left 30-9003-00 Flipper Link 11-0003-00 Flipper Plunger 94-4002-00 5/32” x 7/16” Roll Pin 94-3001-00 Flipper Crank & Link Bushing 90-4010-14 10-32 x 7/8” SH CS 92-0010-00 #10 Flat Washer 91-0010-00...
- Page 104 Game Parts Information C-20 Left Side (-01) Right Side (-02) Upper (-03)
- Page 105 Hobbit Slingshot Assemblies 51-0003-01, 51-0003-02, 51-0003-03 Item Part Number Description 11-5010-00 Hobbit Left Axe Slingshot Kicker Crank Assy (-01) 11-5011-00 Hobbit Right Axe Slingshot Kicker Crank Assy (-02) 10-0042-00 Slingshot Kicker Crank Assy (-03) 10-0043-00 Slingshot Kicker Crank Mtg Brkt 10-5004-00 Slingshot Coil Brkt 10-7000-01...
- Page 106 Game Parts Information C-22 Pop Bumper Bottom Assembly 51-0004-01 Item Part Number Description 10-0021-00 Pop Bumper Yoke, Steel 10-0021-01 Pop Bumper Yoke, Bakelite 10-5003-00 Pop Bumper Coil Brkt 10-7003-00 Pop Bumper Coil Centering Brkt 11-0004-00 Pop Bumper Plunger 13-7002-00 Pop Bumper Plunger Return Spring 18-7007-00 Pop Bumper Leaf Switch Assy 110-0002-0T...
- Page 107 Pop Bumper Top Assembly, White 51-0006-09 Item Part Number Description 30-0003-09 Pop Bumper Base, White 30-0004-09 Pop Bumper Skirt, White 30-0005-09 Pop Bumper Body, White 13-7003-00 Pop Bumper Skirt Spring 30-0046-00 555 Light Socket, With Leads 24-0006-13 Wedge Base LED, 12V, 4-Chip, Cool White * Used in Left Pop Bumper of Hobbit LE &...
- Page 108 Game Parts Information C-24 VUK/Steel Trough Assembly, Right Mount 51-0012-00 Item Part Number Description Item Part Number Description 10-5005-01 Trough Mount VUK Coil Brkt 83-0006-06 6-32 x 3/8” PPH MS, Type 25 Thread Cutter 10-0145-02 Trough Mount VUK Brkt, Center 23-0003-00 23-800 Standard Coil 10-9004-00...
- Page 109 VUK/Steel Trough Assembly, Left Mount 51-0012-01 Item Part Number Description Item Part Number Description 10-5005-01 Trough Mount VUK Coil Brkt 83-0006-06 6-32 x 3/8” PPH MS, Type 25 Thread Cutter 10-0145-02 Trough Mount VUK Brkt, Center 23-0003-00 23-800 Standard Coil 10-9004-01 VUK Steel Entry Trough, Left 30-0014-30-1...
- Page 110 Game Parts Information C-26 Right Side, MAN (-00) Left Side, ELF (-01)
- Page 111 3-Bank Drop Target Assemblies, Right & Left 51-0015-00, 51-0015-01 Item Part Number Description Item Part Number Description 10-8002-03 3-Bank Drop Tgt Main Brkt Assy 30-0016-02 Drop Tgt, Rollover, Red 10-5028-03 3-Bank Drop Tgt Reset Coil Brkt 10-0143-03 3-Bank Drop Tgt Opto Mtg Brkt 10-0141-00 Drop Tgt Right Opto Brkt Mount 30-0024-00...
- Page 112 Game Parts Information C-28...
- Page 113 5-Bank Drop Target Assembly 51-0017-00 Item Part Number Description Item Part Number Description 10-8002-05 5-Bank Drop Tgt Main Brkt Assy 10-0144-05 5-Bank Drop Tgt Retract Coil Mtg Brkt 10-5028-05 5-Bank Drop Tgt Reset Coil Brkt 30-0016-02 Drop Tgt, Rollover, Red 10-0141-00 Drop Tgt Right Opto Brkt Mount 10-0143-05...
- Page 114 Game Parts Information C-30 5-Ball Trough Assembly 51-0021-00 Item Part Number Description 10-5010-00 Ball Trough Main Brkt 10-5010-01 Ball Trough Coil Brkt 11-5001-00 VUK Armature Plunger Assy 23-0010-00 26-1200 Standard Coil 10-7000-00 Coil Centering Brkt, 5/8", 3/8" Mnts, 8-32 Tapped 30-0014-30-1 1-7/8”...
-
Page 115: Kickback Assembly, Left Mount, Pn: 51-0025-00
Kickback Assembly, Left Mount 51-0025-00 Item Part Number Description 10-5007-00 Kickback/Knocker Coil Brkt, Left Mount 23-0003-00 23-800 Standard Coil 30-0014-30-1 1-7/8” Coil Tubing, Flanged 13-7005-00 VUK Plunger Return Spring 25-9001-00 Rubber Bumper Plug, Black 10-7000-00 Coil Centering Brkt, 5/8", 3/8" Mnts, 8-32 Tapped 11-5012-00 Kickback Plunger Assy 80-2008-04... -
Page 116: Auto-Launch Assembly, Pn: 51-0026-00
Game Parts Information C-32 Auto-Launch Assembly 51-000026-00 Item Part Number Description 10-0028-00 Auto-Launch Crank Brkt 10-5009-00 Auto-Launch Coil Brkt 10-7005-00 Auto-Launch Coil Stop Brkt 90-4010-06 10-32 x 3/8" SH CS, Black 92-1010-00 #10 Split Lock Washer 23-0003-00 23-800 Standard Coil 30-0014-28 1-3/4”... -
Page 117: Plumb Bob Tilt Assembly, Pn: 51-0028-00
Plumb Bob Tilt Assembly 51-0028-00 Disappearing Post Assembly 51-0030-00 Item Part Number Description 10-0086-00 Tilt Hanger Wire Brkt 11-0028-00 Plumb Bob Weight Item Part Number Description 13-3008-00 Tilt Contact Wire Form Brkt 10-5027-00 Disappearing Post Coil Brkt 13-3009-00 Tilt Hanger Wire 30-0014-30-1 1-7/8”... -
Page 118: Ball Shooter Assemblies, Pn: 51-0031-0X
Game Parts Information C-34 Ball Shooter Assemblies 51-0031-01, 51-0031-02, 51-0031-03, 51-0031-04 Item Part Number Description 11-0007-00 Ball Shooter Rod, Black Ball 13-7006-00 Ball Shooter Outer Spring 95-2564-58-16 Flat Washer, 25/64” x 5/8” x 16ga 4 LE 14-0001-10 Ball Shooter Housing, Bronze Vein (-01) 14-0001-09 Ball Shooter Housing, Gold Vein (-02) BA 14-0001-11... -
Page 119: Knocker Assembly, Vertical, Pn: 51-0032-01
Knocker Assembly, Vertical 51-0032-01 Item Part Number Description 10-5007-00 Kickback/Knocker Coil Brkt, Left Mount 23-0003-00 23-800 Standard Coil 30-0014-30-1 1-7/8” Coil Tubing, Flanged 25-9001-00 Rubber Bumper Plug, Black 10-7000-00 Coil Centering Brkt, 5/8", 3/8" Mnts, 8-32 Tapped 11-0011-00 Knocker Plunger Assy 80-2008-04 8-32 x 1/4”... -
Page 120: Dual Magnet Assembly, Pn: 51-0046-00
Game Parts Information C-36 Dual Magnet Assembly Subway Diverter Assembly 51-0046-00 51-0048-00 Item Part Number Description Item Part Number Description 10-5025-00 Dual Magnet Brkt, Adjustable Core 10-5007-01 Kickback/Knocker Coil Brkt, Right Mount 11-0012-00 Magnet Pole Shaft 05-3006-00 Kickback Wood Spacer 91-2034-00 3/4-16 Hex Jam Nut 11-5009-01... -
Page 121: Upper Jump Bumper Barrel Assembly, Pn: 51-0068-00
Upper Jump Bumper Barrel Assembly Right Jump Bumper Barrel Assembly 51-0068-00 51-0069-00 Item Part Number Description Item Part Number Description 11-0005-00 Pop Bumper Ring 11-0005-00 Pop Bumper Ring 11-0008-00 Pop Bumper Rod 11-0008-00 Pop Bumper Rod 94-1406-16 1/4” x 1” Hex Spacer, F-F, 6-32, Zinc 94-1406-16 1/4”... -
Page 122: Playfield Opto Pair Assembly, Pn: 51-0071-00
Game Parts Information C-38 Playfield Opto Pair Assembly 51-0071-00 Item Part Number Description 10-0178-00 Single Opto Mtg Brkt 10-0097-00 Playfield Opto Retainer 18-7020-24-07 Opto Pair Assy, 24” Cable, VIO 18-5001-00 Infrared LED Assy 18-5001-01 Phototransistor Assy... -
Page 123: Power Box Assembly, Pn: 51-5001-00
Power Box Assembly 51-5001-00 Item Part Number Description 10-0008-00 Cabinet Metal Power Box 18-7012-00 On/Off Switch Assy 10-0087-00 On/Off Switch Mtg Brkt 18-3006-00 On/Off Switch, Rocker Style 22-0001-00 USA Service Outlet, Snap-In 22-8000-00 Line Fuse Holder USA 170-0110-SR Fuse, Slow Blow, 10A, 125V, 0.25” x 1.25”, 3AG Euro 170-0205-SR Fuse, Slow Blow, 5A, 250V, 0.25”... -
Page 124: Backbox Speaker Bar Assembly, Pn: 51-5010-01
Game Parts Information C-40 Backbox Speaker Bar Assembly 51-5010-01 Item Part Number Description Item Part Number Description 05-3002-01 Speaker Box Enclosure 82-6104-10 #4 x 5/8” PFH SMS, w/Undercut, Black 10-0066-00 Speaker Bar Housing, Black 42-2002-00 Backbox Lock Assy 17-6000-00 2” Mylar Dome Tweeter 108-001M-250 Capacitor, 1µF, 250V, 25%, Audio Grade 17-6001-00... -
Page 125: Shaker Motor Assembly, Pn: 51-5027-01
Shaker Motor Assembly 51-005027-01 Item Part Number Description 10-005006-02 Shaker Motor Mtg Brkt 10-005006-03 Shaker Motor Front Brkt 23-005003-01 Shaker Motor 11-000010-00 Eccentric Weight 80-000006-48 6-32 x 3” PPH MS 95-004000-00 Insulator Washer 80-000010-08 10-32 x 1/2” PPH MS 85-004008-04 8-32 x 1/4”... -
Page 126: Hobbit Back Panel Assembly, Pn: 51-5031-00
Game Parts Information C-42 Hobbit Back Panel Assembly 51-5031-00 Item Part Number Description Item Part Number Description 05-9004-00 Hobbit Back Panel Wood 82-0004-06 #4 x 3/8” PPH SMS 10-0162-00 Back Panel Support Brkt 10-0179-00 Flasher/GI Mtg Brkt, 45 deg 91-4008-00 8-32 x 1/4”... -
Page 127: Hobbit Bottom Arch Assembly, Pn: 52-0037-00
Hobbit Bottom Arch Assembly 52-0037-00 Item Part Number Description 10-0091-01 Hobbit Bottom Arch, Black 62-0011-14 Hobbit Shooter Gauge Decal 62-0014-01 Hobbit Bottom Arch Decal 10-0092-00 Bottom Arch Retainer Brkt, Black Game Parts Information C-43... - Page 128 Game Parts Information C-44 +12V Power Cable, from Power Supply DVI-D Cable, from CPU Bd...
- Page 129 27” LCD Panel Assembly 51-5032-00 Item Part Number Description Item Part Number Description 05-3005-00 27” LCD Wood Panel 82-0004-08 #4 x 1/2” PPH SMS 10-0137-01 27” LCD Panel Mtg Brkt, Left 19-3066-00 27” LCD Adjustment Keypad Cable 19-3067-00 27”LCD LVDS Cable, 25cm 10-0137-00 27”...
- Page 130 Game Parts Information C-46...
-
Page 131: Hobbit Smaug Assemblies, Pn: 52-0038-0X
Hobbit Smaug Assemblies 52-0038-00, 52-0038-01 Item Part Number Description Item Part Number Description 10-0169-00 Hobbit Smaug Bottom Plate 80-0004-06 4-40 X 3/8” PPH MS 10-0172-00 Hobbit Smaug Top Plate 80-0008-04 8-32 x 1/4” PPH MS 23-5007-00 Hobbit Smaug Stepper Motor 30-0108-00 1/2”... - Page 132 Game Parts Information C-48...
-
Page 133: Hobbit Steel Ramp Assembly, Pn: 52-0042-00
Hobbit Steel Ramp Assembly 52-0042-00 Item Part Number Description 10-9005-00 Hobbit Steel Ramp 11-6005-00 Hobbit Ramp Flap, Left 11-6005-01 Hobbit Ramp Flap, Right 93-0003-00 1/8” x 5/32” Semi-Tubular Rivet, TH 92-0004-00 #4 Flat Washer (Behind Ramp) 18-7020-17-04 Opto Pair Assy, 17” Cable, YEL 18-5001-00 Infrared LED Assy 18-5001-01... - Page 134 Game Parts Information C-50 18-7019-XX Character Switch Assy Detail A 18-7019-XX Character Switch Assy See Detail A...
-
Page 135: Hobbit Pop-Up Assemblies, Pn: 52-0044-0X
Hobbit Pop-Up Assemblies 52-0044-00, 52-0044-01, 52-0044-02, 52-0044-03 Item Part Number Description Item Part Number Description 10-5021-00 Pop-Up Main Brkt 18-3005-01 Microswitch w/Internal Roller Actuator 10-5022-00 Pop-Up Carriage Brkt 98-0011-00 Rubber Bumper w/Stud, 8-32 11-6004-00 Pop-Up Spring Steel Flap 80-2102-08 2-56 x 1/2” HWH MS, Black 10-0154-00 Pop-Up Coil Brkt 70-9002-00... -
Page 136: Hobbit Book Lcd Assembly, Pn: 52-0045-00
Game Parts Information C-52 Hobbit Book LCD Assembly 52-0045-00 Item Part Number Description 10-5034-00 Book LCD Mtg Brkt, Front 10-0176-00 Book LCD Mtg Brkt, Rear 10-0166-00 Book LCD Retaining Brkt 17-0004-00 4.3” LCD Screen 15-0038-00 4.3” LCD Driver Board 30-0066-00 Book LCD Front Shield 30-0081-00 Nylon Round Spacer, #6 x 1/4”... - Page 137 Coil, Motor & Light Table (1 of 3) Drive # Coil Function Coil Type I/O Bd Power Source I/O Bd Drive Details Fuses Part Number Part of Assembly Drawing MAN Drop Target Reset (Up) 26-1200 BRN, J104-1, 70V BRN-BLK, J104-9, Q308 F701, F704 23-0010-00 51-0015-00...
- Page 138 Game Parts Information C-54 Coil, Motor & Light Table (2 of 3) Drive # Coil Function Coil Type I/O Bd Power Source I/O Bd Drive Details Fuses Part Number Part of Assembly Drawing Left Pop Bumper 26-1200 PNK, J108-1, 70V PNK-BLK, J108-10, Q408 F702, F708 23-0010-00...
-
Page 139: Coil, Motor & Light Table
Coil, Motor & Light Table (3 of 3) Drive # Coil Function Coil Type I/O Bd Power Source I/O Bd Drive Details Fuses Part Number Part of Assembly Drawing DWARF Drop Target Retract (Down) 32-1350, Mini VIO, J112-1, 20V VIO-BLK, J112-3, Q501 F703, F712 23-3015-00 51-0017-00... - Page 140 Game Parts Information C-56...
- Page 141 70-Volt Coil Locations Above Playfield Drive Coil Function Part Number Part of Assembly Drawing Drive Coil Function Part Number Part of Assembly Drawing MAN Drop Target Reset (Up) 23-0010-00 51-0015-00 C-26 Upper Slingshot 23-0010-00 51-0003-03 C-20 Drop Target Reset (Up) 23-0010-00 51-0015-00 C-26...
- Page 142 Game Parts Information C-58...
- Page 143 70-Volt Coil Locations Under Playfield Drive Coil Function Part Number Part of Assembly Drawing Drive Coil Function Part Number Part of Assembly Drawing MAN Drop Target Reset (Up) 23-0010-00 51-0015-00 C-26 Upper Slingshot 23-0010-00 51-0003-03 C-20 Drop Target Reset (Up) 23-0010-00 51-0015-00 C-26...
- Page 144 Game Parts Information C-60...
- Page 145 20-Volt Coil Locations Above Playfield Drive Function Part Number Part of Assembly Drawing Drop Target Retract (Down) 23-3015-00 51-0015-01 C-26 Drop Target Retract (Down) 23-3015-00 51-0015-01 C-26 ELF Drop Target Retract (Down) 23-3015-00 51-0015-01 C-26 Top Magnet, Left 23-4005-00 51-0046-00 C-36 Top Magnet, Right 23-4005-00...
- Page 146 Game Parts Information C-62...
- Page 147 20-Volt Coil Locations Under Playfield Drive Function Part Number Part of Assembly Drawing Drop Target Retract (Down) 23-3015-00 51-0015-01 C-26 Drop Target Retract (Down) 23-3015-00 51-0015-01 C-26 ELF Drop Target Retract (Down) 23-3015-00 51-0015-01 C-26 Top Magnet, Left 23-4005-00 51-0046-00 C-36 Top Magnet, Right 23-4005-00...
- Page 148 Game Parts Information C-64 46/47 43/44 Color Key: GI/Flasher Boards RGB LED Boards...
- Page 149 Playfield Printed Circuit Boards Above Playfield Item Number Color Key PCB Type Part Number Function Details 11 to 13, 15, 16 (R, G, B) GI LED Board 15-0027-00 General illumination/flasher D-12 38 to 40 RGB LED Single Board 15-0028-0X Feature lighting D-16 43/44, 46/47 RGB LED Double Board...
- Page 150 Game Parts Information C-66 92/93 89-91 77/78 27/28 94-96 73/74 83/84 25/26 85/86 87/88 41/42 65/66 35-37 69/70 52-54 33/34 49-51 55/56 67/68 Color Key: GI Boards RGB LED Boards Opto Boards Other Boards...
- Page 151 Playfield Printed Circuit Boards Under Playfield Item Number Color Key PCB Type Part Number Function Details 1 to 6, 9 to 15, 19 to 24 (R, G & B) GI LED Board 15-0027-0X General illumination/accent lighting D-12 29 to 31, 45, 71, 75, 76, 79 to 82 RGB LED Single Board 15-0028-0X Feature lighting...
- Page 152 Game Parts Information C-68...
- Page 153 Playfield Feature Lighting (RGB LEDs) Above Playfield RGB# Location/Function RGB Bd, Connector RGB# Location/Function RGB Bd, Connector RGB# Location/Function RGB Bd, Connector Bilbo Arrow Bd A, J101 Bd B, J101 LOCK Rollover Bd C, J101 Bilbo Parchment Bd A, J101 Dwalin Bd B, J101 LOCK...
- Page 154 Game Parts Information C-70...
- Page 155 Playfield Feature Lighting (RGB LEDs) Under Playfield RGB# Location/Function RGB Bd, Connector RGB# Location/Function RGB Bd, Connector RGB# Location/Function RGB Bd, Connector Bilbo Arrow Bd A, J101 Bd B, J101 LOCK Rollover Bd C, J101 Bilbo Parchment Bd A, J101 Dwalin Bd B, J101 LOCK...
- Page 156 Game Parts Information C-72 SW100 SW100...
-
Page 157: Rgb Led Feature Lighting Wiring - Under Playfield
RGB LED Feature Lighting Wiring Under Playfield Cable Description Part Number RGB Bd(s), Connector(s) Details Hobbit Upper Right RGB Cable, 1mm 19-3095-01 Bd A, J101 D-34, D-36 Hobbit Upper Right RGB Cable, 2.5mm 19-3095-11 D-45, D-47 Hobbit Upper Left RGB Cable, 1mm 19-3095-02 Bd A, J102 D-34, D-37... - Page 158 Game Parts Information C-74...
- Page 159 Playfield GI Lighting & Flashers (LEDs) Above Playfield BAG Bd Details BAG Bd Details LED# Location/Function Connector 1mm/2.5mm LED# Location/Function Connector 1mm/2.5mm Left Sling #2 J105 D-56, D-61/D-64, D-69 Right Upper Flasher (mounted to plastic) J109 D-56, D-62/D-64, D-70 Left Sling #3 (Low) J105 D-56, D-61/D-64, D-69 Ramp U-Turn Flasher (above steel ramp)
- Page 160 Game Parts Information C-76 12B 11G...
- Page 161 Playfield GI Lighting & Flashers (LEDs) Under Playfield BAG Bd Details BAG Bd Details LED# Location/Function Connector 1mm/2.5mm LED# Location/Function Connector 1mm/2.5mm Left Sling #2 J105 D-56, D-61/D-64, D-69 Right Upper Flasher (mounted to plastic) J109 D-56, D-62/D-64, D-70 Left Sling #3 (Low) J105 D-56, D-61/D-64, D-69 Ramp U-Turn Flasher (above steel ramp)
- Page 162 Game Parts Information C-78 J110 J109 J108...
-
Page 163: Gi Lighting & Flasher Wiring - Under Playfield
GI Lighting & Flasher Wiring Under Playfield Cable Description Part Number BAG Bd Connector Details Hobbit Lower Left GI Cable, 1mm 19-3092-01 J105 D-56, D-61 Hobbit Lower Left GI Cable, 2.5mm 19-3092-11 D-64, D-69 Hobbit Lower Right GI Cable, 1mm 19-3092-02 J113 D-56, D-63... - Page 164 Game Parts Information C-80...
- Page 165 Opto Wiring Under Playfield Cable Description Function Part Number Opto I/O Board Connector Details U-Shaped Opto Assy, OPB816Z, 12” Cable, BLK Drop Target Switch 18-7022-12-00 Lower Left J1/BLK D-7, D-9 U-Shaped Opto Assy, OPB816Z, 11” Cable, BRN Drop Target Switch 18-7022-11-01 Lower Left J2/BRN...
- Page 166 Game Parts Information C-82...
- Page 167 Playfield Switch Locations (1 of 3) Above Playfield Switch Switch Function Switch Type Part Number Part of Assembly Drawing 5-Ball Trough #5 (Left) Opto LED, Phototransistor Pair 15-5007-01, 15-5007-00 51-0021-00 C-30 5-Ball Trough #4 Opto LED, Phototransistor Pair 15-5007-01, 15-5007-00 51-0021-00 C-30 5-Ball Trough #3...
- Page 168 Game Parts Information C-84...
- Page 169 Playfield Switch Locations (2 of 3) Above Playfield Switch Switch Function Switch Type Part Number Part of Assembly Drawing Drop Target U-Shaped Opto 18-5000-00 51-0015-01 C-26 Drop Target U-Shaped Opto 18-5000-00 51-0015-01 C-26 ELF Drop Target U-Shaped Opto 18-5000-00 51-0015-01 C-26 Smaug Left Limit U-Shaped Opto, PCB Mount...
- Page 170 Game Parts Information C-86...
- Page 171 Playfield Switch Locations (3 of 3) Above Playfield Switch Switch Function Switch Type Part Number Part of Assembly Drawing Left Slingshot, High Stand-Up Leaf 18-7008-00 51-0003-01 C-20 Left Slingshot, Low Stand-Up Leaf 18-7008-00 51-0003-01 C-20 Orc Return Lane Microswitch & Wireform 18-3004-01 Warg Return Lane Microswitch &...
- Page 172 Game Parts Information C-88...
- Page 173 Playfield Switch Locations (1 of 3) Under Playfield Switch Switch Function Switch Type Part Number Part of Assembly Drawing 5-Ball Trough #5 (Left) Opto LED, Phototransistor Pair 15-5007-01, 15-5007-00 51-0021-00 C-30 5-Ball Trough #4 Opto LED, Phototransistor Pair 15-5007-01, 15-5007-00 51-0021-00 C-30 5-Ball Trough #3...
- Page 174 Game Parts Information C-90...
- Page 175 Playfield Switch Locations (2 of 3) Under Playfield Switch Switch Function Switch Type Part Number Part of Assembly Drawing Drop Target U-Shaped Opto 18-5000-00 51-0015-01 C-26 Drop Target U-Shaped Opto 18-5000-00 51-0015-01 C-26 ELF Drop Target U-Shaped Opto 18-5000-00 51-0015-01 C-26 Smaug Left Limit U-Shaped Opto, PCB Mount...
- Page 176 Game Parts Information C-92...
- Page 177 Playfield Switch Locations (3 of 3) Under Playfield Switch Switch Function Switch Type Part Number Part of Assembly Drawing Left Slingshot, High Stand-Up Leaf 18-7008-00 51-0003-01 C-20 Left Slingshot, Low Stand-Up Leaf 18-7008-00 51-0003-01 C-20 Orc Return Lane Microswitch & Wireform 18-3004-01 Warg Return Lane Microswitch &...
- Page 178 Game Parts Information C-94 18 17...
-
Page 179: Dedicated Switch Locations
Dedicated Switch Locations Switch Switch Function Switch Type Part Number Part of Assembly Drawing Left Flipper EOS Leaf 18-0001-00 51-0002-00 C-19 Right Flipper EOS Leaf 18-0001-00 51-0001-00 C-18 Upper Right Flipper EOS Leaf 18-0001-00 51-0001-13 C-18 Left Flipper Switch Leaf 18-0005-00 Right Flipper Switch, Lower Leaf... - Page 180 Game Parts Information C-96...
-
Page 181: Printed Playfield Plastics
Printed Playfield Plastics Item Part Number Description 30-3003-01 Hobbit Left Inlane Plastic 30-3003-02 Hobbit Right Inlane Plastic 30-3003-03 Hobbit Left Slingshot Plastic 30-3003-04 Hobbit Right Slingshot Plastic 30-3003-05 Hobbit Left Side/Elves Plastic 30-3003-06 Hobbit Upper Left Side Plastic 30-3003-09 Hobbit Captive Ball Plastic 30-3003-10 Hobbit Upper Right Corner Plastic 30-3003-11... - Page 182 Game Parts Information C-98...
-
Page 183: Clear Plastics, Flasher Domes & Flipper Bats
Clear Plastics, Flasher Domes & Flipper Bats Item Part Number Description 30-3003-24 Hobbit Left Side/Elves Clear Plastic 30-3003-25 Hobbit Right Side/Men Clear Plastic 30-0012-04 Flipper Bat, Yellow or BA 30-0012-00 Flipper Bat, Black 30-0076-04 Mini Flasher Dome w/Tabs, Yellow Game Parts Information C-99... - Page 184 Game Parts Information C-100...
-
Page 185: Playfield Sculptures
Playfield Sculptures Item Part Number Description Item Part Number Description 1 LE 32-0020-00 Hobbit Smaug Head Sculpture, Red 32-5004-00 Hobbit Left Pillar Assembly SE 32-0020-01 Hobbit Smaug Head Sculpture, Gold 10-0183-00 Hobbit Left Pillar Mtg Brkt Std 32-0020-00 Hobbit Smaug Head Sculpture, Red 10-0189-00 Hobbit Left Pillar Seam Brkt 2 LE 32-0029-00... - Page 186 Game Parts Information C-102...
-
Page 187: Game Decals & Mylar Playfield Protectors
Game Decals & Mylar Playfield Protectors Item Part Number Description Part of Assy Drawing Item Part Number Description Part of Assy Drawing 62-0011-01 Hobbit Left Spinner Decal, Front 18-7002-02 C-16 62-0011-23 Hobbit Drop Tgt Decal 51-0015-00 C-26 62-0011-02 Hobbit Right Spinner Decal, Front 18-7002-01 C-16 62-0011-24... - Page 188 Game Parts Information C-104...
-
Page 189: Rubber Rings, Bumpers & Sleeves
Rubber Rings, Bumpers & Sleeves Item Part Number Description 25-2004-07-9 Silicone Ring, 7/16”, White BA 25-2003-07-0 Rubber Ring, 7/16”, Black 25-2004-12-9 Silicone Ring, 3/4”, White BA 25-2003-12-0 Rubber Ring, 3/4”, Black 25-2004-16-9 Silicone Ring, 1”, White BA 25-2003-16-0 Rubber Ring, 1”, Black 25-2004-24-9 Silicone Ring, 1-1/2”, White BA 25-2003-24-0... - Page 190 Game Parts Information C-106...
-
Page 191: Plastic Playfield Posts
Plastic Playfield Posts Item Part Number Description 30-9004-12 1-1/16” Standard Poly Post, Clear 30-9005-04 Single Star Poly Post, Yellow 30-9007-04 Mini Poly Post, Yellow Game Parts Information C-107... - Page 192 Game Parts Information C-108...
-
Page 193: Metal Playfield Posts, Screws & Hex Spacers
Metal Playfield Posts, Screws & Hex Spacers Item Part Number Description 97-0008-00 8-32/8-32 Butyrate Fastener Post, 2-1/8” 97-0008-01 8-32/8-32 Ramp Fastener Post, 2-3/8” 97-0008-02 8-32/WS Butyrate Fastener Post, 2-1/8” 97-0008-03 8-32/WS Ramp Fastener Post, 2-3/8” 97-0009-02 5/16” Hex Sleeve Ramp Fastener Post, 2-7/8” 97-0010-00 Steel Mini Post, 10-32, 2”... - Page 194 Game Parts Information C-110...
-
Page 195: Woodrails, Flatrails, Brackets & Ball Deflectors
Woodrails, Flatrails, Brackets & Ball Deflectors Item Part Number Description 05-8001-03 Hobbit Left Side Woodrail, Upper, 14.5” 05-8001-04 Hobbit Left Side Woodrail, Lower, 19.44” 05-8001-05 Hobbit Right Side Woodrail, 41.25” 12-0016-01 Ball Outhole Flatrail, Extended 12-0032-00 Hobbit Main Loop Flatrail 12-0033-01 Hobbit Left Outlane Flatrail 12-0034-00... - Page 196 Game Parts Information C-112...
-
Page 197: Ball Guide Rails, Wire Ramps & Ball Gates
Ball Guide Rails, Wire Ramps & Ball Gates Item Part Number Description Item Part Number Description 13-3000-05 1.63” Straight Ball Guide Rail, Mini 13-3010-00 Wire Lane Divider (above item #2) 13-3000-07 1.88” Straight Ball Guide Rail, Mini (beneath item #16) 13-0007-01 Hobbit Right Wire Ramp, Chrome 13-3000-10... - Page 198 Game Parts Information C-114...
-
Page 199: Under-Playfield Supports & Brackets
Under-Playfield Supports & Brackets Item Part Number Description 10-0014-00 Playfield Hanger Brkt 51-5030-01 Playfield Support Tube Assy 10-0093-00 Playfield Support Tube 80-7010-24 10-24 x 1-1/2” Phillips TH MS 91-0011-00 10-24 Nylon Stop Nut 25-9008-00 Playfield Support Rubber Spacer 11-7001-00 Playfield Hinge Brkt Assy, 1/15 10-0013-01 Playfield Lift Support Brkt, 10.3”... -
Page 200: Assembly Mounting Hardware Table
Game Parts Information C-116 Assembly Mounting Hardware Assembly Mounting Hardware Part Number Name Mounts To Drawing Part Number Description 51-5010-01 Backbox Speaker Bar Assy Backbox, Through 92-0010-00 #10 Flat Washer 80-8110-10 10-32 x 5/8” TP Torx MS 10-0003-00 Cabinet Vent Hole Grill, 2-3/8” x 22” Backbox, Interior 82-2008-08 #8 x 1/2”... - Page 201 Assembly Mounting Hardware Part Number Name Mounts To Drawing Part Number Description 51-0031-0X Ball Shooter Assy (All Finishes) Cabinet, Through 80-2010-08 10-32 x 1/2” HWH Phillips MS, Serrated 51-0035-00 Door & Interlock Switch Assy Cabinet, Interior 82-2008-08 #8 x 1/2” HWH Phillips SMS 40-000#-00 Coin Door Assy Cabinet, Through...
- Page 202 Game Parts Information C-118 Assembly Mounting Hardware Part Number Name Mounts To Drawing Part Number Description 52-0038-0X Hobbit Smaug Assy Playfield, Through 80-2008-16 8-32 x 1” HWH Phillips MS, Serrated 52-0042-00 Hobbit Steel Ramp Assy Playfield, Top 80-2008-08 8-32 x 1/2” HWH Phillips MS, Serrated 82-6104-10 #4 x 5/8”...
- Page 203 Assembly Mounting Hardware Part Number Name Mounts To Drawing Part Number Description 32-5003-00 Hobbit Smaug Front Gold Pile Assy Playfield, Top C-100 91-0008-00 8-32 Nylon Stop Nut 32-0032-00 Hobbit Upr Left Corner Gold Pile Sclptr Playfield, Top C-100 91-0008-00 8-32 Nylon Stop Nut 32-0036-00 Hobbit Smaug Rt Side Gold Pile Sclptr Playfield, Top...
- Page 204 Game Parts Information C-120 Assembly Mounting Hardware Part Number Name Mounts To Drawing Part Number Description 15-0007-00 Opto I/O Bd (3) Playfield, Under C-66 10-5020-00 Opto I/O PCB Mtg Brkt 80-0004-10 4-40 x 5/8” PPH MS 94-3005-00 #4 x 3/8” Nylon PCB Stand-Off 15-0033-0X BAG Controller PCB Assy Playfield, Under...
-
Page 205: Assembly Cables Table
Assembly Cables Assembly Cable Part Number Name Part Number Description 51-5010-00 Backbox Speaker Bar Assy 19-3000-00 Speaker Box Cable Assy 19-3024-00 2-Wire RCA Cable, 10ft 51-5011-00 Backbox Light Bar Assy 19-3109-00 Backbox Light Cable 51-5032-00 27” LCD Monitor Assy 19-3071-00 DVI-D Cable, M-M, 6ft 19-3072-01 27"... - Page 206 Game Parts Information C-122 Assembly Cable Part Number Name Part Number Description 51-5038-00 Windlance Diverter Assy 19-3085-00 Windlance Diverter Coil Cable 52-0044-0X Hobbit Pop-Up Assy 19-3080-00 Pop-up Character Hit Switch Cable 52-0045-00 Hobbit Book LCD Assy 19-3128-05 4.3" LCD VGA Ribbon Cable, 5" 19-3025-00 VGA 15-pin Sub D Cable, 6ft 19-9026-00...
-
Page 207: Matrixed Switch Wiring Table
Matrixed Switch Wiring Table GRN or GRY Column 1 Column 2 Column 3 Column 4 Column 5 Column 6 Column 7 Column 8 Column 9 Column 10 Column 11 Column 12 Column 13 Column 14 Column 15 Column 16 J201-1 J201-2 J201-3 J201-4... -
Page 208: Dedicated Switch Wiring Table
Game Parts Information C-124 Dedicated Switch Wiring Table Return 1 Return 2 Return 3 Return 4 Return 5 Return 6 Return 7 Return 8 J601-7 J601-6 J601-5 J601-4 J601-2 J601-3 J601-8 J601-9 Common J601-1 Left Right Upper Right Flipper Flipper EOS Flipper EOS Return 9 Return 10... -
Page 209: 70-Volt Coil Wiring Table
70-Volt Coil Wiring Table Drive 1 Drive 2 Drive 3 Drive 4 Drive 5 Drive 6 Drive 7 Drive 8 F701, 10A SB F704, 5A SB J104-9, Q308 J104-8, Q307 J104-7, Q306 J104-6, Q305 J104-5, Q304 J104-4, Q303 J104-3, Q302 J104-2, Q301 70V Power... -
Page 210: 20-Volt Coil Wiring Table
Game Parts Information C-126 20-Volt Coil Wiring Table Drive 49 Drive 50 Drive 51 Drive 52 Drive 53 Drive 54 Drive 55 Drive 56 F703, 6.3A SB F710, 4A SB J110-2, Q421 J110-3, Q422 J110-5, Q423 J110-6, Q424 J110-7, Q425 J110-8, Q426 J110-9,... -
Page 211: Schematic
Section D Reference Diagrams & Schematics Reference Diagrams & Schematics... - Page 212 Reference Diagrams & Schematics 5-Ball Trough Opto Receiver Board 15-0004-00 Component(s) Part Number Description C1, C2 100-104K-050 Capacitor, MLCC, 0805 SMT, 0.1μF, 50V, 10% D1-D7, D9-D15 110-1000-0S Diode, 1N4148, SMT, 75V, 300mA 110-5001-0S Diode, RS1G, SMT, 400V, 1A, 150ns 170-3201-FS Fuse, Fast, 0805 SMT, 1A, 32V Q1-Q7, Q9-Q15 131-0000-0S...
- Page 213 5-Ball Trough Opto Receiver Board 10kΩ 74HC14 15-0004-00 OUT6 OUT5 OUT4 OUT3 OUT2 OUT1 Switch Matrix 1N4148 Row 6 1N4148 Row 5 1kΩ 74HC14 1N4148 10kΩ Row 4 2222A 1N4148 10kΩ 1kΩ Row 3 OUT6 1N4148 10kΩ Row 2 OUT5 2222A 1kΩ...
-
Page 214: Connector Pin-Outs
Reference Diagrams & Schematics J100 5-Ball Trough Opto Receiver Board 15-0004-00 Connector Pin-outs Matrixed Switches J1-1 GRN-BLK Matrixed switches, Column 1 from I/O Board, J201-1 J1-2 Not Used J1-3 WHT-BLK Matrixed switches, Row 1 from I/O Board, J200-1 J1-4 WHT-BRN Matrixed switches, Row 2 from I/O Board J200-2 J1-5 WHT-RED... -
Page 215: Schematic
5-Ball Trough Opto Transmitter Board 15-0004-01 Component(s) Part Number Description LED1-LED6 24-0002-0T LED, IR Emitting, QED123, 880nm, 5mm R1-R3 123-0018-1H4 Resistor, 2512 SMT, 18Ω, 1W, 5% J100 31-2500-02 Header, Male, 2-pin, Rt Angle, 3.96mm Reference Diagrams & Schematics... -
Page 216: Connector Pin-Outs
Reference Diagrams & Schematics 5-Ball Trough Opto Transmitter Board 15-0004-01 J100 Power Input 5-Ball Trough Opto Transmitter Board J100 15-0004-01 Connector Pin-outs, Revision 4 LED2 LED4 LED6 J100 Power Input J100-1 +5VDC from Primary ATX Pwr Supply J100-2 Ground from Primary ATX Pwr Supply LED1 LED3 LED5... -
Page 217: Schematic
Opto I/O Board 15-0007-00 Component(s) Part Number Description C1, C2 100-104K-050 Capacitor, MLCC, 0805 SMT, 0.1μF, 50V, 10% D1-D16 110-1000-0S Diode, 1N4148, SMT, 75V, 300mA 110-5001-0S Diode, RS1G, SMT, 400V, 1A, 150ns 170-3202-FS Fuse, Fast, 0805 SMT, 2A, 32V Q1-Q16 131-0000-0S Transistor, 2222A, SOT-23 SMT, NPN R1-R8... -
Page 218: Schematic
Reference Diagrams & Schematics Opto I/O Board 15-0007-00 74HC14 10kΩ 10kΩ OUT6 OUT5 OUT4 OUT3 OUT2 OUT1 Switch Matrix 1N4148 Row 8 1N4148 Row 7 1kΩ 1N4148 Row 6 2222A 1N4148 1kΩ Row 5 74HC14 10kΩ 1N4148 Row 4 2222A 10kΩ... -
Page 219: Connector Pin-Outs
PWR1 J1 J2 J3 J4 J5 J6 J7 Lower Left Opto I/O Board, 15-0007-00 Connector Pin-outs Matrixed Sw 25 [ Drop Target U-shaped Opto] Opto #5 Connections Matrixed Switches J1-1 RX of Drop Target U-shaped opto J5-1 Not Used J9-1 GRN-ORN Matrixed switches, Column 4 from I/O Board, J201-4 J1-2 RX of Drop Target U-shaped opto... -
Page 220: Connector Pin-Outs
Reference Diagrams & Schematics D-10 PWR1 J1 J2 J3 J4 J5 J6 J7 Right-side Opto I/O Board, 15-0007-00 Connector Pin-outs Matrixed Sw 17 [ Drop Target U-shaped Opto] Matrixed Sw 21 [ Drop Target U-shaped Opto] Matrixed Switches DWARF DWARF J1-1 RX of DWARF... -
Page 221: Schematic
PWR1 J1 J2 J3 J4 J5 J6 J7 Upper Left Opto I/O Board, 15-0007-00 Connector Pin-outs Matrixed Sw 9 [Balin VUK Opto Pair] Matrixed Sw 13 [Bilbo Ramp Enter Opto Pair] Matrixed Switches J1-1 RX of Balin VUK opto pair (“E” lead) J5-1 RX of Bilbo Ramp Enter opto pair (“E” lead) J9-1 GRN-BRN Matrixed switches, Column 2 from I/O Board, J201-2... - Page 222 Reference Diagrams & Schematics D-12 GI LED Board, 1mm 15-0027-00 (games manufactured before Aug 11, 2016) Component(s) Part Number Description R100 124-0015-254 Resistor, 1206 SMT, 15Ω, 0.25W, 5% LED100 24-0019-0S LED, SMT, High-Power, Cool White, 5700K J100 30-2200-02 Header, SMT, Male, 2-Pin, 1mm...
-
Page 223: Connector Pin-Outs
J100 GI LED Board, 1mm 15-0027-00 +7.5V J100 7.5V GI LED Board, 1mm 15-0027-00 R100 Connector Pin-outs 15Ω LED100 J100 LED Control/Power Input J100-1 +7.5VDC from BAG Controller Board, an odd-numbered GI connector (J105-J113) pin J100-2 GRY-XXX LED100 return to BAG Controller Board, an even-numbered GI connector (J105-J113) pin Note: specifies the color of the stripe on the second... -
Page 224: Schematic
Reference Diagrams & Schematics D-14 GI LED Board, 2.5mm 15-0027-01 (games manufactured on/after Aug 11, 2016) Component(s) Part Number Description R100 124-0015-254 Resistor, 1206 SMT, 15Ω, 0.25W, 5% LED100 24-0019-0S LED, SMT, High-Power, Cool White, 5700K J100 30-2202-02 Header, Male, 2-Pin, 2.5mm... -
Page 225: Connector Pin-Outs
J100 GI LED Board, 2.5mm 15-0027-01 +7.5V J100 7.5V GI LED Board, 2.5mm 15-0027-01 R100 Connector Pin-outs 15Ω LED100 J100 LED Control/Power Input J100-1 +7.5VDC from BAG Controller Board, an odd-numbered GI connector (J105-J113) pin J100-2 GRY-XXX LED100 return to BAG Controller Board, an even-numbered GI connector (J105-J113) pin Note: specifies the color of the stripe on the second... -
Page 226: Schematic
Reference Diagrams & Schematics D-16 Single RGB LED Board, 1mm 15-0028-00 (games manufactured before Aug 11, 2016) Component(s) Part Number Description R100, R102 122-0018-102 Resistor, 0603 SMT, 18Ω, 0.1W, 1% R101 120-0075-122 Resistor, 0805 SMT, 75Ω, 0.125W, 1% RGB100 24-0016-00 LED, SMT, High-Power RGB, 624/527/470nm J100 30-2200-04... -
Page 227: Connector Pin-Outs
J100 Single RGB LED Board, 1mm 15-0028-00 J100 Single RGB LED Board, 1mm RGB100 RGB LED 15-0028-00 R100 Connector Pin-outs 18Ω R101 J100 RGB LED Control/Power Input 75Ω J100-1 +4VDC from an RGB LED Controller Board, J101, J102 or J103 R102 J100-2 XXX-GRN RGB100 GRN return to an RGB LED Controller Board, J101, J102 or J103 18Ω... - Page 228 Reference Diagrams & Schematics D-18 Single RGB LED Board, 2.5mm 15-0028-01 (games manufactured on/after Aug 11, 2016) Component(s) Part Number Description R100, R102 122-0018-102 Resistor, 0603 SMT, 18Ω, 0.1W, 1% R101 120-0075-122 Resistor, 0805 SMT, 75Ω, 0.125W, 1% RGB100 24-0016-00 LED, SMT, High-Power RGB, 624/527/470nm J100 30-2203-04...
-
Page 229: Connector Pin-Outs
J100 Single RGB LED Board, 2.5mm 15-0028-01 J100 Single RGB LED Board, 2.5mm RGB100 RGB LED 15-0028-01 R100 Connector Pin-outs 18Ω R101 J100 RGB LED Control/Power Input 75Ω J100-1 +4VDC from an RGB LED Controller Board, J101, J102 or J103 R102 J100-2 XXX-GRN RGB100 GRN return to an RGB LED Controller Board, J101, J102 or J103 18Ω... - Page 230 Reference Diagrams & Schematics D-20 Double RGB LED Board, 1mm 15-0029-00 (games manufactured before Aug 11, 2016) Component(s) Part Number Description R100, R102, R103, R105 122-0018-102 Resistor, 0603 SMT, 18Ω, 0.1W, 1% R101, R104 120-0075-122 Resistor, 0805 SMT, 75Ω, 0.125W, 1% RGB100, RGB101 24-0016-00 LED, SMT, High-Power RGB, 624/527/470nm...
-
Page 231: Connector Pin-Outs
Double RGB LED Board, 1mm 15-0029-00 J100 J100 RGB100 RGB LED R100 18Ω R101 Double RGB LED Board, 1mm 75Ω 15-0029-00 R102 18Ω Connector Pin-outs RGB101 RGB LED R103 J100 RGB LED Control/Power Input 18Ω J100-1 XXX-BLU RGB101 BLU return to an RGB LED Controller Board, J101, J102 or J103 J100-2 XXX-RED RGB101 RED return to an RGB LED Controller Board, J101, J102 or J103... - Page 232 Reference Diagrams & Schematics D-22 Double RGB LED Board, 2.5mm 15-0029-01 (games manufactured on/after Aug 11, 2016) Component(s) Part Number Description R100, R102, R103, R105 122-0018-102 Resistor, 0603 SMT, 18Ω, 0.1W, 1% R101, R104 120-0075-122 Resistor, 0805 SMT, 75Ω, 0.125W, 1% RGB100, RGB101 24-0016-00 LED, SMT, High-Power RGB, 624/527/470nm...
- Page 233 Double RGB LED Board, 2.5mm 15-0029-01 J100 J100 RGB100 RGB LED R100 18Ω R101 Double RGB LED Board, 2.5mm 75Ω 15-0029-01 R102 18Ω Connector Pin-outs RGB101 RGB LED R103 J100 RGB LED Control/Power Input 18Ω J100-1 +4VDC from an RGB LED Controller Board, J101, J102 or J103 J100-2 XXX-GRN RGB101 GRN return to an RGB LED Controller Board, J101, J102 or J103...
- Page 234 Reference Diagrams & Schematics D-24 Triple RGB LED Board, 1mm 15-0030-00 (games manufactured before Aug 11, 2016) Component(s) Part Number Description R100, R102, R103, R105, R106, R108 122-0018-102 Resistor, 0603 SMT, 18Ω, 0.1W, 1% R101, R104, R107 120-0075-122 Resistor, 0805 SMT, 75Ω, 0.125W, 1% RGB100-RGB102 24-0016-00 LED, SMT, High-Power RGB, 624/527/470nm...
- Page 235 Triple RGB LED Board, 1mm 15-0030-00 J100 Triple RGB LED Board, 1mm RGB100 15-0030-00 RGB LED Connector Pin-outs R100 18Ω J100 R101 RGB LED Control/Power Input 75Ω J100-1 XXX-BLU RGB102 BLU return to an RGB LED Controller Board, J101, J102 or J103 J100-2 XXX-RED RGB102 RED return to an RGB LED Controller Board, J101, J102 or J103 R102...
- Page 236 Reference Diagrams & Schematics D-26 Triple RGB LED Board, 2.5mm 15-0030-01 (games manufactured on/after Aug 11, 2016) Component(s) Part Number Description R100, R102, R103, R105, R106, R108 122-0018-102 Resistor, 0603 SMT, 18Ω, 0.1W, 1% R101, R104, R107 120-0075-122 Resistor, 0805 SMT, 75Ω, 0.125W, 1% RGB100-RGB102 24-0016-00 LED, SMT, High-Power RGB, 624/527/470nm...
- Page 237 Triple RGB LED Board, 2.5mm 15-0030-01 J100 Triple RGB LED Board, 2.5mm RGB100 15-0030-01 RGB LED Connector Pin-outs R100 18Ω J100 R101 RGB LED Control/Power Input 75Ω J100-1 +4VDC from an RGB LED Controller Board, J101, J102 or J103 J100-2 XXX-GRN RGB102 GRN return to an RGB LED Controller Board, J101, J102 or J103 R102 J100-3 XXX-RED...
- Page 238 Reference Diagrams & Schematics D-28 Hobbit Arkenstone RGB LED Board, 1mm 15-0032-00 (games manufactured before Aug 11, 2016) Component(s) Part Number Description R100-R115 122-0018-102 Resistor, 0603 SMT, 18Ω, 0.1W, 1% R116-R123 120-0075-122 Resistor, 0805 SMT, 75Ω, 0.125W, 1% RGB100-RGB107 24-0016-00 LED, SMT, High-Power RGB, 624/527/470nm J100 30-2200-40...
- Page 239 Hobbit Arkenstone RGB LED Board, 1mm 15-0032-00 RGB100 RGB LED R100 18Ω J100 R116 75Ω R101 18Ω RGB101 RGB LED RGB102 R102 18Ω RGB LED R104 R117 75Ω 18Ω R103 R118 18Ω 75Ω R105 18Ω RGB103 RGB LED R106 18Ω RGB104 R119 RGB LED...
- Page 240 Reference Diagrams & Schematics D-30 Hobbit Arkenstone RGB LED Board, 1mm 15-0032-00 Connector Pin-outs J100 RGB LED Control/Power Input (RGB Cable 19-3095-05) J100-2 +4VDC from RGB LED Controller Board C, J102-3 J100-33 Not Used J100-4 BLK-GRN RGB100 GRN return to RGB LED Controller Board C, J102-6 J100-34 Not Used J100-6...
- Page 241 Hobbit Arkenstone RGB LED Board, 2.5mm 15-0032-01 (games manufactured on/after Aug 11, 2016) Component(s) Part Number Description R100-R115 122-0018-102 Resistor, 0603 SMT, 18Ω, 0.1W, 1% R116-R123 120-0075-122 Resistor, 0805 SMT, 75Ω, 0.125W, 1% RGB100-RGB107 24-0016-00 LED, SMT, High-Power RGB, 624/527/470nm J100 30-2203-34 Header, Male, 34-Pin, 2 Rows, 2.5mm...
- Page 242 Reference Diagrams & Schematics D-32 Hobbit Arkenstone RGB LED Board, 2.5mm 15-0032-01 RGB100 RGB LED R100 18Ω J100 R116 75Ω R101 18Ω RGB101 RGB LED RGB102 R102 18Ω RGB LED R104 R117 75Ω 18Ω R103 R118 18Ω 75Ω R105 18Ω RGB103 RGB LED R106...
- Page 243 Hobbit Arkenstone RGB LED Board, 2.5mm 15-0032-01 Connector Pin-outs J100 RGB LED Control/Power Input (RGB Cable 19-3095-15) J100-2 +4VDC from RGB LED Controller Board C, J102-3 J100-4 BLK-GRN RGB100 GRN return to RGB LED Controller Board C, J102-6 J100-6 BLK-RED RGB100 RED return to RGB LED Controller Board C, J102-4 J100-8 BLK-BLU RGB100 BLU return to RGB LED Controller Board C, J102-2...
- Page 244 Reference Diagrams & Schematics D-34 RGB LED Controller Board, 1mm 15-0031-00 (games manufactured before Aug 11, 2016) Component(s) Part Number Description C100, C101 109-100M-035 Capacitor, Elect (Radial), 100μF, 35V, 20% C102-C105 103-105Z-016 Capacitor, MLCC, 0603 SMT, 1μF, 16V, +80%, -20% D101-D103 110-1001-0S Diode, 1N4148, SMT, 100V, 300mA...
- Page 245 RGB LED 0-7 Control RGB LED 16-23 Control J104 Power PCU9656 SW100 LED0 Input J101 J103 LED1 J100 UFm I2C LED2 R109 0Ω LED3 ST26C32AB Communications R108 0Ω LED4 LED5 R110 0Ω LED6 R111 0Ω R100 LED7 10kΩ LED8 RJ45 R101 LED9 Connector...
- Page 246 Reference Diagrams & Schematics D-36 J100 RGB LED Controller Board A 15-0031-00 (1mm) Connector Pin-outs J100 Power Input J100-1 +4VDC from 7.5/4VDC Pwr Supply J104 J105 J100-2 +5VDC from Primary ATX Pwr Supply J100-3 Ground from 7.5/4VDC Pwr Supply J101 Upper Right RGB LED Control (RGB Cable 19-3095-01) RGB LED 25 [Bilbo Arrow] J101-2 BLK-BLU...
- Page 247 J101 Upper Right RGB LED Control (RGB Cable 19-3095-01, cont.) RGB LED 34 [Balin, Right] J102-8 BRN-BLU RGB101 BLU return from Double RGB LED Board 33/34, J100-1 RGB LED 30 [Pop Bumpers, Right] J102-10 BRN-RED RGB101 RED return from Double RGB LED Board 33/34, J100-2 J101-32 GRN-BLU RGB100 BLU return from Single RGB LED Board 30, J100-4...
- Page 248 Reference Diagrams & Schematics D-38 J102 Upper Left RGB LED Control (RGB Cable 19-3095-02, cont.) RGB LED 46 [Gandalf Ramp BOOK Cut-out] J102-19 Not Used J103-32 GRN-BLU RGB100 BLU return from Double RGB LED Board 46/47, J100-5 J103-34 GRN-RED RGB100 RED return from Double RGB LED Board 46/47, J100-6 J102-23 Not Used J103-36...
- Page 249 J100 RGB LED Controller Board B 15-0031-00 (1mm) Connector Pin-outs J100 Power Input J100-1 +4VDC from 7.5/4VDC Pwr Supply J104 J105 J100-2 +5VDC from Primary ATX Pwr Supply (jumped from RGB LED Controller Bd A, J100-2) J100-3 Ground from 7.5/4VDC Pwr Supply J101 Middle Left RGB LED Control (RGB Cable 19-3095-04) RGB LED 49 [Gloin]...
- Page 250 Reference Diagrams & Schematics D-40 J101 Middle Left RGB LED Control (RGB Cable 19-3095-04, cont.) RGB LED 58 [Lock 1] J102-8 BRN-BLU RGB101 BLU return from Arkenstone RGB LED Board, J100-7 RGB LED 54 [Balin Arrow] J102-10 BRN-RED RGB101 RED return from Arkenstone RGB LED Board, J100-5 J101-32 GRN-BLU RGB102 BLU return from Triple RGB LED Board 52/53/54, J100-1...
- Page 251 J102 Lower Middle RGB LED Control (RGB Cable 19-3095-05, cont.) RGB LED 70 [Return Lane Warg] J103-32 GRN-BLU RGB101 BLU return from Double RGB LED Board 69/70, J100-1 J102-19 Not Used J103-34 GRN-RED RGB101 RED return from Double RGB LED Board 69/70, J100-2 J102-23 Not Used J103-36 GRN-GRY RGB101 GRN return from Double RGB LED Board 69/70, J100-3...
- Page 252 Reference Diagrams & Schematics D-42 J100 RGB LED Controller Board C 15-0031-00 (1mm) Connector Pin-outs J100 Power Input J100-1 +4VDC from 7.5/4VDC Pwr Supply (jumped from RGB LED Controller Bd B, J100-1) J104 J105 J100-2 +5VDC from Primary ATX Pwr Supply (jumped from BAG Controller Bd, J100-3) J100-3 Ground from 7.5/4VDC Pwr Supply (jumped from RGB LED Controller Bd B, J100-3) J101...
- Page 253 J101 Lower Right RGB LED Control (RGB Cable 19-3095-07, cont.) RGB LED 82 [LOCK Rollover] J102-8 BRN-BLU RGB100 BLU return from Single RGB LED Board 82, J100-4 RGB LED 78 [Return Lane Goblin] J102-10 BRN-RED RGB100 RED return from Single RGB LED Board 82, J100-3 J101-32 GRN-BLU RGB101 BLU return from Double RGB LED Board 77/78, J100-1...
- Page 254 Reference Diagrams & Schematics D-44 J102 Middle RGB LED Control (RGB Cable 19-3095-08, cont.) RGB LED 94 [EXTRA BALL] J103-32 GRN-BLU RGB100 BLU return from Triple RGB LED Board 94/95/96, J100-9 J102-19 Not Used J103-34 GRN-RED RGB100 RED return from Triple RGB LED Board 94/95/96, J100-10 J102-23 Not Used J103-36...
- Page 255 RGB LED Controller PCB Assy, 2.5mm, w/Ferrites 15-4031-02 (games manufactured on/after Aug 11, 2016) Component(s) Part Number Description BARE PCB 15-0031-01 RGB LED Controller Board, 2.5mm C100, C101 109-100M-035 Capacitor, Elect (Radial), 100μF, 35V, 20% C102-C105 103-105Z-016 Capacitor, MLCC, 0603 SMT, 1μF, 16V, +80%, -20% C106-C184 103-102K-050 Capacitor, MLCC, 0603 SMT, 1000pF, 50V, 10%...
- Page 256 Reference Diagrams & Schematics D-46 RGB LED Controller J104 FB109 C113 1000pF FB110 Controller PCB Assy, 2.5mm, w/Ferrites UFm I2C R109 0Ω C114 1000pF RGB LED FB108 FB111 Communications ST26C32AB R108 0Ω 0-7 Control C115 1000pF 15-4031-02 R110 0Ω FB112 J101 FB107 C116...
- Page 257 J100 RGB LED Controller Board A 15-4031-02 (2.5mm, w/Ferrites) Connector Pin-outs J100 Power Input J104 J105 J100-1 +4VDC from 7.5/4VDC Pwr Supply J100-2 +5VDC from Primary ATX Pwr Supply J100-3 Ground from 7.5/4VDC Pwr Supply J101 Upper Right RGB LED Control (RGB Cable 19-3095-11) RGB LED 25 [Bilbo Arrow] J101-1 +4VDC to Double RGB LED Board 25/26, J100-1 J101-2...
- Page 258 Reference Diagrams & Schematics D-48 J101 Upper Right RGB LED Control (RGB Cable 19-3095-11, cont.) RGB LED 37 [Bifur] J102-18 YEL-GRN RGB102 BLU return from Triple RGB LED Board 35/36/37, J100-10 RGB LED 30 [Pop Bumpers, Right] J102-19 YEL-RED RGB102 RED return from Triple RGB LED Board 35/36/37, J100-9 J101-21 +4VDC to Single RGB LED Board 30, J100-1 J102-20...
- Page 259 J103 RGB LED 48 [Ring Button Light] Upper Middle RGB LED Control (RGB Cable 19-3095-13) J103-29 +4VDC to Single RGB LED Board 48, J100-1, thru 6-pin inline connector RGB LED 41 [Gandalf Parchment] J103-30 VIO-BLU RGB100 BLU return from Single RGB LED Board 48, J100-4, thru 6-pin inline connector J103-1 +4VDC to Double RGB LED Board 41/42, J100-1 J103-31...
- Page 260 Reference Diagrams & Schematics D-50 J100 RGB LED Controller Board B 15-4031-02 (2.5mm, w/Ferrites) Connector Pin-outs J100 Power Input J104 J105 J100-1 +4VDC from 7.5/4VDC Pwr Supply J100-2 +5VDC from Primary ATX Pwr Supply (jumped from RGB LED Controller Bd A, J100-2) J100-3 Ground from 7.5/4VDC Pwr Supply J101...
- Page 261 J101 RGB LED 60 [Barrel Escape] Middle Left RGB LED Control (RGB Cable 19-3095-14, cont.) J102-14 ORN-BLU RGB103 BLU return from Arkenstone RGB LED Board, J100-16 RGB LED 54 [Balin Arrow] J102-15 ORN-RED RGB103 RED return from Arkenstone RGB LED Board, J100-15 J101-22 GRN-BLU RGB102 BLU return from Triple RGB LED Board 52/53/54, J100-10 J102-16 ORN-GRN RGB103 GRN return from Arkenstone RGB LED Board, J100-14...
- Page 262 Reference Diagrams & Schematics D-52 J103 Lower Left RGB LED Control (RGB Cable 19-3095-16) J103-32 Not Used J103-33 Not Used RGB LED 65 [Spider Pop-Up Parchment] J103-34 Not Used J103-1 +4VDC to Double RGB LED Board 65/66, J100-1 J103-5 Not Used J103-2 BLK-BLU RGB100 BLU return from Double RGB LED Board 65/66, J100-4 J103-13 Not Used J103-3...
- Page 263 J100 RGB LED Controller Board C 15-4031-02 (2.5mm, w/Ferrites) Connector Pin-outs J100 Power Input J104 J105 J100-1 +4VDC from 7.5/4VDC Pwr Supply (jumped from RGB LED Controller Bd B, J100-1) J100-2 +5VDC from Primary ATX Pwr Supply (jumped from BAG Controller Bd, J100-3) J100-3 Ground from 7.5/4VDC Pwr Supply (jumped from RGB LED Controller Bd B, J100-3) J101...
- Page 264 Reference Diagrams & Schematics D-54 J101 Lower Right RGB LED Control (RGB Cable 19-3095-17, cont.) RGB LED 85 [Thorin Parchment] J102-17 +4VDC to Double RGB LED Board 85/86, J100-1 RGB LED 78 [Return Lane Goblin] J102-18 YEL-GRN RGB100 BLU return from Double RGB LED Board 85/86, J100-4 J101-22 GRN-BLU RGB101 BLU return from Double RGB LED Board 77/78, J100-8...
- Page 265 J103 Middle Right RGB LED Control (RGB Cable 19-3095-19) J103-9 Not Used J103-17 Not Used RGB LED 89 [Ori] J103-25 Not Used J103-1 +4VDC to Triple RGB LED Board 89/90/91, J100-1 J103-29 Not Used J103-2 BLK-BLU RGB100 BLU return from Triple RGB LED Board 89/90/91, J100-4 J103-3 BLK-RED RGB100 RED return from Triple RGB LED Board 89/90/91, J100-3...
- Page 266 Reference Diagrams & Schematics D-56...
- Page 267 BAG Controller PCB Assy, 1mm 15-4033-00 (games manufactured before Aug 11, 2016) Component(s) Part Number Description Component(s) Part Number Description BARE PCB 15-0033-00 Bus, Accelerometer & GI Board, 1mm R123, R124 122-01K1-104 Resistor, 0603 SMT, 1.1kΩ, 0.1W, 5% C100-C102 109-100M-035 Capacitor, Elect (Radial), 100μF, 35V, 20% R125, R126 122-0027-102...
- Page 268 Reference Diagrams & Schematics D-58 J103 +3.3V R144 150Ω PCU9669 +3.3V J102 R141 10kΩ R114 51.1Ω DD(IO) UFm I2C R142 10kΩ R143 150Ω TRST R113 51.1Ω Communications R122 1kΩ Fm+ I2C R112 51.1Ω R121 0Ω Communications R111 51.1Ω Shield R120 1kΩ...
- Page 269 GI LED Control J105 PCU9656 BAG Controller PCB Assy, 1mm LED0 LED1 7.5V LED2 LED3 7.5V 15-4033-00 LED4 LED5 7.5V LED6 pg 2 of 2 7.5V LED7 J106 LED8 LED9 7.5V Power Input & GI Control 7.5V LED10 LED11 7.5V 7.5V LED12 LED13...
- Page 270 Reference Diagrams & Schematics D-60 J100 BAG Controller PCB Assy, 1mm 15-4033-00 Connector Pin-outs J105 J102 J103 J100 DC Power Input J100-1 Not Used J100-2 +7.5VDC from 7.5/4VDC Pwr Supply J113 J100-3 +5VDC from Primary ATX Pwr Supply (jumped from RGB LED Controller Bd B, J100-2) J114 J100-4 Ground from 7.5/4VDC Pwr Supply...
- Page 271 J107 J105 GI Control Lower Left GI Control (GI Cable 19-3092-01) J107-1 Not Used J105-1 +7.5V to GI Board 3R [Left Side #7 (Low)], J100-1 J107-2 Not Used J105-2 GRY-VIO LED return from GI Board 3R [Left Side #7 (Low)], J100-2 J107-3 Not Used J105-3 +7.5V to GI Board 3B [Left Return #1 (High)], J100-1 J107-4...
- Page 272 Reference Diagrams & Schematics D-62 J109 J111 Left/Right Side Flasher Control (Flasher Cable 19-3092-06) GI Control J109-1 Not Used J111-1 Not Used J109-2 Not Used J111-2 Not Used J109-3 +7.5V to GI Board 13G [Ramp U-Turn Diverter], J100-1 J111-3 Not Used J109-4 GRY-BLU LED return from GI Board 13G [Ramp U-Turn Diverter], J100-2 J111-4 Not Used J109-5...
- Page 273 J113 J115 Lower Right GI Control (GI Cable 19-3092-02) Auxiliary I/O J113-1 +7.5V to GI Board 24G [Right Side #4], J100-1 J115-1 Not Used J113-2 GRY-VIO LED return from GI Board 24G [Right Side #4], J100-2 J115-2 Not Used J113-3 +7.5V to GI Board 24R [Right Side #5 (Low)], J100-1 J115-3 Not Used J113-4...
- Page 274 Reference Diagrams & Schematics D-64...
- Page 275 BAG Controller PCB Assy, 2.5mm, w/Ferrites 15-4033-02 (games manufactured on/after Aug 11, 2016) Component(s) Part Number Description Component(s) Part Number Description BARE PCB 15-0033-01 Bus, Accelerometer & GI Controller Bd, 2.5mm R120, R122 122-001K-104 Resistor, 0603 SMT, 1kΩ, 0.1W, 5% C100-C102 109-100M-035 Capacitor, Elect (Radial), 100μF, 35V, 20%...
- Page 276 Reference Diagrams & Schematics D-66 J103 +3.3V +3.3V R144 150Ω PCU9669 FB190 J102 R141 10kΩ R114 51.1Ω DD(IO) UFm I2C R142 10kΩ R143 150Ω TRST FB189 R113 51.1Ω FB194 Communications R122 1kΩ Fm+ I2C R112 51.1Ω FB193 FB188 C132 FB187 R121 0Ω...
- Page 277 BAG Controller PCB Assy, 2.5mm, w/Ferrites J105 GI LED Control 7.5V PCU9656 FB111 LED0 15-4033-02 C136 1000pF 7.5V LED1 FB112 LED2 C137 1000pF 7.5V LED3 pg 2 of 2 FB113 LED4 C138 1000pF 7.5V LED5 FB114 Power Input & GI Control LED6 C139 1000pF...
- Page 278 Reference Diagrams & Schematics D-68 J100 BAG Controller PCB Assy, 2.5mm, w/Ferrites 15-4033-02 J102 J103 Connector Pin-outs J100 DC Power Input J100-1 Not Used J100-2 +7.5VDC from 7.5/4VDC Pwr Supply J114 J116 J100-3 +5VDC from Primary ATX Pwr Supply (jumped from RGB LED Controller Bd B, J100-2) J100-4 Ground from 7.5/4VDC Pwr Supply J101...
- Page 279 J107 J105 GI Control Lower Left GI Control (GI Cable 19-3092-11) J107-1 Not Used J105-1 +7.5V to GI Board 1B [Left Sling #1 (High)], J100-1 J107-2 Not Used J105-2 GRY-BLK LED return from GI Board 1B [Left Sling #1 (High)], J100-2 J107-3 Not Used J105-3 +7.5V to GI Board 1R [Left Sling #2], J100-1 J107-4...
- Page 280 Reference Diagrams & Schematics D-70 J109 J111 Left/Right Side Flasher Control (Flasher Cable 19-3092-16) GI Control J109-1 +7.5V to GI Board 11G [Left Upper Flasher], J100-1 J111-1 Not Used J109-2 GRY-BLK LED return from GI Board 11G [Left Upper Flasher], J100-2 J111-2 Not Used J109-3 +7.5V to GI Board 12B [Left Middle Flasher], J100-1 J111-3...
- Page 281 J113 J115 Lower Right GI Control (GI Cable 19-3092-12) Auxiliary I/O J113-1 +7.5V to GI Board 22R [Right Sling #1 (High)], J100-1 J115-1 Not Used J113-2 GRY-BLK LED return from GI Board 22R [Right Sling #1 (High)], J100-2 J115-2 Not Used J113-3 +7.5V to GI Board 22G [Right Sling #2], J100-1 J115-3 Not Used J113-4...
- Page 282 Reference Diagrams & Schematics D-72 Hobbit Smaug Controller Board 15-0035-00 Component(s) Part Number Description Component(s) Part Number Description C100-C102 103-104K-025 Capacitor, MLCC, 0603 SMT, 0.1μF, 25V, 10% R107, R108, R113, C103 109-100M-035 Capacitor, Elect (Radial), 100μF, 35V, 20% R115, R120 122-001K-104 Resistor, 0603 SMT, 1kΩ, 0.1W, 5% D100...
- Page 283 D101 1N4148 D102 Power Input & 1N4148 OPTO101 Switch Matrix 74HC3G14 Q103 R107 1kΩ Connections 2222A OPTO100 OPTO101 R108 1kΩ F100 J100 3A SLOW Q104 2222A Row 4 Q100 Q101 OPTO100 2222A 2222A Row 6 Col 4 D100 RS1G Hobbit Smaug Controller Board 15-0035-00 Fm+ I2C Communications...
- Page 284 Reference Diagrams & Schematics D-74 Hobbit Smaug Controller Board J100 15-0035-00 Connector Pin-outs J100 Power Input/Switch Matrix Connections J100-1 +5VDC from Primary ATX Pwr Supply J100-2 WHT-ORN Matrixed switches, Row 4 from I/O Board, J200-4 J100-3 WHT-GRN Matrixed switches, Row 6 from I/O Board, J200-6 J100-4 Not Used J100-5...
- Page 285 Sound Amplifier Board, 15-0002-00 Component(s) Part Number Description R22, R27, R31, R40, R47 122-09K1-102 Resistor, 0603 SMT, 9.1kΩ, 0.1W, 1% 122-082K-102 Resistor, 0603 SMT, 82kΩ, 0.1W, 1% R59-R61, R63 122-04K7-102 Resistor, 0603 SMT, 4.7kΩ, 0.1W, 1% Component(s) Part Number Description R3, R10, R11, C1, C4, C11, C13, R50, R52, R55, R57...
- Page 286 Reference Diagrams & Schematics D-76 CPU In Aux Out 0Ω R10* 0Ω R11* Shutdown Indicator LED BB Speakers +24V 100nF 3.5 mm 3.5 mm Jack Jack 0Ω 1kΩ 470µF 50V 47µH PVCCL PGNDL LM324 22kΩ PGNDL LED5 Headphone White RCA PVCCL LOUT +24V...
- Page 287 Sound Amplifier Board, 15-0002-00 Connector Pin-outs DC Power Input Headphone/Volume Control Connection J1-1 +24VDC from Primary ATX Pwr Supply RJ45 cable to Volume Control Board (on back of coin door), J1 J1-2 Not Used J1-3 Ground from Primary ATX Pwr Supply Backbox Speaker Connection (Left) J1-4 Not Used WHT RCA cable to Backbox Speaker Bar (left side RCA jack) Audio Input Backbox Speaker Connection (Right)
- Page 288 Reference Diagrams & Schematics D-78 Volume Control Board 15-0013-00 Component(s) Part Number Description C1-C5, C10, C12, C16 103-105K-025 Capacitor, MLCC, 0603 SMT, 1μF, 25V, 10% C6, C11, C13 103-104K-050 Capacitor, MLCC, 0603 SMT, 100nF, 50V, 10% 103-101K-050 Capacitor, MLCC, 0603 SMT, 100pF, 50V, 10% 109-470M-050 Capacitor, Elect (Radial), 470μF, 50V, 20% C8, C14...
- Page 289 Volume Control Board Amplifier 10kΩ 15-0013-00 1MΩ 1µF Headphone LED1 220Ω Headphone Headphone_Amp_Out_L Volume Control PVDD OUTL LED2 220Ω BIAS Headphone_Amp_Out_R MAX97220B PGND OUTR 100nF SVDD2 Volume LED3 220Ω Control Switches 3.5 mm Jack LOGIC DN/BALR MODEIND Down LED4 220Ω 1µF UP/BALL LEDIND4...
- Page 290 Reference Diagrams & Schematics D-80 I/O PCB Assy, HOB 15-4001-01 Component(s) Part Number Description Component(s) Part Number Description BARE PCB 15-0001-00 I/O Board C704-C705 101-104K-630 Capacitor, MLCC, Leaded, 100nF, 630V, 10% BR701-BR704 150-0001-0T Bridge Rectifier, Wire Leads, 600V, 35A C800-C804 Not Populated C001-C008 100-471J-050...
- Page 291 Component(s) Part Number Description Component(s) Part Number Description D701-D714, D200, D203 24-0014-0S LED, 0805 SMD, RED, 621nm R701, R702, R724-R728 121-06K8-2H4 Resistor, Leaded, 6.8kΩ, 2W, 5% D806-D810 Not Populated R703, R730-R732 121-02K7-2H4 Resistor, Leaded, 2.7kΩ, 2W, 5% F701, F702 170-0110-SM Fuse, Time Delay, 10A, 250V, 5mm x 20mm R704, R729, R733 121-01K2-2H4...
- Page 292 Reference Diagrams & Schematics D-82 I/O PCB Assy, HOB R001 CPU Communication 100Ω 15-4001-01 R017 (Switch Monitoring, 4.7kΩ Device Control) R002 Switch Matrix 100Ω pg 1 of 14 Rows 1-8 C202 22pF 74HCT245 PIC18F4550 Matrixed Switches R003 J200 JUSB 100Ω D200 Row 1 Row 2...
- Page 293 I/O PCB Assy, HOB 15-4001-01 pg 2 of 14 R643 R603 220Ω 220Ω Dedicated Switches Dedicated Dedicated R602 R642 220Ω 220Ω Switch Switch Returns 1-8 Returns 17-24 CLOCK R644 R604 220Ω 220Ω LOAD J601 J603 74HCT165 74HCT165 R605 R645 220Ω 220Ω...
- Page 294 Reference Diagrams & Schematics D-84 BLANKING D[0..7] OE[1..12] 74HCT574 74HCT574 74HCT574 I/O PCB Assy, HOB TR49 TR25 15-4001-01 TR50 TR26 TR51 TR27 pg 3 of 14 TR52 TR28 TR53 TR29 Device Control TR54 TR30 TR55 TR31 TR56 TR32 TR[1..8] TR[25..32] TR[49..56] 74HCT574 74HCT574...
- Page 295 I/O PCB Assy, HOB 15-4001-01 +70V pg 4 of 14 Drives 70-Volt Drivers (1-8) D705 J104 Q301 IRL540 R300 220Ω R301 220Ω Q302 R302 220Ω IRL540 R303 220Ω R304 220Ω R305 220Ω R306 220Ω Q303 TR[1..8] IRL540 R307 220Ω Q304 IRL540 Q305 IRL540...
- Page 296 Reference Diagrams & Schematics D-86 I/O PCB Assy, HOB 15-4001-01 +70V pg 5 of 14 Drives 9-16 70-Volt Drivers (9-16) D706 J105 Q311 IRL540 TR16 R320 220Ω TR15 R321 220Ω TR14 TR13 R322 220Ω Q312 IRL540 TR12 R323 220Ω TR11 TR10 R324 220Ω...
- Page 297 I/O PCB Assy, HOB 15-4001-01 +70V pg 6 of 14 Drives 17-24 70-Volt Drivers (17-24) D707 J106 Q321 IRL540 TR24 R340 220Ω TR23 R341 220Ω TR22 TR21 R342 Q322 220Ω IRL540 TR20 R343 220Ω TR19 TR18 R344 220Ω TR17 R345 220Ω...
- Page 298 Reference Diagrams & Schematics D-88 I/O PCB Assy, HOB 15-4001-01 +70V pg 7 of 14 Drives 25-32 70-Volt Drivers (25-32) D708 J107 Q331 IRL540 TR32 R360 220Ω TR31 R361 220Ω TR30 TR29 R362 Q332 220Ω IRL540 TR28 R363 220Ω TR27 TR26 R364 220Ω...
- Page 299 I/O PCB Assy, HOB 15-4001-01 +70V pg 8 of 14 Drives 33-40 70-Volt Drivers (33-40) D709 J108 Q401 IRL540 TR40 R400 220Ω TR39 R401 220Ω TR38 TR37 R402 Q402 220Ω IRL540 TR36 R403 220Ω TR35 TR34 R404 220Ω TR33 R405 220Ω...
- Page 300 Reference Diagrams & Schematics D-90 I/O PCB Assy, HOB 15-4001-01 +20V pg 9 of 14 Drives 49-56 20-Volt Drivers (49-56) D711 J110 Q421 IRL540 TR49 R440 220Ω TR50 R441 220Ω TR51 TR52 R442 Q422 220Ω IRL540 TR53 R443 220Ω TR54 TR55 R444 220Ω...
- Page 301 I/O PCB Assy, HOB 15-4001-01 +20V pg 10 of 14 Drives 57-64 20-Volt Drivers (57-64) D712 J111 Q431 IRL540 TR57 R460 220Ω TR58 R461 220Ω TR59 TR60 R462 Q432 220Ω IRL540 TR61 R463 220Ω TR62 TR63 R464 220Ω TR64 R465 220Ω...
- Page 302 Reference Diagrams & Schematics D-92 I/O PCB Assy, HOB 15-4001-01 +20V pg 11 of 14 Drives 65-72 20-Volt Drivers (65-72) D713 J112 Q501 IRL540 TR65 R500 220Ω TR66 R501 220Ω TR67 TR68 R502 Q502 220Ω IRL540 TR69 R503 220Ω TR70 TR71 R504 220Ω...
- Page 303 I/O PCB Assy, HOB 15-4001-01 +12V pg 12 of 14 Drives 41-48 12-Volt Drivers (41-48) D710 J109 Q411 IRL540 TR41 R420 220Ω TR42 R421 220Ω TR43 TR44 R422 Q412 220Ω IRL540 TR45 R423 220Ω TR46 TR47 R424 220Ω TR48 R425 220Ω...
- Page 304 Reference Diagrams & Schematics D-94 I/O PCB Assy, HOB 15-4001-01 +12V Drives pg 13 of 14 73-80 12-Volt Drivers (73-80) J113 D714 Q511 IRL540 TR73 R520 220Ω TR74 R521 220Ω TR75 TR76 R522 Q512 220Ω IRL540 TR77 R523 220Ω TR78 TR79 R524 220Ω...
- Page 305 +12V DC Power I/O PCB Assy, HOB Input C801* PWR1 15-4001-01 PIC18F2550 pg 14 of 14 U800 Power Input/Rectification Flash Access 1A FAST PC Disk Drive OSC1 Power Connector J804* OSC2 MCLR AC Power Input J701 49VAC 49VAC +70V +70V CPU Communication R701 R702...
- Page 306 Reference Diagrams & Schematics D-96 J604 J603 J602 J601 J109 J113 J112 J111 J110 J702 J200 J202 J701 J201 J108 J107 J106 J105 J104 PWR1 J203 JUSB I/O PCB Assy, HOB 15-4001-01 Connector Pin-outs J104 J105 J106 70-Volt Coil Drives (1-8) 70-Volt Coil Drives (9-16) 70-Volt Coil Drives (17-24) J104-1 +70VDC supply to coils below J105-1...
- Page 307 J107 70-Volt Coil Drives (25-32) J110 J113 20-Volt Coil Drives (49-56) 12-Volt Coil Drives (73-80) J107-1 +70VDC supply to coils/magnets below J110-1 +20VDC supply to coils/magnets below J113-1 J107-2 TAN-VIO Coil drive 32 [Upper Slingshot] J110-2 PLM-BLK Coil drive 49 [ELF Drop Target Retract] J113-2 LT BLU +12VDC supply to light below J107-3 TAN-BLU Coil drive 31 [Spider Pop-Up Hold]...
- Page 308 Reference Diagrams & Schematics D-98 J202 J602 Matrixed Switches, Columns (9-16) Dedicated Switches (9-16) J202-1 GRY-BLK Column 9 to playfield switches J602-1 Dedicated switch common (Ground) J202-2 GRY-BRN Column 10 to playfield switches J602-2 YEL-GRY Dedicated switch return 13 [Enter/Menu Button] J202-3 GRY-RED Column 11 to playfield switches J602-3 YEL-GRN Dedicated switch return 14 [Up/Volume+ Button]...
- Page 309 J604 J800 Dedicated Switches (25-32) CPU Communication J604-1 Dedicated switch common (Ground) Not Used (Not Populated) J604-2 VIO-YEL Not Used J604-3 VIO-GRN Not Used J802 RGB LED Control J604-4 VIO-ORN Not Used Not Used (Not Populated) J604-5 VIO-RED Dedicated switch return 27 [Ring Button] J604-6 VIO-BRN Dedicated switch return 26 [Coin Door Open]...
- Page 310 Reference Diagrams & Schematics D-100 CPUFAN JPWR2 USB1 USB2 DVI1 VGA1 JPWR1 SYSFAN1 AUDIO1 SATA1 CPU Board, 15-0000-01 Connector Pin-outs...
- Page 311 JPWR2 SATA1 DC Power Input SATA Data Input/Output JPWR2-1 Ground from Primary ATX Pwr Supply SATA cable to solid state hard drive (inside Cabinet PCB Chassis) JPWR2-2 Ground jumpered from pin 1 JPWR2-3 YEL-BLK +12VDC from Primary ATX Pwr Supply SYSFAN1 System Fan Power JPWR2-4 YEL-BLK +12VDC jumpered from pin 3 Secondary connection for CPU fan (on CPU Board) CPUFAN...
- Page 312 Reference Diagrams & Schematics D-102 10, 11 Rear Panel of Cabinet PCB Chassis Assy, HOB, 15-5000-02 Pass-through Connector Pin-outs Inside PCB Chassis Wire Color Outside PCB Chassis Inside PCB Chassis Pin Wire Color Outside PCB Chassis CPU Board Connections Subwoofer Speaker CPU PS-2 Mouse Input J1-1 Not Used Sound Amplifier Bd, J8...
- Page 313 Inside PCB Chassis Wire Color Outside PCB Chassis Inside PCB Chassis Wire Color Outside PCB Chassis I/O Board, J104-9 J7-19 BRN-BLK Coil drive 1 [MAN Drop Target Reset] 20-Volt Coil Drives (65-72) J7-20 Not Used I/O Board, J112-1 J6-1 +70VDC supply to coils below I/O Board, J112-10 J6-2 VIO-BLK...
- Page 314 Reference Diagrams & Schematics D-104 Inside PCB Chassis Wire Color Outside PCB Chassis Inside PCB Chassis Wire Color Outside PCB Chassis I/O Board, J200-6 J9-16 WHT-GRN Row 6 to playfield switches 7.5/4VDC Pwr Supply J12-7 +4VDC to RGB LED Controller Bds I/O Board, J200-7 J9-17 WHT-BLU...
- Page 315 Inside PCB Chassis Wire Color Outside PCB Chassis Inside PCB Chassis Wire Color Outside PCB Chassis I/O Board, J110-6 J19-7 PLM-ORN Not Used Dedicated Switches (1-8) I/O Board, J110-5 J19-8 PLM-RED Coil drive 51 [ELF Drop Target Retract] I/O Board, J601-1 J17-1 Dedicated switch common (Ground) I/O Board, J110-3 J19-9...
- Page 316 Reference Diagrams & Schematics D-106 European Coin Door Board 15-0017-00 Component(s) Part Number Description Q1-Q6 131-0001-0S Transistor, 3906, SOT-23 SMT, PNP R1-R6 120-1K00-124 Resistor, 0805 SMT, 1kΩ, 0.125W, 5% European Coin Door Board R7-R12 120-10K0-124 Resistor, 0805 SMT, 10kΩ, 0.125W, 5% 31-2513-10 Connector Header, Male, 10-pin, 2 Rows, 2.54mm 15-0017-00...
- Page 317 European Coin Door Board 15-0017-00 Connector Pin-outs Coin Mech Comms Dedicated Switch Connections DC Power Input 10-pin Ribbon cable J2-1 Dedicated switch common (Ground), I/O Board, J603-1 J3-1 Ground from Primary ATX Pwr Supply J1-1 -> J2-2 BLU-BLK Dedicated switch return 17 [Left Coin Switch], I/O Board, J603-7 J3-2 Not Used J1-2...
-
Page 318: Fuse Locations
Reference Diagrams & Schematics D-108 Fuse Locations... -
Page 319: Fuse Information
Fuse Information Power Box Assembly Sound Amplifier Board I/O Board Line Fuse F709 F713 F712 F710 I/O Board F711 F705 F705 F704 F706 F707 F708 Fuse Identifier(s) Description Part Number Fuse Identifier(s) Description Part Number F701, F702 Fuse, Time Delay, 10A, 250V, 5mm x 20mm 170-0110-SM F1, F2 Fuse, Fast-Acting, 1A, 32V, Mini Blade... -
Page 320: Fused Power Stream
Reference Diagrams & Schematics D-110 Fused Power Stream 70V Coils - MAN Drop Target Resets (3), Right Flipper Power & Hold, Goblin Pop-up Power & Hold, Ramp U-Turn Diverter F704 F701 F705 70V Coils - ELF Drop Target Resets (3), Le� Flipper Power & Hold, Orc Pop-up Power & Hold, Le� Slingshot 6.3A F706 - DWARF Drop Target Resets (5), Warg Pop-up Power &... -
Page 321: Lower Cabinet Wiring Diagram
Lower Cabinet Wiring Diagram Connection on playfield Connection in backbox Connection in lower cabinet Unused Connector 61/9 Connector used to select the game’s Left Flipper Shaker 1 drive/3 returns supply AC voltage (120V or 220V) Lower Switch Motor For Redemption Knocker Ticket Motor For Backbox Topper Light... -
Page 322: Backbox Wiring Diagram
Reference Diagrams & Schematics D-112 Backbox Wiring Diagram Backbox Topper Backbox Topper Light 1 drive/1supply LED Strip Connection in lower cabinet 1 drive/1supply Knocker Connection in backbox Backbox Speaker Bar L & R Audio Cables RCA Audio Cables 1 (L) 1 (L) 1 (R) Left Speaker... -
Page 323: Supply Voltage Conversion
Supply Voltage Conversion If you need to convert your game to a different supply voltage than it was wired for at the factory, locate the 9-pin connector at the input of the transformer, in Hobbit 120V AC the bottom of the lower cabinet (shown opposite and in the green box on page Configuration D-111). - Page 324 Reference Diagrams & Schematics D-114...
- Page 325 Section E Game Service & Troubleshooting Game Service & Troubleshooting...
-
Page 326: E.1 The Hobbit Smaug Assembly Removing The Smaug Assembly
Game Service & Troubleshooting E.1 The Hobbit Smaug Assembly Removing the Smaug Assembly Preparations: Tools Required: Ensure that all 5 pinballs are in the trough or completely removed from the game (not in the shooter lane, sub- Wire cutters way or either of the VUK holes). Power down the game. -
Page 327: Disassembling The Sculpture
Disassembling the Sculpture Preparations: Disconnect and remove the Smaug Assembly Tools Required: from the playfield and place it on a flat surface, using the bottom #1 Phillips screwdriver of the stepper motor as a base. #2 Phillips screwdriver 1/4" wrench or socket/ratchet Using the #2 Phillips screwdriver, remove the two sheet metal screws (one on either side) holding Smaug's head/upper jaw sculpture in place (see figure E2). -
Page 328: Removing The Jaw Crank Link & Servo Horn
Game Service & Troubleshooting Removing the Jaw Crank Link & Servo Horn Tools Required: Preparations: Disconnect and remove the Smaug Assembly from the playfield and place it on a flat surface, using the bottom #2 Phillips screwdriver of the stepper motor as a base. Remove the head/upper jaw, back 5/64"... -
Page 329: Calibrating The Servo Horn
Calibrating the Servo Horn Tools Required: Preparations: Disconnect and remove the Smaug Assembly from the playfield and place it on a flat surface, using the bottom #2 Phillips screwdriver of the stepper motor as a base. Remove the head/upper jaw, back 5/64"... - Page 330 Game Service & Troubleshooting While holding Smaug's lower jaw in the highest position possible (as "closed" as possible), firmly press the servo horn completely back onto the servo motor hub (figure E5). IMPORTANT: DO NOT allow the motor hub/ shaft to turn AT ALL as you reinstall the servo horn! Using the #2 Phillips screwdriver, install the retaining screw, through the center of the servo horn, into the end of the servo motor hub.
-
Page 331: E.2 Coin Door Sound Controls
Volume UP LEDs Volume DOWN The Hobbit sound system features a stereo headphone jack on the front of the coin door, along with volume and mute controls (circled in figure E7). To adjust the headphone levels, use the vol- MUTE ume up and down buttons. -
Page 332: E.3 The Hobbit Lighting System Theory Of Operation
J103), adds a great deal of flexibility to the system. Simultaneous control of a wide variety of device types is now possible. In The Hobbit, this I2C bus is used to control the servo motor that moves Smaug's lower jaw - in addition to all of the feature lighting in the game. - Page 333 (J101-J103). Up to 8 individually addressable (0 through 7) RGB LED Controller boards can be used in a game. Controller board addresses are set using the 3-bank dip switch labeled SW100. In The Hobbit, RGB LED Controller board A is set to address 0 (SW100 -> 000), board B is set to address 1 (SW100 -> 001) and board C is set to address 2 (SW100 ->...
-
Page 334: E.4 Hobbit Playfield Post Adjustments
11/32" open end wrench #2 Phillips screwdriver You can make several post adjustments on the Hobbit playfield to make your game play either more liberally or more conservatively. The steel mini post between the main flippers (circled in red in figure E10) can be removed to make the game play a bit more conservatively. - Page 335 To remove a steel mini post: The first step is to firmly grasp the rubber ring and pull it straight up, off of the post. Locate the washer and nylon stop nut for the post under the playfield. Using the ratchet and 1/4", deep socket from above and the 3/8"...
-
Page 336: E.5 Performing A Full Software Update
Select the Disk Image option, then click the ‘ ... ‘ button (both are circled in figure E12). Locate and select the Hobbit ISO file you downloaded from the Jersey Jack Pinball® website. Ensure that the USB Drive is selected under Type and the USB stick you inserted earlier (“E:\” in this example) is selected under Drive (both are circled in figure E12). - Page 337 USB stick and power it on again. Your game will boot up running the new ver- sion of software (which can be verified by entering the Hobbit menu system - see Section B). Store your 8 GB USB stick in a safe place;...
-
Page 338: E.6 Replacing Your Game's Cpu Battery
Game Service & Troubleshooting E-14 E.6 Replacing Your Game’s CPU Battery Loosen Slide Your game’s CPU board uses a 3V coin cell, lithium battery (CR2032) to maintain its basic input/out- put system (BIOS) settings when the game is powered down. If these settings are lost, the CPU will not boot when the game is powered up. - Page 339 Holding onto the tape “handle” with one hand, free the battery from its holder clip with the other. Ensure that the battery does not touch anything on the surface of the CPU board as you pull it out of its holder and away from the PCB Chassis. Pull the tape “handle”...
- Page 340 Game Service & Troubleshooting E-16...
- Page 341 Appendices...
- Page 342 25¢ USA Coin Door Assembly JJP® PN 40-0001-00 NOTE: Suzo-Happ parts and numbers are listed above.
- Page 343 Euro-Style Coin Door Assembly JJP® PN 40-0002-00 NOTE: Suzo-Happ parts and numbers are listed above.
- Page 344 Package) Picofarad CMOS Complementary Metal- for Standardization Transient Voltage Suppressor Phillips Flat Head Oxide Semiconductor Joule Transmitter Column JJP® Jersey Jack Pinball® Plum μF Microfarad Phillips Pan Head Const Constant kΩ Kilo Ohm Ultra Fast-mode Cup Point Kilohertz Parts Per Million...
- Page 345 What does the Limited Warranty cover - and for how long? 1. The JJP® “Bumper to Post” Limited Warranty covers every part in your new Jersey Jack Pinball® Machine for a period of 30 days from the date of delivery of the Machine to its original Purchaser.
- Page 347 TO MAINTAIN THESE LEVELS, reposition harnesses and reconnect ground straps to their original placements, if they become disconnected during maintenance. FCC/CANADA STICKER. Check the back of your game to verify that an FCC/Canada-certification sticker was attached to your game at the factory. All Games that leave the Jersey Jack Pinball® plant have been tested and found to comply with FCC/Canada Rules.
Need help?
Do you have a question about the The Hobbit and is the answer not in the manual?
Questions and answers