
Related Manuals for ParTech EverServ ES7700


Summary of Contents for ParTech EverServ ES7700
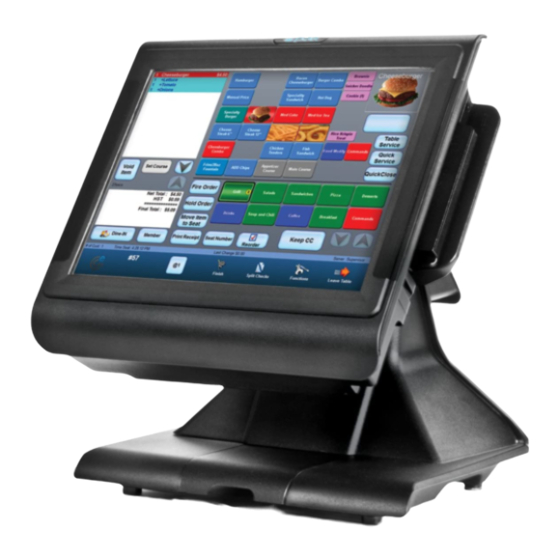
- Page 1 ® PAR POS Installation Manual for TACO DEL MAR® ES7700 [©2013 ParTech, Inc. All rights reserved.] PN. 772231701...
- Page 2 While ParTech, Inc. takes great care to ensure the accuracy of these materials, all material is provided without warranty whatsoever, including, but not limited to, the implied warranties of merchantability or fitness for a particular purpose.
-
Page 3: Table Of Contents
Table of Contents Chapter 1: Getting Started......................... 1 Overview ..............................1 Inventory Equipment ..........................1 How to Use this Manual ........................... 3 Pre-Installation Guidelines ........................3 POS Terminal Electrical Requirements ..................... 3 Size and Type of Electrical Service ......................3 LAN Cable Considerations ........................ -
Page 4: Chapter 1: Getting Started
For GoLive questions or to reschedule your GoLive date, please call our PAR Help Desk and ask to leave a message for a PAR GoLive Specialist. Or you can send an e-mail to the PAR_GoLive_Team@partech.com mailbox. If you identify any PAR hardware is not working, call the Help Desk immediately ... - Page 5 Below are the examples of what you should have in your inventory: AC Power Cord C4823-02 Serial K7552 Zoom Modem Adapter Cables (Optional) EverServ 7000 M7700 POS M8570-03 Cash Drawer with Interface cable M3557 Tripp Lite M3873-61V Epson (TM-T88V) Uninterruptible Power Supply Printer with Interface Cable Cable that comes with M3557 –...
-
Page 6: How To Use This Manual
If you have any questions regarding the following guidelines, contact your PAR sales representative Mike Hatcher at 1-800-458-6898 Ext. 5873 and e-mail at Mike_Hatcher@ParTech.com. If your store requires additional electrical wiring or network cabling, you may need to contact an electrical contractor to perform this work. -
Page 7: Lan Cable Considerations
LAN Cable Considerations EverServ POS terminals typically communicate with the other registers in the store and to the outside world over a local area network (LAN). This is accomplished by connecting a four-pair CAT5e cable from the POS terminal’s LAN port in the cable well to the K4300-03 Netgear router and the stores DSL/Router. - Page 8 The recommended maximum distance of the horizontal link (home run and patch cables) should not exceed 325 feet: 295 for the home run and 30 feet split between the ends of the home run cable. Do not put sharp bends into individual wire pairs when terminating. ...
-
Page 9: Chapter 2: Installing The Par Es7700® Pos System
PAR POS Installation Manual for TACO DEL MAR Chapter 2: Installing the PAR ES7700® POS System Topics covered in this chapter: Setting up your ES7700 POS terminal and peripherals (receipt printer, cash drawer, keyboard, mouse, UPS, and router). The typical store configuration will consist of one terminal called Station 1. If the store has a drive-thru then there may be 2 terminals, and the second terminal will be called Station 2. -
Page 10: Remove Covers To Access Connection Panels
PAR POS Installation Manual for TACO DEL MAR 6. Move the POS so it is upright in the box, shown in Figure 3. Figure 3: Removing the POS from the box 7. Pull the anti-static bag off the POS, shown in Figure 4. Figure 4: Removing the anti-static bag 8. -
Page 11: Set Up K7552 Zoom Modem - Optional
PAR POS Installation Manual for TACO DEL MAR Note: On Station 1 you will see a black or yellow Pixel License key. Ensure this key is securely connected to the USB port. This looks like a USB thumb drive. See Figure 7. Also, on Station 1 only you will see the F7552 Zoom modem, if your store ordered it, and gray telephone cable. - Page 12 PAR POS Installation Manual for TACO DEL MAR Position the modem and Velcro on the top cover far enough inward and to the right so the I/O panel can be in installed. Zoom Modem Figure 10: Install USB Modem 3. Plug the modem USB cable into one of the open USB ports on the left side of the cable well. Figure 11: Plug USB Modem cable 4.
- Page 13 PAR POS Installation Manual for TACO DEL MAR NOTE: The wireless mouse is part of the same kit as the wireless keyboard, K3244. Figure 12: K3244, Keyboard Battery Cover (left) wireless mouse (right) 3. Remove the battery cover from the mouse. 4.
- Page 14 PAR POS Installation Manual for TACO DEL MAR Power LED Figure 15: Mouse Power Switch Connect Receipt Printer to POS 1. Remove the tape from the printer cover. 2. Open the printer cover by pressing the gray button on the right top side of the printer. Press to Open Cover Remove Tape...
-
Page 15: Set Up Network Connection
PAR POS Installation Manual for TACO DEL MAR Connect the USB cable to the printer Figure 18: Install the cable shroud on the printer 8. Connect the other end of the USB printer cable, also shaded reddish-orange, into the reddish- orange powered-USB port on the POS shown in the diagram on the next page. -
Page 16: Connect Your System To The Internet
PAR POS Installation Manual for TACO DEL MAR Connect your System to the Internet If you are connecting the ES7700 POS System to the Internet via high-speed (broadband) connection, use the diagram below as a guide. Your ES7700 may also have an optional Zoom Modem which connects to the phone line. - Page 17 PAR POS Installation Manual for TACO DEL MAR Connect Cash Drawer Cable to POS Install K1056 Cash Drawer Bracket (Optional) Each cash drawer will be mounted in the K1056 cash drawer brackets. Follow the instructions included in the cash drawer bracket kit. Before installing, ensure the underside of the counter top is a smooth, flat surface.
- Page 18 PAR POS Installation Manual for TACO DEL MAR Connect Coin Dispenser to POS (optional) Note: A software configuration change may be required to make the coin dispener operational. Call the PAR Help Desk if you need assistance with your coin dispenser 1.
-
Page 19: Verify All Cables Are Connected To The Terminal
PAR POS Installation Manual for TACO DEL MAR Verify all Cables are Connected to the Terminal All necessary cables and your power supply have been connected to the POS terminal. Verify that the MSR card reader, Customer Display and DC power cord are all connected as shown below. Figure 32: From left: PS2 MSR, Customer Display and Power cable ports Gather the Cables and Replace Cable Retainers 1. -
Page 20: Connect Pos Components To Ups
PAR POS Installation Manual for TACO DEL MAR Connect POS Components to UPS Your POS order includes an Uninterruptible Power Supply, or UPS. This device provides surge protection for your POS equipment, and battery backup to provide power to your equipment in the event of power loss. -
Page 21: Power On The Pos Equipment
PAR POS Installation Manual for TACO DEL MAR 6. Locate the C3901 telephone cable. Connect one end of the C3901 telephone cable telephone jack on the UPS with the wall jack symbol next to it. Connect the other end of this telephone cable to a telephone wall jack. Power on the POS Equipment Plug the UPS into a wall outlet. - Page 22 PAR POS Installation Manual for TACO DEL MAR Contamination builds up on the read/write heads of the magnetic stripe reader (MSR) due to magnetic oxides, dust, dirt, grease, fingerprint oils, etc. that are on credit cards. The magnetic reader head scrapes the magnetic stripe on the credit card during the reading process.
-
Page 23: Chapter 3: Pre-Go Live Setup Instructions
PAR POS Installation Manual for TACO DEL MAR Chapter 3: Pre-Go Live Setup Instructions In this chapter, you will perform the following steps: Adding Employees Customer Receipt Setup Prices and taxes Setup Pre-Go Live Instructions In preparation for going live with your new PAR POS system, complete the following steps: Step 1: Starting up System 1. -
Page 24: Step 3: Verify System Taxes
PAR POS Installation Manual for TACO DEL MAR Step 3: Verify System Taxes 1. Select Administrator from the pull down menu. Select System Setup. 2. Select Taxes tab. 3. Verify Restaurant tax rates (up to 5 tax rates). 4. Select to save any changes or click Close Form to exit. -
Page 25: Step 7: Add Employees To The System
PAR POS Installation Manual for TACO DEL MAR Step 7: Add Employees to the System 1. Select Employee Setup icon. 2. Click + at the bottom of the window. 3. Add new employee information. 4. Click Assign Card. 5. Swipe a new card or click Manual Enter to enter new code and click OK. 6. -
Page 26: Chapter 4: Troubleshooting
PAR POS Installation Manual for TACO DEL MAR Chapter 4: Troubleshooting This chapter provides several basic trouble shooting steps. M3873-61V Printer Troubleshooting Steps Verify the printer is connected, the printer power switch is turned on and the printer green power LED is on. The printer receives power and print data directly from the register, so the printer must be connected to the register and the register must be powered on and operational. -
Page 27: Cash Drawer Troubleshooting Steps
PAR POS Installation Manual for TACO DEL MAR b. The self-test prints the configuration data that indicates the firmware version interface configuration, DIP switch settings, etc. A partial printout is shown below: Firmware Version 30.12 ESC/POS USB or Serial Interface Baud rate :9600 bps Data bits... -
Page 28: Register Troubleshooting
PAR POS Installation Manual for TACO DEL MAR b. Check for smooth operation c. Clear any obstructions Figure 42: Cash Drawer M8570-03 3. Verify the user is configured for Cash Drawer #1 a. Sign In b. Go to System c. Select Your Settings d. - Page 29 PAR POS Installation Manual for TACO DEL MAR Power LED Figure 44: ES7700 Power LED 3. Verify the DC power and AC power connectors are plugged into the side of the register. a. Check the DC power connector on the I/O expansion board located in the pedestal. This connector is four pin push in connector.
-
Page 30: Ups Troubleshooting
PAR POS Installation Manual for TACO DEL MAR UPS Troubleshooting Verify the UPS is plugged into a 120 VAC 15 Amp outlet that has AC power, which you can test by plugging another device into the outlet. Reference Page 17 for the installation instructions to make sure the UPS is connected properly. - Page 31 PAR POS Installation Manual for TACO DEL MAR system OFF and cut power to connected equipment loads. To ensure you hold the button for the correct length of time, do not release the button until you hear the UPS System’s audible alarm beep twice.
- Page 32 PAR Phone Numbers For Service USA and CANADA: 800.382.6200 For Parts USA and CANADA: 800.PAR.PART For Sales Continental USA except New York: 800.448.6505 Outside Continental USA: 315.738.0600...
Need help?
Do you have a question about the EverServ ES7700 and is the answer not in the manual?
Questions and answers