Table of Contents
Advertisement
Advertisement
Table of Contents
Troubleshooting

Related Manuals for DeLonghi ECAM65*.55 series


Summary of Contents for DeLonghi ECAM65*.55 series
- Page 1 De’Longhi Appliances via Seitz, 47 31100 Treviso Italy www.delonghi.com...
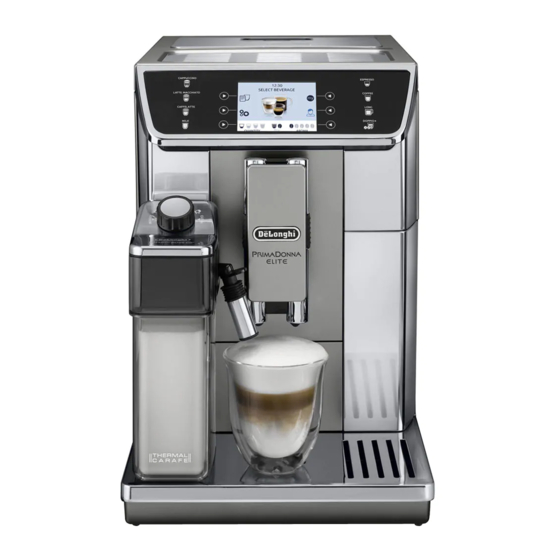
- Page 2 ECAM65X.55 BEAN TO CUP ESPRESSO AND CAPPUCCINO MACHINE Instruction for Use Instructions videos available at: http://ecam65055.delonghi.com...
- Page 3 page 6 10:00 SELECT BEVERAGE PROFILE 1 QUANTITY AROMA...
- Page 6 CLEAN...
-
Page 7: Table Of Contents
CONTENTS 10. MAKING CAPPUCCINOS AND MILK-BASED COFFEES ..........15 1. FUNDAMENTAL SAFETY WARNINGS .....7 10.1 Filling and attaching the milk container ..16 2. SAFETY WARNINGS ........8 10.2 Adjusting the amount of froth .....16 2.1 Symbols used in this Instruction for Use ..8 10.3 Making cappuccino and milk-based coffees 2.2 Instruction for Use .........8 automatically ..........16... -
Page 8: Fundamental Safety Warnings
1. FUNDAMENTAL SAFETY WARNINGS • The appliance is not intended for use by persons (including children) with reduced phys- ical, sensory or mental capabilities, or lack of experience and knowledge, unless they have been given supervision or instruction concerning use of the appliance by a person responsible for their safety. -
Page 9: Safety Warnings
• Children shall not play with the appliance. • Always unplug the appliance when left unattended and before assembly, taking apart or cleaning. Surfaces marked with this symbol become hot during use (the symbol is present in certain models only). 2. -
Page 10: Troubleshooting And Repairs
B14. ESPRESSO appliance. B15. COFFEE B16. LONG Please note: B17. DOPPIO+ Check compatible devices on "compatibledevices.delonghi. com". 4.3 Description of the accessories (page 2 - C) 4. DESCRIPTION C1. "Total Hardness Test" indicator paper (attached to page 2 4.1 Description of the appliance... -
Page 11: Before Use
D4. Milk intake tube 1. Plug the power cord (C8) connector into the socket (A20) at D5. Frothed milk spout (adjustable) the back of the appliance and connect the appliance to the mains electricity supply (fig. 1). Make sure the main switch (A21) at the back of the appliance is pressed (fig. -
Page 12: Turning The Appliance Off
During rinsing, a little hot water comes out of the coffee spouts Do not leave the appliance unattended while hot water is being (A8) and is collected in the drip tray (A14) underneath. Avoid delivered. contact with splashes of water. 3. -
Page 13: Adjust Time
7. Press the selection arrow corresponding to " ESC" twice Please note! to go back to the homepage. • To change the beverages in another profile, go back to the The auto-start time is now set and the corresponding symbol is homepage, select the required profile (B11) and repeat the displayed to indicate that the function has been enabled. -
Page 14: Coffee Temperature
3. Press the selection arrow corresponding to "ENERGY SAV- 2. Scroll through the menu items by pressing the selection ING" to disable ( ) or enable ( ) the function. arrow corresponding to "NEXT>" until " BEEP" appears on 4. Press the selection arrow corresponding to " ESC"... -
Page 15: Statistics
1. Press the selection arrow (B2) corresponding to the " " SMALL SIZE symbol (B8) to enter the menu; 2. Scroll through the menu items by pressing the selection MEDIUM SIZE arrow corresponding to "NEXT>" until " DEFAULT VAL- UES" appears on the display; LARGE SIZE 3. -
Page 16: Making Coffee Using Pre-Ground Coffee
ETC.). Their meaning is explained in section “21. Displayed Please note! messages”. • Various alarm messages could be displayed while using • For hotter coffee, see section “9.6 Tips for a hotter coffee”. the appliance (FILL TANK, EMPTY GROUNDS CONTAINER, •... -
Page 17: Filling And Attaching The Milk Container
Cleaning the milk container” and “15.11 Cleaning the hot water/ steam connection nozzle”. 10.3 Making cappuccino and milk-based coffees automatically 10.1 Filling and attaching the milk container 1. Fill the milk container (D) and attach it as described above. 1. Remove the lid (D2) (fig. 14); 2. -
Page 18: Delivering Hot Water
Each time you use a milk function, "TURN MILK FROTH ADJUST- • Preparation of each coffee can be customised (see sections MENT DIAL TO CLEAN POSITION" appears on the display and the “13. Customising the beverages ”and”14. Memorising milk frother lid must be cleaned: your personal profile”). -
Page 19: Customising The Beverages
You can rename your personal profile by connecting with selected beverage or from the beverages selection menu the DeLonghi Coffee Link App (only the first three charac- - B3) to enter the customising screen. The corresponding ters will be displayed). -
Page 20: Cleaning The Machine's Internal Circuit
coffee spouts (A8); Important! pre-ground coffee funnel (A4); When removing the drip tray, the grounds container must be infuser (A19), accessible after opening the infuser door emptied, even if it contains few grounds. If this is not done, (A18); when you make the next coffees, the grounds container may fill milk container (D);... -
Page 21: Cleaning The Coffee Spouts
15.7 Cleaning the coffee spouts 15.10 Cleaning the milk container 1. Clean the coffee spouts (A8) regularly with a sponge or To keep the frother efficient, clean the milk container (D) every cloth (fig. 28A); two days as described below: 2. -
Page 22: Cleaning The Hot Water/Steam Connection Nozzle
15.11 Cleaning the hot water/steam connection Press the selection arrow cor- responding to "NEXT>"; nozzle 5. "EMPTY DRIP TRAY" (fig. Each time you prepare milk, clean the connection nozzle (A9) 39): Remove, empty and with a sponge to remove milk residues from the gaskets (fig. replace the drip tray (A14) 22). -
Page 23: Setting Water Hardness
12. (If the filter is installed) of the mains water in the various regions so that the machine "INSERT FILTER INTO ITS needs to be descaled less often. HOUSING" (fig. 40). Press "NEXT>" and extract the 17.1 Measuring water hardness water tank. -
Page 24: Installing The Filter
18.1 Installing the filter 9. "INSERT WATER TANK": Close the tank with the lid (A15), then put the tank back in the machine (fig. 6); 1. Remove the filter (C4) 10. "POSITION 0.5L CONTAINER, PRESS OK TO ENABLE FIL- from the packaging; 2. -
Page 25: Displayed Messages
This product complies with European regulation no. Please note! 1935/2004 on materials and articles intended to come After two months (see date indicator) or when the appliance has into contact with food. not been used for 3 weeks, you should replace the filter even if the message has not yet been displayed. - Page 26 DISPLAYED MESSAGE POSSIBLE CAUSE REMEDY INSERT GROUNDS CONTAINER After cleaning, the grounds container (A10) has Remove the drip tray (A14) and insert the not been replaced. grounds container. ADD GROUND COFFEE MAX. The "pre-ground coffee" function has been se- Place pre-ground coffee in the funnel (fig. 13) ONE MEASURE lected without placing any pre-ground coffee and repeat delivery...
- Page 27 DISPLAYED MESSAGE POSSIBLE CAUSE REMEDY GROUND TOO FINE. ADJUST The grinding is too fine and the coffee is deliv- Repeat coffee delivery and turn the grinding adjustment dial (A5) (fig. 11) one click clock- MILL ered too slowly or not at all. wise towards 7 while the coffee mill is in operation.
- Page 28 DISPLAYED MESSAGE POSSIBLE CAUSE REMEDY WATER CIRCUIT EMPTY The water circuit is empty Press " OK" to deliver water from the spout PRESS OK TO START (C6) until it flows out normally. If the problem persists, make sure the water tank (A16) is fully inserted.
- Page 29 DISPLAYED MESSAGE POSSIBLE CAUSE REMEDY DESCALING NEEDED The machine must be descaled. Press " OK" to start descaling or " ESC" PRESS OK TO START to descale later. The descaling procedure de- (~45MIN) scribed in section “16. Descaling” needs to be performed.
-
Page 30: Troubleshooting
TROUBLESHOOTING Below is a list of some of the possible malfunctions. If the problem cannot be resolved as described, contact Customer Services. PROBLEM POSSIBLE CAUSE REMEDY The coffee is not hot. The cups were not preheated. Warm the cups by rinsing them with hot water (Please note: you can use the hot water function). - Page 31 PROBLEM POSSIBLE CAUSE REMEDY The milk does not come out of the The lid (D2) of the milk container (D) Clean the milk container lid as described in sec- milk spout (D5) is dirty tion “15.10 Cleaning the milk container”. The milk contains large bubbles and The milk is not cold enough or is not Use skimmed or semi-skimmed milk at refrig-...
Need help?
Do you have a question about the ECAM65*.55 series and is the answer not in the manual?
Questions and answers