
Subscribe to Our Youtube Channel
Related Manuals for Grammer MSG 90.6PG


Summary of Contents for Grammer MSG 90.6PG
-
Page 1: Table Of Contents
November 2017 Repair Manual GRAMMER Seat MSG 90.6PG Commercial Vehicles, Omnibuses Page 1 of 7 TABLE OF CONTENTS Preliminary remarks 1 Description Safety instructions Seat types (example of seat models) Rating plate 2 Diagnosis Overview of components Functional test Overview of faults Fault diagnosis Material no. - Page 2 November 2017 Repair Manual GRAMMER Seat MSG 90.6PG Commercial Vehicles, Omnibuses Page 2 of 7 TABLE OF CONTENTS 3 Repair work Seat cushion in position for repair – lifting off and attachment Seat cushion and lever for seat angle and seat depth adjustment – removal and installation Seat cushion cover –...
- Page 3 November 2017 Repair Manual GRAMMER Seat MSG 90.6PG Commercial Vehicles, Omnibuses Page 3 of 7 TABLE OF CONTENTS 3.12 Bowden pull wire for backrest adjustment – inspection and adjustment 3.13 Bowden pull wire and lever for backrest adjustment – removal and installation 3.14...
- Page 4 November 2017 Repair Manual GRAMMER Seat MSG 90.6PG Commercial Vehicles, Omnibuses Page 4 of 7 TABLE OF CONTENTS 3.23 Valves for lumbar support and lateral support adjustment – removal and installation 3.24 Armrests – removal and installation (delivery option) 3.25 Operator console and armrest for electro-pneumatic gearshift (EPS) –...
- Page 5 November 2017 Repair Manual GRAMMER Seat MSG 90.6PG Commercial Vehicles, Omnibuses Page 5 of 7 TABLE OF CONTENTS 3.32 Bearing support with backrest locking mechanism and hook-in function – removal and installation 3.33 Lumbar support – removal and installation 3.34 Lateral support adjuster –...
- Page 6 November 2017 Repair Manual GRAMMER Seat MSG 90.6PG Commercial Vehicles, Omnibuses Page 6 of 7 TABLE OF CONTENTS 3.40 Seat fore/aft adjuster – removal and installation 3.40.1 Seat fore/aft adjuster – removal and installation (Actros) 3.40.2 Seat fore/aft adjuster and contact strip – removal and installation (Atego, Axor) 3.40.3 Seat fore/aft adjuster –...
- Page 7 November 2017 Repair Manual GRAMMER Seat MSG 90.6PG Commercial Vehicles, Omnibuses Page 7 of 7 TABLE OF CONTENTS 3.48 Bowden pull wire and bearing for ideal backrest adjustment – removal and installation 3.49 Cable harness for backrest – removal and installation (seat with climate control system) 3.50...
- Page 8 Page 1 of 4 TABLE OF CONTENTS Notes on these instructions This repair manual includes information and instructions on how to perform repair work on the GRAMMER Seat MSG 90.6 PG of the following seat models: • Actros • Atego, Axor •...
- Page 9 Repair Manual MSG 90.6PG Commercial Vehicles, Omnibuses – November 2017 Preliminary remarks Page 2 of 4 TABLE OF CONTENTS At the beginning of each description for repair you will find an overview diagram. All parts included in the overview diagrams within one chapter are consecutively numbered starting with "1".
- Page 10 Defective parts and worn parts must be replaced by new ones. GRAMMER AG rejects any warranty claims if damaged or worn parts and assemblies are not replaced by spare parts released by GRAMMER AG.
-
Page 11: Preliminary Remarks
As an inevitable matter of fact, GRAMMER AG cannot evaluate all situations and consequences that may bear a risk of injury for the persons involved in the described work procedures. For this reason it is absolutely necessary that every person who carries out repair work at a seat uses his/her professional knowledge to make sure that his/her own safety will not be put at risk and that the selected type of repair will not cause any negative effects, in particular with regard to technical safety. -
Page 12: Description
Repair Manual MSG 90.6PG Commercial Vehicles, Omnibuses – November 2017 Description Page 1 of 1 TABLE OF CONTENTS Safety instructions Seat types (example of seat models) Rating plate Note: Please refer to the applicable seat operating instructions for further details. -
Page 13: Safety Instructions
Repair Manual MSG 90.6PG Commercial Vehicles, Omnibuses – November 2017 Safety instructions Page 1 of 3 TABLE OF CONTENTS 1 All inspection, test and repair work must be performed exclusively by adequately trained personnel. 2 All work steps and procedures described are to be performed with consideration to the applicable directives and regulations stipulated by the relevant local authorities and in compliance with the provisions on health protection, prevention of accidents and environmental protection. - Page 14 Repair Manual MSG 90.6PG Commercial Vehicles, Omnibuses – November 2017 Safety instructions Page 2 of 3 TABLE OF CONTENTS 5 The seat position for repair is "seat lowered (no pressure applied)". If it is necessary to bring the seat to a higher position for repair work, this position must be secured with suitable spacers (wooden block, fixation with screws or similar structure).
- Page 15 Repair Manual MSG 90.6PG Commercial Vehicles, Omnibuses – November 2017 Safety instructions Page 3 of 3 TABLE OF CONTENTS • Belt tensioners, which have fallen down from a height of more than 0.5 m must be replaced and must by no means be installed in the vehicle.
-
Page 16: Seat Types (Example Of Seat Models)
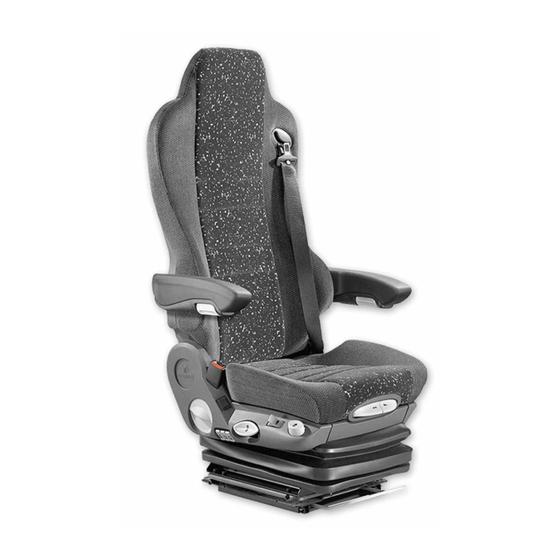
Repair Manual MSG 90.6PG Commercial Vehicles, Omnibuses – November 2017 Seat types (example of seat models) Page 1 of 1 TABLE OF CONTENTS (A) Actros (B) Atego, Axor (C) Bus seat, right (function with swivel) (D) Kingman (sales) 2256 Material no. 1153450_c... -
Page 17: Rating Plate
Repair Manual MSG 90.6PG Commercial Vehicles, Omnibuses – November 2017 Rating plate Page 1 of 11 TABLE OF CONTENTS Actros type of seat The rating plate from the manufacturing plant (A1) is located on the rear right of XXXXXXX the seat frame. - Page 18 Repair Manual MSG 90.6PG Commercial Vehicles, Omnibuses – November 2017 Rating plate Page 2 of 11 TABLE OF CONTENTS The rating plate for delivery (A2) is located on the back of the supporting structure. XXXXXXX The rating plate shows the following MSG 90.6 PG.LI...
- Page 19 Repair Manual MSG 90.6PG Commercial Vehicles, Omnibuses – November 2017 Rating plate Page 3 of 11 TABLE OF CONTENTS The rating plate (A3) of the level control is located on the upper right side. The rating plate shows the following information (example): (A) Inventory no.
- Page 20 Repair Manual MSG 90.6PG Commercial Vehicles, Omnibuses – November 2017 Rating plate Page 4 of 11 TABLE OF CONTENTS Atego, Axor seat types The rating plate from the manufacturing plant (Atego, Axor = B1) is located on the XXXXXXX rear right of the seat frame.
- Page 21 Repair Manual MSG 90.6PG Commercial Vehicles, Omnibuses – November 2017 Rating plate Page 5 of 11 TABLE OF CONTENTS The rating plate for delivery (Atego = B2) is located laterally on the supporting structure and (Axor = B3) is located on the rear of the supporting structure.
- Page 22 Repair Manual MSG 90.6PG Commercial Vehicles, Omnibuses – November 2017 Rating plate Page 6 of 11 TABLE OF CONTENTS The rating plate (B4) of the level control is located on the upper right side. The rating plate shows the following information (example): (A) Inventory no.
- Page 23 Repair Manual MSG 90.6PG Commercial Vehicles, Omnibuses – November 2017 Rating plate Page 7 of 11 TABLE OF CONTENTS Bus seat type The rating plate from the manufacturing plant (C1) is located on the front of the XXXXXXX lower suspension part behind the MSG 90.6 PG.LI...
- Page 24 Repair Manual MSG 90.6PG Commercial Vehicles, Omnibuses – November 2017 Rating plate Page 8 of 11 TABLE OF CONTENTS The rating plate for delivery (C2) is located on the supporting structure. The rating plate shows the following XXXXXXX information (example): MSG 90.6 PG.LI...
- Page 25 Repair Manual MSG 90.6PG Commercial Vehicles, Omnibuses – November 2017 Rating plate Page 9 of 11 TABLE OF CONTENTS The rating plate (C3) of the level control is located on the upper right side. The rating plate shows the following information (example): (A) Inventory no.
- Page 26 Repair Manual MSG 90.6PG Commercial Vehicles, Omnibuses – November 2017 Rating plate Page 10 of 11 TABLE OF CONTENTS Kingman (sales) seat type The rating plate from the manufacturing plant (D1) is located on the front of the XXXXXXX lower suspension part behind the MSG 90.6 PG.LI...
- Page 27 Repair Manual MSG 90.6PG Commercial Vehicles, Omnibuses – November 2017 Rating plate Page 11 of 11 TABLE OF CONTENTS The rating plate (D2) of the level control is located on the upper right side. The rating plate shows the following information (example): (A) Inventory no.
-
Page 28: Diagnosis
Repair Manual MSG 90.6PG Commercial Vehicles, Omnibuses – November 2017 Diagnosis Page 1 of 2 TABLE OF CONTENTS Overview of components (page 1-15) • Control elements (page 1) • Pneumatic connecting diagram (page 2-4) • Level control (page 5-6) • Actros, Atego, Axor, bus seat: Heater cable, belt tensioner cable and pin assignment with circuit diagram (page 7-10) •... - Page 29 Repair Manual MSG 90.6PG Commercial Vehicles, Omnibuses – November 2017 Diagnosis Page 2 of 2 TABLE OF CONTENTS 2.3 Overview of faults (page 1-11) • Seat cushion heater or backrest heater does not operate (page 7) • Seat has too much clearance in the transverse direction (seat wobbles) (page 7) •...
-
Page 30: Overview Of Components
Repair Manual MSG 90.6PG Commercial Vehicles, Omnibuses – November 2017 Overview of components Page 1 of 15 TABLE OF CONTENTS Control elements (1) Lever for seat depth adjustment (2) Lever for seat angle adjustment (3) Lever for locking mechanism of the... - Page 31 Repair Manual MSG 90.6PG Commercial Vehicles, Omnibuses – November 2017 Overview of components Page 2 of 15 TABLE OF CONTENTS Pneumatic connecting diagram (1) Air hose (blue) for air spring (Z) (2) Air hose (black) for air intake (P) (3) Air hose (gray) for air exhaust (R)
- Page 32 Repair Manual MSG 90.6PG Commercial Vehicles, Omnibuses – November 2017 Overview of components Page 3 of 15 TABLE OF CONTENTS (10) Right chamber of lateral support adjustment (11) Left chamber of lateral support adjustment (12) Lower chamber of lumbar support...
- Page 33 Repair Manual MSG 90.6PG Commercial Vehicles, Omnibuses – November 2017 Overview of components Page 4 of 15 TABLE OF CONTENTS Connections: (Z) Connection for air hose (blue) to the air spring (P) Connection for the air hose (black) for air intake...
- Page 34 Repair Manual MSG 90.6PG Commercial Vehicles, Omnibuses – November 2017 Overview of components Page 5 of 15 TABLE OF CONTENTS Level control (1) Level control (2) Bowden pull wire for seat height adjustment (3) Control disc for height adjustment (4) Bowden pull wire for quick lowering...
- Page 35 Repair Manual MSG 90.6PG Commercial Vehicles, Omnibuses – November 2017 Overview of components Page 6 of 15 TABLE OF CONTENTS (12) Valve tappets for air intake (13) Valve tappets for air exhaust (14) Valve tappets for quick lowering of the seat...
- Page 36 Repair Manual MSG 90.6PG Commercial Vehicles, Omnibuses – November 2017 Overview of components Page 7 of 15 TABLE OF CONTENTS Actros, Atego, Axor, bus seat: heater cable, belt tensioner cable and pin assignment with circuit diagram (1) Cable for backrest heater...
- Page 37 Repair Manual MSG 90.6PG Commercial Vehicles, Omnibuses – November 2017 Overview of components Page 8 of 15 TABLE OF CONTENTS (12) Plug of belt tensioner cable (13) Plug of backrest heater (2-pin) (14) Plug of seat cushion heater (3-pin) (15) Socket of backrest heater (2-pin)
- Page 38 Repair Manual MSG 90.6PG Commercial Vehicles, Omnibuses – November 2017 Overview of components Page 9 of 15 TABLE OF CONTENTS (21) Pin assignment for backrest cushion heater at the plug for backrest heater (13) contact 1 (K1) contact 2 (K2)
- Page 39 Repair Manual MSG 90.6PG Commercial Vehicles, Omnibuses – November 2017 Overview of components Page 10 of 15 TABLE OF CONTENTS Electrical plug and socket connections: (A) Electrical connection between the vehicle and the cable for vehicle connection (3) HIGH (B) Electrical connection between the...
- Page 40 Repair Manual MSG 90.6PG Commercial Vehicles, Omnibuses – November 2017 Overview of components Page 11 of 15 TABLE OF CONTENTS Kingman: heater cable and pin assignment with circuit diagram Note: HIGH The overview of components for Kingman corresponds to that for Actros, Atego, Axor and bus seat: •...
- Page 41 Repair Manual MSG 90.6PG Commercial Vehicles, Omnibuses – November 2017 Overview of components Page 12 of 15 TABLE OF CONTENTS Actros: heater cable, belt buckle contact and pin assignment with circuit diagram Note: HIGH The overview of components for Actros...
- Page 42 Repair Manual MSG 90.6PG Commercial Vehicles, Omnibuses – November 2017 Overview of components Page 13 of 15 TABLE OF CONTENTS Note: Pin assignment seen from the back (19) Pin assignment for heater at the plug for vehicle connection (10) contact 3 (K3) voltage 24 V (rt)
- Page 43 Repair Manual MSG 90.6PG Commercial Vehicles, Omnibuses – November 2017 Overview of components Page 14 of 15 TABLE OF CONTENTS Belt buckle with belt buckle cable (if fitted) (1) Belt buckle (2) Belt buckle cable (3) Plug for belt buckle cable...
- Page 44 Repair Manual MSG 90.6PG Commercial Vehicles, Omnibuses – November 2017 Overview of components Page 15 of 15 TABLE OF CONTENTS Cable for electro-pneumatic gearshift (EPS cable) (if fitted) (1) Cable for electro-pneumatic gearshift (EPS cable) (2) Plug for EPS cable...
-
Page 45: Functional Test
Repair Manual MSG 90.6PG Commercial Vehicles, Omnibuses – November 2017 Functional test Page 1 of 6 TABLE OF CONTENTS A functional test is used to circumscribe all possible malfunctions; it must be performed before and after repair work on the seat at any rate. - Page 46 Repair Manual MSG 90.6PG Commercial Vehicles, Omnibuses – November 2017 Functional test Page 2 of 6 TABLE OF CONTENTS Step Notes, cause/remedial Scope of inspection Function to be operated Result/specified status measures Seat height Pull the lever for seat height...
- Page 47 Repair Manual MSG 90.6PG Commercial Vehicles, Omnibuses – November 2017 Functional test Page 3 of 6 TABLE OF CONTENTS Step Notes, cause/remedial Scope of inspection Function to be operated Result/specified status measures Backrest adjustment Pull the handle for backrest The backrest folds Folding angle: approx.
- Page 48 Repair Manual MSG 90.6PG Commercial Vehicles, Omnibuses – November 2017 Functional test Page 4 of 6 TABLE OF CONTENTS Step Notes, cause/remedial Scope of inspection Function to be operated Result/specified status measures Seat fore/aft Pull up the lever for seat fore/aft...
- Page 49 Repair Manual MSG 90.6PG Commercial Vehicles, Omnibuses – November 2017 Functional test Page 5 of 6 TABLE OF CONTENTS Step Notes, cause/remedial Scope of inspection Function to be operated Result/specified status measures Resting position Press the lever for resting position...
- Page 50 Repair Manual MSG 90.6PG Commercial Vehicles, Omnibuses – November 2017 Functional test Page 6 of 6 TABLE OF CONTENTS Step Notes, cause/remedial Scope of inspection Function to be operated Result/specified status measures Fore/aft isolator Turn the handle for the fore/aft...
-
Page 51: Overview Of Faults
Repair Manual MSG 90.6PG Commercial Vehicles, Omnibuses – November 2017 Overview of faults Page 1 of 11 TABLE OF CONTENTS This chapter contains notes on possible seat faults. The notes and information provided in Chapter 2.4 "Fault Diagnosis" are intended to ease troubleshooting of faults. - Page 52 Repair Manual MSG 90.6PG Commercial Vehicles, Omnibuses – November 2017 Overview of faults Page 2 of 11 TABLE OF CONTENTS Fault description Possible cause Troubleshooting Seat moves up too slowly. • Air hoses are leaky. Check all air hoses for air leakage...
- Page 53 Repair Manual MSG 90.6PG Commercial Vehicles, Omnibuses – November 2017 Overview of faults Page 3 of 11 TABLE OF CONTENTS Fault description Possible cause Troubleshooting Seat does not move up (seat does not • Level control is defective. Check leveling valve and level control respond when pulling the lever for seat height (Chapter 2.4, inspection steps 1.1...
- Page 54 Repair Manual MSG 90.6PG Commercial Vehicles, Omnibuses – November 2017 Overview of faults Page 4 of 11 TABLE OF CONTENTS Fault description Possible cause Troubleshooting Seat does not move down (seat does not • Bowden pull wire for seat height...
- Page 55 Repair Manual MSG 90.6PG Commercial Vehicles, Omnibuses – November 2017 Overview of faults Page 5 of 11 TABLE OF CONTENTS Fault description Possible cause Troubleshooting The seat changes its position during • Air spring is leaky. Check the air spring (Chapter 2.4, operation: step no.
- Page 56 Repair Manual MSG 90.6PG Commercial Vehicles, Omnibuses – November 2017 Overview of faults Page 6 of 11 TABLE OF CONTENTS Fault description Possible cause Troubleshooting Backrest cushion does not respond when • Too low reserve air pressure. Check the compressed-air system of operating the valves for lumbar support / the vehicle.
- Page 57 Repair Manual MSG 90.6PG Commercial Vehicles, Omnibuses – November 2017 Overview of faults Page 7 of 11 TABLE OF CONTENTS Fault description Possible cause Troubleshooting Seat cushion heater or backrest heater does • Power supply of the vehicle is Check electrical system of the not operate.
- Page 58 Repair Manual MSG 90.6PG Commercial Vehicles, Omnibuses – November 2017 Overview of faults Page 8 of 11 TABLE OF CONTENTS Fault description Possible cause Troubleshooting Seat suspension squeaks. • Side clearance of rollers in the upper Replace the seat suspension (see or lower suspension part is too large Chapter 3.44).
- Page 59 Repair Manual MSG 90.6PG Commercial Vehicles, Omnibuses – November 2017 Overview of faults Page 9 of 11 TABLE OF CONTENTS Fault description Possible cause Troubleshooting Seat does not respond when the swivel • Linkage rod is jammed or detached. Assure smooth running of the linkage button is pressed (if fitted).
- Page 60 Repair Manual MSG 90.6PG Commercial Vehicles, Omnibuses – November 2017 Overview of faults Page 10 of 11 TABLE OF CONTENTS Fault description Possible cause Troubleshooting Backrest does not fold forwards by itself after • Torsion spring is detached. Hang in the torsion spring being unlocked.
- Page 61 Repair Manual MSG 90.6PG Commercial Vehicles, Omnibuses – November 2017 Overview of faults Page 11 of 11 TABLE OF CONTENTS Fault description Possible cause Troubleshooting Seat fore/aft adjustment does not operate • Lever for seat fore/aft adjustment is Replace the lever for seat fore/aft after pulling or pushing the lever for seat defective.
-
Page 62: Fault Diagnosis
Repair Manual MSG 90.6PG Commercial Vehicles, Omnibuses – November 2017 Fault diagnosis Page 1 of 16 TABLE OF CONTENTS 1 Inspection of the leveling valves Preconditions for fault diagnosis: • Compressed-air reservoir pressure at least 7 bar. • Seat cushion is lifted off in position for repair (Chapter 3.1). - Page 63 Repair Manual MSG 90.6PG Commercial Vehicles, Omnibuses – November 2017 Fault diagnosis Page 2 of 16 TABLE OF CONTENTS Step Inspect/operate Result/specified status Troubleshooting Manually press back the valve lever for quick The seat moves down (mechanical Proceed with inspection lowering of the seat at the level control against end stop).
- Page 64 Repair Manual MSG 90.6PG Commercial Vehicles, Omnibuses – November 2017 Fault diagnosis Page 3 of 16 TABLE OF CONTENTS Step Inspect/operate Result/specified status Troubleshooting WARNING Risk of crushing! The level control immediately pushes the control disc for seat height adjustment forwards and the seat moves up.
- Page 65 Repair Manual MSG 90.6PG Commercial Vehicles, Omnibuses – November 2017 Fault diagnosis Page 4 of 16 TABLE OF CONTENTS Step Inspect/operate Result/specified status Troubleshooting Briefly press the upper actuating cam for the air The seat moves up. Proceed with inspection intake valve against the valve tappet of the air step no.
- Page 66 Repair Manual MSG 90.6PG Commercial Vehicles, Omnibuses – November 2017 Fault diagnosis Page 5 of 16 TABLE OF CONTENTS 2 Inspection of the level control Preconditions for fault diagnosis: • Compressed-air reservoir pressure at least 7 bar. • Seat cushion is lifted off in position for repair (Chapter 3.1).
- Page 67 Repair Manual MSG 90.6PG Commercial Vehicles, Omnibuses – November 2017 Fault diagnosis Page 6 of 16 TABLE OF CONTENTS Step Inspect/operate Result/specified status Troubleshooting Gradually move down the seat until the lowest The seat moves down to the Proceed with inspection position (minimum height) is reached.
- Page 68 Repair Manual MSG 90.6PG Commercial Vehicles, Omnibuses – November 2017 Fault diagnosis Page 7 of 16 TABLE OF CONTENTS Step Inspect/operate Result/specified status Troubleshooting Move the seat to the middle position and apply The level control moves the seat to Proceed with inspection load to the seat.
- Page 69 Repair Manual MSG 90.6PG Commercial Vehicles, Omnibuses – November 2017 Fault diagnosis Page 8 of 16 TABLE OF CONTENTS 3 Checking the air spring Preconditions for fault diagnosis: • Compressed-air reservoir pressure at least 7 bar. • Seat cushion is lifted off in position for repair (Chapter 3.1).
- Page 70 Repair Manual MSG 90.6PG Commercial Vehicles, Omnibuses – November 2017 Fault diagnosis Page 9 of 16 TABLE OF CONTENTS 4 Inspection of the seat heater (Actros, Atego, Axor, bus seat, Kingman) Preconditions for fault diagnosis: • Electrical system of the vehicle has been inspected and found to be OK in compliance with the vehicle operating instructions.
- Page 71 Repair Manual MSG 90.6PG Commercial Vehicles, Omnibuses – November 2017 Fault diagnosis Page 10 of 16 TABLE OF CONTENTS Step Inspect/operate Result/specified status Troubleshooting 4.1b • Disconnect the electrical connection (A) between the Kingman seat and the vehicle. • Turn the heater switch to heating level 2 (high).
- Page 72 Repair Manual MSG 90.6PG Commercial Vehicles, Omnibuses – November 2017 Fault diagnosis Page 11 of 16 TABLE OF CONTENTS Step Inspect/operate Result/specified status Troubleshooting • Disconnect the electrical connection (C) between the heater cable and the cable for seat cushion heater as well as the electrical...
- Page 73 Repair Manual MSG 90.6PG Commercial Vehicles, Omnibuses – November 2017 Fault diagnosis Page 12 of 16 TABLE OF CONTENTS 5 Inspection of the belt tensioner cable Preconditions for fault diagnosis: • Electrical system of the vehicle has been inspected and found to be OK in compliance with the vehicle operating instructions.
- Page 74 Repair Manual MSG 90.6PG Commercial Vehicles, Omnibuses – November 2017 Fault diagnosis Page 13 of 16 TABLE OF CONTENTS 6 Inspection of the belt buckle contact Preconditions for fault diagnosis: • Electrical system of the vehicle has been inspected and found to be OK in compliance with the vehicle operating instructions.
- Page 75 Repair Manual MSG 90.6PG Commercial Vehicles, Omnibuses – November 2017 Fault diagnosis Page 14 of 16 TABLE OF CONTENTS Step Inspect/operate Result/specified status Troubleshooting • Release the belt latch at the belt buckle (buzzing). • Measure the resistance at the contacts in the...
- Page 76 Repair Manual MSG 90.6PG Commercial Vehicles, Omnibuses – November 2017 Fault diagnosis Page 15 of 16 TABLE OF CONTENTS 7 Inspection of the belt buckle with belt buckle cable Preconditions for fault diagnosis: • The electrical system of the vehicle has been inspected and found to be OK in compliance with the vehicle operating instructions.
- Page 77 Repair Manual MSG 90.6PG Commercial Vehicles, Omnibuses – November 2017 Fault diagnosis Page 16 of 16 TABLE OF CONTENTS 8 Inspection of the cable for electro-pneumatic gearshift (EPS cable) Preconditions for fault diagnosis: • The electrical system of the vehicle has been inspected and found to be OK in compliance with the vehicle operating instructions.
- Page 78 Repair Manual MSG 90.6PG Commercial Vehicles, Omnibuses – November 2017 Repair work Page 1 of 6 TABLE OF CONTENTS Seat cushion in position for repair – lifting off and attachment Seat cushion and lever for seat angle and seat depth adjustment – removal and installation Seat cushion cover –...
- Page 79 Repair Manual MSG 90.6PG Commercial Vehicles, Omnibuses – November 2017 Repair work Page 2 of 6 TABLE OF CONTENTS 3.12 Bowden pull wire for backrest adjustment – inspection and adjustment 3.13 Bowden pull wire and lever for backrest adjustment – removal and installation 3.14...
- Page 80 Repair Manual MSG 90.6PG Commercial Vehicles, Omnibuses – November 2017 Repair work Page 3 of 6 TABLE OF CONTENTS 3.23 Valves for lumbar support and lateral support adjustment – removal and installation 3.24 Armrests – removal and installation (delivery option) 3.25...
- Page 81 Repair Manual MSG 90.6PG Commercial Vehicles, Omnibuses – November 2017 Repair work Page 4 of 6 TABLE OF CONTENTS 3.32 Bearing support with backrest locking mechanism and hook-in function – removal and installation 3.33 Lumbar support – removal and installation 3.34...
- Page 82 Repair Manual MSG 90.6PG Commercial Vehicles, Omnibuses – November 2017 Repair work Page 5 of 6 TABLE OF CONTENTS 3.40 Seat fore/aft adjuster – removal and installation 3.40.1 Seat fore/aft adjuster – removal and installation (Actros) 3.40.2 Seat fore/aft adjuster and contact strip – removal and installation (Atego, Axor) 3.40.3 Seat fore/aft adjuster –...
- Page 83 Repair Manual MSG 90.6PG Commercial Vehicles, Omnibuses – November 2017 Repair work Page 6 of 6 TABLE OF CONTENTS 3.48 Bowden pull wire and bearing for ideal backrest adjustment – removal and installation 3.49 Cable harness for backrest – removal and installation (seat with climate control system) 3.50...
- Page 84 Repair Manual MSG 90.6PG Commercial Vehicles, Omnibuses – November 2017 Seat cushion in position for repair – lifting off and attachment Page 1 of 5 RAISE/ATTACH TABLE OF CONTENTS (1) Seat cushion (2) Velcro fastener (at the cover of the backrest (4) and the seat cushion (1)).
- Page 85 Repair Manual MSG 90.6PG Commercial Vehicles, Omnibuses – November 2017 Seat cushion in position for repair – lifting off and attachment Page 2 of 5 RAISE/ATTACH TABLE OF CONTENTS Raise, attach 1 Push the seat cushion (1) as far forward as possible.
- Page 86 Repair Manual MSG 90.6PG Commercial Vehicles, Omnibuses – November 2017 Seat cushion in position for repair – lifting off and attachment Page 3 of 5 RAISE/ATTACH TABLE OF CONTENTS 4 Mark the point where the Bowden pull wire for the seat angle adjustment (3)
- Page 87 Repair Manual MSG 90.6PG Commercial Vehicles, Omnibuses – November 2017 Seat cushion in position for repair – lifting off and attachment Page 4 of 5 REMOVAL / INSTALLATION TABLE OF CONTENTS 6 Mark the point where the cable of the...
- Page 88 Repair Manual MSG 90.6PG Commercial Vehicles, Omnibuses – November 2017 Seat cushion in position for repair – lifting off and attachment Page 5 of 5 RAISE/ATTACH TABLE OF CONTENTS 9 Seat with climate control system: Disconnect the electrical connection between the cable harness for backrest and seat fan cable (see Chapter 2.12.).
- Page 89 Repair Manual MSG 90.6PG Commercial Vehicles, Omnibuses – November 2017 Seat cushion and lever for seat angle and seat depth adjustment – Page 1 of 4 removal and installation REMOVAL / INSTALLATION TABLE OF CONTENTS (1) Round head screw ....2.5 Nm...
- Page 90 Repair Manual MSG 90.6PG Commercial Vehicles, Omnibuses – November 2017 Seat cushion and lever for seat angle and seat depth adjustment – Page 2 of 4 removal and installation REMOVAL / INSTALLATION TABLE OF CONTENTS Removal and installation 2 Operate the lever for seat angle...
- Page 91 Repair Manual MSG 90.6PG Commercial Vehicles, Omnibuses – November 2017 Seat cushion and lever for seat angle and seat depth adjustment – Page 3 of 4 removal and installation REMOVAL / INSTALLATION TABLE OF CONTENTS 6 Pull out the housing (5) at the seat cushion (3) until the hauling rope (8) is accessible.
- Page 92 Repair Manual MSG 90.6PG Commercial Vehicles, Omnibuses – November 2017 Seat cushion and lever for seat angle and seat depth adjustment – Page 4 of 4 removal and installation REMOVAL / INSTALLATION TABLE OF CONTENTS 8 Pull out the housing (5) with the lever...
- Page 93 Repair Manual MSG 90.6PG Commercial Vehicles, Omnibuses – November 2017 Seat cushion cover – removal and installation Page 1 of 1 TABLE OF CONTENTS 3.3.1 Seat cushion cover – removal and installation 3.3.2 Seat cushion cover – removal and installation (seat with climate control system)
- Page 94 Repair Manual MSG 90.6PG Commercial Vehicles, Omnibuses – November 2017 3.3.1 Seat cushion cover – removal and installation Page 1 of 3 REMOVAL INSTALLATION TABLE OF CONTENTS (1) Seat cushion cover (2) Foam plastic part (3) Cable seat cushion heater...
- Page 95 Repair Manual MSG 90.6PG Commercial Vehicles, Omnibuses – November 2017 3.3.1 Seat cushion cover – removal and installation Page 2 of 3 REMOVAL INSTALLATION TABLE OF CONTENTS Removal 3 Mark the location of clamps (6) – 16 pcs. – and remove the seat cushion cover (1) from the clamps (6) using a stopping knife.
- Page 96 Repair Manual MSG 90.6PG Commercial Vehicles, Omnibuses – November 2017 3.3.1 Seat cushion cover – removal and installation Page 3 of 3 REMOVAL INSTALLATION TABLE OF CONTENTS Installation 1 Push new clamps (6) – 16 pcs. – at the marked locations onto the seat plate (5).
- Page 97 Repair Manual MSG 90.6PG Commercial Vehicles, Omnibuses – November 2017 3.3.2 Seat cushion cover – removal and installation Page 1 of 6 (seat with climate control system) REMOVAL INSTALLATION TABLE OF CONTENTS (1) Seat cushion cover (2) Foam plastic part...
- Page 98 Repair Manual MSG 90.6PG Commercial Vehicles, Omnibuses – November 2017 3.3.2 Seat cushion cover – removal and installation Page 2 of 6 (seat with climate control system) REMOVAL INSTALLATION TABLE OF CONTENTS 1 Lift off the seat cushion in position for repair (Chapter 3.1).
- Page 99 Repair Manual MSG 90.6PG Commercial Vehicles, Omnibuses – November 2017 3.3.2 Seat cushion cover – removal and installation Page 3 of 6 (seat with climate control system) REMOVAL INSTALLATION TABLE OF CONTENTS 6 Carefully remove clamps (5) at the seat cushion cover (1).
- Page 100 Repair Manual MSG 90.6PG Commercial Vehicles, Omnibuses – November 2017 3.3.2 Seat cushion cover – removal and installation Page 4 of 6 (seat with climate control system) REMOVAL INSTALLATION TABLE OF CONTENTS ATTENTION Damage! The seat cushion cover (1) is kept...
- Page 101 Repair Manual MSG 90.6PG Commercial Vehicles, Omnibuses – November 2017 3.3.2 Seat cushion cover – removal and installation Page 5 of 6 (seat with climate control system) REMOVAL INSTALLATION TABLE OF CONTENTS Installation 1 Push 16 new clamps (5) onto the seat plate (4) at the marked locations.
- Page 102 Repair Manual MSG 90.6PG Commercial Vehicles, Omnibuses – November 2017 3.3.2 Seat cushion cover – removal and installation Page 6 of 6 (seat with climate control system) REMOVAL INSTALLATION TABLE OF CONTENTS 5 Fasten the cable for the seat cushion...
- Page 103 Repair Manual MSG 90.6PG Commercial Vehicles, Omnibuses – November 2017 Left covering in position for repair – removal and attachment Page 1 of 3 REMOVAL/ATTACHMENT TABLE OF CONTENTS (1) Left covering (2) Lever for seat height adjustment (3) Raised countersunk head screw ........
- Page 104 Repair Manual MSG 90.6PG Commercial Vehicles, Omnibuses – November 2017 Left covering in position for repair – removal and attachment Page 2 of 3 REMOVAL/ATTACHMENT TABLE OF CONTENTS Removal, attachment 2 Unscrew the raised countersunk head screw (3) and pull off the lever for seat height adjustment (2) at the handle support (14).
- Page 105 Repair Manual MSG 90.6PG Commercial Vehicles, Omnibuses – November 2017 Left covering in position for repair – removal and attachment Page 3 of 3 REMOVAL/ATTACHMENT TABLE OF CONTENTS 5 Detach the left covering (1) at the bottom of the supports (4). To do this,...
- Page 106 Repair Manual MSG 90.6PG Commercial Vehicles, Omnibuses – November 2017 Entire covering – removal and attachment Page 1 of 9 REMOVAL / INSTALLATION TABLE OF CONTENTS (1) Covering, right-hand (2) Rear covering (3) Backrest (4) Seat frame (5) Round head screw ....1.7 Nm...
- Page 107 Repair Manual MSG 90.6PG Commercial Vehicles, Omnibuses – November 2017 Entire covering – removal and attachment Page 2 of 9 REMOVAL / INSTALLATION TABLE OF CONTENTS (15) Belt buckle (16) Covering, front (17) Lower snap in hook (18) Upper snap in hook...
- Page 108 Repair Manual MSG 90.6PG Commercial Vehicles, Omnibuses – November 2017 Entire covering – removal and attachment Page 3 of 9 REMOVAL / INSTALLATION TABLE OF CONTENTS 1 Lift off the seat cushion in position for repair (Chapter 3.1). 2 Remove the left covering in position for repair (Chapter 3.4).
- Page 109 Repair Manual MSG 90.6PG Commercial Vehicles, Omnibuses – November 2017 Entire covering – removal and attachment Page 4 of 9 REMOVAL / INSTALLATION TABLE OF CONTENTS Removal and installation 4 Seat without climate control system: Disconnect the electrical connection (B) between the connector (7) and heater switch (23).
- Page 110 Repair Manual MSG 90.6PG Commercial Vehicles, Omnibuses – November 2017 Entire covering – removal and attachment Page 5 of 9 REMOVAL / INSTALLATION TABLE OF CONTENTS ATTENTION Hydrostatic test! The hydraulic test of the seat should be performed after connecting the air hoses (8, 9, 10, 12).
- Page 111 Repair Manual MSG 90.6PG Commercial Vehicles, Omnibuses – November 2017 Entire covering – removal and attachment Page 6 of 9 REMOVAL / INSTALLATION TABLE OF CONTENTS Mark the air hoses (8, 9, 10, 12) and cut off with a sharp knife in a clean and straight way directly behind the connections (arrows) of the valve (13).
- Page 112 Repair Manual MSG 90.6PG Commercial Vehicles, Omnibuses – November 2017 Entire covering – removal and attachment Page 7 of 9 REMOVAL / INSTALLATION TABLE OF CONTENTS 8 Unscrew the round head screw (5). Installation note: Round head screw (5), 1.7 Nm.
- Page 113 Repair Manual MSG 90.6PG Commercial Vehicles, Omnibuses – November 2017 Entire covering – removal and attachment Page 8 of 9 REMOVAL / INSTALLATION TABLE OF CONTENTS 11 Detach the right covering (1) at the bottom from the supports (14). First...
- Page 114 Repair Manual MSG 90.6PG Commercial Vehicles, Omnibuses – November 2017 Entire covering – removal and attachment Page 9 of 9 REMOVAL / INSTALLATION TABLE OF CONTENTS 14 Carefully detach the front snap-in hook (26) at the right-hand covering (1) from the support at the front (16).
- Page 115 Repair Manual MSG 90.6PG Commercial Vehicles, Omnibuses – November 2017 Bellows – removal and installation Page 1 of 5 REMOVAL / INSTALLATION TABLE OF CONTENTS (1) Bellows (2) Lever for seat fore/aft adjustment (3) Seat frame (4) Lower suspension part...
- Page 116 Repair Manual MSG 90.6PG Commercial Vehicles, Omnibuses – November 2017 Bellows – removal and installation Page 2 of 5 REMOVAL / INSTALLATION TABLE OF CONTENTS 1 Lift off the seat cushion in position for repair (Chapter 3.1). Seat with operator console and...
- Page 117 Repair Manual MSG 90.6PG Commercial Vehicles, Omnibuses – November 2017 Bellows – removal and installation Page 3 of 5 REMOVAL / INSTALLATION TABLE OF CONTENTS 4 Remove the entire covering (Chapter 3.5). Note: The rear and front covering do not need to be removed at the right covering.
- Page 118 Repair Manual MSG 90.6PG Commercial Vehicles, Omnibuses – November 2017 Bellows – removal and installation Page 4 of 5 REMOVAL / INSTALLATION TABLE OF CONTENTS 7 Seat with fore/aft isolator: Mark the point where the Bowden pull wire for the fore/aft isolator (12) is...
- Page 119 Repair Manual MSG 90.6PG Commercial Vehicles, Omnibuses – November 2017 Bellows – removal and installation Page 5 of 5 REMOVAL / INSTALLATION TABLE OF CONTENTS 10 Remove five bellows pins (7) at the seat frame (3). 11 Push the seat backwards over the seat fore/aft adjustment (5) as far as possible.
- Page 120 Repair Manual MSG 90.6PG Commercial Vehicles, Omnibuses – November 2017 Bowden pull wire and button for quick lowering of the seat – Page 1 of 6 removal and installation REMOVAL / INSTALLATION TABLE OF CONTENTS (1) Bowden pull wire for quick lowering...
- Page 121 Repair Manual MSG 90.6PG Commercial Vehicles, Omnibuses – November 2017 Bowden pull wire and button for quick lowering of the seat – Page 2 of 6 removal and installation REMOVAL / INSTALLATION TABLE OF CONTENTS 1 Lift off the seat cushion in position for repair (Chapter 3.1).
- Page 122 Repair Manual MSG 90.6PG Commercial Vehicles, Omnibuses – November 2017 Bowden pull wire and button for quick lowering of the seat – Page 3 of 6 removal and installation REMOVAL / INSTALLATION TABLE OF CONTENTS 5 Mark the installation position of the Bowden pull wire for quick lowering of the seat (1) prior to removal.
- Page 123 Repair Manual MSG 90.6PG Commercial Vehicles, Omnibuses – November 2017 Bowden pull wire and button for quick lowering of the seat – Page 4 of 6 removal and installation REMOVAL / INSTALLATION TABLE OF CONTENTS 9 Pull the Bowden pull wire (1) out of the seat suspension in backward direction.
- Page 124 Repair Manual MSG 90.6PG Commercial Vehicles, Omnibuses – November 2017 Bowden pull wire and button for quick lowering of the seat – Page 5 of 6 removal and installation REMOVAL / INSTALLATION TABLE OF CONTENTS 14 Loosen the lock washer (13) at the Bowden pull wire (1).
- Page 125 Repair Manual MSG 90.6PG Commercial Vehicles, Omnibuses – November 2017 Bowden pull wire and button for quick lowering of the seat – Page 6 of 6 removal and installation REMOVAL / INSTALLATION TABLE OF CONTENTS 17.2 Unscrew two rounded head screws (15) and remove the button for quick lowering of the seat (6).
- Page 126 Repair Manual MSG 90.6PG Commercial Vehicles, Omnibuses – November 2017 Bowden pull wire for seat height adjustment – Page 1 of 6 inspection and adjustment INSPECTION ADJUSTMENT TABLE OF CONTENTS (1) Bowden pull wire for seat height - adjustment (2) Handle for seat height adjustment...
- Page 127 Repair Manual MSG 90.6PG Commercial Vehicles, Omnibuses – November 2017 Bowden pull wire for seat height adjustment – Page 2 of 6 inspection and adjustment INSPECTION ADJUSTMENT TABLE OF CONTENTS Inspection Note: Check the Bowden pull wire for seat height adjustment (1) for correct functioning upon installation.
- Page 128 Repair Manual MSG 90.6PG Commercial Vehicles, Omnibuses – November 2017 Bowden pull wire for seat height adjustment – Page 3 of 6 inspection and adjustment INSPECTION ADJUSTMENT TABLE OF CONTENTS Adjustment Notes: • No different adjustable dimensions of the Bowden pull wires for seat height adjustment (1) with regard to seat models with left-hand or right-hand drive.
- Page 129 Repair Manual MSG 90.6PG Commercial Vehicles, Omnibuses – November 2017 Bowden pull wire for seat height adjustment – Page 4 of 6 inspection and adjustment INSPECTION ADJUSTMENT TABLE OF CONTENTS 2 Pull the Bowden pull wire for seat height adjustment (1) as far as...
- Page 130 Repair Manual MSG 90.6PG Commercial Vehicles, Omnibuses – November 2017 Bowden pull wire for seat height adjustment – Page 5 of 6 inspection and adjustment INSPECTION ADJUSTMENT TABLE OF CONTENTS 5 Hold the nut (7) in position and secure the adjustment with the counternut (6).
- Page 131 Repair Manual MSG 90.6PG Commercial Vehicles, Omnibuses – November 2017 Bowden pull wire for seat height adjustment – Page 6 of 6 inspection and adjustment INSPECTION ADJUSTMENT TABLE OF CONTENTS 9 Install the bellows at the rear left of the handle rail (see Chapter 3.6).
- Page 132 Repair Manual MSG 90.6PG Commercial Vehicles, Omnibuses – November 2017 Bowden pull wire and handle support for seat height adjustment – Page 1 of 6 removal and installation REMOVAL / INSTALLATION TABLE OF CONTENTS (1) Bowden pull wire for seat height...
- Page 133 Repair Manual MSG 90.6PG Commercial Vehicles, Omnibuses – November 2017 Bowden pull wire and handle support for seat height adjustment – Page 2 of 6 removal and installation REMOVAL / INSTALLATION TABLE OF CONTENTS 1 Lift off the seat cushion in position for repair (Chapter 3.1).
- Page 134 Repair Manual MSG 90.6PG Commercial Vehicles, Omnibuses – November 2017 Bowden pull wire and handle support for seat height adjustment – Page 3 of 6 removal and installation REMOVAL / INSTALLATION TABLE OF CONTENTS 6 Remove the Bowden pull wire (1) from the control disc (7).
- Page 135 Repair Manual MSG 90.6PG Commercial Vehicles, Omnibuses – November 2017 Bowden pull wire and handle support for seat height adjustment – Page 4 of 6 removal and installation REMOVAL / INSTALLATION TABLE OF CONTENTS 12 Unscrew two rounded head screws (2) and lay the handle rail (3) down.
- Page 136 Repair Manual MSG 90.6PG Commercial Vehicles, Omnibuses – November 2017 Bowden pull wire and handle support for seat height adjustment – Page 5 of 6 removal and installation REMOVAL / INSTALLATION TABLE OF CONTENTS 16 Unthread the Bowden pull wire (1)
- Page 137 Repair Manual MSG 90.6PG Commercial Vehicles, Omnibuses – November 2017 Bowden pull wire and handle support for seat height adjustment – Page 6 of 6 removal and installation REMOVAL / INSTALLATION TABLE OF CONTENTS 17.2 Pull the handle support for seat height adjustment (6) out of the handle rail (3).
- Page 138 Repair Manual MSG 90.6PG Commercial Vehicles, Omnibuses – November 2017 3.10 Bowden pull wire for vertical shock absorber adjustment – Page 1 of 5 inspection and adjustment INSPECTION ADJUSTMENT TABLE OF CONTENTS (1) Bowden pull wire for vertical shock absorber adjustment...
- Page 139 Repair Manual MSG 90.6PG Commercial Vehicles, Omnibuses – November 2017 3.10 Bowden pull wire for vertical shock absorber adjustment – Page 2 of 5 inspection and adjustment INSPECTION ADJUSTMENT TABLE OF CONTENTS Inspection 2 Operate the lever for vertical shock...
- Page 140 Repair Manual MSG 90.6PG Commercial Vehicles, Omnibuses – November 2017 3.10 Bowden pull wire for vertical shock absorber adjustment – Page 3 of 5 inspection and adjustment INSPECTION ADJUSTMENT TABLE OF CONTENTS 4 Check the adjustment of the vertical shock absorber (3): •...
- Page 141 Repair Manual MSG 90.6PG Commercial Vehicles, Omnibuses – November 2017 3.10 Bowden pull wire for vertical shock absorber adjustment – Page 4 of 5 inspection and adjustment INSPECTION ADJUSTMENT TABLE OF CONTENTS 3 Turn the lever for vertical shock absorber adjustment (2) to the middle position.
- Page 142 Repair Manual MSG 90.6PG Commercial Vehicles, Omnibuses – November 2017 3.10 Bowden pull wire for vertical shock absorber adjustment – Page 5 of 5 inspection and adjustment INSPECTION ADJUSTMENT TABLE OF CONTENTS 6 Hold the nut (8) in position and secure the adjustment with the counternut (7).
- Page 143 Repair Manual MSG 90.6PG Commercial Vehicles, Omnibuses – November 2017 3.11 Bowden pull wire and lever for vertical shock absorber adjustment – Page 1 of 7 removal and installation REMOVAL / INSTALLATION TABLE OF CONTENTS (1) Bowden pull wire for vertical shock...
- Page 144 Repair Manual MSG 90.6PG Commercial Vehicles, Omnibuses – November 2017 3.11 Bowden pull wire and lever for vertical shock absorber adjustment – Page 2 of 7 removal and installation REMOVAL / INSTALLATION TABLE OF CONTENTS (14) Axial locking ring ....replace...
- Page 145 Repair Manual MSG 90.6PG Commercial Vehicles, Omnibuses – November 2017 3.11 Bowden pull wire and lever for vertical shock absorber adjustment – Page 3 of 7 removal and installation REMOVAL / INSTALLATION TABLE OF CONTENTS Removal and installation WARNING Risk of crushing!
- Page 146 Repair Manual MSG 90.6PG Commercial Vehicles, Omnibuses – November 2017 3.11 Bowden pull wire and lever for vertical shock absorber adjustment – Page 4 of 7 removal and installation REMOVAL / INSTALLATION TABLE OF CONTENTS 7 Take off the Bowden pull wire (1) at the fork (5) and remove the compression spring (6).
- Page 147 Repair Manual MSG 90.6PG Commercial Vehicles, Omnibuses – November 2017 3.11 Bowden pull wire and lever for vertical shock absorber adjustment – Page 5 of 7 removal and installation REMOVAL / INSTALLATION TABLE OF CONTENTS 10 Pull the Bowden pull wire (1) out of the seat suspension in backward direction.
- Page 148 Repair Manual MSG 90.6PG Commercial Vehicles, Omnibuses – November 2017 3.11 Bowden pull wire and lever for vertical shock absorber adjustment – Page 6 of 7 removal and installation REMOVAL / INSTALLATION TABLE OF CONTENTS 15 Remove the Bowden pull wire (1) at the holder (18).
- Page 149 Repair Manual MSG 90.6PG Commercial Vehicles, Omnibuses – November 2017 3.11 Bowden pull wire and lever for vertical shock absorber adjustment – Page 7 of 7 removal and installation REMOVAL / INSTALLATION TABLE OF CONTENTS If the lever for vertical shock...
- Page 150 Repair Manual MSG 90.6PG Commercial Vehicles, Omnibuses – November 2017 3.12 Bowden pull wire for backrest adjustment – Page 1 of 5 inspection and adjustment INSPECTION ADJUSTMENT TABLE OF CONTENTS (1) Bowden pull wire for backrest adjustment (left) (2) Bowden pull wire for backrest...
- Page 151 Repair Manual MSG 90.6PG Commercial Vehicles, Omnibuses – November 2017 3.12 Bowden pull wire for backrest adjustment – Page 2 of 5 inspection and adjustment INSPECTION ADJUSTMENT TABLE OF CONTENTS 1 Lift off the seat cushion in position for repair (Chapter 3.1).
- Page 152 Repair Manual MSG 90.6PG Commercial Vehicles, Omnibuses – November 2017 3.12 Bowden pull wire for backrest adjustment – Page 3 of 5 inspection and adjustment INSPECTION ADJUSTMENT TABLE OF CONTENTS 4 Carefully pivot the backrest (8) forwards against the stop.
- Page 153 Repair Manual MSG 90.6PG Commercial Vehicles, Omnibuses – November 2017 3.12 Bowden pull wire for backrest adjustment – Page 4 of 5 inspection and adjustment INSPECTION ADJUSTMENT TABLE OF CONTENTS Adjust the regulating screw (9) at the left (1) and right Bowden pull wire (2): 3.1 Loosen the counternut (10) and...
- Page 154 Repair Manual MSG 90.6PG Commercial Vehicles, Omnibuses – November 2017 3.12 Bowden pull wire for backrest adjustment – Page 5 of 5 inspection and adjustment INSPECTION ADJUSTMENT TABLE OF CONTENTS 4 Lock/unlock the backrest (8) several times and check the adjustment on both sides, readjust if necessary.
- Page 155 Repair Manual MSG 90.6PG Commercial Vehicles, Omnibuses – November 2017 3.13 Bowden pull wire and lever for backrest adjustment – Page 1 of 6 removal and installation REMOVAL / INSTALLATION TABLE OF CONTENTS (1) Bowden pull wire for backrest adjustment (left)
- Page 156 Repair Manual MSG 90.6PG Commercial Vehicles, Omnibuses – November 2017 3.13 Bowden pull wire and lever for backrest adjustment – Page 2 of 6 removal and installation REMOVAL / INSTALLATION TABLE OF CONTENTS (13) Torsion spring (14) Cable tie (15) Clamp...
- Page 157 Repair Manual MSG 90.6PG Commercial Vehicles, Omnibuses – November 2017 3.13 Bowden pull wire and lever for backrest adjustment – Page 3 of 6 removal and installation REMOVAL / INSTALLATION TABLE OF CONTENTS Removal and installation 4 Mark the point where the right...
- Page 158 Repair Manual MSG 90.6PG Commercial Vehicles, Omnibuses – November 2017 3.13 Bowden pull wire and lever for backrest adjustment – Page 4 of 6 removal and installation REMOVAL / INSTALLATION TABLE OF CONTENTS 6 Fold the backrest (3) forward until the lock (10) is free.
- Page 159 Repair Manual MSG 90.6PG Commercial Vehicles, Omnibuses – November 2017 3.13 Bowden pull wire and lever for backrest adjustment – Page 5 of 6 removal and installation REMOVAL / INSTALLATION TABLE OF CONTENTS 10 Remove two axial locking rings (6) at the stud (4).
- Page 160 Repair Manual MSG 90.6PG Commercial Vehicles, Omnibuses – November 2017 3.13 Bowden pull wire and lever for backrest adjustment – Page 6 of 6 removal and installation REMOVAL / INSTALLATION TABLE OF CONTENTS 13 Loosen the lock washers (8) at the left Bowden pull wire (1) and at the right Bowden pull wire (2).
- Page 161 Repair Manual MSG 90.6PG Commercial Vehicles, Omnibuses – November 2017 3.14 Bowden pull wire for locking mechanism of the fore/aft isolator – Page 1 of 5 inspection and adjustment (delivery option) INSPECTION ADJUSTMENT TABLE OF CONTENTS (1) Lever for fore/aft isolator...
- Page 162 Repair Manual MSG 90.6PG Commercial Vehicles, Omnibuses – November 2017 3.14 Bowden pull wire for locking mechanism of the fore/aft isolator – Page 2 of 5 inspection and adjustment (delivery option) INSPECTION ADJUSTMENT TABLE OF CONTENTS 1 Lift off the seat cushion in position for repair (Chapter 3.1).
- Page 163 Repair Manual MSG 90.6PG Commercial Vehicles, Omnibuses – November 2017 3.14 Bowden pull wire for locking mechanism of the fore/aft isolator – Page 3 of 5 inspection and adjustment (delivery option) INSPECTION ADJUSTMENT TABLE OF CONTENTS 3.2 The retracting spring (8) must lock the stop lever (7) into the clamp (10) (arrow direction "e").
- Page 164 Repair Manual MSG 90.6PG Commercial Vehicles, Omnibuses – November 2017 3.14 Bowden pull wire for locking mechanism of the fore/aft isolator – Page 4 of 5 inspection and adjustment (delivery option) INSPECTION ADJUSTMENT TABLE OF CONTENTS 4.2 The Bowden pull wire (4) must...
- Page 165 Repair Manual MSG 90.6PG Commercial Vehicles, Omnibuses – November 2017 3.14 Bowden pull wire for locking mechanism of the fore/aft isolator – Page 5 of 5 inspection and adjustment (delivery option) INSPECTION ADJUSTMENT TABLE OF CONTENTS 2 Turn the regulating screw (14) away...
- Page 166 Repair Manual MSG 90.6PG Commercial Vehicles, Omnibuses – November 2017 3.15 Bowden pull wire for locking mechanism of the fore/aft isolator – Page 1 of 4 removal and installation (delivery option) REMOVAL / INSTALLATION TABLE OF CONTENTS (1) Bowden pull wire for locking...
- Page 167 Repair Manual MSG 90.6PG Commercial Vehicles, Omnibuses – November 2017 3.15 Bowden pull wire for locking mechanism of the fore/aft isolator – Page 2 of 4 removal and installation (delivery option) REMOVAL / INSTALLATION TABLE OF CONTENTS 3 Seat with operator console and...
- Page 168 Repair Manual MSG 90.6PG Commercial Vehicles, Omnibuses – November 2017 3.15 Bowden pull wire for locking mechanism of the fore/aft isolator – Page 3 of 4 removal and installation (delivery option) REMOVAL / INSTALLATION TABLE OF CONTENTS 6 Temporarily reinstall the lever for the...
- Page 169 Repair Manual MSG 90.6PG Commercial Vehicles, Omnibuses – November 2017 3.15 Bowden pull wire for locking mechanism of the fore/aft isolator – Page 4 of 4 removal and installation (delivery option) REMOVAL / INSTALLATION TABLE OF CONTENTS 9 Loosen the lock washer (2) at the Bowden pull wire (1).
- Page 170 Repair Manual MSG 90.6PG Commercial Vehicles, Omnibuses – November 2017 3.16 Bowden pull wire for seat angle adjustment – Page 1 of 4 inspection and adjustment INSPECTION ADJUSTMENT TABLE OF CONTENTS (1) Lever for seat angle adjustment (2) Seat cushion...
- Page 171 Repair Manual MSG 90.6PG Commercial Vehicles, Omnibuses – November 2017 3.16 Bowden pull wire for seat angle adjustment – Page 2 of 4 inspection and adjustment INSPECTION ADJUSTMENT TABLE OF CONTENTS Inspection 2 Apply load to the seat frame (9) and lock/unlock the lever for seat angle adjustment (1) several times.
- Page 172 Repair Manual MSG 90.6PG Commercial Vehicles, Omnibuses – November 2017 3.16 Bowden pull wire for seat angle adjustment – Page 3 of 4 inspection and adjustment INSPECTION ADJUSTMENT TABLE OF CONTENTS 3 Check the adjustment of the right (4) and left latch (5) in the 8 locking positions: •...
- Page 173 Repair Manual MSG 90.6PG Commercial Vehicles, Omnibuses – November 2017 3.16 Bowden pull wire for seat angle adjustment – Page 4 of 4 inspection and adjustment INSPECTION ADJUSTMENT TABLE OF CONTENTS Adjustment 1 Adjust the seat to the middle adjustment of the seat angle and lock it in this position.
- Page 174 Repair Manual MSG 90.6PG Commercial Vehicles, Omnibuses – November 2017 3.17 Bowden pull wire for seat angle adjustment with locking mechanism – Page 1 of 9 removal and installation REMOVAL INSTALLATION TABLE OF CONTENTS (1) Locking mechanism (complete) (2) Compression spring (3) Housing ......
- Page 175 Repair Manual MSG 90.6PG Commercial Vehicles, Omnibuses – November 2017 3.17 Bowden pull wire for seat angle adjustment with locking mechanism – Page 2 of 9 removal and installation REMOVAL INSTALLATION TABLE OF CONTENTS 1 Lift off the seat cushion in position for repair (Chapter 3.1).
- Page 176 Repair Manual MSG 90.6PG Commercial Vehicles, Omnibuses – November 2017 3.17 Bowden pull wire for seat angle adjustment with locking mechanism – Page 3 of 9 removal and installation REMOVAL INSTALLATION TABLE OF CONTENTS Removal WARNING Risk of crushing! Bring the seat into the highest position...
- Page 177 Repair Manual MSG 90.6PG Commercial Vehicles, Omnibuses – November 2017 3.17 Bowden pull wire for seat angle adjustment with locking mechanism – Page 4 of 9 removal and installation REMOVAL INSTALLATION TABLE OF CONTENTS 10 Remove the cover (9) at the housing (3).
- Page 178 Repair Manual MSG 90.6PG Commercial Vehicles, Omnibuses – November 2017 3.17 Bowden pull wire for seat angle adjustment with locking mechanism – Page 5 of 9 removal and installation REMOVAL INSTALLATION TABLE OF CONTENTS Installation 1 Adjust the new Bowden pull wire (5) to the length of the old one (excess length of the wire).
- Page 179 Repair Manual MSG 90.6PG Commercial Vehicles, Omnibuses – November 2017 3.17 Bowden pull wire for seat angle adjustment with locking mechanism – Page 6 of 9 removal and installation REMOVAL INSTALLATION TABLE OF CONTENTS 6 Apply acid-free multi-purpose lubricant (F) to the compression springs (8).
- Page 180 Repair Manual MSG 90.6PG Commercial Vehicles, Omnibuses – November 2017 3.17 Bowden pull wire for seat angle adjustment with locking mechanism – Page 7 of 9 removal and installation REMOVAL INSTALLATION TABLE OF CONTENTS 10 Turn the complete locking 15 14...
- Page 181 Repair Manual MSG 90.6PG Commercial Vehicles, Omnibuses – November 2017 3.17 Bowden pull wire for seat angle adjustment with locking mechanism – Page 8 of 9 removal and installation REMOVAL INSTALLATION TABLE OF CONTENTS 13 Press in the left latch (17) by hand...
- Page 182 Repair Manual MSG 90.6PG Commercial Vehicles, Omnibuses – November 2017 3.17 Bowden pull wire for seat angle adjustment with locking mechanism – Page 9 of 9 removal and installation REMOVAL INSTALLATION TABLE OF CONTENTS 16 Install the compression spring (2) under the bearing pins of the catch element (4).
- Page 183 Repair Manual MSG 90.6PG Commercial Vehicles, Omnibuses – November 2017 3.18 Handle rail – removal and installation Page 1 of 4 REMOVAL / INSTALLATION TABLE OF CONTENTS (1) Handle rail (2) Rounded head screw ....3 Nm (3) Bowden pull wire for seat height...
- Page 184 Repair Manual MSG 90.6PG Commercial Vehicles, Omnibuses – November 2017 3.18 Handle rail – removal and installation Page 2 of 4 REMOVAL / INSTALLATION TABLE OF CONTENTS Removal and installation WARNING Risk of crushing! Bring the seat into the highest position...
- Page 185 Repair Manual MSG 90.6PG Commercial Vehicles, Omnibuses – November 2017 3.18 Handle rail – removal and installation Page 3 of 4 REMOVAL / INSTALLATION TABLE OF CONTENTS 5 If the Bowden pull wire for quick lowering of the seat (4) is defective:...
- Page 186 Repair Manual MSG 90.6PG Commercial Vehicles, Omnibuses – November 2017 3.18 Handle rail – removal and installation Page 4 of 4 REMOVAL / INSTALLATION TABLE OF CONTENTS 9 If the Bowden pull wire for vertical shock absorber adjustment (5) is...
- Page 187 Repair Manual MSG 90.6PG Commercial Vehicles, Omnibuses – November 2017 3.19 Heater switch – removal and installation Page 1 of 1 TABLE OF CONTENTS 3.19.1 Heater switch – removal and installation 3.19.2 Heater switch – removal and installation (seat with climate control system)
- Page 188 Repair Manual MSG 90.6PG Commercial Vehicles, Omnibuses – November 2017 3.19.1 Heater switch – removal and installation Page 1 of 2 RAISE/ATTACH TABLE OF CONTENTS (1) Heater switch (2) Left covering (3) Plug (for cable for heater switch) 1 Lift off the seat cushion in position for repair (Chapter 3.1).
- Page 189 Repair Manual MSG 90.6PG Commercial Vehicles, Omnibuses – November 2017 3.19.1 Heater switch – removal and installation Page 2 of 2 RAISE/ATTACH TABLE OF CONTENTS Removal and installation 3 Disconnect the electrical connection (B) between the connector (3) and heater switch (1).
- Page 190 Repair Manual MSG 90.6PG Commercial Vehicles, Omnibuses – November 2017 3.19.2 Heater switch - removal and installation Page 1 of 2 (seat with climate control system) RAISE/ATTACH TABLE OF CONTENTS (1) Heater switch (2) Left covering (3) Plug (cable harness for heater...
- Page 191 Repair Manual MSG 90.6PG Commercial Vehicles, Omnibuses – November 2017 3.19.2 Heater switch - removal and installation Page 2 of 2 (seat with climate control system) RAISE/ATTACH TABLE OF CONTENTS Removal and installation 3 Mark two electrical connections (N) (note the color of the cables) and...
- Page 192 Repair Manual MSG 90.6PG Commercial Vehicles, Omnibuses – November 2017 3.20 Heater cable and belt tensioner cable (delivery option) – Page 1 of 8 removal and installation REMOVAL / INSTALLATION TABLE OF CONTENTS (1) Cable for backrest heater (2) Cable for seat cushion heater...
- Page 193 Repair Manual MSG 90.6PG Commercial Vehicles, Omnibuses – November 2017 3.20 Heater cable and belt tensioner cable (delivery option) – Page 2 of 8 removal and installation REMOVAL / INSTALLATION TABLE OF CONTENTS Electrical plug and socket connections: (A) Electrical connection between the...
- Page 194 Repair Manual MSG 90.6PG Commercial Vehicles, Omnibuses – November 2017 3.20 Heater cable and belt tensioner cable (delivery option) – Page 3 of 8 removal and installation REMOVAL / INSTALLATION TABLE OF CONTENTS 1 Lift off the seat cushion in position for repair (Chapter 3.1).
- Page 195 Repair Manual MSG 90.6PG Commercial Vehicles, Omnibuses – November 2017 3.20 Heater cable and belt tensioner cable (delivery option) – Page 4 of 8 removal and installation REMOVAL / INSTALLATION TABLE OF CONTENTS Seat with belt tensioner (7): 6.1 Mark the point where the belt...
- Page 196 Repair Manual MSG 90.6PG Commercial Vehicles, Omnibuses – November 2017 3.20 Heater cable and belt tensioner cable (delivery option) – Page 5 of 8 removal and installation REMOVAL / INSTALLATION TABLE OF CONTENTS 7 Mark the point where the cable of the...
- Page 197 Repair Manual MSG 90.6PG Commercial Vehicles, Omnibuses – November 2017 3.20 Heater cable and belt tensioner cable (delivery option) – Page 6 of 8 removal and installation REMOVAL / INSTALLATION TABLE OF CONTENTS 9 Disconnect the electrical connections (C, D).
- Page 198 Repair Manual MSG 90.6PG Commercial Vehicles, Omnibuses – November 2017 3.20 Heater cable and belt tensioner cable (delivery option) – Page 7 of 8 removal and installation REMOVAL / INSTALLATION TABLE OF CONTENTS 13 Pull out the clip (14) at the Z-section (15) and detach the cable of the heater switch (3) at the clip (14).
- Page 199 Repair Manual MSG 90.6PG Commercial Vehicles, Omnibuses – November 2017 3.20 Heater cable and belt tensioner cable (delivery option) – Page 8 of 8 removal and installation REMOVAL / INSTALLATION TABLE OF CONTENTS 16 Disconnect the electrical connection (A). For seat model Actros: (see Chapter 3.39).
- Page 200 Repair Manual MSG 90.6PG Commercial Vehicles, Omnibuses – November 2017 3.21 Cable for electro-pneumatic gearshift (EPS) – removal and installation Page 1 of 6 REMOVAL / INSTALLATION TABLE OF CONTENTS (1) Cable for electro-pneumatic gearshift (EPS cable) (2) Right covering...
- Page 201 Repair Manual MSG 90.6PG Commercial Vehicles, Omnibuses – November 2017 3.21 Cable for electro-pneumatic gearshift (EPS) – removal and installation Page 2 of 6 REMOVAL / INSTALLATION TABLE OF CONTENTS 1 Lift off the seat cushion in position for repair (Chapter 3.1).
- Page 202 Repair Manual MSG 90.6PG Commercial Vehicles, Omnibuses – November 2017 3.21 Cable for electro-pneumatic gearshift (EPS) – removal and installation Page 3 of 6 REMOVAL / INSTALLATION TABLE OF CONTENTS 5 Thread the EPS cable (1) through the right covering (2).
- Page 203 Repair Manual MSG 90.6PG Commercial Vehicles, Omnibuses – November 2017 3.21 Cable for electro-pneumatic gearshift (EPS) – removal and installation Page 4 of 6 REMOVAL / INSTALLATION TABLE OF CONTENTS 10 Mark the position of the clip (8) at the EPS cable (1) and pull off the clip (8) at the EPS cable (1).
- Page 204 Repair Manual MSG 90.6PG Commercial Vehicles, Omnibuses – November 2017 3.21 Cable for electro-pneumatic gearshift (EPS) – removal and installation Page 5 of 6 REMOVAL / INSTALLATION TABLE OF CONTENTS For seat model Actros: 11.1 Remove the plug of the EPS cable at the pin contact strip (see Chapter 3.39).
- Page 205 Repair Manual MSG 90.6PG Commercial Vehicles, Omnibuses – November 2017 3.21 Cable for electro-pneumatic gearshift (EPS) – removal and installation Page 6 of 6 REMOVAL / INSTALLATION TABLE OF CONTENTS For seat models Atego, Axor: 12.1 Remove the plug of the EPS cable at the pin contact strip (see Chapter 3.40).
- Page 206 Repair Manual MSG 90.6PG Commercial Vehicles, Omnibuses – November 2017 3.22 Air hose set – removal and installation Page 1 of 15 REMOVAL / INSTALLATION TABLE OF CONTENTS (1) Air hose (blue) for air spring (Z) (2) Air hose (black) for air intake (P)
- Page 207 Repair Manual MSG 90.6PG Commercial Vehicles, Omnibuses – November 2017 3.22 Air hose set – removal and installation Page 2 of 15 REMOVAL / INSTALLATION TABLE OF CONTENTS (12) Cable for vehicle connection (13) Cable tie (14) Hose connector (T-piece)
- Page 208 Repair Manual MSG 90.6PG Commercial Vehicles, Omnibuses – November 2017 3.22 Air hose set – removal and installation Page 3 of 15 REMOVAL / INSTALLATION TABLE OF CONTENTS General instructions for air hose (2, 3, 4) installation in bus seats: •...
- Page 209 Repair Manual MSG 90.6PG Commercial Vehicles, Omnibuses – November 2017 3.22 Air hose set – removal and installation Page 4 of 15 REMOVAL / INSTALLATION TABLE OF CONTENTS ATTENTION Malfunction! • It is not allowed to replace individual air hoses (2, 3, 4) due to risk of crushing (when improperly installed).
- Page 210 Repair Manual MSG 90.6PG Commercial Vehicles, Omnibuses – November 2017 3.22 Air hose set – removal and installation Page 5 of 15 REMOVAL / INSTALLATION TABLE OF CONTENTS ATTENTION Hydrostatic test! The hydraulic test of the seat should be performed upon installation of the air hoses (1, 2, 3, 4).
- Page 211 Repair Manual MSG 90.6PG Commercial Vehicles, Omnibuses – November 2017 3.22 Air hose set – removal and installation Page 6 of 15 REMOVAL / INSTALLATION TABLE OF CONTENTS 3 Take off the rear covering at the right covering (see Chapter 3.5).
- Page 212 Repair Manual MSG 90.6PG Commercial Vehicles, Omnibuses – November 2017 3.22 Air hose set – removal and installation Page 7 of 15 REMOVAL / INSTALLATION TABLE OF CONTENTS Removal and installation WARNING Risk of crushing! Bring the seat into the highest position...
- Page 213 Repair Manual MSG 90.6PG Commercial Vehicles, Omnibuses – November 2017 3.22 Air hose set – removal and installation Page 8 of 15 REMOVAL / INSTALLATION TABLE OF CONTENTS ATTENTION Damage! Take care not to damage the connection (mandrel profile) of the level control (8).
- Page 214 Repair Manual MSG 90.6PG Commercial Vehicles, Omnibuses – November 2017 3.22 Air hose set – removal and installation Page 9 of 15 REMOVAL / INSTALLATION TABLE OF CONTENTS 8.3 Pull off the hose nozzle (9) at the air hose (1).
- Page 215 Repair Manual MSG 90.6PG Commercial Vehicles, Omnibuses – November 2017 3.22 Air hose set – removal and installation Page 10 of 15 REMOVAL / INSTALLATION TABLE OF CONTENTS 10 Pull out the clip (18) at the Z-section (17) and detach the air hose (4) at the clip (18).
- Page 216 Repair Manual MSG 90.6PG Commercial Vehicles, Omnibuses – November 2017 3.22 Air hose set – removal and installation Page 11 of 15 REMOVAL / INSTALLATION TABLE OF CONTENTS ATTENTION Damage! Take care not to damage the connections (mandrel profiles) of the level control (8).
- Page 217 Repair Manual MSG 90.6PG Commercial Vehicles, Omnibuses – November 2017 3.22 Air hose set – removal and installation Page 12 of 15 REMOVAL / INSTALLATION TABLE OF CONTENTS 15 Pull off the hose nozzle (9) at the air hose (2).
- Page 218 Repair Manual MSG 90.6PG Commercial Vehicles, Omnibuses – November 2017 3.22 Air hose set – removal and installation Page 13 of 15 REMOVAL / INSTALLATION TABLE OF CONTENTS For seat model Actros: 18.1 Remove the air hoses at the pin contact strip (see Chapter 3.39).
- Page 219 Repair Manual MSG 90.6PG Commercial Vehicles, Omnibuses – November 2017 3.22 Air hose set – removal and installation Page 14 of 15 REMOVAL / INSTALLATION TABLE OF CONTENTS For seat models Atego/Axor: 19.1 Remove the air hoses at the pin contact strip (see Chapter 3.40).
- Page 220 Repair Manual MSG 90.6PG Commercial Vehicles, Omnibuses – November 2017 3.22 Air hose set – removal and installation Page 15 of 15 REMOVAL / INSTALLATION TABLE OF CONTENTS 19.4 Mark the point where the air hoses (2, 3) and the cable for vehicle...
- Page 221 Repair Manual MSG 90.6PG Commercial Vehicles, Omnibuses – November 2017 3.23 Valves for lumbar support and lateral support adjustment – Page 1 of 4 removal and installation REMOVAL / INSTALLATION TABLE OF CONTENTS (1) Air hose for lumbar support, lower...
- Page 222 Repair Manual MSG 90.6PG Commercial Vehicles, Omnibuses – November 2017 3.23 Valves for lumbar support and lateral support adjustment – Page 2 of 4 removal and installation REMOVAL / INSTALLATION TABLE OF CONTENTS 1 Lift off the seat cushion in position for repair (Chapter 3.1).
- Page 223 Repair Manual MSG 90.6PG Commercial Vehicles, Omnibuses – November 2017 3.23 Valves for lumbar support and lateral support adjustment – Page 3 of 4 removal and installation REMOVAL / INSTALLATION TABLE OF CONTENTS ATTENTION Damage! Take care not to damage the air hoses (1, 2, 3, 4).
- Page 224 Repair Manual MSG 90.6PG Commercial Vehicles, Omnibuses – November 2017 3.23 Valves for lumbar support and lateral support adjustment – Page 4 of 4 removal and installation REMOVAL / INSTALLATION TABLE OF CONTENTS Notes: • The air hoses (1, 2, 3, 4) can be cut off only once.
- Page 225 Repair Manual MSG 90.6PG Commercial Vehicles, Omnibuses – November 2017 3.24 Armrests – removal and installation (delivery option) Page 1 of 2 REMOVAL / INSTALLATION TABLE OF CONTENTS (1) Backrest (2) Backrest cover (3) Rounded head screw (inner race) ......4 Nm...
- Page 226 Repair Manual MSG 90.6PG Commercial Vehicles, Omnibuses – November 2017 3.24 Armrests – removal and installation (delivery option) Page 2 of 2 REMOVAL / INSTALLATION TABLE OF CONTENTS Removal and installation 1 Unscrew two rounded head screws (3). Installation note: Rounded head screw (3), 4 Nm.
- Page 227 Repair Manual MSG 90.6PG Commercial Vehicles, Omnibuses – November 2017 3.25 Operator console and armrest for electro-pneumatic gearshift (EPS) – Page 1 of 5 removal and installation (delivery option) REMOVAL / INSTALLATION TABLE OF CONTENTS (1) Support for EPS console...
- Page 228 Repair Manual MSG 90.6PG Commercial Vehicles, Omnibuses – November 2017 3.25 Operator console and armrest for electro-pneumatic gearshift (EPS) – Page 2 of 5 removal and installation (delivery option) REMOVAL / INSTALLATION TABLE OF CONTENTS (12) Left armrest, bottom (13) Right armrest, top...
- Page 229 Repair Manual MSG 90.6PG Commercial Vehicles, Omnibuses – November 2017 3.25 Operator console and armrest for electro-pneumatic gearshift (EPS) – Page 3 of 5 removal and installation (delivery option) REMOVAL / INSTALLATION TABLE OF CONTENTS Removal and installation 1 Disconnect the electrical connection between the plug of the EPS cable (6) and the EPS control element (3).
- Page 230 Repair Manual MSG 90.6PG Commercial Vehicles, Omnibuses – November 2017 3.25 Operator console and armrest for electro-pneumatic gearshift (EPS) – Page 4 of 5 removal and installation (delivery option) REMOVAL / INSTALLATION TABLE OF CONTENTS 6 Unscrew the micro-encapsulated cap...
- Page 231 Repair Manual MSG 90.6PG Commercial Vehicles, Omnibuses – November 2017 3.25 Operator console and armrest for electro-pneumatic gearshift (EPS) – Page 5 of 5 removal and installation (delivery option) REMOVAL / INSTALLATION TABLE OF CONTENTS Remove the right armrest (12, 13): 8.1 Unscrew four rounded head screws...
- Page 232 Repair Manual MSG 90.6PG Commercial Vehicles, Omnibuses – November 2017 3.26 Backrest cover and seat belt – removal and installation Page 1 of 9 REMOVAL / INSTALLATION TABLE OF CONTENTS (1) Hexagon bolt ......45 Nm (2) Belt buckle (3) Spacer...
- Page 233 Repair Manual MSG 90.6PG Commercial Vehicles, Omnibuses – November 2017 3.26 Backrest cover and seat belt – removal and installation Page 2 of 9 REMOVAL / INSTALLATION TABLE OF CONTENTS (15) Belt guide (16) Rounded head screw (inner race) ......2 Nm...
- Page 234 Repair Manual MSG 90.6PG Commercial Vehicles, Omnibuses – November 2017 3.26 Backrest cover and seat belt – removal and installation Page 3 of 9 REMOVAL / INSTALLATION TABLE OF CONTENTS 1 Lift off the seat cushion in position for repair (Chapter 3.1).
- Page 235 Repair Manual MSG 90.6PG Commercial Vehicles, Omnibuses – November 2017 3.26 Backrest cover and seat belt – removal and installation Page 4 of 9 REMOVAL / INSTALLATION TABLE OF CONTENTS Removal and installation 5 Unscrew the five rounded head screws (11) and remove the backrest cover (12).
- Page 236 Repair Manual MSG 90.6PG Commercial Vehicles, Omnibuses – November 2017 3.26 Backrest cover and seat belt – removal and installation Page 5 of 9 REMOVAL / INSTALLATION TABLE OF CONTENTS Belt roller (9) with belt tensioner (25): WARNING Risk of injury! Pay attention to the safety notes in Chapter 1.1 on belt roller (9) with...
- Page 237 Repair Manual MSG 90.6PG Commercial Vehicles, Omnibuses – November 2017 3.26 Backrest cover and seat belt – removal and installation Page 6 of 9 REMOVAL / INSTALLATION TABLE OF CONTENTS 8 Unscrew the hexagon bolt (10) at the support (13) and remove the spring washer (8).
- Page 238 Repair Manual MSG 90.6PG Commercial Vehicles, Omnibuses – November 2017 3.26 Backrest cover and seat belt – removal and installation Page 7 of 9 REMOVAL / INSTALLATION TABLE OF CONTENTS 10 Unscrew the serrated washer head screw (18), and put aside the belt bracket (17) with the belt guide (21).
- Page 239 Repair Manual MSG 90.6PG Commercial Vehicles, Omnibuses – November 2017 3.26 Backrest cover and seat belt – removal and installation Page 8 of 9 REMOVAL / INSTALLATION TABLE OF CONTENTS 12 Pull out the belt guide (15) forwards towards the backrest (23).
- Page 240 Repair Manual MSG 90.6PG Commercial Vehicles, Omnibuses – November 2017 3.26 Backrest cover and seat belt – removal and installation Page 9 of 9 REMOVAL / INSTALLATION TABLE OF CONTENTS 15 Belt buckle with belt buckle cable: Remove the belt buckle with belt buckle cable (Chapter 3.28).
- Page 241 Repair Manual MSG 90.6PG Commercial Vehicles, Omnibuses – November 2017 3.27 Lap belt – removal and installation Page 1 of 4 REMOVAL / INSTALLATION TABLE OF CONTENTS (1) Hexagon bolt ......45 Nm (2) Belt buckle (3) Spacer (4) Seat frame...
- Page 242 Repair Manual MSG 90.6PG Commercial Vehicles, Omnibuses – November 2017 3.27 Lap belt – removal and installation Page 2 of 4 REMOVAL / INSTALLATION TABLE OF CONTENTS 1 Lift off the seat cushion in position for repair (Chapter 3.1). 2 Seat with operator console and...
- Page 243 Repair Manual MSG 90.6PG Commercial Vehicles, Omnibuses – November 2017 3.27 Lap belt – removal and installation Page 3 of 4 REMOVAL / INSTALLATION TABLE OF CONTENTS Removal and installation 5 Belt buckle with belt buckle cable: Remove the belt buckle with belt buckle cable (Chapter 3.28).
- Page 244 Repair Manual MSG 90.6PG Commercial Vehicles, Omnibuses – November 2017 3.27 Lap belt – removal and installation Page 4 of 4 REMOVAL / INSTALLATION TABLE OF CONTENTS 7 Unscrew the groove screw (11) from the support (6). Note: The groove screw (11) protects the belt roller (8) against distortion.
- Page 245 Repair Manual MSG 90.6PG Commercial Vehicles, Omnibuses – November 2017 3.28 Belt buckle with belt buckle cable (delivery option) – Page 1 of 3 removal and installation REMOVAL / INSTALLATION TABLE OF CONTENTS (1) Belt buckle (with belt buckle cable) (2) Belt buckle cable (short) (3) Hexagon bolt ......
- Page 246 Repair Manual MSG 90.6PG Commercial Vehicles, Omnibuses – November 2017 3.28 Belt buckle with belt buckle cable (delivery option) – Page 2 of 3 removal and installation REMOVAL / INSTALLATION TABLE OF CONTENTS 1 Lift off the seat cushion in position for repair (Chapter 3.1).
- Page 247 Repair Manual MSG 90.6PG Commercial Vehicles, Omnibuses – November 2017 3.28 Belt buckle with belt buckle cable (delivery option) – Page 3 of 3 removal and installation REMOVAL / INSTALLATION TABLE OF CONTENTS 6 Pull out the clip (8) at the seat frame (10).
- Page 248 Repair Manual MSG 90.6PG Commercial Vehicles, Omnibuses – November 2017 3.29 Secondary belt – removal and installation Page 1 of 3 REMOVAL / INSTALLATION TABLE OF CONTENTS (1) Webbing (secondary belt) (2) Seat frame (3) Protective profile (4) Micro-encapsulated cap screw ....
- Page 249 Repair Manual MSG 90.6PG Commercial Vehicles, Omnibuses – November 2017 3.29 Secondary belt – removal and installation Page 2 of 3 REMOVAL / INSTALLATION TABLE OF CONTENTS 1 Lift off the seat cushion in position for repair (Chapter 3.1). 2 Seat with operator console and...
- Page 250 Repair Manual MSG 90.6PG Commercial Vehicles, Omnibuses – November 2017 3.29 Secondary belt – removal and installation Page 3 of 3 REMOVAL / INSTALLATION TABLE OF CONTENTS 5 Detach the webbing retaining plate (5) at the lower suspension part (6).
- Page 251 Repair Manual MSG 90.6PG Commercial Vehicles, Omnibuses – November 2017 3.30 Backrest – removal and installation Page 1 of 13 REMOVAL INSTALLATION TABLE OF CONTENTS (1) Renew micro-encapsulated hexagon bolt (right), ....to replace, grease, 47 Nm (2) Bearing support (right-hand) (3) Micro-encapsulated cap screw ....
- Page 252 Repair Manual MSG 90.6PG Commercial Vehicles, Omnibuses – November 2017 3.30 Backrest – removal and installation Page 2 of 13 REMOVAL INSTALLATION TABLE OF CONTENTS Note: If the scope of delivery of spare parts contain bolts which are not micro- encapsulated, a suitable threadlocking compound (e.
- Page 253 Repair Manual MSG 90.6PG Commercial Vehicles, Omnibuses – November 2017 3.30 Backrest – removal and installation Page 3 of 13 REMOVAL INSTALLATION TABLE OF CONTENTS 4 Remove the left covering in position for repair (Chapter 3.4). 5 Remove the covering completely (Chapter 3.5).
- Page 254 Repair Manual MSG 90.6PG Commercial Vehicles, Omnibuses – November 2017 3.30 Backrest – removal and installation Page 4 of 13 REMOVAL INSTALLATION TABLE OF CONTENTS 7 Remove the backrest cover and the safety belt (see Chapter 3.26). Note: Remove the safety belt only at the backrest.
- Page 255 Repair Manual MSG 90.6PG Commercial Vehicles, Omnibuses – November 2017 3.30 Backrest – removal and installation Page 5 of 13 REMOVAL INSTALLATION TABLE OF CONTENTS 9.2 Remove the cable harness for the brackets (see Chapter 3.49). Note: Electrical connections between...
- Page 256 Repair Manual MSG 90.6PG Commercial Vehicles, Omnibuses – November 2017 3.30 Backrest – removal and installation Page 6 of 13 REMOVAL INSTALLATION TABLE OF CONTENTS Removal 10 Unscrew two micro-encapsulated cap screws (3) from the right and left hexagon nut (4).
- Page 257 Repair Manual MSG 90.6PG Commercial Vehicles, Omnibuses – November 2017 3.30 Backrest – removal and installation Page 7 of 13 REMOVAL INSTALLATION TABLE OF CONTENTS 13 Unscrew two hexagon bolts (1, 10) and remove the backrest (7) with the torsion springs (5, 9) at the bearing supports (2, 11).
- Page 258 Repair Manual MSG 90.6PG Commercial Vehicles, Omnibuses – November 2017 3.30 Backrest – removal and installation Page 8 of 13 REMOVAL INSTALLATION TABLE OF CONTENTS Installation 1 Put the backrest (7) in forward inclined horizontal position on the bearing supports (2, 11).
- Page 259 Repair Manual MSG 90.6PG Commercial Vehicles, Omnibuses – November 2017 3.30 Backrest – removal and installation Page 9 of 13 REMOVAL INSTALLATION TABLE OF CONTENTS 2.2 Hang in the angular leg (b) of the torsion spring (5) in the drill hole (c) on the leaf (6) of the backrest (7).
- Page 260 Repair Manual MSG 90.6PG Commercial Vehicles, Omnibuses – November 2017 3.30 Backrest – removal and installation Page 10 of 13 REMOVAL INSTALLATION TABLE OF CONTENTS 3.2 Hang in the angular leg (e) of the torsion spring (9) in the drill hole (f) on the leaf (8) of the backrest (7).
- Page 261 Repair Manual MSG 90.6PG Commercial Vehicles, Omnibuses – November 2017 3.30 Backrest – removal and installation Page 11 of 13 REMOVAL INSTALLATION TABLE OF CONTENTS 5 Set the backrest (7) upright. 6 Tighten the micro-encapsulated cap screws (3) at the right and left hexagon nut (4).
- Page 262 Repair Manual MSG 90.6PG Commercial Vehicles, Omnibuses – November 2017 3.30 Backrest – removal and installation Page 12 of 13 REMOVAL INSTALLATION TABLE OF CONTENTS 8.3 Install the control module for climate control system (Chapter 3.53). 8.4 Install radial fan for backrest (Chapter 3.52).
- Page 263 Repair Manual MSG 90.6PG Commercial Vehicles, Omnibuses – November 2017 3.30 Backrest – removal and installation Page 13 of 13 REMOVAL INSTALLATION TABLE OF CONTENTS 11 Install the complete covering (Chapter 3.5). 12 Attach the left covering (Chapter 3.4). 13 Seat with armrests:...
- Page 264 Repair Manual MSG 90.6PG Commercial Vehicles, Omnibuses – November 2017 3.31 Backrest cover – removal and installation Page 1 of 1 TABLE OF CONTENTS 3.31.1 Backrest cover – removal and installation 3.31.2 Backrest cover – removal and installation (seat with climate control system)
- Page 265 Repair Manual MSG 90.6PG Commercial Vehicles, Omnibuses – November 2017 3.31.1 Backrest cover – removal and installation Page 1 of 5 REMOVAL / INSTALLATION TABLE OF CONTENTS (1) Backrest cover (2) Foam plastic part (3) Velcro (4) Zipper (5) Insertion rod (6) Covering clamps ....
- Page 266 Repair Manual MSG 90.6PG Commercial Vehicles, Omnibuses – November 2017 3.31.1 Backrest cover – removal and installation Page 2 of 5 REMOVAL / INSTALLATION TABLE OF CONTENTS 1 Lift off the seat cushion in position for repair (Chapter 3.1). 2 Remove the left covering in position for repair (Chapter 3.4).
- Page 267 Repair Manual MSG 90.6PG Commercial Vehicles, Omnibuses – November 2017 3.31.1 Backrest cover – removal and installation Page 3 of 5 REMOVAL / INSTALLATION TABLE OF CONTENTS 6 Remove the backrest cover and the safety belt (see Chapter 3.26). Note: Remove the safety belt only at the backrest.
- Page 268 Repair Manual MSG 90.6PG Commercial Vehicles, Omnibuses – November 2017 3.31.1 Backrest cover – removal and installation Page 4 of 5 REMOVAL / INSTALLATION TABLE OF CONTENTS 8 Open fully the zip fastener (4) of backrest cushioning (1). 9 Remove the lower and upper insertion rod (5) from the backrest cover (1).
- Page 269 Repair Manual MSG 90.6PG Commercial Vehicles, Omnibuses – November 2017 3.31.1 Backrest cover – removal and installation Page 5 of 5 REMOVAL / INSTALLATION TABLE OF CONTENTS Installation notes: • When installing a new backrest cover (1), cut in the holes for the belt guide and belt bracket mounting.
- Page 270 Repair Manual MSG 90.6PG Commercial Vehicles, Omnibuses – November 2017 3.31.2 Backrest cover – removal and installation Page 1 of 6 (seat with climate control system) REMOVAL / INSTALLATION TABLE OF CONTENTS (1) Backrest cover (2) Foam plastic part (3) Clamp...
- Page 271 Repair Manual MSG 90.6PG Commercial Vehicles, Omnibuses – November 2017 3.31.2 Backrest cover – removal and installation Page 2 of 6 (seat with climate control system) REMOVAL / INSTALLATION TABLE OF CONTENTS Note: No claims for warranty can be accepted...
- Page 272 Repair Manual MSG 90.6PG Commercial Vehicles, Omnibuses – November 2017 3.31.2 Backrest cover – removal and installation Page 3 of 6 (seat with climate control system) REMOVAL / INSTALLATION TABLE OF CONTENTS 5 Remove the backrest cover and the safety belt (see Chapter 3.26).
- Page 273 Repair Manual MSG 90.6PG Commercial Vehicles, Omnibuses – November 2017 3.31.2 Backrest cover – removal and installation Page 4 of 6 (seat with climate control system) REMOVAL / INSTALLATION TABLE OF CONTENTS Removal and installation 8 Bend open the three covering clamps (9), turn off from the backrest (1) and remove.
- Page 274 Repair Manual MSG 90.6PG Commercial Vehicles, Omnibuses – November 2017 3.31.2 Backrest cover – removal and installation Page 5 of 6 (seat with climate control system) REMOVAL / INSTALLATION TABLE OF CONTENTS 11 Remove the lower and upper insertion rod (10) from the backrest cover (1).
- Page 275 Repair Manual MSG 90.6PG Commercial Vehicles, Omnibuses – November 2017 3.31.2 Backrest cover – removal and installation Page 6 of 6 (seat with climate control system) REMOVAL / INSTALLATION TABLE OF CONTENTS 14 Pull off the backrest cover (1) over the foam plastic part (2) in upward direction.
- Page 276 Repair Manual MSG 90.6PG Commercial Vehicles, Omnibuses – November 2017 3.32 Bearing support with backrest locking mechanism and hook-in Page 1 of 14 function – removal and installation REMOVAL INSTALLATION TABLE OF CONTENTS (1) Bearing support (right) (2) Bearing support (left) (3) Seat frame (right) (4) Rounded head screw ....
- Page 277 Repair Manual MSG 90.6PG Commercial Vehicles, Omnibuses – November 2017 3.32 Bearing support with backrest locking mechanism and hook-in Page 2 of 14 function – removal and installation REMOVAL INSTALLATION TABLE OF CONTENTS (17) Bracket for backrest hook-in function (right)
- Page 278 Repair Manual MSG 90.6PG Commercial Vehicles, Omnibuses – November 2017 3.32 Bearing support with backrest locking mechanism and hook-in Page 3 of 14 function – removal and installation REMOVAL INSTALLATION TABLE OF CONTENTS Note: If screws are included in the scope of...
- Page 279 Repair Manual MSG 90.6PG Commercial Vehicles, Omnibuses – November 2017 3.32 Bearing support with backrest locking mechanism and hook-in Page 4 of 14 function – removal and installation REMOVAL INSTALLATION TABLE OF CONTENTS 4 Remove the entire covering (Chapter 3.5).
- Page 280 Repair Manual MSG 90.6PG Commercial Vehicles, Omnibuses – November 2017 3.32 Bearing support with backrest locking mechanism and hook-in Page 5 of 14 function – removal and installation REMOVAL INSTALLATION TABLE OF CONTENTS 6 Pull off the lever for backrest adjustment at the stud (see Chapter 3.13).
- Page 281 Repair Manual MSG 90.6PG Commercial Vehicles, Omnibuses – November 2017 3.32 Bearing support with backrest locking mechanism and hook-in Page 6 of 14 function – removal and installation REMOVAL INSTALLATION TABLE OF CONTENTS Removal 8 Drill off two rivet heads and drive out blind rivets (5) at the right bearing support (1).
- Page 282 Repair Manual MSG 90.6PG Commercial Vehicles, Omnibuses – November 2017 3.32 Bearing support with backrest locking mechanism and hook-in Page 7 of 14 function – removal and installation REMOVAL INSTALLATION TABLE OF CONTENTS Installation Note: Reuse or convert parts which are not included in the scope of delivery of the backrest locking mechanism.
- Page 283 Repair Manual MSG 90.6PG Commercial Vehicles, Omnibuses – November 2017 3.32 Bearing support with backrest locking mechanism and hook-in Page 8 of 14 function – removal and installation REMOVAL INSTALLATION TABLE OF CONTENTS 1.2 Insert the lock (B/13) into the bearing support (B/1).
- Page 284 Repair Manual MSG 90.6PG Commercial Vehicles, Omnibuses – November 2017 3.32 Bearing support with backrest locking mechanism and hook-in Page 9 of 14 function – removal and installation REMOVAL INSTALLATION TABLE OF CONTENTS 1.3 Push the catch element (C/15) from the right through the bearing support (C/1) as far as possible.
- Page 285 Repair Manual MSG 90.6PG Commercial Vehicles, Omnibuses – November 2017 3.32 Bearing support with backrest locking mechanism and hook-in Page 10 of 14 function – removal and installation REMOVAL INSTALLATION TABLE OF CONTENTS 1.4 Hang the transversal bracket of the torsion spring (D/16) into the hinge of the bearing support (D/1).
- Page 286 Repair Manual MSG 90.6PG Commercial Vehicles, Omnibuses – November 2017 3.32 Bearing support with backrest locking mechanism and hook-in Page 11 of 14 function – removal and installation REMOVAL INSTALLATION TABLE OF CONTENTS 1.6 Insert the short leg of the retaining spring (E/7) into the catch element (E/15).
- Page 287 Repair Manual MSG 90.6PG Commercial Vehicles, Omnibuses – November 2017 3.32 Bearing support with backrest locking mechanism and hook-in Page 12 of 14 function – removal and installation REMOVAL INSTALLATION TABLE OF CONTENTS 3 Insert the right and left bearing...
- Page 288 Repair Manual MSG 90.6PG Commercial Vehicles, Omnibuses – November 2017 3.32 Bearing support with backrest locking mechanism and hook-in Page 13 of 14 function – removal and installation REMOVAL INSTALLATION TABLE OF CONTENTS 6 Tighten the rounded head screw (4) at the right bearing support (3) and pull the hexagon bolt (6) out again.
- Page 289 Repair Manual MSG 90.6PG Commercial Vehicles, Omnibuses – November 2017 3.32 Bearing support with backrest locking mechanism and hook-in Page 14 of 14 function – removal and installation REMOVAL INSTALLATION TABLE OF CONTENTS 10 Tighten the rounded head screw (11) of the left bearing support (2).
- Page 290 Repair Manual MSG 90.6PG Commercial Vehicles, Omnibuses – November 2017 3.33 Lumbar support – removal and installation Page 1 of 5 REMOVAL / INSTALLATION TABLE OF CONTENTS (1) Backrest (2) Safety belt (3) Backrest cover (4) Foam plastic part (5) Lumbar support...
- Page 291 Repair Manual MSG 90.6PG Commercial Vehicles, Omnibuses – November 2017 3.33 Lumbar support – removal and installation Page 2 of 5 REMOVAL / INSTALLATION TABLE OF CONTENTS 1 Lift off the seat cushion in position for repair (Chapter 3.1). 2 Remove the left covering in position for repair (Chapter 3.4).
- Page 292 Repair Manual MSG 90.6PG Commercial Vehicles, Omnibuses – November 2017 3.33 Lumbar support – removal and installation Page 3 of 5 REMOVAL / INSTALLATION TABLE OF CONTENTS Removal and installation 5 Hang in the seat belt (2) at the left curvature of the backrest (1).
- Page 293 Repair Manual MSG 90.6PG Commercial Vehicles, Omnibuses – November 2017 3.33 Lumbar support – removal and installation Page 4 of 5 REMOVAL / INSTALLATION TABLE OF CONTENTS ATTENTION Hydrostatic test! The hydraulic test of the lumbar support (5) and of the air hoses for the upper...
- Page 294 Repair Manual MSG 90.6PG Commercial Vehicles, Omnibuses – November 2017 3.33 Lumbar support – removal and installation Page 5 of 5 REMOVAL / INSTALLATION TABLE OF CONTENTS 9 Detach the lumbar support (5) at the lattice frame (6). 10 Pull out the lumbar support (5) through the lattice frame (6) in backward direction.
- Page 295 Repair Manual MSG 90.6PG Commercial Vehicles, Omnibuses – November 2017 3.34 Lateral support adjustment – removal and installation Page 1 of 7 REMOVAL / INSTALLATION TABLE OF CONTENTS (1) Lateral support adjustment, left (2) Backrest frame (3) Foam plastic part ..to glue with (2)
- Page 296 Repair Manual MSG 90.6PG Commercial Vehicles, Omnibuses – November 2017 3.34 Lateral support adjustment – removal and installation Page 2 of 7 REMOVAL / INSTALLATION TABLE OF CONTENTS 1 Lift off the seat cushion in position for repair (Chapter 3.1).
- Page 297 Repair Manual MSG 90.6PG Commercial Vehicles, Omnibuses – November 2017 3.34 Lateral support adjustment – removal and installation Page 3 of 7 REMOVAL / INSTALLATION TABLE OF CONTENTS 6 Remove the backrest cover and the seat belt (see Chapter 3.26).
- Page 298 Repair Manual MSG 90.6PG Commercial Vehicles, Omnibuses – November 2017 3.34 Lateral support adjustment – removal and installation Page 4 of 7 REMOVAL / INSTALLATION TABLE OF CONTENTS 8 Mark the point where the air hose for the right chamber (7) is fastened to...
- Page 299 Repair Manual MSG 90.6PG Commercial Vehicles, Omnibuses – November 2017 3.34 Lateral support adjustment – removal and installation Page 5 of 7 REMOVAL / INSTALLATION TABLE OF CONTENTS ATTENTION Damage! Take care not to damage the air hose for the left chamber (5).
- Page 300 Repair Manual MSG 90.6PG Commercial Vehicles, Omnibuses – November 2017 3.34 Lateral support adjustment – removal and installation Page 6 of 7 REMOVAL / INSTALLATION TABLE OF CONTENTS Lateral support adjustment, right (6): 10.1 Carefully pull off the foam plastic...
- Page 301 Repair Manual MSG 90.6PG Commercial Vehicles, Omnibuses – November 2017 3.34 Lateral support adjustment – removal and installation Page 7 of 7 REMOVAL / INSTALLATION TABLE OF CONTENTS 10.3 ATTENTION Damage! Take care not to damage the air hose for the right chamber (7).
- Page 302 Repair Manual MSG 90.6PG Commercial Vehicles, Omnibuses – November 2017 3.35 Vertical shock absorber – removal and installation Page 1 of 3 REMOVAL / INSTALLATION TABLE OF CONTENTS (1) Vertical shock absorber (2) Collar screw ..to replace, to grease (3) Hexagon nut ......
- Page 303 Repair Manual MSG 90.6PG Commercial Vehicles, Omnibuses – November 2017 3.35 Vertical shock absorber – removal and installation Page 2 of 3 REMOVAL / INSTALLATION TABLE OF CONTENTS Removal and installation WARNING Risk of crushing! Bring the seat into the highest position...
- Page 304 Repair Manual MSG 90.6PG Commercial Vehicles, Omnibuses – November 2017 3.35 Vertical shock absorber – removal and installation Page 3 of 3 REMOVAL / INSTALLATION TABLE OF CONTENTS Installation notes: • Replace the collar screw (2). • Apply acid-free multi-purpose lubricant to the entire collar (F) of the collar screw (2).
- Page 305 Repair Manual MSG 90.6PG Commercial Vehicles, Omnibuses – November 2017 3.36 Air spring – removal and installation Page 1 of 8 REMOVAL / INSTALLATION TABLE OF CONTENTS (1) Air spring (2) Collar screw (inner race) ..5 Nm (3) Upper air spring support (swinging...
- Page 306 Repair Manual MSG 90.6PG Commercial Vehicles, Omnibuses – November 2017 3.36 Air spring – removal and installation Page 2 of 8 REMOVAL / INSTALLATION TABLE OF CONTENTS ATTENTION Damage! • Before pulling out the air hose (6) at the air spring (1), the retaining ring of the quick coupling (7) must be pressed to the very back (e.g.
- Page 307 Repair Manual MSG 90.6PG Commercial Vehicles, Omnibuses – November 2017 3.36 Air spring – removal and installation Page 3 of 8 REMOVAL / INSTALLATION TABLE OF CONTENTS ATTENTION Hydrostatic test! The hydraulic test of the seat should be performed upon installation of the air spring (1).
- Page 308 Repair Manual MSG 90.6PG Commercial Vehicles, Omnibuses – November 2017 3.36 Air spring – removal and installation Page 4 of 8 REMOVAL / INSTALLATION TABLE OF CONTENTS 3 Hang out the Bowden pull wire for seat height adjustment at the level control (control disc) (see Chapter 3.9).
- Page 309 Repair Manual MSG 90.6PG Commercial Vehicles, Omnibuses – November 2017 3.36 Air spring – removal and installation Page 5 of 8 REMOVAL / INSTALLATION TABLE OF CONTENTS 7 For seat model Actros: Remove the pin contact strip at the supporting structure (see Chapter 3.39).
- Page 310 Repair Manual MSG 90.6PG Commercial Vehicles, Omnibuses – November 2017 3.36 Air spring – removal and installation Page 6 of 8 REMOVAL / INSTALLATION TABLE OF CONTENTS WARNING The pressure in the pneumatic system might cause injury! The pneumatic system is to be vented before removing the air hose (1) (e.g.
- Page 311 Repair Manual MSG 90.6PG Commercial Vehicles, Omnibuses – November 2017 3.36 Air spring – removal and installation Page 7 of 8 REMOVAL / INSTALLATION TABLE OF CONTENTS 11 Unscrew the collar screw (9). Installation note: Collar screw (9), 5 Nm.
- Page 312 Repair Manual MSG 90.6PG Commercial Vehicles, Omnibuses – November 2017 3.36 Air spring – removal and installation Page 8 of 8 REMOVAL / INSTALLATION TABLE OF CONTENTS 13 Pull out the air spring (1) between the upper and lower air spring support (3, 4) and remove it from the seat in downward direction.
- Page 313 Repair Manual MSG 90.6PG Commercial Vehicles, Omnibuses – November 2017 3.37 Fore/aft isolator – removal and installation (delivery option) Page 1 of 5 REMOVAL / INSTALLATION TABLE OF CONTENTS (1) Stopper (2) Rounded flange head screw (inner race) ......5 Nm (3) Upper suspension part (4) Clamp ......
- Page 314 Repair Manual MSG 90.6PG Commercial Vehicles, Omnibuses – November 2017 3.37 Fore/aft isolator – removal and installation (delivery option) Page 2 of 5 REMOVAL / INSTALLATION TABLE OF CONTENTS 1 Lift off the seat cushion in position for repair (Chapter 3.1).
- Page 315 Repair Manual MSG 90.6PG Commercial Vehicles, Omnibuses – November 2017 3.37 Fore/aft isolator – removal and installation (delivery option) Page 3 of 5 REMOVAL / INSTALLATION TABLE OF CONTENTS 4 Unscrew two rounded flange head screws (2). Installation note: Rounded flange head screw (2), 5 Nm.
- Page 316 Repair Manual MSG 90.6PG Commercial Vehicles, Omnibuses – November 2017 3.37 Fore/aft isolator – removal and installation (delivery option) Page 4 of 5 REMOVAL / INSTALLATION TABLE OF CONTENTS 7 Release the clamp (4) and the stop lever (10) and push the upper...
- Page 317 Repair Manual MSG 90.6PG Commercial Vehicles, Omnibuses – November 2017 3.37 Fore/aft isolator – removal and installation (delivery option) Page 5 of 5 REMOVAL / INSTALLATION TABLE OF CONTENTS 10 Press off the clamp (4) at the swinging structure (6).
- Page 318 Repair Manual MSG 90.6PG Commercial Vehicles, Omnibuses – November 2017 3.38 Level control – removal and installation Page 1 of 6 REMOVAL / INSTALLATION TABLE OF CONTENTS (1) Level control (2) Swinging structure (3) Lock washer (4) Centre axle (swinging structure)
- Page 319 Repair Manual MSG 90.6PG Commercial Vehicles, Omnibuses – November 2017 3.38 Level control – removal and installation Page 2 of 6 REMOVAL / INSTALLATION TABLE OF CONTENTS WARNING Hydrostatic test! The hydraulic test of the seat should be performed upon installation of the level control (1).
- Page 320 Repair Manual MSG 90.6PG Commercial Vehicles, Omnibuses – November 2017 3.38 Level control – removal and installation Page 3 of 6 REMOVAL / INSTALLATION TABLE OF CONTENTS 1 Lift off the seat cushion in position for repair (Chapter 3.1). 2 Remove the left covering in position for repair (Chapter 3.4).
- Page 321 Repair Manual MSG 90.6PG Commercial Vehicles, Omnibuses – November 2017 3.38 Level control – removal and installation Page 4 of 6 REMOVAL / INSTALLATION TABLE OF CONTENTS 7 Remove the cable for vehicle connection at the level control (see Chapter 3.20).
- Page 322 Repair Manual MSG 90.6PG Commercial Vehicles, Omnibuses – November 2017 3.38 Level control – removal and installation Page 5 of 6 REMOVAL / INSTALLATION TABLE OF CONTENTS Removal and installation WARNING Risk of crushing! Bring the seat into the highest...
- Page 323 Repair Manual MSG 90.6PG Commercial Vehicles, Omnibuses – November 2017 3.38 Level control – removal and installation Page 6 of 6 REMOVAL / INSTALLATION TABLE OF CONTENTS 15 Detach the level control first with the right clamp (6) and then with the left clamp (7) at the centre axle (4) of the swinging structure (2).
- Page 324 Repair Manual MSG 90.6PG Commercial Vehicles, Omnibuses – November 2017 3.39 Supporting structure – removal and installation Page 1 of 1 TABLE OF CONTENTS 3.39 Supporting structure – removal and installation 3.39.1 Supporting structure and pin contact strip – removal and installation (Actros) 3.39.2 Supporting structure –...
- Page 325 Repair Manual MSG 90.6PG Commercial Vehicles, Omnibuses – November 2017 3.39.1 Supporting structure and pin contact strip – Page 1 of 3 removal and installation (Actros) REMOVAL / INSTALLATION TABLE OF CONTENTS (1) Supporting structure (2) Pin contact strip (3) Rounded head screw (inner race) ......
- Page 326 Repair Manual MSG 90.6PG Commercial Vehicles, Omnibuses – November 2017 3.39.1 Supporting structure and pin contact strip – Page 2 of 3 removal and installation (Actros) REMOVAL / INSTALLATION TABLE OF CONTENTS Removal and installation 1 Unscrew two rounded head screws (3) and lay the pin contact strip (2) down.
- Page 327 Repair Manual MSG 90.6PG Commercial Vehicles, Omnibuses – November 2017 3.39.1 Supporting structure and pin contact strip – Page 3 of 3 removal and installation (Actros) REMOVAL / INSTALLATION TABLE OF CONTENTS 4 Lift off the seat from the supporting structure (1) and remove the supporting structure (1).
- Page 328 Repair Manual MSG 90.6PG Commercial Vehicles, Omnibuses – November 2017 3.39.2 Supporting structure – removal and installation (Atego, Axor) Page 1 of 2 REMOVAL / INSTALLATION TABLE OF CONTENTS (1) Supporting structure (2) Micro-encapsulated cap screw ....to replace, 25 Nm...
- Page 329 Repair Manual MSG 90.6PG Commercial Vehicles, Omnibuses – November 2017 3.39.2 Supporting structure – removal and installation (Atego, Axor) Page 2 of 2 REMOVAL / INSTALLATION TABLE OF CONTENTS Removal and installation 2 Unscrew four micro-encapsulated cap screws (2). Installation note: Replace the micro-encapsulated cap screw (2), 25 Nm.
- Page 330 Repair Manual MSG 90.6PG Commercial Vehicles, Omnibuses – November 2017 3.39.3 Supporting structure – removal and installation (bus seat) Page 1 of 3 REMOVAL / INSTALLATION TABLE OF CONTENTS (1) Supporting structure Note: Size and shape of the supporting structure (1) might differ depending on the design or model of the seat.
- Page 331 Repair Manual MSG 90.6PG Commercial Vehicles, Omnibuses – November 2017 3.39.3 Supporting structure – removal and installation (bus seat) Page 2 of 3 REMOVAL / INSTALLATION TABLE OF CONTENTS Removal and installation 1 Push the seat backwards as far as possible.
- Page 332 Repair Manual MSG 90.6PG Commercial Vehicles, Omnibuses – November 2017 3.39.3 Supporting structure – removal and installation (bus seat) Page 3 of 3 REMOVAL / INSTALLATION TABLE OF CONTENTS 5 Unscrew four micro-encapsulated cap screws (6) at the rear and remove hexagon nuts (7), washers (8) and the plates with mounting holes (5).
- Page 333 Repair Manual MSG 90.6PG Commercial Vehicles, Omnibuses – November 2017 3.40 Seat fore/aft adjustment – removal and installation Page 1 of 1 TABLE OF CONTENTS 3.40.1 Seat fore/aft adjustment – removal and installation (Actros) 3.40.2 Seat fore/aft adjustment and pin contact strip – removal and installation (Atego, Axor) 3.40.3 Seat fore/aft adjustment –...
- Page 334 Repair Manual MSG 90.6PG Commercial Vehicles, Omnibuses – November 2017 3.40.1 Seat fore/aft adjustment – removal and installation (Actros) Page 1 of 3 REMOVAL / INSTALLATION TABLE OF CONTENTS (1) Lever for seat fore/aft adjustment (2) Locking rail ...... to grease...
- Page 335 Repair Manual MSG 90.6PG Commercial Vehicles, Omnibuses – November 2017 3.40.1 Seat fore/aft adjustment – removal and installation (Actros) Page 2 of 3 REMOVAL / INSTALLATION TABLE OF CONTENTS 1 Remove the supporting structure (see Chapter 3.39). Note: The pin contact strip does not need to be removed from the supporting structure.
- Page 336 Repair Manual MSG 90.6PG Commercial Vehicles, Omnibuses – November 2017 3.40.1 Seat fore/aft adjustment – removal and installation (Actros) Page 3 of 3 REMOVAL / INSTALLATION TABLE OF CONTENTS 5 Unscrew four micro-encapsulated cap screws (7) at the rear and remove two plates with mounting holes (6) from the adjusting rails (3).
- Page 337 Repair Manual MSG 90.6PG Commercial Vehicles, Omnibuses – November 2017 3.40.2 Seat fore/aft adjustment and pin contact strip – Page 1 of 6 removal and installation (Atego, Axor) REMOVAL / INSTALLATION TABLE OF CONTENTS (1) Seat fore/aft adjustment (complete) = (2) + (3) + (4) + (5) (2) Lever for seat fore/aft adjustment (3) Locking rail ......
- Page 338 Repair Manual MSG 90.6PG Commercial Vehicles, Omnibuses – November 2017 3.40.2 Seat fore/aft adjustment and pin contact strip – Page 2 of 6 removal and installation (Atego, Axor) REMOVAL / INSTALLATION TABLE OF CONTENTS (13) Rounded head screw (inner race) ......2.6 Nm...
- Page 339 Repair Manual MSG 90.6PG Commercial Vehicles, Omnibuses – November 2017 3.40.2 Seat fore/aft adjustment and pin contact strip – Page 3 of 6 removal and installation (Atego, Axor) REMOVAL / INSTALLATION TABLE OF CONTENTS Removal and installation 1 Unscrew the rounded head screw (13).
- Page 340 Repair Manual MSG 90.6PG Commercial Vehicles, Omnibuses – November 2017 3.40.2 Seat fore/aft adjustment and pin contact strip – Page 4 of 6 removal and installation (Atego, Axor) REMOVAL / INSTALLATION TABLE OF CONTENTS 4 Push the seat forwards as far as possible.
- Page 341 Repair Manual MSG 90.6PG Commercial Vehicles, Omnibuses – November 2017 3.40.2 Seat fore/aft adjustment and pin contact strip – Page 5 of 6 removal and installation (Atego, Axor) REMOVAL / INSTALLATION TABLE OF CONTENTS 7 Move the seat by means of the seat...
- Page 342 Repair Manual MSG 90.6PG Commercial Vehicles, Omnibuses – November 2017 3.40.2 Seat fore/aft adjustment and pin contact strip – Page 6 of 6 removal and installation (Atego, Axor) REMOVAL / INSTALLATION TABLE OF CONTENTS Removal of the pin contact strip (6): 11.1 Disconnect the electrical...
- Page 343 Repair Manual MSG 90.6PG Commercial Vehicles, Omnibuses – November 2017 3.40.3 Seat fore/aft adjustment – removal and installation (bus seat) Page 1 of 3 REMOVAL / INSTALLATION TABLE OF CONTENTS (1) Lever for seat fore/aft adjustment (2) Locking rail ...... to grease 45°...
- Page 344 Repair Manual MSG 90.6PG Commercial Vehicles, Omnibuses – November 2017 3.40.3 Seat fore/aft adjustment – removal and installation (bus seat) Page 2 of 3 REMOVAL / INSTALLATION TABLE OF CONTENTS Removal and installation 2 Turn the swivel (7) by approx. 45 45°...
- Page 345 Repair Manual MSG 90.6PG Commercial Vehicles, Omnibuses – November 2017 3.40.3 Seat fore/aft adjustment – removal and installation (bus seat) Page 3 of 3 REMOVAL / INSTALLATION TABLE OF CONTENTS 6 Unscrew two micro-encapsulated cap screws (5) at the rear and remove two hexagon nuts (6).
- Page 346 Repair Manual MSG 90.6PG Commercial Vehicles, Omnibuses – November 2017 3.41 Guides – removal and installation Page 1 of 2 REMOVAL / INSTALLATION TABLE OF CONTENTS (1) Guide ....... to grease (2) Blind rivet (3) Seat frame 1 Lift off the seat cushion in position for repair (Chapter 3.1).
- Page 347 Repair Manual MSG 90.6PG Commercial Vehicles, Omnibuses – November 2017 3.41 Guides – removal and installation Page 2 of 2 REMOVAL / INSTALLATION TABLE OF CONTENTS Removal and installation 2 Bore off four rivet heads at the guides (1) and drive out the blind rivets (2).
- Page 348 Repair Manual MSG 90.6PG Commercial Vehicles, Omnibuses – November 2017 3.42 Air hose for compressed-air quick coupling – removal and installation Page 1 of 3 (delivery option) REMOVAL / INSTALLATION TABLE OF CONTENTS (1) Air hose (for compressed-air quick coupling)
- Page 349 Repair Manual MSG 90.6PG Commercial Vehicles, Omnibuses – November 2017 3.42 Air hose for compressed-air quick coupling – removal and installation Page 2 of 3 (delivery option) REMOVAL / INSTALLATION TABLE OF CONTENTS Removal and installation WARNING The pressure in the...
- Page 350 Repair Manual MSG 90.6PG Commercial Vehicles, Omnibuses – November 2017 3.42 Air hose for compressed-air quick coupling – removal and installation Page 3 of 3 (delivery option) REMOVAL / INSTALLATION TABLE OF CONTENTS 5 Pull off the hose nozzle (5) at the air hose (1).
- Page 351 Repair Manual MSG 90.6PG Commercial Vehicles, Omnibuses – November 2017 3.43 Seat frame – removal and installation Page 1 of 8 REMOVAL / INSTALLATION TABLE OF CONTENTS (1) Seat frame (2) Stud ......... to grease (3) Blind rivet (4) Support...
- Page 352 Repair Manual MSG 90.6PG Commercial Vehicles, Omnibuses – November 2017 3.43 Seat frame – removal and installation Page 2 of 8 REMOVAL / INSTALLATION TABLE OF CONTENTS (15) Support (16) Eccentric (17) Blind rivet (18) Support (Bowden pull wire) (19) Blind rivet...
- Page 353 Repair Manual MSG 90.6PG Commercial Vehicles, Omnibuses – November 2017 3.43 Seat frame – removal and installation Page 3 of 8 REMOVAL / INSTALLATION TABLE OF CONTENTS 3 Seat with operator console and armrest for electro-pneumatic gearshift: Remove the operator console for the electro-pneumatic gearshift (EPS) (see Chapter 3.25).
- Page 354 Repair Manual MSG 90.6PG Commercial Vehicles, Omnibuses – November 2017 3.43 Seat frame – removal and installation Page 4 of 8 REMOVAL / INSTALLATION TABLE OF CONTENTS 8 Remove the seat belt at the seat frame (see Chapter 3.26). 9 Seat with lap belt: Remove the lap belt (Chapter 3.27).
- Page 355 Repair Manual MSG 90.6PG Commercial Vehicles, Omnibuses – November 2017 3.43 Seat frame – removal and installation Page 5 of 8 REMOVAL / INSTALLATION TABLE OF CONTENTS Removal and installation WARNING Risk of crushing! Bring the seat into the highest...
- Page 356 Repair Manual MSG 90.6PG Commercial Vehicles, Omnibuses – November 2017 3.43 Seat frame – removal and installation Page 6 of 8 REMOVAL / INSTALLATION TABLE OF CONTENTS 17 Bore off two rivet heads and drive out the blind rivets (5) at the seat frame (1).
- Page 357 Repair Manual MSG 90.6PG Commercial Vehicles, Omnibuses – November 2017 3.43 Seat frame – removal and installation Page 7 of 8 REMOVAL / INSTALLATION TABLE OF CONTENTS • Apply acid-free multi-purpose lubricant to the contact surfaces of the seat cushion (F) of the four guides (11).
- Page 358 Repair Manual MSG 90.6PG Commercial Vehicles, Omnibuses – November 2017 3.43 Seat frame – removal and installation Page 8 of 8 REMOVAL / INSTALLATION TABLE OF CONTENTS 20.4 Bore off four rivet heads, drive out the blind rivets (10) at the seat frame (1) and remove two Z-sections (9).
- Page 359 Repair Manual MSG 90.6PG Commercial Vehicles, Omnibuses – November 2017 3.44 Seat suspension – removal and installation Page 1 of 8 REMOVAL / INSTALLATION TABLE OF CONTENTS (1) Seat suspension (2) Seat frame (3) Stud ......... to grease (4) Blind rivet...
- Page 360 Repair Manual MSG 90.6PG Commercial Vehicles, Omnibuses – November 2017 3.44 Seat suspension – removal and installation Page 2 of 8 REMOVAL / INSTALLATION TABLE OF CONTENTS 1 Lift off the seat cushion in position for repair (Chapter 3.1). 2 Remove the seat cushion and the lever for seat angle and seat depth adjustment (Chapter 3.2).
- Page 361 Repair Manual MSG 90.6PG Commercial Vehicles, Omnibuses – November 2017 3.44 Seat suspension – removal and installation Page 3 of 8 REMOVAL / INSTALLATION TABLE OF CONTENTS 7 Hang out the Bowden pull wire for quick lowering of the seat at the level control (valve lever and retainer) (see Chapter 3.7) and pull it out in...
- Page 362 Repair Manual MSG 90.6PG Commercial Vehicles, Omnibuses – November 2017 3.44 Seat suspension – removal and installation Page 4 of 8 REMOVAL / INSTALLATION TABLE OF CONTENTS Seat with fore/aft isolator: 10.1 Remove the Bowden pull wire for the locking mechanism of the fore/aft isolator (Chapter 3.15).
- Page 363 Repair Manual MSG 90.6PG Commercial Vehicles, Omnibuses – November 2017 3.44 Seat suspension – removal and installation Page 5 of 8 REMOVAL / INSTALLATION TABLE OF CONTENTS 13 Detach the belt roller at the support (upper suspension part) (see Chapter 3.26), lead it upwards at the webbing and secure it.
- Page 364 Repair Manual MSG 90.6PG Commercial Vehicles, Omnibuses – November 2017 3.44 Seat suspension – removal and installation Page 6 of 8 REMOVAL / INSTALLATION TABLE OF CONTENTS 17 Detach the cable for vehicle connection and the belt tensioner cable at the clip (see Chapter 3.20).
- Page 365 Repair Manual MSG 90.6PG Commercial Vehicles, Omnibuses – November 2017 3.44 Seat suspension – removal and installation Page 7 of 8 REMOVAL / INSTALLATION TABLE OF CONTENTS 22 Unscrew the rounded head screw (10) and remove the support (9) at the seat suspension (1).
- Page 366 Repair Manual MSG 90.6PG Commercial Vehicles, Omnibuses – November 2017 3.44 Seat suspension – removal and installation Page 8 of 8 REMOVAL / INSTALLATION TABLE OF CONTENTS 25 Lift off the seat frame (2) with the attached backrest (6) in upward direction.
- Page 367 Repair Manual MSG 90.6PG Commercial Vehicles, Omnibuses – November 2017 3.45 Swinging structure – disassembly and assembly Page 1 of 2 DISASSEMBLY / ASSEMBLY TABLE OF CONTENTS (1) Lower suspension part, guiding rail ....face side to be greased (2) Swinging structure ......
- Page 368 Repair Manual MSG 90.6PG Commercial Vehicles, Omnibuses – November 2017 3.45 Swinging structure – disassembly and assembly Page 2 of 2 DISASSEMBLY / ASSEMBLY TABLE OF CONTENTS (13) Sleeve (tube piece) (14) Fixed bearing (15) Hexagon nut ......25 Nm...
- Page 369 Repair Manual MSG 90.6PG Commercial Vehicles, Omnibuses – November 2017 3.46 Worn parts – removal and installation Page 1 of 2 REMOVAL / INSTALLATION TABLE OF CONTENTS (1) Fork (1x) (see Chapter 3.11) (2) Compression spring (1x) (see Chapter 3.11) (3) Fixing (1x) (see Chapter 3.11)
- Page 370 Repair Manual MSG 90.6PG Commercial Vehicles, Omnibuses – November 2017 3.46 Worn parts – removal and installation Page 2 of 2 REMOVAL / INSTALLATION TABLE OF CONTENTS (10) Buffer (2x) (see Chapter 3.45) (11) Fixed bearing (4x) (see Chapter 3.45) (12) Sleeve (tube piece) (4x) (see Chapter 3.45)
- Page 371 Repair Manual MSG 90.6PG Commercial Vehicles, Omnibuses – November 2017 3.47 Entire swivel – removal and installation Page 1 of 1 (driver's seat with swivel, e.g. bus seat) TABLE OF CONTENTS 3.47.1 Swivel and linkage rod – removal and installation 3.47.2 Cylinder for swivel –...
- Page 372 Repair Manual MSG 90.6PG Commercial Vehicles, Omnibuses – November 2017 3.47.1 Swivel and linkage rod – removal and installation Page 1 of 4 REMOVAL / INSTALLATION TABLE OF CONTENTS (1) Swivel (complete) (2) Micro-encapsulated cap screw ....to replace, 25 Nm...
- Page 373 Repair Manual MSG 90.6PG Commercial Vehicles, Omnibuses – November 2017 3.47.1 Swivel and linkage rod – removal and installation Page 2 of 4 REMOVAL / INSTALLATION TABLE OF CONTENTS 1 Position the backrest vertically and put the seat onto the backrest.
- Page 374 Repair Manual MSG 90.6PG Commercial Vehicles, Omnibuses – November 2017 3.47.1 Swivel and linkage rod – removal and installation Page 3 of 4 REMOVAL / INSTALLATION TABLE OF CONTENTS Removal and installation ATTENTION Damage! When lifting off the swivel (1), do not...
- Page 375 Repair Manual MSG 90.6PG Commercial Vehicles, Omnibuses – November 2017 3.47.1 Swivel and linkage rod – removal and installation Page 4 of 4 REMOVAL / INSTALLATION TABLE OF CONTENTS 6 Unscrew the rounded head screw (11) at the cylinder (6).
- Page 376 Repair Manual MSG 90.6PG Commercial Vehicles, Omnibuses – November 2017 3.47.2 Cylinder for swivel – removal and installation Page 1 of 4 REMOVAL / INSTALLATION TABLE OF CONTENTS (1) Air hose (to the cylinder) (2) Cylinder for the swivel (3) Rounded head screw (inner race) .....
- Page 377 Repair Manual MSG 90.6PG Commercial Vehicles, Omnibuses – November 2017 3.47.2 Cylinder for swivel – removal and installation Page 2 of 4 REMOVAL / INSTALLATION TABLE OF CONTENTS 1 Position the backrest vertically and put the seat onto the backrest.
- Page 378 Repair Manual MSG 90.6PG Commercial Vehicles, Omnibuses – November 2017 3.47.2 Cylinder for swivel – removal and installation Page 3 of 4 REMOVAL / INSTALLATION TABLE OF CONTENTS ATTENTION Damage! Take care not to damage the connection (6) of the cylinder (2). Do...
- Page 379 Repair Manual MSG 90.6PG Commercial Vehicles, Omnibuses – November 2017 3.47.2 Cylinder for swivel – removal and installation Page 4 of 4 REMOVAL / INSTALLATION TABLE OF CONTENTS 7 Pull off the hose nozzle (5) at the air hose (1).
- Page 380 Repair Manual MSG 90.6PG Commercial Vehicles, Omnibuses – November 2017 3.47.3 Button and valve for swivel – removal and installation Page 1 of 5 REMOVAL / INSTALLATION TABLE OF CONTENTS (1) Button for swivel (2) Handle rail (3) Holder (for button of swivel) (4) Grooved pin .....
- Page 381 Repair Manual MSG 90.6PG Commercial Vehicles, Omnibuses – November 2017 3.47.3 Button and valve for swivel – removal and installation Page 2 of 5 REMOVAL / INSTALLATION TABLE OF CONTENTS 1 Lift off the seat cushion in position for repair (Chapter 3.1).
- Page 382 Repair Manual MSG 90.6PG Commercial Vehicles, Omnibuses – November 2017 3.47.3 Button and valve for swivel – removal and installation Page 3 of 5 REMOVAL / INSTALLATION TABLE OF CONTENTS 5 Unscrew the rounded head screw (5) and pull out the valve for the swivel (8) with the valve support (7) at the holder (3).
- Page 383 Repair Manual MSG 90.6PG Commercial Vehicles, Omnibuses – November 2017 3.47.3 Button and valve for swivel – removal and installation Page 4 of 5 REMOVAL / INSTALLATION TABLE OF CONTENTS WARNING Damage! Take care not to damage the air hoses (10, 11).
- Page 384 Repair Manual MSG 90.6PG Commercial Vehicles, Omnibuses – November 2017 3.47.3 Button and valve for swivel – removal and installation Page 5 of 5 REMOVAL / INSTALLATION TABLE OF CONTENTS Notes: • The air hoses (10, 11) can be cut off only once.
- Page 385 Repair Manual MSG 90.6PG Commercial Vehicles, Omnibuses – November 2017 3.47.4 Air hose set for swivel – removal and installation Page 1 of 8 REMOVAL / INSTALLATION TABLE OF CONTENTS (1) Valve (for swivel) 13 14 (2) Hose nozzle (3) Cable tie...
- Page 386 Repair Manual MSG 90.6PG Commercial Vehicles, Omnibuses – November 2017 3.47.4 Air hose set for swivel – removal and installation Page 2 of 8 REMOVAL / INSTALLATION TABLE OF CONTENTS (15) Retainer (16) Level control (17) Cable tie (18) Bellows...
- Page 387 Repair Manual MSG 90.6PG Commercial Vehicles, Omnibuses – November 2017 3.47.4 Air hose set for swivel – removal and installation Page 3 of 8 REMOVAL / INSTALLATION TABLE OF CONTENTS 1 Lift off the seat cushion in position for repair (Chapter 3.1).
- Page 388 Repair Manual MSG 90.6PG Commercial Vehicles, Omnibuses – November 2017 3.47.4 Air hose set for swivel – removal and installation Page 4 of 8 REMOVAL / INSTALLATION TABLE OF CONTENTS 7 Remove the air hose for lumbar support and lateral support adjustment...
- Page 389 Repair Manual MSG 90.6PG Commercial Vehicles, Omnibuses – November 2017 3.47.4 Air hose set for swivel – removal and installation Page 5 of 8 REMOVAL / INSTALLATION TABLE OF CONTENTS 10 Mark the point where the air hose (8) and the connection piece (4) are...
- Page 390 Repair Manual MSG 90.6PG Commercial Vehicles, Omnibuses – November 2017 3.47.4 Air hose set for swivel – removal and installation Page 6 of 8 REMOVAL / INSTALLATION TABLE OF CONTENTS Notes: 13 14 • For easier removal, carefully slit the air hoses (6, 7, 8, 9, 10) by means of a sharp knife.
- Page 391 Repair Manual MSG 90.6PG Commercial Vehicles, Omnibuses – November 2017 3.47.4 Air hose set for swivel – removal and installation Page 7 of 8 REMOVAL / INSTALLATION TABLE OF CONTENTS 16 Mark the point where the air hoses (8, 9) are bundled by means of cable ties (17) and remove the cable ties (17).
- Page 392 Repair Manual MSG 90.6PG Commercial Vehicles, Omnibuses – November 2017 3.47.4 Air hose set for swivel – removal and installation Page 8 of 8 REMOVAL / INSTALLATION TABLE OF CONTENTS 21 Pull off the hose nozzle (5) at the air hose (9).
- Page 393 Repair Manual MSG 90.6PG Commercial Vehicles, Omnibuses – November 2017 3.48 Bowden pull wire and bearing for optional backrest adjustment – Page 1 of 8 removal and installation (delivery option) REMOVAL / INSTALLATION TABLE OF CONTENTS (1) Bowden pull wire for optional...
- Page 394 Repair Manual MSG 90.6PG Commercial Vehicles, Omnibuses – November 2017 3.48 Bowden pull wire and bearing for optional backrest adjustment – Page 2 of 8 removal and installation (delivery option) REMOVAL / INSTALLATION TABLE OF CONTENTS (14) Angle plate (15) Handle for optional backrest...
- Page 395 Repair Manual MSG 90.6PG Commercial Vehicles, Omnibuses – November 2017 3.48 Bowden pull wire and bearing for optional backrest adjustment – Page 3 of 8 removal and installation (delivery option) REMOVAL / INSTALLATION TABLE OF CONTENTS ATTENTION Noise! When driving out the blind rivets, make sure that the residues of the blind rivets do not fall into the seat.
- Page 396 Repair Manual MSG 90.6PG Commercial Vehicles, Omnibuses – November 2017 3.48 Bowden pull wire and bearing for optional backrest adjustment – Page 4 of 8 removal and installation (delivery option) REMOVAL / INSTALLATION TABLE OF CONTENTS 5 Remove the lever for backrest adjustment at the stud (see Chapter 3.13).
- Page 397 Repair Manual MSG 90.6PG Commercial Vehicles, Omnibuses – November 2017 3.48 Bowden pull wire and bearing for optional backrest adjustment – Page 5 of 8 removal and installation (delivery option) REMOVAL / INSTALLATION TABLE OF CONTENTS 8 Unscrew the countersunk screw (6) at the left side of the seat frame (4).
- Page 398 Repair Manual MSG 90.6PG Commercial Vehicles, Omnibuses – November 2017 3.48 Bowden pull wire and bearing for optional backrest adjustment – Page 6 of 8 removal and installation (delivery option) REMOVAL / INSTALLATION TABLE OF CONTENTS 11 Loosen the lock washer (21) at the Bowden pull wire for optional backrest adjustment (1).
- Page 399 Repair Manual MSG 90.6PG Commercial Vehicles, Omnibuses – November 2017 3.48 Bowden pull wire and bearing for optional backrest adjustment – Page 7 of 8 removal and installation (delivery option) REMOVAL / INSTALLATION TABLE OF CONTENTS 15 Completely open the zip fastener (24) of the backrest upholstery (20).
- Page 400 Repair Manual MSG 90.6PG Commercial Vehicles, Omnibuses – November 2017 3.48 Bowden pull wire and bearing for optional backrest adjustment – Page 8 of 8 removal and installation (delivery option) REMOVAL / INSTALLATION TABLE OF CONTENTS 19 Pull off the lever for backrest...
- Page 401 Repair Manual MSG 90.6PG Commercial Vehicles, Omnibuses – November 2017 3.49 Cable harness for backrest – removal and installation Page 1 of 8 (seat with climate control system) REMOVAL / INSTALLATION TABLE OF CONTENTS (1) Cable harness for backrest (2) Cable for microphone...
- Page 402 Repair Manual MSG 90.6PG Commercial Vehicles, Omnibuses – November 2017 3.49 Cable harness for backrest – removal and installation Page 2 of 8 (seat with climate control system) REMOVAL / INSTALLATION TABLE OF CONTENTS (14) Air hose (15) Cable harness for heater switch...
- Page 403 Repair Manual MSG 90.6PG Commercial Vehicles, Omnibuses – November 2017 3.49 Cable harness for backrest – removal and installation Page 3 of 8 (seat with climate control system) REMOVAL / INSTALLATION TABLE OF CONTENTS Electrical plug and socket connections: (H) Electrical connection between cable...
- Page 404 Repair Manual MSG 90.6PG Commercial Vehicles, Omnibuses – November 2017 3.49 Cable harness for backrest – removal and installation Page 4 of 8 (seat with climate control system) REMOVAL / INSTALLATION TABLE OF CONTENTS 1 Lift off the seat cushion in position for repair (Chapter 3.1).
- Page 405 Repair Manual MSG 90.6PG Commercial Vehicles, Omnibuses – November 2017 3.49 Cable harness for backrest – removal and installation Page 5 of 8 (seat with climate control system) REMOVAL / INSTALLATION TABLE OF CONTENTS 7 Disconnect the electrical connection between the cable harness for...
- Page 406 Repair Manual MSG 90.6PG Commercial Vehicles, Omnibuses – November 2017 3.49 Cable harness for backrest – removal and installation Page 6 of 8 (seat with climate control system) REMOVAL / INSTALLATION TABLE OF CONTENTS 10 Mark the points where the electrical...
- Page 407 Repair Manual MSG 90.6PG Commercial Vehicles, Omnibuses – November 2017 3.49 Cable harness for backrest – removal and installation Page 7 of 8 (seat with climate control system) REMOVAL / INSTALLATION TABLE OF CONTENTS 13 Mark the points where the cable...
- Page 408 Repair Manual MSG 90.6PG Commercial Vehicles, Omnibuses – November 2017 3.49 Cable harness for backrest – removal and installation Page 8 of 8 (seat with climate control system) REMOVAL / INSTALLATION TABLE OF CONTENTS 15 Disconnect the electrical connection (M) between cable harness for backrest (1) and backrest fan cable (19).
- Page 409 Repair Manual MSG 90.6PG Commercial Vehicles, Omnibuses – November 2017 3.50 Cable harness heater switch – removal and installation Page 1 of 4 (seat with climate control system) REMOVAL / INSTALLATION TABLE OF CONTENTS (1) Cable harness for heater switch...
- Page 410 Repair Manual MSG 90.6PG Commercial Vehicles, Omnibuses – November 2017 3.50 Cable harness heater switch – removal and installation Page 2 of 4 (seat with climate control system) REMOVAL / INSTALLATION TABLE OF CONTENTS 1 Lift off the seat cushion in position for repair (Chapter 3.1).
- Page 411 Repair Manual MSG 90.6PG Commercial Vehicles, Omnibuses – November 2017 3.50 Cable harness heater switch – removal and installation Page 3 of 4 (seat with climate control system) REMOVAL / INSTALLATION TABLE OF CONTENTS 5 Mark two electrical connections (N)
- Page 412 Repair Manual MSG 90.6PG Commercial Vehicles, Omnibuses – November 2017 3.50 Cable harness heater switch – removal and installation Page 4 of 4 (seat with climate control system) REMOVAL / INSTALLATION TABLE OF CONTENTS 7 Mark the points where the electrical...
- Page 413 Repair Manual MSG 90.6PG Commercial Vehicles, Omnibuses – November 2017 3.51 Cable harness for vehicle connection – removal and installation Page 1 of 8 (seat with climate control system) REMOVAL / INSTALLATION TABLE OF CONTENTS (1) Cable harness for vehicle...
- Page 414 Repair Manual MSG 90.6PG Commercial Vehicles, Omnibuses – November 2017 3.51 Cable harness for vehicle connection – removal and installation Page 2 of 8 (seat with climate control system) REMOVAL / INSTALLATION TABLE OF CONTENTS (14) Cable clamp (15) Cable tie...
- Page 415 Repair Manual MSG 90.6PG Commercial Vehicles, Omnibuses – November 2017 3.51 Cable harness for vehicle connection – removal and installation Page 3 of 8 (seat with climate control system) REMOVAL / INSTALLATION TABLE OF CONTENTS Electrical plug and socket connections:...
- Page 416 Repair Manual MSG 90.6PG Commercial Vehicles, Omnibuses – November 2017 3.51 Cable harness for vehicle connection – removal and installation Page 4 of 8 (seat with climate control system) REMOVAL / INSTALLATION TABLE OF CONTENTS 1 Lift off the seat cushion in position for repair (Chapter 3.1).
- Page 417 Repair Manual MSG 90.6PG Commercial Vehicles, Omnibuses – November 2017 3.51 Cable harness for vehicle connection – removal and installation Page 5 of 8 (seat with climate control system) REMOVAL / INSTALLATION TABLE OF CONTENTS 5 Disconnect electrical connection (A).
- Page 418 Repair Manual MSG 90.6PG Commercial Vehicles, Omnibuses – November 2017 3.51 Cable harness for vehicle connection – removal and installation Page 6 of 8 (seat with climate control system) REMOVAL / INSTALLATION TABLE OF CONTENTS 8 Mark the points where the bellows (8)
- Page 419 Repair Manual MSG 90.6PG Commercial Vehicles, Omnibuses – November 2017 3.51 Cable harness for vehicle connection – removal and installation Page 7 of 8 (seat with climate control system) REMOVAL / INSTALLATION TABLE OF CONTENTS 12 Mark the points where the cable for...
- Page 420 Repair Manual MSG 90.6PG Commercial Vehicles, Omnibuses – November 2017 3.51 Cable harness for vehicle connection – removal and installation Page 8 of 8 (seat with climate control system) REMOVAL / INSTALLATION TABLE OF CONTENTS 15 Mark the installation position of the...
- Page 421 Repair Manual MSG 90.6PG Commercial Vehicles, Omnibuses – November 2017 3.52 Radial fan for backrest – removal and installation Page 1 of 3 (seat with climate control system) REMOVAL / INSTALLATION TABLE OF CONTENTS (1) Radial fan for backrest (2) Support (in foam part for backrest)
- Page 422 Repair Manual MSG 90.6PG Commercial Vehicles, Omnibuses – November 2017 3.52 Radial fan for backrest – removal and installation Page 2 of 3 (seat with climate control system) REMOVAL / INSTALLATION TABLE OF CONTENTS 1 Remove the backrest cover (see Chapter 3.26).
- Page 423 Repair Manual MSG 90.6PG Commercial Vehicles, Omnibuses – November 2017 3.52 Radial fan for backrest – removal and installation Page 3 of 3 (seat with climate control system) REMOVAL / INSTALLATION TABLE OF CONTENTS 4 Disconnect the electrical connection (M) between cable harness for backrest (7) and backrest fan cable (6).
- Page 424 Repair Manual MSG 90.6PG Commercial Vehicles, Omnibuses – November 2017 3.53 Control module for climate control system – removal and installation Page 1 of 3 (seat with climate control system) REMOVAL / INSTALLATION TABLE OF CONTENTS (1) Control module for the climate...
- Page 425 Repair Manual MSG 90.6PG Commercial Vehicles, Omnibuses – November 2017 3.53 Control module for climate control system – removal and installation Page 2 of 3 (seat with climate control system) REMOVAL / INSTALLATION TABLE OF CONTENTS 1 Remove the backrest cover (see Chapter 3.26).
- Page 426 Repair Manual MSG 90.6PG Commercial Vehicles, Omnibuses – November 2017 3.53 Control module for climate control system – removal and installation Page 3 of 3 (seat with climate control system) REMOVAL / INSTALLATION TABLE OF CONTENTS Removal and installation 4 Unlock the bracket (5) at the catcher...
- Page 427 Repair Manual MSG 90.6PG Commercial Vehicles, Omnibuses – November 2017 3.54 Cable harness for microphone – removal and installation Page 1 of 5 (seat with climate control system) REMOVAL / INSTALLATION TABLE OF CONTENTS (1) Cable for microphone (2) Microphone support...
- Page 428 Repair Manual MSG 90.6PG Commercial Vehicles, Omnibuses – November 2017 3.54 Cable harness for microphone – removal and installation Page 2 of 5 (seat with climate control system) REMOVAL / INSTALLATION TABLE OF CONTENTS 1 Lift off the seat cushion in position for repair (Chapter 3.1).
- Page 429 Repair Manual MSG 90.6PG Commercial Vehicles, Omnibuses – November 2017 3.54 Cable harness for microphone – removal and installation Page 3 of 5 (seat with climate control system) REMOVAL / INSTALLATION TABLE OF CONTENTS Removal and installation 6 Disconnect the electrical connection (O) between microphone cable (1) and microphone contact cable (15).
- Page 430 Repair Manual MSG 90.6PG Commercial Vehicles, Omnibuses – November 2017 3.54 Cable harness for microphone – removal and installation Page 4 of 5 (seat with climate control system) REMOVAL / INSTALLATION TABLE OF CONTENTS 9 Mark the points where the microphone...
- Page 431 Repair Manual MSG 90.6PG Commercial Vehicles, Omnibuses – November 2017 3.54 Cable harness for microphone – removal and installation Page 5 of 5 (seat with climate control system) REMOVAL / INSTALLATION TABLE OF CONTENTS 12 Mark the point where the...
- Page 432 Repair Manual MSG 90.6PG Commercial Vehicles, Omnibuses – November 2017 3.55 Microphone support – removal and installation Page 1 of 3 (seat with climate control system) REMOVAL / INSTALLATION TABLE OF CONTENTS (1) Microphone support (2) Cable for microphone (3) Backrest (4) Serrated washer head screw ......
- Page 433 Repair Manual MSG 90.6PG Commercial Vehicles, Omnibuses – November 2017 3.55 Microphone support – removal and installation Page 2 of 3 (seat with climate control system) REMOVAL / INSTALLATION TABLE OF CONTENTS Removal and installation 3 Fold the backrest (3) forwards.
- Page 434 Repair Manual MSG 90.6PG Commercial Vehicles, Omnibuses – November 2017 3.55 Microphone support – removal and installation Page 3 of 3 (seat with climate control system) REMOVAL / INSTALLATION TABLE OF CONTENTS 5 Mark the point where the microphone cable (2) is fastened at the microphone support (1) with cable tie (5) and remove the cable tie (5).
- Page 435 Repair Manual MSG 90.6PG Commercial Vehicles, Omnibuses – November 2017 3.56 Play in the backrest locking mechanism – inspection and adjustment Page 1 of 3 INSPECTION TABLE OF CONTENTS (1) Backrest (2) Bearing support, right-hand (3) Catch element (4) Lock...
- Page 436 Repair Manual MSG 90.6PG Commercial Vehicles, Omnibuses – November 2017 3.56 Play in the backrest locking mechanism – inspection and adjustment Page 2 of 3 INSPECTION TABLE OF CONTENTS 3 Remove the covering at the back (see Chapter 3.5). 4 Fold the backrest forwards.
- Page 437 Repair Manual MSG 90.6PG Commercial Vehicles, Omnibuses – November 2017 3.56 Play in the backrest locking mechanism – inspection and adjustment Page 3 of 3 INSPECTION/ADJUSTMENT TABLE OF CONTENTS Adjusting play 6 Remove the catch element (3) and lock (4) (see Chapter 3.29).
Need help?
Do you have a question about the MSG 90.6PG and is the answer not in the manual?
Questions and answers