Samsung WF-R1061 Service Manual
Hide thumbs
Also See for WF-R1061:
- Service manual (70 pages) ,
- Owner's instructions manual (56 pages) ,
- User manual (20 pages)
Table of Contents
Advertisement
SERVICE
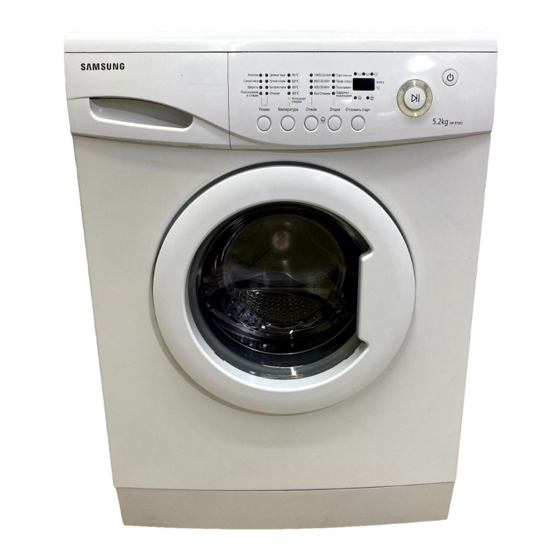
WF-R1061
Refer to the service manual in the itself (http://itself.sec.samsung.co.kr/) for the more information.
All manuals and user guides at all-guides.com
WASHING MACHINE
WF-R1061/YLP
R861/YLP
BASIC MODEL
WF-F1061
Manual
THE FEATURE OF PRODUCT
1. Delay start
2. Coloureds
3. Hand wash
4. Prewash
5. Quick wash
Advertisement
Table of Contents

Related Manuals for Samsung WF-R1061


Summary of Contents for Samsung WF-R1061
- Page 1 WASHING MACHINE WF-R1061/YLP R861/YLP BASIC MODEL WF-F1061 SERVICE Manual WF-R1061 THE FEATURE OF PRODUCT 1. Delay start 2. Coloureds 3. Hand wash 4. Prewash 5. Quick wash Refer to the service manual in the itself (http://itself.sec.samsung.co.kr/) for the more information.
-
Page 2: Table Of Contents
All manuals and user guides at all-guides.com CONTENTS 1. PRECAUTIONS 1-1. SAFE PRECAUTIONS ............................1 1-2. PRECAUTIONS UPON INSTALLATION ........................ 2 2. THE FEATURE OF PRODUCT 2-1. SPECIFICATIONS ..............................5 2-2. OVERVIEW OF THE WASHING MACHINE ......................6 2-3. THE COMPARATIVE SPECIFICATIONS OF PRODUCT ..................7 3. - Page 3 9. WIRING DIAGRAM 9-1. PCB ASSY’ LAYOUT ............................48 9-2.CONNECTOR & RELAY TERMINALS DESCRIPTION (MAIN PCB) ..............49 10. SCHEMATIC-DIAGRAM 10-1. EMZ (WF-R1061) ............................... 50 11. PCB CIRCUIT DIAGRAM 11-1. PCB CIRCUIT DIAGRAM ........................... 51 12. CIRCUIT DESCRIPTION 12-1. OVERALL SYSTEM ............................52 12-2.
-
Page 4: Precautions
All manuals and user guides at all-guides.com 1. Precautions 1-1. Safe Precautions 1. Do not allow the customer to repair the product. It may cause personal injury or product damage when the unit is serviced by unqualifi ed personnel. 2. Disconnect power to the appliance before servicing. Be aware of the possibilities of an electric shock. -
Page 5: Precautions Upon Installation
All manuals and user guides at all-guides.com 1-2. Precautions upon Installation ■ How to Remove Shipping Bolts 2. Remove the shipping bolts 1. Remove the screws by using from the back of the unit. the supplied spanner. 4. Keep the shipping bolts and 3. - Page 6 All manuals and user guides at all-guides.com ■ Grounding Make sure to ground the unit to prevent electric leak age or shock. With a grounded receptacle It does not need an additional grounding. ■ Water Drainage Hook the drain hose over the Wash Basin or Laundry Tub or plug the end of the drai hose into the Standpipe.
- Page 7 All manuals and user guides at all-guides.com ■ How to Level the Unit 1.Select an installation place. Install the unit with 10cm or more clearance from its surrounding walls. 2.Check if the unit is leveled. If the unit wabbles, adjust the leveling legs.
-
Page 8: The Feature Of Product
WASH and SPIN CAPACITY 5.2 kg (DRY LAUNDRY) 220V 180W WASHING 240V 180W 220V 1800W WASHING AND HEATING POWER CONSUMPTION 240V 2100W MODEL WF-R1061 WF-R861 SPIN 220~240V 500W 430W PUMPING 34 w WATER CONSUMPTION 49ℓ(STANDARD COURSE) MODEL WF-R1061 WF-R861 SPIN REVOLUTION 1000 PAPER 2.1kg... -
Page 9: Overview Of The Washing Machine
All manuals and user guides at all-guides.com 2-2. OVERVIEW OF THE WASHING MACHINE OPTION... -
Page 10: The Comparative Specifications Of Product
All manuals and user guides at all-guides.com 2-3. THE COMPARATIVE SPECIFICATIONS OF PRODUCT THE COMPARATIVE SPECIFICATIONS OF PRODUCT Item 5.2kg Old (4.5kg) Model Name WF-R1061 WF-F1061 Capacity (Washing) 5.2kg 4.5kg Drum Capacity 49ℓ 43ℓ Washing Motor HXGN2I HXGN2I Supply/Drain All temperatures /Drain pump... -
Page 11: Product Specifications
All manuals and user guides at all-guides.com 3. PRODUCT SPECIFICATIONS 3-1. OVERVIEW OF THE CONTROL PANEL... -
Page 12: Programme Chart
All manuals and user guides at all-guides.com 3-2. PROGRAMME CHART... -
Page 13: Main Function
All manuals and user guides at all-guides.com 3-3. MAIN FUNCTION 1) Auto power S/W off function ● After power on, the auto power S/W off function automatically switches power off for you if you do not press selection button for 10 minutes ●... - Page 14 All manuals and user guides at all-guides.com 8) Fuzzy washing function (weight-sensing) ● After fi nishing initial water supply, when the fall of the water level needs supplementary water supply, Sensing function perceives the weight with the supplementary water supply numbers and starts to work.
- Page 15 All manuals and user guides at all-guides.com 10) Unbalance detecting & laundry balance positioning system Just before the hydrating process and just after reversal rotation for balancing laundry position, this function is carried out The initial 6 sec is the period of reversal rotation for balancing laundry position , Drum rotates 50rpm for initial 6 sec Next 12 sec, the rotation increases the speed from 50 rpm to 95 rpm slowly During the next 8 sec, drum rotates at the speed of 95 rpm, the sensor decides the degree of laundry...
-
Page 16: Technical Point
Model Motor r.p.m Course Cotton Coloureds Synthetics Wool Handwash Quick 2) Final dehydrating r.p.m at each course unit:rpm Model WF-R1061 WF-R861 Course Cotton 1000 Coloureds 1000 Synthetics Wool Quick 1000 Handwash You can change the r.p.m to the above a table by use spin button under no spin situation. - Page 17 All manuals and user guides at all-guides.com 3) The water supply control at each process cycle Model WF-R1061,WF-R861 Process cycle Pre Washing Cold water 5L/min Washing Cold water 10L/min + (Hot water 10L/min) Rinse Cold water 10L/min Final rinse Cold water 10L/min + Cold water 5L/min...
- Page 18 All manuals and user guides at all-guides.com 5) The other water level data unit:Khz The water data unter each conditon WF-R1061,WF-R861 1st water supply (only preparation) 25.50 1st water supply level to washing tub Overfl ow error 21.50 The water supplied reach 2/3 of door Bubble 24.50...
-
Page 19: Designation Of Main Components
PROTEC (± 7%) STATOR(5.1) ROTOR(8.9) TACHO(3.4) “H”(mm) Code-No. Remark TOR(5.10) TOR(6.7) Resist DC31- WF-R1061 2.07Ω 0.90Ω 1.99Ω 38.8Ω ancevalue 00002E WF-R861 Rated 220~240V/50Hz value 3-5-2. Door safety Device When Door is closed, door stay closed. if “set” is operated, power supplied to ,wires have solenoid or bimetal keep the door closed, and electronical power fl... - Page 20 All manuals and user guides at all-guides.com 3-5-3. Detergent tub and water supply value A Detergent tub is composed of housing and 3 drawers . supplied water fl ows into the 3 drawer-detergent tub by way of classifi er at each washing process. three open drainage way with detergent and supplied water by way of connector located under the housing fl...
-
Page 21: Alignment And Adjustments
All manuals and user guides at all-guides.com 4. ALIGNMENT AND ADJUSTMENTS 4-1. GENERAL ERROR FUNCTION An occurrence of an Error will make a sound of error melody for 5sec and continuously show one of the Error Displays from the following errors. (But, Fault Check Led will fl ash for 0.5sec.) All of the steering parts will be off at that time until that error was released. - Page 22 All manuals and user guides at all-guides.com 11. Natural Drain/Water Leak Error - If more than 4 times of water supply and safe water level of Heater are sensed for each course, this error will occur. - Display : “LE - This error will be released by turning off Power S/W.
-
Page 23: Test Mode
All manuals and user guides at all-guides.com 4-2. TEST MODE 1. Driving Compartment Test Mode A. Hold down “1” and “2” keys simultaneously and then press POWER S/W “4” on. (Whole lamps turn on and display show “t1” after 3 Seconds.) B. -
Page 24: Tools For Disassembly And Assembly
All manuals and user guides at all-guides.com 5. ASSEMBLY AND DISASSEMBLY 5-1. TOOLS FOR DISASSEMBLY AND ASSEMBLY TOOL 10mm Motor (1), Balance (5), 2 holes of each left and right of the Box driver 13mm shock absorber 1 Pulley hole 19mm Replaceable for the box driver. - Page 25 All manuals and user guides at all-guides.com 5-2. ASSEMBLY AND DISASSEMBLY Warning! To avoid risk of electrical shock, personal injury or death, disconnect the power to the washing machine Part Name Descriptive Picture How To Do ASS’Y- Remove the two screws holding the Top Cover at the back of the unit.
- Page 26 All manuals and user guides at all-guides.com Part Name Descriptive Picture How To Do FRAME Remove the Top Cover and the Ass’y FRONT Drawer. Remove the two screws on the front of the control panel. Remove the two screws on the plate(u). Remove the control panel by disconnect ing the connector that connects PCB to the wire-harness.
- Page 27 All manuals and user guides at all-guides.com Part Nam e D escript ive Pic ture HowTo D o ¤º Insert a flat head screwdriver into the gap and FRAME pry down the Cover Front (Left) to separate it. FRONT Remove the Wire Diaphragm from the Frame ¤...
- Page 28 All manuals and user guides at all-guides.com Part Nam e Descript i ve Pic ture How To Do Before removing the belt, should be opened BELT the Cover Bottom. Remove the belt before the re-assembly. ¤ Ensure the belt is placed on the center of ¤Ł...
- Page 29 All manuals and user guides at all-guides.com Part Name Descriptive Picture How To Do Remove the fi xing screws for the water Water supply valve. Supply Valve Disconnect the valve wires. Separate the water hoses. Remove the top cover. Water Level Sensor Remove the fi...
- Page 30 All manuals and user guides at all-guides.com Part Name Descriptive Picture How To Do Remove the fi xing screws holding the Door- Door-Glass. Hinge Separate the glass. After removing the two screws holding the Holder Glass, replace the Door Hinge. After putting them back together, check if the screws holding the Door Hinge is fastened properly.
- Page 31 All manuals and user guides at all-guides.com Part Name Descriptive Picture How To Do Tilt the unit backward and take out the drain pump. Disconnect the incoming water hose and the wire harness. (Caution: Check if the unit is plugged out. There is possibility of electric shock.) Separate the Hose Filter Tub and the Drain Hose.
- Page 32 All manuals and user guides at all-guides.com Part Name Descriptive Picture How To Do Open the Door. Door S/W Remove the Spring Diaphragm and separate the Diaphragm from the Frame Front. - Insert the fl at head screwdriver and pry up the spring to remove the Spring Diaphragm.
- Page 33 All manuals and user guides at all-guides.com Part Nam e D escript ive Pic ture HowTo Do Disconnect the Connector Housing. ¤Ł Remove the nut holding the Heater and ¤Ø separate the Heater. Take out the Heater from the Tub. ¤Œ...
-
Page 34: Trouble Diagnosis5
All manuals and user guides at all-guides.com 6. TROUBLE DIAGNOSIS 6-1. TROUBLE DIAGNOSIS As the micom wash machine is confi gured of the complicate structure, there might be the service call. Below information is prepared for exact trouble diagnosis and suitable repair guide. Caution for the Repair and Replacement Please follow below instruction for the trouble diagnosis and parts replacement. - Page 35 All manuals and user guides at all-guides.com Item Cause and treatment The power is not supplied - Is the PCB connector connected well? - Is the voltage normal? - Is the power supply plug connected well? - Is the noise fi lter connected well? - Is the secondary output of the power supply transformation normal? - Is the fuse disconnected? (option) •...
-
Page 36: Problem Checking And Method Of Pcb
All manuals and user guides at all-guides.com 6-2. PROBLEM CHECKING AND METHOD OF PCB 6-2-1. The Part Of Power Source NO Power On The Voltage Of Between e and f Is Check The DIODE(D18~D21) As Big As DC300V? The Voltage Of Check LVT1 Between a and b is And IC3... - Page 37 All manuals and user guides at all-guides.com 6-2-2. Reset Part The Value Of Measurement Result Of Check The Power Source Between Micom 8And Gnd Is 5V? Check IC7 Check The Curve Check PC2 Output Of ¤˝ ? 6-2-3. Interrupt Part Check The Micom Check TR2,R32 Number 9?
- Page 38 All manuals and user guides at all-guides.com 6-2-4. Checking The Part Of An Oscillator When The Micom 2,3 Check, The Value Is Check Resonator R46 16Mhz? Exchange Micom 6-2-5. Check The Part Of Buzzer Part Confirm DC12V ? Check The Part Of Power Source Exchange BZ1, Check TR1,R59, Micom...
- Page 39 All manuals and user guides at all-guides.com 6-2-6. Driving Part Checking Confi rm The Output Of DC5V, When The Every Part Of Micom Number Check, According To The Some Problem Condition ex) When The Drain Is Not Operating But Pump Motor Is Operating, Check The 5Voltage Of Micom Micom Number 31 Is Micom Bad...
- Page 40 All manuals and user guides at all-guides.com 6-2-7. Confi rm The Driving Part Of Motor Motor Is Not Spinning Check BD1, TRIAC1 Motor Is Not Turning Check RELAY3 Right And Left Check The Tacho Part...
- Page 41 All manuals and user guides at all-guides.com 6-2-8. Checking The Tacho Part Have The Motor Turn In Hand Is The Rectangular Check The Surroundings Curve In The Micom 13? Circuit And TR5 Exchange The Motor...
-
Page 42: Detailed Diagnosis
All manuals and user guides at all-guides.com 6-3. DETAILED DIAGNOSIS 1. Driving Compartment Test Mode A. Hold down the and the buttons simultaneously and then press the Power button (All of the LEDs li ght up and the display shows t1 in 3 seconds.) B. -
Page 43: Exploded Views And Parts List
All manuals and user guides at all-guides.com 7. EXPLODED VIEWS AND PARTS LIST 7-1. EXPLODED VIEWS OF TOP(FRONT) R0019 C0002 C0044 C0043 P0036 R0036 C0115 F0065 R0025 C0058 D0004 R0065 F0064 D0112 D0061 D0075 C0103... -
Page 44: Exploded Views Of Tub
All manuals and user guides at all-guides.com 7-2. EXPLODED VIEWS OF TUB U0355 U0095 I0043 U0010 R0158 U0015 U0033 U0355 U0016 U0038 U0328 U0029 R0030 R0001 U0078 U0030... -
Page 45: Exploded Views Of Case
All manuals and user guides at all-guides.com 7-3. EXPLODED VIEWS OF CASE P0001 W0002 W0004 Y0040 W0001 A0115 R0159 R0158 W0032 R0159 A0025 R0027 I0022 A0114 F0027 U0133 U0133 I0003 B0070 A0006 J0013... -
Page 46: Parts List
All manuals and user guides at all-guides.com 7-4. PARTS LIST CODE NO. DESCRIPTION SPECIFICATION QTY SA/SNA REMARK A0006 DC61-10672A COVER-FRONT(L) SWF-P12,PP(BJ-730),-,-,-, A0025 DC97-02106A ASSY-FIXER TUB S1005J,SLIM-PJT A0034 DC60-40146A BOLT-SPANER -,-,OD36,T2.5,L52,FE,FZY,-,P A0043 DC61-10688A CAP-FIXER SWF-P12,PP(TB53),-,-,-,WHT,-, A0043 DC61-10688A CAP-FIXER SWF-P12,PP(TB53),-,-,-,WHT,-, A0114 DC64-00434A SHUTTER F1215J/F-PJT,PP,-,-,-,WHT,- A0115 DC61-60180A SLEEVE-PLUG... - Page 47 All manuals and user guides at all-guides.com 7-4. PARTS LIST CODE NO. DESCRIPTION SPECIFICATION SNA REMARK R0025 DC97-11122A ASSY-PANEL DRAWER WF-F1061/YLP,4.5KG/RUS ASSY-SENSOR R0027 DC97-00731A PRESSURE P1091,S-PRE+BRAKET+ R0030 DC91-12078A ASSY-WIRE DIAPHRAGM SWF-P12,FRAME-FRONT R0036 DC61-00366A BODY-DRAWER SL-600,TB-53,-,-,-,-,-,- R0047 DC67-00114A CAP-FILTER SW80ASPIW/YMI,P.P,-,-,-,BLK,- R0065 DC63-00450A COVER-FRONT S821,PP,T1.8,-,-,-,-,WHT,GUI...
- Page 48 All manuals and user guides at all-guides.com 7-4. PARTS LIST CODE NO. DESCRIPTION SPECIFICATION SA/SNA REMARK U0353 DC65-00008A CLAMPER HOSE SEW-DR605,SK5,-,-,YEL,ID14. U0353 DC61-60359E CLAMPER HOSE F1235AS/F1035AS,-,-,ID7.8,Y U0353 DC61-60359E CLAMPER HOSE F1235AS/F1035AS,-,-,ID7.8,Y U0353 DC61-60359G CLAMPER HOSE F1235AS/F1035AS,-,-,ID37.2, U0353 DC61-00133A CLAMPER HOSE P1291,PP(BJ-730),ID24.5,OD2 U0355 DC67-00042C...
-
Page 49: Block Diagram
All manuals and user guides at all-guides.com 8. BLOCK DIAGRAM... -
Page 50: Wiring Diagram
All manuals and user guides at all-guides.com 9. WIRING DIAGRAM 9-1. PCB ASSY’ LAYOUT... -
Page 51: 9-2.Connector & Relay Terminals Description (Main Pcb)
All manuals and user guides at all-guides.com 9-2. Connector & Relay Terminals Description (MAIN PCB) -
Page 52: Schematic-Diagram
All manuals and user guides at all-guides.com 10. SCHEMATIC-DIAGRAM 10-1. EMZ (WF-F1061) -
Page 53: Pcb Circuit Diagram
All manuals and user guides at all-guides.com 11. PCB CIRCUIT DIAGRAM 11-1. PCB CIRCUIT DIAGRAM This Document can not be used without Samsung’s authorization. -
Page 54: Circuit Description 12-1.Overall System
All manuals and user guides at all-guides.com 12. CIRCUIT DESCRIPTION 12-1.OVERALL SYSTEM... -
Page 55: Ac Input & Power Circuit
All manuals and user guides at all-guides.com 12-2.AC INPUT & POWER CIRCUIT... -
Page 56: Driving System Circuit
All manuals and user guides at all-guides.com 12-3.DRIVING SYSTEM CIRCUIT... -
Page 57: Motor Circuit
All manuals and user guides at all-guides.com 12-4.MOTOR CIRCUIT... -
Page 58: Sensor Detection Circuit
All manuals and user guides at all-guides.com 12-5.SENSOR DETECTION CIRCUIT... -
Page 59: Motor Tacho Input System
All manuals and user guides at all-guides.com 12-6.MOTOR TACHO INPUT SYSTEM... -
Page 60: Reference Information
All manuals and user guides at all-guides.com 13. REFERENCE INFORMATION 13-1. MODEL NAME... -
Page 61: Terminology
All manuals and user guides at all-guides.com 13-2. TERMINOLOGY ASSY-MAIN PCB (Imbalance Sensor) → To prevent the laundry from gathering on one side of the tube causing noise and vibration, the washing machine uses an imbalance detection device that evenly disentangles the laundry before the hydrating cycle starts. -
Page 62: Fabric Care Chart
All manuals and user guides at all-guides.com 13-3. FABRIC CARE CHART Can be ironed at 100˚C max Resistant material Do not iron Delicate fabric Can be dry cleaned using any sol- vent Item may be washed at 95˚C Dry clean with perchloride, lighter Item may be washed at 60˚C fuel, pure alcohol or R113 only Dry clean with aviation fuel, pure... -
Page 63: Q & A
All manuals and user guides at all-guides.com 13-5. Q & A Type Part Situation Solution Before consulting cause Management method DRUM appear Being opened & closed AS rere In case of Door is not opened during washing. For models WASHER ance part bad/Being attached &... - Page 64 All manuals and user guides at all-guides.com DRUM a noise A noise being occurred General ..Make a comment Did you Please check whether the machine-installed WASHER intermittently during consulting for the customer remove the place is not leaned to one direction and then (MODEL dehydrating to prepare the...
- Page 65 All manuals and user guides at all-guides.com DRUM water le Natural General It can be For the machine having the drain hose at the WASHER akage drain(continually)/water consulting appeared at below of that raise the drain hose up and fi x it (MOEL related not fi...
- Page 66 All manuals and user guides at all-guides.com DRUM 4E :front Water level sensor AS rerecomm This may be Disconnect the water supply hose and check WASHER loading inferiority ended happened whether there is a foreign material inserted in it. (MODEL washing when there And then request an engineer’s inspection.
- Page 67 All manuals and user guides at all-guides.com DRUM 11E : front E9 Water leakage ERR AS rerecom- Check In this case you are recommended our WASHER loading mended whether there engineer’s inspection. (MODEL washing is foreign ma- NAME : machine terial inserted Q1*3*) error...
- Page 68 All manuals and user guides at all-guides.com DRUM rinsing Rinse being not put in tub General It may appear Did the rinse agent drain immediately or part to WASHER related consulting when the rinse put the rinse is clogged after putting the rinse (MODEL agent remains agent? The rinse agent does not drain only...
- Page 69 All manuals and user guides at all-guides.com DRUM installation Consulting for installation General The drum washing machine is leveled after WASHER / connec- of front loading washing consulting removing the safety device at the rear of drum. (MODEL tion machine And for a removing the safety device refer to NAME : accessories and user’s manual.
- Page 70 All manuals and user guides at all-guides.com © Samsung Electronics Co., Ltd. April. 2006 This Service Manual is a property of Samaung Electronic Co.,Ltd. Printed in Korea Any unauthorized use of Manual can be punished under applicable inter- national and/or domestic law.
Need help?
Do you have a question about the WF-R1061 and is the answer not in the manual?
Questions and answers