Table of Contents
Advertisement
Quick Links
RV
Read this manual before installing or using this product. Failure to follow the instructions
and safety precautions in this manual can result in personal injury and/or cause the
product to not operate properly.
T
C
ABLE OF
ONTENTS
Product Overview .......................................................................................................................... 1
Component Checklist.............................................................................................................................. 2
Required Pre-Installation Preparation ......................................................................................... 3
Upgrades to Existing Awnings ................................................................................................................ 3
Installing an Awning Rail ......................................................................................................................... 4
Roller Tube Endcaps .............................................................................................................................. 4
Top Mounting Brackets ........................................................................................................................... 4
Installation ..................................................................................................................................... 5
Attaching the Roller Tube ....................................................................................................................... 5
Cable Routing at the Top of the Arm .............................................................................................. 5
Routing LED Harness to Bottom of the Arm ................................................................................... 5
Mounting the Awning .............................................................................................................................. 6
Mounting the Arms ......................................................................................................................... 6
Securing the Fabric ................................................................................................................................. 7
Switch and Wiring Installation ..................................................................................................... 8
Wire Routing ........................................................................................................................................... 8
Carefree Connects Power Cable ............................................................................................................ 8
Awning Control Switch ............................................................................................................................ 9
Optional LED's ............................................................................................................................. 10
Switch Installation for LED's ................................................................................................................. 10
Optional Wire Covers .................................................................................................................. 11
070026-020
A
FTERMARKET
A
LTITUDE
T
HIS MANUAL PROVIDES INSTRUCTIONS FOR THE
Printed in USA
I
NSTALLATION
A
RMS AND
B
I
ASIC
NSTALLATION OF THE
M
ANUAL
C
ANOPY
A
.
WNING
August, 2018
Advertisement
Table of Contents

Subscribe to Our Youtube Channel
Related Manuals for Carefree RV


Summary of Contents for Carefree RV
-
Page 1: Table Of Contents
Mounting the Arms ......................... 6 Securing the Fabric ..........................7 Switch and Wiring Installation ..................... 8 Wire Routing ............................8 Carefree Connects Power Cable ......................8 Awning Control Switch ..........................9 Optional LED’s ..........................10 Switch Installation for LED's ......................... 10 ... - Page 2 Carefree of Colorado agrees to allow the reproduction of this document for use with Carefree of Colorado products only. Any other reproduction or translation of this document in whole or part is strictly prohibited without prior written approval from Carefree of Colorado.
-
Page 3: Product Overview
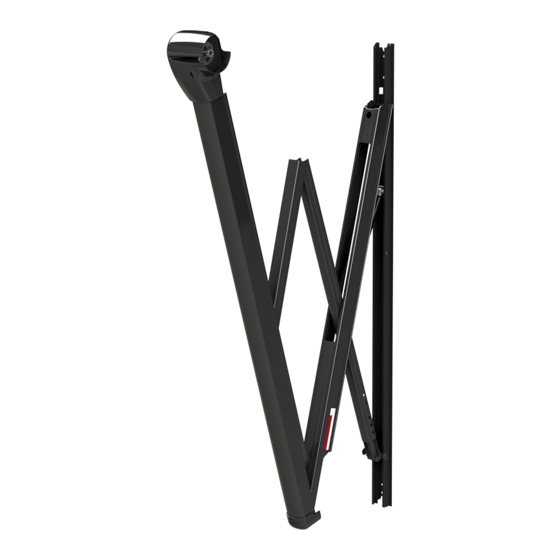
Carefree of Colorado RODUCT VERVIEW The adjustable pitch Altitude provides motorized awning comfort with Carefree's standards for looks, strength and dependability with a successful blend of style, quality and economy. The variable pitch offers 6 settings from flat (3˚) to steep (16˚). -
Page 4: Component Checklist
Aftermarket Installation Manual LTITUDE Carefree of Colorado OMPONENT HECKLIST Alt033 I ESCRIPTION Arm Assembly, LH Arm Assembly, RH Roller tube Assembly Ordered Separately Endcap, Roller Tube Top Bracket Hole Plug Screw, Truss Head... -
Page 5: Required Pre-Installation Preparation
1.3. Configuration B – Control box electronics (including auto-retract). . Disconnect and remove the existing control box, wiring and switches. The system is replaced with the single switch control or the Carefree BT12 Wireless Awning Control System. End Cap End Cap 2. -
Page 6: Installing An Awning Rail
Aftermarket Installation Manual LTITUDE Carefree of Colorado 3. Repeat for other side. 4. Allow the roller tube and canopy to hang down the side of the vehicle. 5. Remove the arms from the vehicle. 6. Remove any existing brackets. 7. Plug and seal all mounting holes. The mounting holes of the new arms may not match the old awning arms. -
Page 7: Installation
Aftermarket Installation Manual Altitude Carefree of Colorado NSTALLATION TTACHING THE OLLER , start at “Mounting the Arms” on OR AWNING UPGRADES WITH THE CANOPY ALREADY INSTALLED ON THE VEHICLE page 6. 1. On the RH (motor) arm, press the roller tube shaft into the hole in the motor head. It may be necessary to twist the roller tube to align the flats on the roller tube shaft with the flats in the motor head bearing. -
Page 8: Mounting The Awning
Aftermarket Installation Manual LTITUDE Carefree of Colorado OUNTING THE WNING NOTICE It is recommended that at least three people install the awning due to its size and weight. 1. On the awning rail, mark the location of the centerline of the idler and motor arm assemblies. -
Page 9: Securing The Fabric
Aftermarket Installation Manual Altitude Carefree of Colorado Hole Plug (2 per arm) 13. Install the hole plugs in the front channel: 13.1. From the back of the channel, insert the plug into the hole. 13.2. Twist to lock into place. -
Page 10: Switch And Wiring Installation
An accessory power cable is installed in the motor and idler arms and routed in the back of the mounting rail. These are for optional Carefree Connects. NOTE: If the installer chooses not to connect the cables, they can be trimmed flush at the bottom of the rail. -
Page 11: Awning Control Switch
Aftermarket Installation Manual Altitude Carefree of Colorado If installing the BT12 Wireless Awning Control System use the instructions in 070029-001 “BT12 Installation Manual” for the controls wiring and setup. WNING ONTROL WITCH 1. At the switch location, cut a rectangular hole 1.25" [3.2cm] x 1.88" [4.8cm]. -
Page 12: Optional Led's
Per RVIA Low Voltage Systems in Conversion and Recreation Vehicles Chapter 3, Section 3-1: For Carefree LED strip lighting near the awning rail: when the 24AWG power harness is spliced or connected 10" or less from the harness connector using a heavier gauge wire, the fuse size is determined by the heavier wire gauge. -
Page 13: Optional Wire Covers
Aftermarket Installation Manual Altitude Carefree of Colorado PTIONAL OVERS Two optional wire covers are available for the Altitude. For upper wire routing use the upper wire cover. The cover slides Slide Upper Wire Cover into Channel and into the channel from the top and over the wires.
Need help?
Do you have a question about the RV and is the answer not in the manual?
Questions and answers