Table of Contents
Advertisement
Quick Links
Advertisement
Table of Contents

Related Manuals for ICT International PSY1


Summary of Contents for ICT International PSY1
- Page 1 PSY1 Leaf Psychrometer May, 2018...
-
Page 2: Table Of Contents
Introduction ................................3 System Requirements ............................... 4 Hardware................................4 Software ................................4 Screen Resolution ............................. 4 Charging the PSY1 Internal Battery ........................... 5 Connecting a Power Supply to the Instrument ....................6 3.1.1 Individual Power Supply Connections ....................... 6 3.1.2 Connecting Power via USB Cable to a Laptop/PC .................. -
Page 3: Introduction
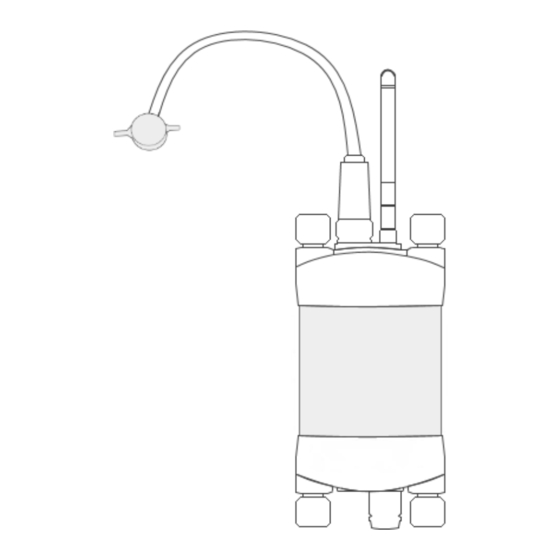
Introduction The PSY1 Leaf Psychrometer follows the same principle of measurement as the stem psychrometer, however the body of the chamber is reduced to accommodate smaller and thinner leaf areas in several plant species. The technique used to prepare and install the Leaf Psychrometer is different to the Stem Psychrometer as it requires additional care to prepare the installation site. -
Page 4: System Requirements
System Requirements Hardware The ICT Combined Instrument Software does not require a powerful computer. Recommended Minimum System Specifications: Intel Atom 1.66 GHz and 1GB RAM or higher. Software The ICT Instrument software is compatible with the following Operating Systems: Windows 7 Windows 8 &... -
Page 5: Charging The Psy1 Internal Battery
Charging the PSY1 Internal Battery The PSY1 is a self-contained instrument that incorporates a lithium polymer battery. Before using the instrument, this battery should be charged. To choose from a range of charging options see: Connecting a Power Supply to the Instrument (pages 6 to 9). -
Page 6: Connecting A Power Supply To The Instrument
Connecting a Power Supply to the Instrument 3.1.1 Individual Power Supply Connections Enabling better global research outcomes in soil, plant & environmental monitoring. -
Page 7: Connecting Power Via Usb Cable To A Laptop/Pc
3.1.2 Connecting Power via USB Cable to a Laptop/PC Enabling better global research outcomes in soil, plant & environmental monitoring. -
Page 8: Connecting Power Directly Via Ch24 Power Supply
Note: Continuous connection of an external battery or constant power supply (for days to months at a time) is not recommended as this can shorten the life of the internal battery. ICT International recommend using a solar panel directly connected (with no external battery backup in parallel) wherever possible; or a timer switch to turn off external power for 8-12 hours daily to simulate a solar panel during the day and night. -
Page 9: Connecting Power Directly Via Solar Panel (Field Operation)
3.1.4 Connecting Power Directly via Solar Panel (Field Operation) Note: The PSY1 is non-polarised Enabling better global research outcomes in soil, plant & environmental monitoring. -
Page 10: Cleaning The Psychrometer Chamber
Cleaning the Psychrometer Chamber The Leaf Psychrometer consists of two very small welded thermocouples made of very fine 25µm wire. This makes the sensor very sensitive for measuring water potential, but equally sensitive to dirt and mild oxidation. It is recommended that before starting any measurements you clean the thermocouples. The cleaning process involved using an organic solvent such as chloroform, or electronics contact cleaner. -
Page 11: Install Ict Combined Instrument Software And Usb Driver
Install ICT Combined Instrument Software and USB Driver Insert the supplied USB drive and run Autorun.exe. Choose Software (a) then choose ICT Instrument Software (b). Follow the on-screen prompts until the finished installation screen appears. To install the USB driver, choose USB Driver (c) and wait for the installation to complete. Alternatively, the individual installers (Windows and Mac) are available in the Instrument Software folder. -
Page 12: Turn The Instrument On
Turn the Instrument On To turn on your PSY1, connect the Instrument to a computer via a USB cable. Alternatively, the PSY1 can either be turned on manually by pressing the power button or automatically by connecting an external power supply. -
Page 13: Connect To The Instrument
Connect to the Instrument Connect the USB cable to the instrument and the computer. The PSY1 will automatically be detected by the computer, as with any USB device. Open ICT Instrument Software and Search for Devices. Double-click the instrument in the list to connect to it, or select it and click ‘Connect’. -
Page 14: Connect Via Mcc Mini
Connect via MCC Mini Ensure that the PSY1 is on. Connect the MCC Mini to your computer, open ICT Combined Instrument software. Tick ‘Auto RF Discover’ and then Search for Devices. The MCC Mini should appear on the list, it will then automatically search for nearby ICT Instruments. -
Page 15: Set The Measurement Parameters
Set the Measurement Parameters When you connect to an instrument, the Channels screen will be displayed. This shows the current measurement status, when the next measurement will take place, the currently configured channels, instrument serial number/name/comment, battery status, external power status, SD card status, and the instrument time and date. Enabling better global research outcomes in soil, plant &... -
Page 16: Configuration
Configuration Normally, all instruments provided by ICT International come pre-configured and tested. All that you need to do is select a logging interval. This is done from the Configuration screen: Note: Click ‘Update Measurement Option Changes’ after changing any settings to send them to the logger. -
Page 17: Chamber Heating
Chamber Heating Chamber heating should be used whenever the psychrometer is subjected to very cold temperatures at night that could induce condensation. If such conditions are expected, a good protocol to follow is to employ chamber heating between 5 pm and 10 am to prevent the chamber from becoming colder than the stem. Calibration It is highly recommended that the psychrometer is calibrated before each installation. -
Page 18: Diagnostics
Diagnostics Temperature Correction Constants (C1 and C2) should not be changed unless advised to do so by an ICT Technician. Reverse Peltier (Warming) Reverse Peltier is not normally required for a clean psychrometer. This is typically only required for very humid conditions. -
Page 19: Sd Card Logging Options
SD Card Logging Options These settings allow you to select what is recorded to the SD card. By default, everything except Raw Data is logged. Raw Data creates a separate data file on the SD card in addition to the standard .csv file. View Options Enables the display of diagnostic measurement results during measurement. -
Page 20: Download Data
Download Data The Data tab can be used for basic data visualisation, SD card management, and to download data files from the instrument. Data is stored on the MicroSD card in csv format. The MicroSD card can also be removed from the logger and read by a computer. - Page 21 Manage SD displays the content of the instrument SD card. Refresh List loads the list of files currently present on the SD card. Download File downloads the selected file to the location of your choice. Rename File allows you to change the name of the selected file. Note that if the instrument data file is renamed a new file will be created for measurements from that point onward.
-
Page 22: Sensor Installation
10. Sensor Installation Insert a flat portion of the leaf into the Leaf Psychrometer clamp to use as the installation area. Abrade the cuticle layer of the leaf with 400-600 grit sandpaper or 0.5-micron polish compound. This increases water vapour exchange between the leaf tissue and the leaf psychrometer. -
Page 23: Grit Selection
Grit Selection Level of Abrasion Enabling better global research outcomes in soil, plant & environmental monitoring. - Page 24 ICT International Pty Ltd Enabling better global research outcomes in soil, plant & environmental monitoring www.ictinternational.com sales@ictinternational.com.au Phone: 61 2 6772 6770 Fax: 61 2 6772 7616 PO Box 503, Armidale, NSW, 2350, Australia. Enabling better global research outcomes in soil, plant & environmental monitoring.
Need help?
Do you have a question about the PSY1 and is the answer not in the manual?
Questions and answers