Table of Contents
Advertisement
Advertisement
Table of Contents

Related Manuals for KSB Multitec A SX


Summary of Contents for KSB Multitec A SX
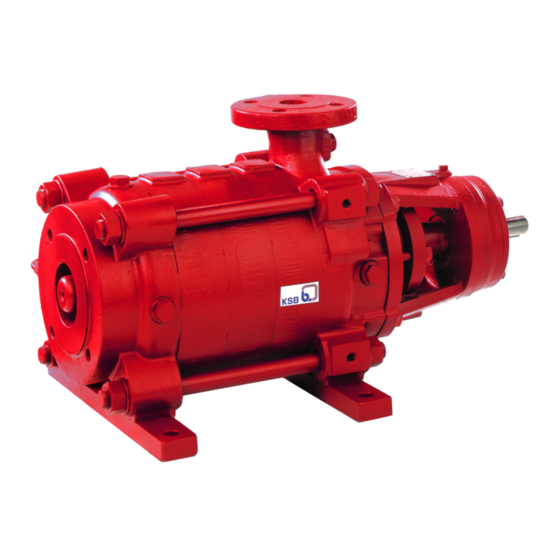
- Page 1 Sprinkler Pump Multitec A SX Installation/Operating Manual...
- Page 2 All rights reserved. The contents provided herein must neither be distributed, copied, reproduced, edited or processed for any other purpose, nor otherwise transmitted, published or made available to a third party without the manufacturer's express written consent. Subject to technical modification without prior notice. © KSB SE & Co. KGaA, Frankenthal 29/01/2018...
-
Page 3: Table Of Contents
Aligning the pump and motor ........................ 25 5.6.1 Motor with levelling screw........................ 25 5.6.2 Motor without levelling screw...................... 26 Electrical connection ............................ 27 5.7.1 Setting the time relay ........................ 27 5.7.2 Earthing .............................. 27 5.7.3 Connecting the motor ........................ 28 Checking the direction of rotation........................ 28 Multitec A SX 3 of 68... - Page 4 Recommended spare parts stock for 2 years' operation to DIN 24296 .......... 58 Trouble-shooting.......................... 60 Related Documents .......................... 62 General assembly drawing with list of components .................. 62 EC Declaration of Conformity ...................... 64 Certificate of Decontamination...................... 65 Index .............................. 66 Multitec A SX 4 of 68...
-
Page 5: Glossary
Rotor Fully assembled unit of all rotating parts, without mechanical seal, rolling element bearings or plain bearings Suction lift line/suction head line The line which is connected to the suction nozzle Multitec A SX 5 of 68... -
Page 6: General
The order number and order item number uniquely identify the pump (set) and serve as identification for all further business processes. In the event of damage, immediately contact your nearest KSB service centre to maintain the right to claim under warranty. Noise characteristics see (ð Section 4.6, Page 18) 1.2 Installation of partly completed machinery... - Page 7 1 General Symbol Description Step-by-step instructions Note Recommendations and important information on how to handle the product Multitec A SX 7 of 68...
-
Page 8: Safety
This applies to, for example: ▪ Arrow indicating the direction of rotation ▪ Markings for connections ▪ Name plate The operator is responsible for ensuring compliance with all local regulations not taken into account in this manual. Multitec A SX 8 of 68... -
Page 9: Intended Use
– Hazards to persons due to electrical, thermal, mechanical and chemical effects and explosions – Failure of important product functions – Failure of prescribed maintenance and servicing practices – Hazard to the environment due to leakage of hazardous substances Multitec A SX 9 of 68... -
Page 10: Safety Awareness
(set) is only valid if the equipment is used in accordance with its intended use. (ð Section 2.3, Page 9) 2.10 Explosion protection Always observe the information on explosion protection given in this section when DANGER operating the pump in potentially explosive atmospheres. Multitec A SX 10 of 68... -
Page 11: Marking
A special design is required for compliance with temperature class T6. If the pump is to be operated at a higher temperature, if there is no data sheet, or if the pump is part of a pool of pumps, contact KSB for the maximum permissible operating temperature. -
Page 12: Monitoring Equipment
Check whether monitoring equipment is required to ensure that the pump set functions properly. Contact KSB for further information on monitoring equipment. 2.10.4 Operating limits The minimum flows indicated in (ð Section 6.2.3, Page 35) refer to water and water-like fluids. -
Page 13: Transport/Temporary Storage/Disposal
▷ Only remove caps/covers from the openings of the pump set at the time of installation. Store the pump (set) in a dry, protected room where the atmospheric humidity is as constant as possible. Rotate the shaft by hand once a month, e.g. via the motor fan. Multitec A SX 13 of 68... -
Page 14: Return To Supplier
(set). (ð Section 11, Page 65) Always indicate any safety and decontamination measures taken. NOTE If required, a blank certificate of decontamination can be downloaded from the KSB web site at: www.ksb.com/certificate_of_decontamination 3.4 Disposal WARNING Fluids posing a health hazard and/or hot fluids Hazard to persons and the environment! ▷... -
Page 15: Description Of The Pump (Set)
(drive end), rolling element bearings (drive end) and plain bearing (suction end), axial suction nozzle for the entire H/Q range 4.2 Designation Example: Multitec A SX 100/3 - 8.1 25.65 Table 5: Key to the designation Code Description Multitec Type series... -
Page 16: Design Details
Maximum starting current (only Impeller diameter [mm] relevant for submersible borehole pumps) Rated speed VdS approved flow rate VdS approval number KSB order and order item number Type series, size Application 4.4 Design details Design ▪ Sprinkler pump ▪ High-pressure centrifugal pump ▪... -
Page 17: Configuration And Function
(15) and plain bearings (7) located in a bearing housing (5) and the suction casing (6), respectively. The bearing housing (5) is connected with the suction casing (6) and/or discharge casing (3). Sealing The pump is sealed by a shaft seal. Standardised mechanical seal or gland packing Multitec A SX 17 of 68... -
Page 18: Noise Characteristics
Special accessories ▪ As required Measured at a distance of 1 m from the pump outline (as per DIN 45635 Parts 1 and 24) Increase for 60 Hz operation: 3500 rpm +3dB; 1750 rpm 1dB Multitec A SX 18 of 68... -
Page 19: Dimensions And Weights
4 Description of the Pump (Set) 4.8 Dimensions and weights For dimensions and weights refer to the general arrangement drawing/outline drawing of the pump (set). Multitec A SX 19 of 68... -
Page 20: Installation At Site
5.3 Installing the pump set CAUTION Warped baseplate or pump Damage to the pump! ▷ Align the baseplate and the pump accurately and carefully when installing the pump set. Multitec A SX 20 of 68... -
Page 21: Installation On The Foundation
Perform secondary treatment of the concrete to DIN 1045. NOTE For low-noise operation contact the manufacturer to check whether the pump set can be installed on anti-vibration mounts. NOTE Expansion joints can be fitted between pump and suction/discharge line. Multitec A SX 21 of 68... -
Page 22: Piping
CAUTION Welding beads, scale and other impurities in the piping Damage to the pump! ▷ Remove any impurities from the piping. ▷ If necessary, install a filter. ▷ Observe the information in (ð Section 7.2.2.3, Page 41) . Multitec A SX 22 of 68... -
Page 23: Permissible Forces And Moments At The Pump Nozzles
Suction and discharge nozzles must be regarded separately. Refer to the data sheet for the relevant suction and discharge nozzle diameters. Multitec A SX 23 of 68... -
Page 24: Checking The Coupling Alignment
ü The coupling guard and step guard, if any, have been removed. 1. Loosen the support foot and re-tighten it without transmitting any stresses and strains. 2. Place the straight-edge axially on both coupling halves. Multitec A SX 24 of 68... -
Page 25: Aligning The Pump And Motor
Risk of injury by rotating shafts! ▷ Always operate the pump set with a coupling guard. If the customer specifically requests not to include a coupling guard in KSB's delivery, then the operator must supply one! ▷ Observe all relevant regulations for selecting a coupling guard. -
Page 26: Motor Without Levelling Screw
Risk of injury by rotating shafts! ▷ Always operate the pump set with a coupling guard. If the customer specifically requests not to include a coupling guard in KSB's delivery, then the operator must supply one! ▷ Observe all relevant regulations for selecting a coupling guard. -
Page 27: Electrical Connection
Time relay settings for star-delta starting: 3 seconds ± 30 %. 5.7.2 Earthing DANGER Electrostatic charging Explosion hazard! Fire hazard! Damage to the pump set! ▷ Connect the PE conductor to the earthing terminal provided. Multitec A SX 27 of 68... -
Page 28: Connecting The Motor
The motor's direction of rotation must match the arrow indicating the direction of rotation on the pump. 3. If the motor is running in the wrong direction of rotation, check the electrical connection of the motor and the control system, if necessary. Multitec A SX 28 of 68... -
Page 29: Commissioning/Start-Up/Shutdown
Insufficient quantity of lubricating oil in the reservoir of the constant level oiler Damage to the bearings! ▷ Regularly check the oil level. ▷ Always fill the oil reservoir completely. ▷ Keep the oil reservoir properly filled at all times. Multitec A SX 29 of 68... - Page 30 On pumps with oil level sight glass the oil level must be visible between the two red marks on the oil level sight glass. Remove the vent plug and top up oil, if necessary. Multitec A SX 30 of 68...
-
Page 31: Priming And Venting The Pump
Explosion hazard! Damage to the pump set! ▷ Never operate the pump set without liquid fill. ▷ Prime the pump as per operating instructions. ▷ Always operate the pump within the permissible operating range. Multitec A SX 31 of 68... -
Page 32: Checking The Shaft Seal
1. Only lightly tighten the nuts of the gland follower by hand. 2. Use a feeler gauge to verify that the gland follower is mounted centred and at a right angle to the shaft. ð The gland must leak after the pump has been primed. Multitec A SX 32 of 68... -
Page 33: Shutdown
If the fluid handled is fed in under vacuum, also supply the shaft seal with barrier fluid during standstill. CAUTION Risk of freezing during prolonged pump shutdown periods Damage to the pump! ▷ Drain the pump and the cooling/heating chambers (if any) or otherwise protect them against freezing. Multitec A SX 33 of 68... -
Page 34: Operating Limits
If the start-ups are evenly spaced over the period indicated, the following limits can be used for orientation for start-up with the discharge-side gate valve slightly open: Table 9: Frequency of starts Motor rating Maximum No. of start-ups [kW] [Start-ups/hour] up to 45 more than 45 Multitec A SX 34 of 68... -
Page 35: Flow Rate
CAUTION Impermissibly high density of the fluid handled Motor overload! ▷ Observe the information on fluid density indicated in the data sheet. ▷ Make sure the motor has sufficient power reserves. Best efficiency point Multitec A SX 35 of 68... -
Page 36: Abrasive Fluids
Observe any additional instructions and information provided. (ð Section 3.2, Page 13) 6.4 Returning to service For returning the pump to service observe the sections on commissioning/start-up (ð Section 6.1, Page 29) and the operating limits (ð Section 6.2, Page 34) . Multitec A SX 36 of 68... - Page 37 ▷ As soon as the work is complete, re-install and/or re-activate any safety-relevant and protective devices. NOTE If the pump has been out of service for more than one year, replace all elastomer seals. Multitec A SX 37 of 68...
-
Page 38: Servicing/Maintenance
(set) with a minimum of maintenance expenditure and work. NOTE All maintenance, service and installation work can be carried out by KSB Service. Find your contact in the attached "Addresses" booklet or on the Internet at www.ksb.com/contact". -
Page 39: Maintenance/Inspection
While the pump is in operation, observe and check the following: ▪ The pump must run quietly and free from vibrations at all times. ▪ In case of oil lubrication, ensure the oil level is correct. (ð Section 6.1.2, Page 29) ▪ Check the shaft seal. (ð Section 6.1.6, Page 32) Multitec A SX 39 of 68... -
Page 40: Inspection Work
Excessive temperatures caused by friction, impact or frictional sparks Explosion hazard! Fire hazard! Damage to the pump set! ▷ Regularly check the coupling guard, plastic components and other guards of rotating parts for deformation and sufficient distance from rotating parts. Multitec A SX 40 of 68... - Page 41 Excessive temperatures caused by mechanical contact Risk of explosion! Damage to the pump set! ▷ Check correct seating of axial seal rings mounted on the shaft. Only gentle contact of the sealing lip shall be established. Multitec A SX 41 of 68...
-
Page 42: Lubrication And Lubricant Change Of Rolling Element Bearings
▷ Collect and dispose of any lubricants. ▷ Observe all legal regulations on the disposal of fluids posing a health hazard. At least once a year Oil quantity without oil fill in the reservoir of the constant-level oiler Multitec A SX 42 of 68... - Page 43 7.2.3.2.2 Grease quality Optimum grease properties for rolling element bearings ▪ High melting point lithium soap base grease ▪ Free of resin and acid ▪ Not liable to crumble Multitec A SX 43 of 68...
-
Page 44: Drainage/Disposal
7.4 Dismantling the pump set 7.4.1 General information/Safety regulations WARNING Unqualified personnel performing work on the pump (set) Risk of injury! ▷ Always have repair and maintenance work performed by specially trained, qualified personnel. Multitec A SX 44 of 68... -
Page 45: Preparing The Pump Set
For dismantling and reassembly observe the exploded views and the general assembly drawing. NOTE All maintenance, service and installation work can be carried out by KSB Service. Find your contact in the attached "Addresses" booklet or on the Internet at www.ksb.com/contact". - Page 46 Preparations for dismantling the rolling element bearing Grease lubrication 901.1 360.1 551.1 920.2 920.6 411.7 940.3 320.1 520.1 Fig. 14: Grease lubrication 1. Remove joint ring (V-ring) 411.7. 2. Undo hexagon head bolts 901.1. 3. Remove bearing cover 360.1. Multitec A SX 46 of 68...
- Page 47 1. Undo socket head cap screws 914.4 and remove them together with disc 550.10 and O-ring 412.12. 2. Remove bearing cover 360.2. 3. Pull off sleeve 520.4 with ring 500.1 (tolerance ring) and O-ring 412.11. Oil lubrication of labyrinth seal Multitec A SX 47 of 68...
- Page 48 CAUTION Incorrect axial adjustment of rotor ▷ After bearing or seal replacement, fit the same spacer discs on the bearing side. ▷ Always reproduce the original rotor adjustment. 3. Take out spacer disc 551.1. Multitec A SX 48 of 68...
-
Page 49: Removing The Shaft Seal
9. Pull off shaft sleeve 523.1 with the rotating assembly of mechanical seal 433.1. Two holes are provided in the shaft sleeve for engaging a puller. 10. Take off seal housing 441.1. 11. Remove O-ring 412.4. 7.4.4.2 Dismantling the gland packing Fig. 19: Dismantling the gland packing Multitec A SX 49 of 68... -
Page 50: Dismantling The Hydraulic System
2. Pull off stage casing 108.1 and diffuser 171.1. Use the raised areas at the outside diameter or the groove provided for this purpose. If necessary, separate them by tapping gently with a mallet. Multitec A SX 50 of 68... -
Page 51: Reassembling The Pump Set
ü Reassemble the pump in vertical position, if possible. ü The clearance between the last impeller 230.1 or 230.3 and the balance drum 59-4 (or spacer sleeve 525.4) is between 0.7 and 1.2 mm. Multitec A SX 51 of 68... -
Page 52: Fitting The Shaft Seal
For drawings and part numbers refer to the section on the mechanical seal. Uni-directional mechanical seal Left-hand spring Right-hand spring Shaft Shaft rotation: rotation: anti- clockwise clockwise View towards the primary ring Fig. 21: Uni-directional spring of mechanical seal Multitec A SX 52 of 68... - Page 53 6. Carefully press the stationary mating ring of mechanical seal 433.1 or 433.2 into seal cover 471.1. 7. Fit seal cover 471.1 with gasket 400.1. 8. Insert and tighten nuts 920.3. 9. Connect circulation line 710.2 (depending on seal code). Multitec A SX 53 of 68...
- Page 54 5. Use a feeler gauge to verify that gland follower 452 is fitted centred and at a right angle to the shaft. 6. Tighten gland follower 452 lightly and evenly. It must be easy to rotate the rotor. Multitec A SX 54 of 68...
-
Page 55: Fitting The Bearings
Axial position of rotor Axial adjustment of the rotor is not required. The correct axial position of the rotor is achieved by inserting spacer discs 551.1 on the side of the bearing (or angular contact ball bearings) in bearing housing 350.1. The total thickness of the spacer sleeves is 1.6 Multitec A SX 55 of 68... -
Page 56: Tightening Torques
Table 20: Tie bolt tightening torques (in Nm) Max. permissible pressure MTC material code [bar] Loosen again after first tightening. Final tightening torque of first nut Tightening torque of second nut (if any) Block first nut when tightening. Multitec A SX 56 of 68... -
Page 57: Shaft Nut Tightening Torques
Always quote the following data when ordering replacement or spare parts: ▪ Type series ▪ Material variant ▪ Size ▪ Seal code ▪ KSB order number ▪ Order item number ▪ Consecutive number ▪ Year of construction Refer to the name plate for all data. -
Page 58: Recommended Spare Parts Stock For 2 Years' Operation To Din 24296
On pump sizes 125 and 150 only; on pump sizes 32 to 100 with material codes 20 to 30 On pump sizes 32 to 100 only On installation types A and B Additional parts on installation types C and D; part No. 99-20.1 not fitted Depending on version Multitec A SX 58 of 68... - Page 59 Part No. Description Number of pumps (including stand-by pumps) 6 and 7 8 and 9 10 and more Labyrinth ring 90 % 99-9.2 Set of sealing elements 150 % (incl. parts No. 411.10/.11, 412.6/.10/.11/.12) Multitec A SX 59 of 68...
-
Page 60: Trouble-Shooting
Fix the pipelines using anti-vibration material. Pump pressure must be released before attempting to remedy faults on parts which are subjected to pressure. Consult installation contractor or KSB customer service. Multitec A SX 60 of 68... - Page 61 Gland not packed correctly. Check. Packing material not suitable Change in the free cross-section of the Check the balancing line. balancing liquid return line. Check throttling bush/balance drum Wear in balancing device. clearances. Multitec A SX 61 of 68...
-
Page 62: Related Documents
9 Related Documents 9 Related Documents 9.1 General assembly drawing with list of components Fig. 27: Multitec A SX general assembly drawing Table 24: List of components Part No. Description Part No. Description 106.2 Suction casing Shaft protecting sleeve Discharge casing 525.1 Spacer sleeve 108.2... - Page 63 Part No. Description Part No. Description Gland packing 920.1/.2/.3/.4/.5 471.1 Seal cover Lockwasher 502.1 Casing wear ring 932.2 Circlip Thrower 940.1/.2/.3 520.1 Sleeve 970.1 Plate 523.1 Shaft sleeve Except for Multitec 65, material code 12 Multitec A SX 63 of 68...
-
Page 64: Ec Declaration Of Conformity
The manufacturer herewith declares that the product: Multitec A SX KSB order number: ....................KSB order item number: ............... ▪ is in conformity with the provisions of the following Directives as amended from time to time: – Pump (set): Machinery Directive 2006/42/EC The manufacturer also declares that ▪... -
Page 65: Certificate Of Decontamination
We confirm that the above data and information are correct and complete and that dispatch is effected in accordance with the relevant legal provisions....................................Place, date and signature Address Company stamp Required fields Multitec A SX 65 of 68... -
Page 66: Index
Shaft seal 16 Shutdown 36 Spare part Gland packing 32 Ordering spare parts 57 Grease lubrication Grease quality 43 Spare parts stock 58 Start-up 32 Storage 36 Impeller type 16 Installation Installation on foundation 21 Temperature limits 11 Installation at site 20 Tightening torques 57 Intended use 9 Trouble-shooting 60 Multitec A SX 66 of 68... - Page 68 KSB SE & Co. KGaA Johann-Klein-Straße 9 • 67227 Frankenthal (Germany) Tel. +49 6233 86-0 www.ksb.com...
Need help?
Do you have a question about the Multitec A SX and is the answer not in the manual?
Questions and answers