
Related Manuals for Security Command 1912XR

Summary of Contents for Security Command 1912XR
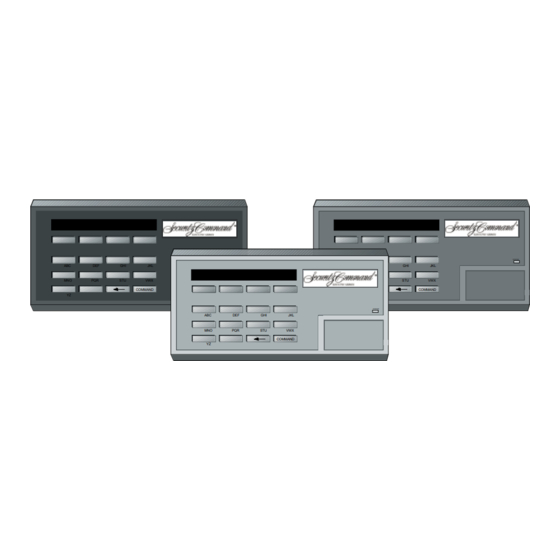
- Page 1 P O W E R P O W E R COMMAND COMMAND P O W E R COMMAND USER'S GUIDE...
-
Page 2: Table Of Contents
1912XR Command Processor Panels Table of Contents About Your Security System .......... 1 Loop Status ..............15 The Security Command Keypad ........2 Bypass Loops .............. 16 Special Security Command Messages ......3 Loop Monitor ............... 17 Special Security Command Tones ........ 4 System Status ............. - Page 3 Copyright 1993 - 1996 Digital Monitoring Products, Inc. Information furnished by DMP is believed to be accurate and reliable. This information is subject to change without notice.
-
Page 4: About Your Security System
The system combines ease of use with a simple to understand false alarms and prevent their occurring. Security Command keypad display to offer the full range of features requested by today’s security system owners. Security Command As part of our commitment to reducing false alarms, we’d like to can protect both the interior and perimeter of your home or business encourage you to read this guide thoroughly. -
Page 5: The Security Command Keypad
This ends the function you were performing. AC LED This green LED remains on steady as long as your Security Command system is connected to its AC power supply. Should there be an interruption, the green LED will flash on and off. The system's backup battery will maintain normal operation for a time allowing you contact our service department. -
Page 6: Special Security Command Messages
INVALID LEVEL Special Security Command Messages All security code numbers have authority levels that allow the user to As you use your system, you’ll occasionally see a keypad display that only access certain functions. When a user attempts a function asks you to enter a code or that describes a condition on the system. -
Page 7: Special Security Command Tones
Special Security Command Tones Understanding Security System Terms Your keypad also contains a small speaker that allows it to alert you Throughout this guide, and in some displays on your keypad, you’ll to events as they occur on your system. Below are brief descriptions see certain words or phrases that might be unfamiliar. - Page 8 Status is a feature that automatically displays the armed or disarmed Entry or Exit loop status of your system on the Security Command keypads. Alarm or Almost all systems have one or more doors through which you can trouble conditions on a loop or a system monitor such as AC or battery enter or exit the premises.
-
Page 9: How Your System Operates
How your System Operates If the problem can be corrected by simply closing a door or window, do not bypass the loop. Instead, correct the problem and repeat the Your system has been programmed to operate in one of three modes: arming procedure. -
Page 10: Area System Arming
Area System Arming 7a. If a problem exists on one or more loops, the loop name and Arming: Your Security Command keypad is usually located close to problem are displayed followed by: BYPASS? NO YES the door from which you enter and exit the premises. This allows the 7b. -
Page 11: Area System Disarming
Disarming an Area System After opening the door, the Security Command keypad sounds a prewarn tone to remind you to disarm the system. You must disarm 1. Press the COMMAND key until ARM DISARM is displayed. -
Page 12: All/Perimeter System Arming
4. The Security Command displays loops that have been bypassed All/Perimeter System Arming prior to arming and 24 hour loops that are in a bad condition. No Area Assignment: Your security system is divided into two separate action is required by you. -
Page 13: All/Perimeter System Disarming
. Enter your security code number and press COMMAND. After opening the door, the Security Command keypad sounds a 2. The keypad then displays any loops that went into alarm or any prewarn tone to remind you to disarm the system. -
Page 14: Home/Away System Arming
Area Assignment: Your security system is divided into two or three separate areas. Motion detectors, inside doors, and other interior 5. The Security Command displays loops that have been bypassed devices are assigned to an Interior and possibly Bedroom area while prior to arming and 24 hour loops that are in a bad condition. -
Page 15: Home/Away System Disarming
Enter a 1 to 3 digit code number and press COMMAND or enter After opening the door, the Security Command keypad sounds a a 4 digit code without pressing COMMAND. -
Page 16: Security Command User Menu
1. Access the User Menu. Many of the features of your system have been put into a User Menu you can access from any Security Command keypad. The menu 2. The keypad displays ALARM SILENCE?. requires you to enter your security code and then only shows those 3. -
Page 17: Door Access
Door Access is used to operate a door strike relay that is built in to Armed Areas is used to display all of the armed areas in your system some Security Command keypads. Power for the door strike is at the Security Command keypads. Each armed area is displayed connected to the keypad relay and can be interrupted by using the along with its area number and name. -
Page 18: Outputs On Off
Outputs On Off Loop Status User Code Level: 5 and above. User Code Level: All users at any time. Function: Allows you to turn the system relay outputs on and off. Function: Displays a list of armed, bypassed, or alarmed loops. Also allows you to check the status of individual loops. -
Page 19: Bypass Loops
Loop Status Bypass Loops continued 4. Select ARM for a list of loops that are currently armed. You can User Code Level: 6 and above. scroll through the list by pressing the COMMAND key. Function: Allows you to bypass a loop prior to arming. 5. -
Page 20: Loop Monitor
4. Select PERIM to place all disarmed perimeter loops into Loop Loop Monitor Monitor. PERIM is displayed only on All/Perimeter and Home/ User Code Level: 4 and above. Away systems. Function: Allows the system to monitor selected disarmed loops 4a. The keypad displays PERIM? ADD RMV. (doors, windows, or motion detectors) and display their name at the 4b. -
Page 21: System Status
System Status System Test User Code Level: 1 and 2 - During schedules only. 3 to 9 - Anytime. User Code Level: 4 and above. Function: Displays the current condition of internal system hardware. Function: Automatically tests various parts of your system. System Status displays the condition of the panel's AC power, battery System Test is used to test the battery, alarm bell or siren, and power, and optional panel tamper. -
Page 22: User Codes
Loop Monitor Outputs On/Off Code Number - Users also have a 1 to 5 digit number that they enter into the Security Command keypad when arming or disarming. This Extend code number is kept secret from other users. Bypass Loops A user enters only their code number when operating the system. -
Page 23: Ambush Codes
ARM/DIS (arm & disarm) SYS STAT (system status) User Codes continued ALM SLNC (alarm silence) NO SYS TEST (system test) Adding User Code Numbers: SNSR RST (sensor reset) USR CODE (user codes) 1. Access the User Menu. DOOR ACS (door access) SCHEDULS (schedules) 2. - Page 24 User Codes Changing User Code Numbers continued Deleting User Code Numbers: 1. Access the User Menu. 2. Press the COMMAND key until USER CODES? displays. 1. Access the User Menu. 3. Press any one of the SELECT keys. The keypad displays ADD 2.
-
Page 25: Schedules
Schedules Setting an Arming and Disarming Schedule 1. Access the User Menu. User Code Level: 7 and above 2. Press the COMMAND key until SCHEDULES? displays. Press Function: The Schedules function allows you to program into the any SELECT key. system the times at which you normally turn your burglary protection 3. - Page 26 Schedules Relay Output Schedules continued The Schedules function allows you to set up to 50 different scheduled XR100 Systems: The display CLOSE TIME? is followed by the times for relays connected to your system to turn on and off display MON – : AM PM. Pressing the SELECT key under the automatically.
- Page 27 Schedules continued 7. If On Off times are displayed, the keypad then displays DELETE KEEP. Press the SELECT key under DELETE to enter new times. 8. The keypad then displays ON TIME?. This is followed by the display – : AM PM.
- Page 28 Schedules continued Area # __ , or PRM - PRI Opening Int or Perim TMP - SEC Closing Area # __ , or PRM - PRI Opening Int or Perim TMP - SEC Closing Area # __ , or PRM - PRI Opening Int or Perim TMP - SEC...
-
Page 29: Date And Time
Function: Allows you to change the current date and time displayed 8. Press the SELECT key under DATE to change the date. The on the Security Command keypad and used by the system to log keypad displays events in its Event Memory program. -
Page 30: Display Events
The event display you’ll see at the keypad is slightly different for each Display Events event type but all will end with a month and day display. For example: User Code Level: 1 and 2 - During schedules only. 3 to 9 - Anytime. POWER TBL 1125 shows the panel lost AC power on November 25 (zeroes are not placed in front of single digit months). -
Page 31: Loop Event Displays
Loop Event Displays Arming and Disarming Event Displays A typical loop display looks like this: A typical display looks like this: L### BURG ALR 1125 ARM 1 12 1125 The display actually contains four separate sections. The display actually contains four separate sections. L### - Records up to 3 digits for the loop number. -
Page 32: User Code Change Event Displays
User Code Change Event Displays Schedule Change Event Displays A typical User Code Change display looks like this: A typical Schedule Change display looks like this: PRM MON 24 1125 12 ADD 24 1125 The display actually contains four separate sections. The display actually contains four separate sections. -
Page 33: Door Access Event Displays
Door Access Event Displays Supervisory Event Displays A typical Door Access event display looks like this: A typical Supervisory event display looks like this: DOOR 7 24 1125 POWER TBL 1125 The display actually contains four separate sections. The display can contain three separate sections. DOOR - This is the only display you’ll see here. -
Page 34: System Setup
We've provided this System Setup section to allow you to track the Address Locations current and future status of the programmable options on your Security Command system. If you make changes to the system, you _____________________________________________ should update the information contained on these pages. _____________________________________________ Your system is monitored by a central station. - Page 35 Area names and numbers Output relays If you have an area system, where your system is divided into up to Your system has ____ output relays that are used to control various eight separate areas, each area can have a custom name or functions within the building or around its perimeter.
- Page 36 User Codes Depending on how your system is programmed, you may have 25 or User Name more user codes available. As you add new users or change current user's codes, you can keep track of their level of access to the system, User # and the areas in which their codes will operate.
- Page 37 Standard User Codes You can program user numbers from 1 to ____ (25, 50, or 99). Use the tables provided below to track users of the system. System Setup Suggestion : Photocopy this page before using.
-
Page 38: Appendix
This section of the user's guide attempts to answer questions you A. If your system is programmed to arm automatically, the keypad might have regarding the operation of your Security Command emits a steady tone prior to arming the system. During this tone, system. - Page 39 Notes...
- Page 40 LT-0172 (1/96)
Need help?
Do you have a question about the 1912XR and is the answer not in the manual?
Questions and answers
How do I change the battery?