Summary of Contents for Seiko H601
- Page 1 DUO-DISPLAY QUARTZ Cal. H601/ H801 ALARM CHRONOGRAPH INSTRUCTIONS ISTRUZIONI INSTRUCTIONS INSTRUÇÕES INSTRUCCIONES GEBRAUCHSANWEISUNGEN (S. )
- Page 2 Cal. H601, H801 INSTRUCTIONS INSTRUCTIONS INSTRUCCIONES BEDIENUNGSANLEITUNG (S. 68) ISTRUZIONI INSTRUÇÕES (P. 114) (136...
-
Page 3: Table Of Contents
You are now the proud owner of a SEIKO Duo-Display Watch Cal. H601/H801. For best results, please read the instructions in this booklet carefully before using your SEIKO Duo-Display Watch. Please keep this manual handy for ready reference. Vous voici l’heureux propriétaire d’une montre SEIKO double affichage Cal. H601/H801. Pour en obtenir d’excellentes performances, veuillez lire attentivement les explications suivantes avant... -
Page 4: Features
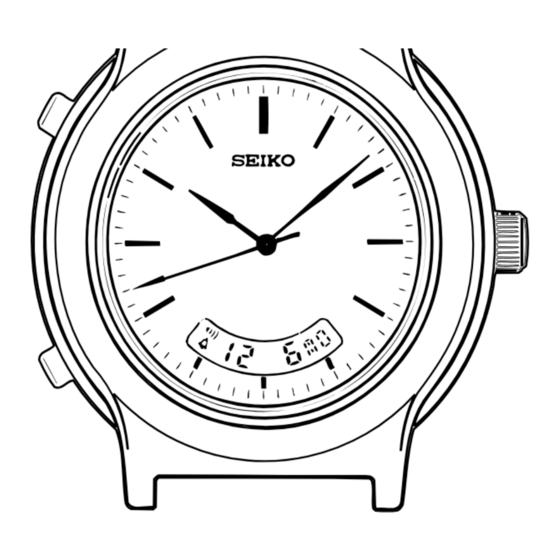
SEIKO DUO-DISPLAY QUARTZ Cal. H601, H801 FEATURES SEIKO Duo-Display Alarm Chronographs Cal. H601 and Cal. H801 combine an analogue and digital display and feature alarm and stopwatch functions. ANALOGUE DISPLAY I Time Three hand indication DIGITAL DISPLAY I Time I Calendar Calendar automatically adjusts for odd and even months except February of leap years. -
Page 5: Digital Display
DIGITAL DISPLAY There are two buttons and a crown as indicated in the illustration below. CALENDAR Display Month The display changes with each press of “A” in the CALENDAR display. 1. Press once TIME 2. Press again STOPWATCH 3. Press again ALARM 4. -
Page 6: Analogue Time Setting
4. Press “B” to show the TIME/CALENDAR SETTING display. To return to the CALENDAR display, press “A”. * If the watch is left untouched with digits flashing, the display will automatically return to the CALENDAR display after 1 to 2 minutes. -
Page 7: Alarm And Hourly Time Signal
* If “A” is kept pressed, the digits advance quickly. 4. Press “B” to return to the ALARM display. * If the watch is left untouched in the ALARM display or with digits flashing, the display will automatically return to the CALENDAR display after 1 to 2 minutes. -
Page 8: Stopwatch
Alarm Hourly time signal Both engaged Hourly time signal engaged Alarm engaged Neither engaged * The alarm can be tested by pressing “A” and “B” at the same time for several seconds. The alarm rings for 20 seconds. To stop it manually, press “A” or “B”. -
Page 9: How To Use The Tachymeter
Note: When measuring a long period of time, press “A” to return the STOPWATCH to the CALENDAR or TIME display after the stopwatch starts. This will prevent any possible mistaken operation. HOW TO USE THE TACHYMETER (For those models which include a tachymeter with a graduated dial) Note: Some models have a dial with 12 graduations. -
Page 10: Illuminating Light
When the battery expires, be sure to replace it as soon as possible to prevent any possible malfunction. For battery replacement, we recommend that you contact an AUTHORIZED SEIKO DEALER and request SEIKO SR920W battery. Note:... -
Page 11: To Preserve The Quality Of Your Watch
If the watch becomes wet, we suggest that you have it checked by an AUTHORIZED SEIKO DEALER or SERVICE CENTER. - Page 12 I PERIODIC CHECK It is recommended that the watch be checked once every 2 to 3 years. Have your watch checked by an AUTHORIZED SEIKO DEALER or SER- VICE CENTER to ensure that the case, crown, buttons, gasket and crystal seal remain intact.
-
Page 13: Specifications
Alarm display ... Hour, minutes, “P” mark and “AL” mark. 7. Digital display medium ... Nematic Liquid Crystal, FEM (Field Effect Mode) 8. Battery ... SEIKO SR920W, 1 piece 9. IC (Integrated Circuit) ... C-MOS-LSI, 1 piece Bipolar IC, 1 piece 10.


Need help?
Do you have a question about the H601 and is the answer not in the manual?
Questions and answers
I have had an H601 for many years. Still keeps perfect time but the past couple of years battery drain seems to have increased. A battery now lasts around 8 or 9 months top. I do not use the 'light' function. What could be the reason for increased battery drain?
Increased battery drain in a Seiko H601 watch could be caused by an internal fault in the watch circuitry, such as a short or malfunctioning component. This can lead to rapid battery depletion, even if the batteries are tested and confirmed to be good before installation.
This answer is automatically generated