
Related Manuals for WELDTECH EZITIG 200AC/DC


Summary of Contents for WELDTECH EZITIG 200AC/DC
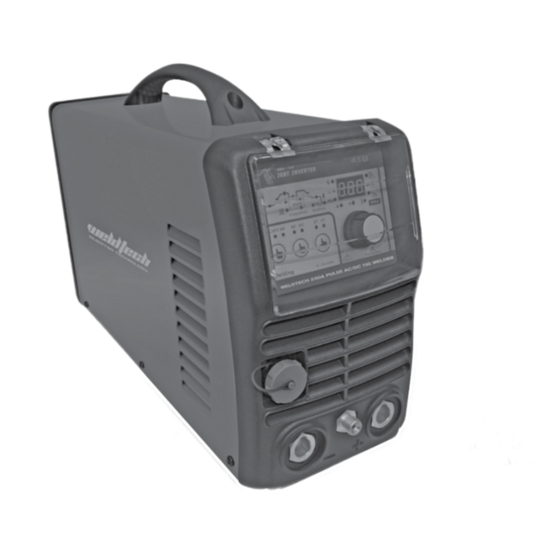
- Page 1 EZITIG 200AC/DC 200A MULTI-PROCESS TIG WELDER OPERATING INSTRUCTIONS www.weldtech.net.nz...
- Page 2 Designed for discerning operators who seek professional results and product quality without the price tag of a full professional setup. Design emphasis is placed on simple, functional design and operation. Weldtech product is subject to stringent quality control and designed and manufactured to NZ & Australian standards.
-
Page 3: Table Of Contents
EZITIG200 AC/DC Welding Machine Contents Know Your Machine..........5 Controls Explained..........6 Tips & Tricks..............8 Quick Start Guide............8 Care & Maintenance..........9 Available Parts & Accessories......10 Wiring Diagram.............10 MMA (Stick) Basic Welding Guide....12 MMA (Stick) Troubleshooting.......18 TIG Basic Welding Guide........19 TIG Troubleshooting...........21 Knowledge & Resources........22 Safety .................22 Warranty..............27 www.weldtech.net.nz... - Page 4 Optional accessories to help you get the job done! Flip Front Helmet 4 Sensor Auto Helmet 2 Sensor Auto Helmet Standard Collets Mild Steel TIG Rods - 1m with grind ER70S Grade (#DW2500) (#AFF1000) (#TCB10N23) function (#TR16MS-70S-6) (#TCB10N24) (#DW3000) (#TR24MS-70S-6) (#TCB10N25) (#TR32MS-70S-6) Aluminium TIG Rods - 1m...
-
Page 5: Know Your Machine
21. End current setting indicator 30. MMA welding current indicator 22. Post gas flow setting indicator 31. MMA Arc Force setting indicator 23. Pulse mode ‘off’ indicator 32. Error/ Overload Indicator 24. Pulse mode ‘on’ indicator 33. Parameter select/ adjust knob www.weldtech.net.nz... -
Page 6: Controls Explained
Controls Explained piece, activating the torch trigger signal and then lifting the tungsten off. The control circuit will sense when the tungsten is removed from the work piece TIG 2T/4T Trigger Control (5 - 7) and send a low powered pulse of electricity through In 2T Mode the trigger is pulled and held on to acti- the tungsten that will cause the TIG arc to initiate. Be- vate the welding circuit, when the trigger is released, cause the tungsten is not ‘live’... - Page 7 www.weldtech.net.nz...
-
Page 8: Tips & Tricks
Parameter Select/ Adjust Knob (33) to be rested for 8 minutes. All duty cycle ratings are based on an ambient air temperature of 40°C with Switch between welding parameter settings by 50% humidity, which is the international standard pressing this knob, adjust by turning the knob. Value for such a rating. -
Page 9: Care & Maintenance
WARNING! Before performing cleaning/main- Keep your Welding Machine tenance, replacing cables / connections , make in Top Condition sure the welding machine is switched off and The EZITIG 200AC/DC does not require any special disconnected from the power supply. www.weldtech.net.nz... -
Page 10: Available Parts & Accessories
Thoriated Tungsten Electrode 2.4mm (3pk) PDL15 Plug, 3 Pin 15A 250V - Straight TT32-150 Thoriated Tungsten Electrode 3.2mm (3pk) 17844 Gas Inlet QC TZ16-150 Zirconiated Tungsten Electrode 1.6mm (3pk) 17847 12 Pin Strata TIG Remote Connection Plug These accessories listed are available from your Weldtech Supplier. Refer to the Weldtech Product Brochure, your Weldtech Supplier or look online at www.weldtech.net.nz for other accessories and consumables available. -
Page 11: Wiring Diagram
EZITIG200 AC/DC Welding Machine Wiring Diagram www.weldtech.net.nz... -
Page 12: Mma (Stick) Basic Welding Guide
MMA (Stick) Basic Flat Position, Down Hand Butt Weld Welding Guide (Fig 1-11) Size of Electrodes The electrode size is determined by the thickness of metals being joined and can also be governed by Flat Position, Gravity Fillet Weld the type of welding machine available. Small weld- (Fig 1-12) ing machines will only provide current (amperage) to run smaller sized electrodes. - Page 13 CAST IRON: ENI-CL - Suitable for joining all cast irons except white cast iron. Lap Joint (Fig 1-19e) STAINLESS STEEL: E318L-16 - High corrosion resistances. Ideal for dairy work etc. Fillet Joint (Fig 1-19f) Joint Preparations In many cases, it will be possible to weld steel sec- tions without any special preparation. For heavier www.weldtech.net.nz...
- Page 14 Arc Welding Techniques Corner Weld - A Word for Beginners (Fig 1-19g) For those who have not yet done any welding, the simplest way to commence is to run beads on a piece of scrap plate. Use mild steel plate about 6.0mm thick and a 3.2mm electrode. Clean any paint, loose scale or grease off the plate and set it firmly on the work bench so that welding can Tee Joints be carried out in the down hand position. Make sure (Fig 1-19h)
- Page 15 If the travel is too fast, the bead will be narrow and strung out and may even be broken up into individ- ual globules. If the travel is too slow, the weld metal piles up and the bead will be too large. www.weldtech.net.nz...
- Page 16 Heavy plate will require several runs to complete the joint. After completing the first run, chip the slag out Multi-Runs in HV Fillet Weld (Fig 1-24) and clean the weld with a wire brush. It is important to do this to prevent slag being trapped by the sec- ond run. Subsequent runs are then deposited using either a weave technique or single beads laid down in the sequence shown in Figure 1-22. The width of...
- Page 17 Apart from the rather awkward position necessary, to plate overhead welding is not much more difficult that down hand welding.Set up a specimen for overhead welding by first tacking a length of angle iron at right Angle tacked to pipe angles to another piece of angle iron or a length of www.weldtech.net.nz...
-
Page 18: Mma (Stick) Troubleshooting
MMA (Stick) Troubleshooting... -
Page 19: Tig Basic Welding Guide
Direct current straight polarity is the most widely used polarity for (Fig 16-2) DC TIG welding. It allows limited wear of the elec- Stable ARC Flat Grinding Wheel Straight Ground Ideal Tungsten Preparation - Stable ARC Diameter of the flat determines amperage capacity. www.weldtech.net.nz... - Page 20 (Fig 16-3) ARC Welder Point Grinding Wheel Radial Ground Wrong Tungsten Preparation - Wandering ARC Diameter of the flat determines amperage capacity. (Fig 17) Pointing the Electrode The electrode should be pointed according to the welding current.
-
Page 21: Tig Troubleshooting
EZITIG200 AC/DC Welding Machine TIG Welding Troubleshooting www.weldtech.net.nz... -
Page 22: Knowledge & Resources
Knowledge & GENERAL SAFETY WARNINGS 1. Maintain labels and nameplates on the welder. Resources These carry important information. If unreadable or missing, contact Euroquip for a replacement. Please refer to Euroquip website www.euroquip.co.nz/ Downloads.html 2. Avoid unintentional starting. Make sure the for knowledgebase articles &... - Page 23 AS/NZS 1337.1 and AS/NZS 1338.1 Safety Stand- Unapproved safety equipment may not provide ards) to protect your face and eyes when weld- adequate protection. Eye and breathing protec- ing or watching. (See Filter Table on Page17). tion must be AS/NZS compliant for the specific 2. Wear approved safety glasses. Side shields are hazards in the work area. recommended. www.weldtech.net.nz...
- Page 24 3. Use protective screens or barriers to protect adequate ventilation in work areas to prevent ac- others from flash and glare; warn others not to cumulation of flammable gases, vapours, and dust. watch the arc. 7. Do not apply heat to a container that has held 4.
- Page 25 1. Keep your head out of the fumes. Do not breathe WARNING! the fumes. Welding produces fumes and gases. Breathing 2. If inside, ventilate the area and/or use an exhaust these fumes and gases can be hazardous to your at the arc to remove welding fumes and gases. health. www.weldtech.net.nz...
- Page 26 3. If ventilation is poor, use an approved air-sup- 8. Connect the work lead/clamp to the job as close to the welding area as practical to prevent weld- plied respirator. ing current from travelling long, possibly un- 4. Read the Safety Data Sheets (SDS) and the man- known paths and causing electric shock and fire ufacturer’s instruction for the metals, consuma- hazards.
-
Page 27: Warranty
Failure caused by incorrect operation of the product, lack of proper care and maintenance of the product, external damage, external circumstances such as contaminated fuel or poor water supply, modifica- To qualify for your 18 month Commercial Warranty - scan here to register your product. www.weldtech.net.nz... - Page 28 Congratulations on your new WELDTECH product. We are proud to have you as our customer and will strive to provide you with the best service and reliability in the industry. This product is backed by our extensive warranty and world-wide service network. To locate your nearest distributor or service agency visit www.weldtech.net.nz, or email us at info@euroquip.co.nz.
Need help?
Do you have a question about the EZITIG 200AC/DC and is the answer not in the manual?
Questions and answers