Neptune MRX920 Getting Started Manual
Mobile data collector
Hide thumbs
Also See for MRX920:
- User manual (154 pages) ,
- Getting started manual (72 pages) ,
- Getting started manual (26 pages)

Related Manuals for Neptune MRX920


Summary of Contents for Neptune MRX920
- Page 1 MRX920™ Getting Started Guide (Versión en español disponible en www.neptunetg.com)
- Page 3 MRX920 Getting Started Guide (Versión en español disponible en www.neptunetg.com)
- Page 4 This manual is an unpublished work and contains the trade secrets and confidential information of Neptune Technology Group Inc., which are not to be divulged to third parties and may not be reproduced or transmitted in whole or part, in any form or by any means, electronic or mechanical for any purpose, without the express written permission of Neptune Technology Group Inc.
- Page 5 Freq: 896-970 MHz Professional Installation In accordance with section 15.203 of the FCC rules and regulations, the MRX920 must be professionally installed by trained installers. Industry Canada (IC) Notice: IC: 4171B-MRXV4 This radio transmitter (4171B-MRXV4) has been approved by Industry Canada to operate with the antenna types listed below with the maximum permissible gain and required antenna impedance for each antenna type indicated.
- Page 6 (2) este equipo o dispositivo debe aceptar cualquier interferencia, incluyendo la que pueda causar su operación no deseada. Neptune Technology Group Inc. MRX920 Getting Started Guide Literature No. GS MRX920 v3 01.18 1600 Alabama Highway 229 Part No. 12508-002 Tallassee, AL 36078 Tel: (334) 283-6555 Fax: (334) 283-7293 Copyright ©...
-
Page 7: Table Of Contents
Dimensions and Weight of the MRX920 ........ - Page 8 Becoming Familiar with the MRX920 ........
- Page 9 Troubleshooting the MRX920 ........
- Page 10 Contents Notes: viii MRX920 Getting Started Guide...
- Page 11 3.15 Neptune MRX920 Properties General Tab ....... . . 3-14 3.16...
- Page 12 ..........3-28 MRX920 Getting Started Guide...
- Page 13 Physical Specifications ......... 2-1 Dimensions and Weight of the MRX920 ......2-2 Hardware Requirements .
- Page 14 Tables Notes: MRX920 Getting Started Guide...
- Page 15 The MRX920 is a compact, portable, mobile data collection device used for meter reading of Neptune radio frequency (RF) equipped water meters. It is used in conjunction with the MX900 software to conduct automatic meter reading. The data collected is then communicated through the host software to the utility’s billing system.
-
Page 16: System Operations
• Access for meters that are “hard-to-read” or “dangerous-to-read” • Increased safety and minimized liability exposure The MRX920 is only to be used for in-vehicle purposes. System Operations Operators use the N_SIGHT host software to make route assignments for meter readers. The routes to be read are obtained from the utility billing system and placed on a USB flash drive or accessed by use of a Bluetooth connection for the meter readers. -
Page 17: About This Guide
About This Guide The MRX920™ Getting Started Guide describes the system and its features. This guide also provides procedures on how to set up the MRX920, use its MX900 software, exit, and close the unit. This guide contains the following chapters: Chapter... -
Page 18: Conventions Used In This Guide
Customer Support. However, before contacting Neptune, it is important that you know the version number of the host software that your MRX920 uses. This information is useful to the Customer Support Specialist who addresses the call. The version number of MX900 software is located on the title bar at the top of your window. -
Page 19: Contacting Customer Support
Introduction Contacting Customer Support Within North America, Neptune Customer Support is available Monday through Friday, 7:00 AM to 5:00 PM Central Standard Time by telephone, email, or fax. Phone To contact Neptune Customer Support by phone, complete the following steps. -
Page 20: Fax
Introduction To contact Neptune Customer Support by fax, send a description of your problem to (334) 283-7497. Please include on the fax cover sheet the best time of day for a Customer Support Specialist to contact you. Email To contact Customer Support by email, send your message with a description of the problem to hhsupp@neptunetg.com. -
Page 21: Specifications
Specifications This chapter provides product specifications, including dimensions, weight, and environmental conditions for the MRX920. Physical Conditions The following table lists the specifications and weight for the MRX920 data collection device. Table 2.1 Physical Specifications Operating Temperature -4F to +122F (-20C to +50C) -
Page 22: Dimensions And Weight Of The Mrx920
Specifications Dimensions and Weight of the MRX920 The MRX920 is light in weight and compact in size. Refer to Table 2.2 and Figure 2.1 for the dimensions and weight of this unit. Table 2.2 Dimensions and Weight of the MRX920 Dimensions Refer to Figure 2.1, measurement in inches. -
Page 23: Hardware Requirements
Table 2.3 Hardware Requirements The MRX920 is a mobile data collector designed to be used in a vehicle designated for meter reading. It has been constructed to be used occasionally on a bumpy terrain found in rural meter reading routes. This needs to be considered when choosing a laptop to use with the MRX920. - Page 24 Specifications Notes: MRX920 Getting Started Guide...
-
Page 25: Getting Started
MRX920/MX900 Overview The MRX920 is a portable, mobile data collection device. It is used in conjunction with internal software, a laptop computer, and the MX900 software to conduct automatic meter reading. The data collected is then communicated to the utility’s billing system. -
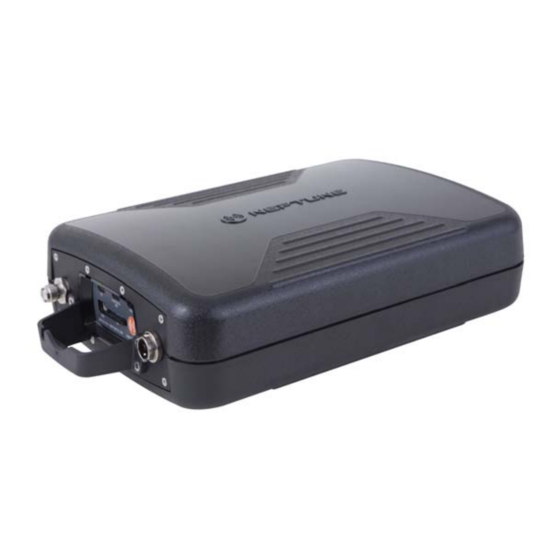
Page 26: Mrx920 Features
Figure 3.1 MRX920 Receiving/Processing Unit Before using the MRX920 unit, be sure that the SD card is securely inserted into the SD card slot. If not, the unit will not work. Sometimes in shipment, it can become loose or partially ejected. -
Page 27: Bluetooth/Usb Support
Bluetooth Support The MRX920 supports Bluetooth connectivity from the MRX920 unit to the laptop. Only one MRX920 at a time can be connected/paired to the MX900 software/PC. USB Connection The MX900 software supports a virtual serial port over USB. -
Page 28: Laptop
Getting Started Laptop MRX920 is a receiver unit. It needs to be connected to or paired with a laptop in order to display data captured and processed by the MRX920. This section guides you through setting up the MRX920 with a third- party laptop. -
Page 29: Installshield Wizard Mx900 Window
Getting Started The InstallShield Wizard MX900 window appears. Figure 3.3 InstallShield Wizard MX900 Window Click Next to continue. The InstallShield Wizard Welcome window appears. Figure 3.4 InstallShield Wizard Welcome Window Click Next to continue. MRX920 Getting Started Guide... -
Page 30: Accepting The License Agreement
Getting Started Accepting the License Agreement The Neptune Software License Agreement appears in the installation dialog. Figure 3.5 Neptune Software License Agreement Read the license agreement that appears in the dialog. Click I accept the terms in the license agreement. -
Page 31: For Windows 7 Users
After accepting the License Agreement, the following window appears. Figure 3.8 Installing MRX900 Window Please wait to continue. The installation can take a few minutes. The green progress bar indicates how much time the installation is taking. MRX920 Getting Started Guide... -
Page 32: Setting Up The Connection
Turn on the MRX920, and wait approximately one minute for the receiver to gain full power. Using a USB cable, attach the MRX920 to the laptop that is running the MX900 software. If a USB driver has not yet been installed, install the USB driver supplied on the installation media. -
Page 33: Scan For Devices
A drop down list of manufacturers and network adapters appears. Select Microsoft Corporation and Remote NDIS Compatible Device. Click Next, and then scroll through the Update Driver Warning Dialog. In MX900, select the Settings tab and then select Scan For Devices. MRX920 Getting Started Guide... -
Page 34: To Upgrade The Receiver
A dialog appears asking you to select the firmware provided by Neptune. Click Select File and select the path for the firmware file provided to you by Neptune Support. Configuring the Driver To configure the driver, complete the following steps. -
Page 35: Local Area Connection 6 Properties
Center dialog. See Figure 3.10 for available options. Figure 3.10 Network and Setup Connections Click the connection, and then Properties. A dialog similar to the following appears. See Figure 3.11. Figure 3.11 Local Area Connection 6 Properties MRX920 Getting Started Guide 3-11... -
Page 36: If Windows 7 Or Higher Does Not Recognize Driver
You can use any IP address on the 192.168.199 subnet as long as the value is 192.168.199.3 or higher. The MRX920's IP address is 192.168.199.2 and is listening on port 43431. If Windows 7 or Higher Does Not Recognize Driver If Windows 7 or higher does not automatically prompt you for the device driver, complete the following steps. -
Page 37: Neptune Mrx920 Properties
Getting Started The following dialog appears. Figure 3.13 Selecting Neptune MRX920 Properties Right-click and select Properties. The following dialog appears. Figure 3.14 Neptune MRX920 Properties Select the Hardware tab. The following dialog appears. MRX920 Getting Started Guide 3-13... -
Page 38: Neptune Mrx920 Properties General Tab
Getting Started Figure 3.15 Neptune MRX920 Properties General Tab Click The Neptune MRX920 Properties dialog appears. 3-14 MRX920 Getting Started Guide... -
Page 39: Updating The Driver
Getting Started Updating the Driver Complete the following steps. Figure 3.16 Update Driver Dialog Click The following dialog appears. Figure 3.17 Update Driver Software MRX920 Getting Started Guide 3-15... - Page 40 Select Browse my computer for driver software. Figure 3.18 Browse for Driver Click Browse to locate the mrxusbdriver folder on the installation media. The following dialog appears. Figure 3.19 Windows Security Dialog Select Install this driver software anyway. 3-16 MRX920 Getting Started Guide...
-
Page 41: Update Driver Software Successful
Getting Started The following dialog appears. Figure 3.20 Update Driver Software Successful Click Close. Close all dialogs and go back to Devices and Printers. The driver installation is complete. MRX920 Getting Started Guide 3-17... -
Page 42: Accessing The Mx900 Software
Verifying the Laptop Date and Time When you first start the MX900 software, it displays your laptop's date and time. Double-click the icon on your Windows desktop. The following dialog appears. Figure 3.21 Dialog with Laptop’s Date and Time 3-18 MRX920 Getting Started Guide... - Page 43 Figure 3.22 Incorrect Date and Time Dialog You now need to exit the software and change the date and time on your laptop. Refer to Windows Help or your laptop manual to correct the date and time on your laptop. MRX920 Getting Started Guide 3-19...
-
Page 44: Starting Mx900
Setting Up the MRX920 To set up the MRX920, please refer to the following sections of this guide for the following instructions. •... -
Page 45: Installing The Mrx920 In The Vehicle
Getting Started Installing the MRX920 in the Vehicle With the MRX920, you have flexibility as to where to place the unit, for example, under the seat, in the back seat, and so forth. The most optimum way of using the unit is to place the unit in the passenger seat and fasten the seat belt through the straps on the carrying case, Part No. -
Page 46: Vehicle Power Supply Power Cable
After the power supply cable is connected, the red dot and red arrow should align, ensuring you that the cable is connected. Insert the appropriate end of the vehicle power supply power cable into the connector on the MRX920, as illustrated in Figure 3.25. RF antenna connection Vehicle power supply cable Figure 3.25 Vehicle Power Supply Power Cable... -
Page 47: Installing The Antenna
Installing the Antenna The proper installation of the antenna cable is critical for the optimal performance of the MRX920. If the cable is crimped, the performance of the unit degrades significantly. There are several options for running the cable. Whichever method works best for you depends on the type of vehicle being used. - Page 48 Cable runs through the window, which is the preferred method. Figure 3.28 Antenna Cable Through Window Caution is necessary to ensure there is sufficient room for the cable and that it does not get crimped. 3-24 MRX920 Getting Started Guide...
- Page 49 Getting Started Use the cable protector that is included with the MRX920 to keep the cable from being pinched by the window. Cable protector Figure 3.29 Cable Protector In some vehicles, there is enough room to run the cable through the doorframe of the vehicle without crimping the cable.
-
Page 50: Inserting The Usb Flash Drive
Getting Started Inserting the USB Flash Drive Neptune recommends that you insert the USB flash drive into the laptop after you place the laptop in the vehicle. Complete the following steps to insert the USB flash drive containing the routes you plan to read. -
Page 51: Starting The Software
MRX920 for meter reading. Please refer the MX900 Web Help for instructions on operating the MRX920. An audible tone or beeper is available in MRX920 to emit a beep tone for every account that is read and stored in the MX900 software. This allows you to safely monitor the reading progress without having to look at the laptop screen. -
Page 52: Navigation
All MX900 functions are performed by using the tabs at the top of the MX900 window. You click the appropriate tab to perform the tasks. Navigation tabs Figure 3.31 Navigating Within the Software For example, Figure 3.31 shows the Routes window with the route icon highlighted. 3-28 MRX920 Getting Started Guide... -
Page 53: Software
Software The MX900 software application runs on the laptop computer that works in conjunction with the MRX920. The purpose of the software is to log meter readings from routes where R900s are installed. Messages from MIUs outside of the route are identified as such and are discarded. - Page 54 Getting Started Notes: 3-30 MRX920 Getting Started Guide...
- Page 55 MRX920 problems. It includes both a hard- ware section and a software section. It also includes recommendations on how to verify that the MRX920 is performing up to specification. Included are tables of possible symptoms, areas of focus, and actions that can be taken to try to resolve problems that can arise with either your MRX920 or MX900 software.
-
Page 56: Hardware Troubleshooting Table
Look for the LED on the power cable. Loose connection at the MRX920. Look for the LED on power cable, but not on the MRX920. Be sure the red arrow on the cable matches the red dot No power to the unit. - Page 57 Table 4.1 Hardware Troubleshooting Table Problem Probable Cause Things to Check As long as the RF LED is flashing or solid green, the MRX920 is receiving Unit is not connected correctly. readings. Red indicates the MRX920 is not receiving readings. Not getting readings.
-
Page 58: Mx900 Software Troubleshooting Table
Unable to locate route file. proper location where the route file has located on network. been saved and select it. Refer to “Software Installation” on Cannot install the software. Page 3-4 in this guide MRX920 Getting Started Guide... - Page 59 My MX900/RF Test software is under Connection Settings) and connected to the wrong MRX920 compare it to the MAC address on the MRX920's label. Look at front of MRX920. The LED My Bluetooth connection isn't labeled Bluetooth/USB is: working. Connected through the other method •...
- Page 60 Troubleshooting MRX920 Getting Started Guide...
- Page 61 The function keys used by the software are on the top row of the laptop computer (PF1 - PF7) and in the two rows of F keys (F1 - F17). PF keys and F keys have an equivalent function in the MX900 host software. MRX920 Getting Started Guide...
- Page 62 An abbreviation for personal computer, in the case of MRX920, this refers to the laptop. A general-purpose, single-user microcomputer designed to be operated by personal computer one person at a time.
- Page 63 To choose a route or address by positioning a highlighted area using function select keys. The highlighted item is selected. The process of sending readings and route data from the MRX920 to the upload host computer via Bluetooth/USB/serial port connection.
- Page 64 Glossary Notes: MRX920 Getting Started Guide...
- Page 65 Index Numerics 3rd-party laptop data, collection installing dimensions and weight, MRX920 setting up drive, flash 3-20 3-26 specifications driver using installation 3-27 3-10 software driver installation 3-17 driver, configure antenna 3-10 3-23 durability, specs cable 3-23 to 3-25 installing 3-23 to 3-24...
- Page 66 MRX920 unit placement 3-21 how it works placement portable of laptop 3-21 of MRX920 unit 3-21 plugging in the MRX920/MTX950 power cable 3-22 third-party laptop to 3-23 tone, audible plug-in power cord 3-22 troubleshooting portable collector possible symptoms, troubleshooting...
- Page 68 11560 México D.istrito Federal TAKE CONTROL Fax: (905) 858-0428 Tel: (525) 55203 5294 / (525) 55203 5708 neptunetg.com GS MRX920 v3 01.18 Part No. 12508-002 © Copyright 2005-2018, Neptune Technology Group Inc. Neptune is a registered trademark of Neptune Technology Group Inc...
Need help?
Do you have a question about the MRX920 and is the answer not in the manual?
Questions and answers