
Related Manuals for PV Electronics Nixie QTC Plus


Summary of Contents for PV Electronics Nixie QTC Plus
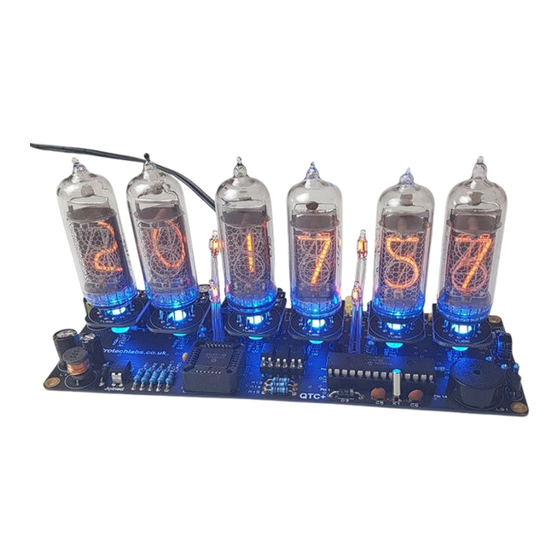
- Page 1 Assembly Instructions User Guide Nixie Clock Type ‘Nixie QTC Plus’ Nixie Tube Clock ‘Nixie QTC+’ - 1 - 2 (01 October 2018) www.pvelectronics.co.uk...
-
Page 2: Revision History
REVISION HISTORY Issue Date Reason for Issue Number 01 October 2018 C5 changed to 15pF Draft 1 29 August 2018 New document Nixie Tube Clock ‘Nixie QTC+’ - 2 - 2 (01 October 2018) www.pvelectronics.co.uk... - Page 3 RODUCTION 1. INT Nixie QTC Plus - Features Hours, Minutes and Seconds display Drives a wide range of medium sized solder-in tubes Uses a Quartz Crystal Oscillator as the timebase 12 or 24 hour modes Programmable leading zero blanking ...
- Page 4 Tubes Supported Each tube is soldered to a mini PCB 'Cell', making tubes easily changeable. Through the use of 2 different cell PCB types, and 3 different configurations of the microcontroller, it is possible for the kit to drive a wide range of solder-in tubes as detailed in the table below.
- Page 5 SAFETY DANGER: The clock pcb includes a switched-mode voltage booster circuit. This generates nominally 170 Volts DC. Assembly may only be undertaken by individuals who are suitably qualified and experienced in electronics assembly, and are familiar with safe procedures for working with high voltages.
-
Page 6: Tools And Equipment Required
2. TOOLS AND EQUIPMENT REQUIRED Tools required to assemble the PCB. The following tools will be required to assemble the PCB: Soldering iron with a small tip (1-2 mm). Wire cutters to trim the excess component leads after soldering. (TIP: A small pair of nail clippers works very well for this function). Wire strippers (TIP: A small pair of scissors is quite suitable). -
Page 7: List Of Components
3. LIST OF COMPONENTS Table of Components – Driver Board Circuit Designation Part Description Resistors R1, R2 4.7 KΩ, ¼ Watt R3, R4 390 KΩ, ¼ Watt 300 KΩ, ¼ Watt R6 - R11 270 Ω, ¼ Watt 4.7 KΩ, ¼ Watt R13 –... - Page 8 NX1 – NX6 2X6 way 0.1” header plug 32.768KHz watch crystal Nixie Tube Clock ‘Nixie QTC+’ - 8 - 2 (01 October 2018) www.pvelectronics.co.uk...
- Page 9 Parts list / Packing Sheet - Component Bag Part Description Quantity Resistors 270 Ω, ¼ Watt 1 KΩ, ¼ Watt 4.7 KΩ, ¼ Watt 15 KΩ, ¼ Watt 300 KΩ, ¼ Watt 390 KΩ, ¼ Watt Capacitors 15pF, Ceramic 33pF, Ceramic 100nF, Ceramic 1uF, 250V, Electrolytic 220uF, 16-25V, Electrolytic...
- Page 10 We recommend to check We recommend to check against the list above, to ensure all parts against the list above, to ensure all parts are present before commencing assembly. are present before commencing assembly. The resistors used in the kit are 1% tolerance metal film. They are stors used in the kit are 1% tolerance metal film.
- Page 11 ASSEMBLY OF THE PCB DUE TO PRODUCT DEVELOPMENT AND IMPROVEMENTS, YOUR PCB MAY NOT LOOK EXACTLY LIKE THE ONE PICTURED. Low Voltage Power components: J1, FUSE D1-D3 (1N5819) D4 (1N4148) IC1 (LM2576) L2 (100uH Inductor) C1, C2 (220uF) Start by installing D1-D4. Align the band on the components with the band marked on the PCB.
- Page 12 Bend the leads of IC1 as shown below then solder in place. Continue to mount C1, C2, L2, J1 and FUSE. C1 and C2 are polarized. The longer lead goes in the hole marked ‘+’. Testing Low Voltage Power Supply. Identify the test GND, 5V and HV test points as shown below.
- Page 13 Plug in the power supply, and then test using a DC voltmeter: Touch the black probe on the GND test point and the red probe on the 5V test point. The voltage should measure between 5.6 and 5.9 Volts. If not, disconnect power and check your work. Do not proceed with the assembly until the error is corrected.
- Page 14 Take care that the notched end of the IC socket is at the end shown. However, if you find you soldered it with the wrong orientation, do not try to remove it. It is perfectly fine with the notch at the wrong end, just be sure to place the IC in the socket with the IC’s notch in the correct position.
- Page 15 High Voltage Generator Test. - Refer to the warnings on page 5 - Insert IC2 into its socket. Orient the notch on the IC with the notch on the IC socket and the PCB marking. - Power up the PCB, and using the GND and HV test points, measure the high voltage generated using a voltmeter on DC setting.
- Page 16 R13, R14, R15 (1 KΩ) Q2, Q3, Q4 (EL817) SIL Socket Strip You will either receive 2 X 6 Way sockets, or a strip of 12 sockets. If the latter, clip in the middle to get two 6 way socket strips. Assemble the parts as shown below, paying attention to the orientation of the dot on the body of the parts.
- Page 17 R16, R17, R18, R19, R20, R21 (4.7 KΩ) These are the anode resistors. Socket for IC3 Align the notch on one corner of the socket with the marking on the PCB. Be careful not to force in the socket if all pins are not aligned.
- Page 18 Ensure the connectors are soldered very close to the PCB. Ensure the connectors are soldered very close to the PCB. Ensure the connectors are soldered very close to the PCB. Also now insert IC3 into its socket, with insert IC3 into its socket, with the dot on the bevelled face pointing the dot on the bevelled face pointing to the front of the PCB.
- Page 19 ASSEMBLING THE NIXIE TUBE CELLS PLEASE REFER TO THE APPROPRIATE SECTION FOR YOUR NIXIE TUBE TYPE. IN-14 Nixie Tubes. Code configuration: A (see page 36) Cell PCB Type: Start by identifying the anode lead at the back of the tube. It has a white coating where it enters the glass.
- Page 20 Referring to the pictur Referring to the picture below, identify the anode pad e below, identify the anode pad on the tube cell PCB. Now you can insert and solder in the Now you can insert and solder in the tube. Pay attention that th attention that the tube sits squarely on the PCB tube sits squarely on the PCB.
- Page 21 IN-8-2 and ZM1177 Nixie Tubes. Code configuration: A (see page 36) Cell PCB Type: These tubes have a gap between leads at the back of the tube. The ZM1177 in fact has a small stub of a lead that is trimmed at manufacture.
- Page 22 Note that there is one hole without a pad, that is unused - simply trim off this lead without soldering. Then solder on the connector. The tube cell is now complete. Repeat for the other 5 tubes. Then move on to step 6. Nixie Tube Clock ‘Nixie QTC+’...
- Page 23 Z570M, Z5700M, Z573M, ZM1080, ZM1082, GN9A, ZM1136 Nixie Tubes. Code configuration: A (see page 36) Cell PCB Type: It is necessary to clip off two of the Z570M and equivalent tube leads: Clip off the two leads as shown below: This is how the tube will look after removing the leads: To facilitate easy insertion of the flying leads into the PCB holes, it helps enormously to trim the remaining flying leads with a pair of...
- Page 24 scissors as shown below. Start at one of the leads at the back of the tube. Then, working around the tube, cut each sucessive lead approx 2mm shorter than the previous one. This will allow you to feed each lead in in turn. Now you can insert and solder in the tube.
- Page 25 The tube cell is now complete. Repeat for the other 5 tubes. Then move on to step 6. Nixie Tube Clock ‘Nixie QTC+’ - 25 - 2 (01 October 2018) www.pvelectronics.co.uk...
- Page 26 GNP-17A Nixie Tubes. Code configuration: A (see page 36) Cell PCB Type: These tubes have 2 leads that need to be removed as shown below. Use the gap to correctly orient the tube: To facilitate easy insertion of the flying leads into the small holes, it helps enormously to trim the flying leads with a pair of scissors.
- Page 27 Pay attention that the tube sits squarely on the PCB. Ensure the tube is facing perfectly forwards before soldering - you may need to twist it a little. Then solder on the connector . The tube cell is now complete. Repeat for the other 5 tubes. Then move on to step 6.
- Page 28 GNP-7A and GNP-7AH Nixie Tubes. Code configuration: A (see page 36) Cell PCB Type: These tubes have 2 leads that need to be removed as shown below. Use the gap to correctly orient the tube: To facilitate easy insertion of the flying leads into the small holes, it helps enormously to trim the flying leads with a pair of scissors.
- Page 29 Pay attention that the tube sits squarely on the PCB. Ensure the tube is facing perfectly forwards before soldering - you may need to twist it a little. Then solder on the connector. The tube cell is now complete. Repeat for the other 5 tubes. Then move on to step 6.
- Page 30 ZM1210 and ZM1212 Nixie Tubes. Code configuration: B (see page 36) Cell PCB Type: These tubes have 2 leads that need to be removed as shown below. Use the gap to correctly orient the tube: To facilitate easy insertion of the flying leads into the small holes, it helps enormously to trim the flying leads with a pair of scissors.
- Page 31 Pay attention that the tube sits squarely on the PCB. Ensure the tube is facing perfectly forwards before soldering - you may need to twist it a little. Then solder on the connector . The tube cell is now complete. Repeat for the other 5 tubes. Then move on to step 6.
- Page 32 IN-16 Nixie Tubes. PLEASE NOTE: THIS IS FOR IN-16 TUBES – THAT IS WHY THE SECTION IS TITLED ‘IN-16’ TUBES. FOR IN-14 TUBES, FOLLOW THE SECTION TITLED ‘IN-14’ TUBES. Code configuration: C (see page 36) Cell PCB Type: These tubes have 2 leads that need to be removed as shown below.
- Page 33 Pay attention that the tube sits squarely on the PCB. Ensure the tube is facing perfectly forwards before soldering - you may need to twist it a little. Then solder on the connector . The tube cell is now complete. Repeat for the other 5 tubes. Then move on to step 6.
- Page 34 CD66, ZM1242, ZM1240, XN11 and XN12 Nixie Tubes. Code configuration: A (see page 36) Cell PCB Type: CD66, ZM1240 and ZM1242: These tubes have 1 lead at the very back of the tube that needs to be removed. Ensure you only clip the lead at the very back of the tube, this will leave you with 11 leads remaining and a gap at the back of the tube.
- Page 35 Pay attention that the tube sits squarely on the PCB. Ensure the tube is facing perfectly forwards before soldering - you may need to twist it a little. Then solder on the connector. The tube cell is now complete. Repeat for the other 5 tubes. Then move on to step 6.
- Page 36 FIRST CLOCK TEST It is now time to check that all tubes are working correctly. Microcontroller Code Configuration The Microcontroller IC2 needs to be setup for your tube type as the tube connections differ for the 3 types of pinout that the kit supports.
- Page 37 If you do not get this count up, or have missing or overlapping digits, stop and check your work. Try swapping tubes around to see if the problem is with the tube, or the location. Please make these basic tests before contacting us for help and have the results to hand.
- Page 38 Q5, Q11, Q12, Q13, Q14 (MPSA42) R12 (4.7 KΩ) GPS/ RFT (SMD Jack Connector) LS1 (Piezo Buzzer) C8 (0.22F) To solder the GPS / RFT connector: First wet one pad on the PCB with solder. Then place the connector in position and re-touch the pad with the soldering iron.
- Page 39 D7 (5mm Green LED) D6, D8 (5mm Yellow LED) SET, ADJ, ALARM, DST (Push switches) First, bend the leads of the LEDs as shown below, paying attention to the longer (+) lead being on the left hand side. Then solder in place with the body of the LED just touching the PCB.
- Page 40 R22, R23, R24, R25 (15 KΩ) These resistors need to be soldered vertically. The leads need to be formed as shown below. Bend the leads of each resistor as shown and solder in to the correct postion, making sure the component body is as close to the board as possible.
- Page 41 Slip the insulation over the neon lamp leads and with a hot air gun, shrink the tubing: Finally, solder the neons in place on the PCB, with the taller neons at the back. Nixie Tube Clock ‘Nixie QTC+’ - 41 - 2 (01 October 2018) www.pvelectronics.co.uk...
- Page 42 RGB1 – RGB6 (APA106 RGB LED). To install the RGB LEDs, first note the 2 longer of the 4 leads and insert as shown below. Nixie Tube Clock ‘Nixie QTC+’ - 42 - 2 (01 October 2018) www.pvelectronics.co.uk...
- Page 43 Then, place a Nixie Tube assembly into position on the 6X2 connectors. Push the RGB LED gently into position under the tube and then solder in place. Nixie Tube Clock ‘Nixie QTC+’ - 43 - 2 (01 October 2018) www.pvelectronics.co.uk...
-
Page 44: How To Operate The Clock
HOW TO OPERATE THE CLOCK The four buttons have the following functions: SET: Exit tube test routine on cold power-up; Show date; Set time and date; Enter configuration menu; ADJ: Adjust: time, date, alarm time, configuration parameters; Enter XTERNA Stats Menu; ALARM: Set alarm time;... - Page 45 Parameter Description Values Software revision 20 = version 2.0, 12 = version 2.1 etc 12 / 24 Hr mode 0 – 12 Hr (default) 1 – 24 Hr Date format 0 = MM.DD.YY (default) 1 = DD.MM.YY 2 = YY.MM.DD Leading zero blanking 0 –...
- Page 46 1 – Slots every minute 2 - Slots every 10 minutes (default) 3 - Slots every hour 4 – Slots at midnight Reserved Reserved Reserved Display Mode 0 – standard change of digits 1 – fading digits 2 – fading digits with scrollback effect (default) Auto date display each 0 –...
- Page 47 Setting the Time and Date: Before setting the time, press 'DST' briefly to toggle between DST and standard time modes. Set according to whether you are currently in DST time or not. The adjacent DST LED will light or extinguish accordingly. From time display mode, press and hold ‘SET’...
- Page 48 Cancelling Alarm: Press ‘ALARM’ briefly to cancel alarm and enter snooze mode, or a longer press until the clock bleeps, to cancel snooze. Alarm remains set for subsequent days. Rapid DST Adjustment Press ‘DST’ briefly to toggle between DST and standard time. The indicator shows whether DST mode is active or not.
- Page 49 XTERNA FUNCTIONS About the XTERNA Module XTERNA is our new concept for synchronising time and capturing outdoor temperature for display on our clock and thermometer kits. Driven by a PIC microcontroller with advanced low power modes, the XTERNA captures time from GPS satellites every 6 hours, and stores in an on-board Temperature Controlled Crystal Oscillator (TCXO).
- Page 50 Time Synchronisation Function XTERNA broadcasts every 10 minutes. After configuring your clock, please be patient in waiting for the first Synchronisation. Upon synchronisation the yellow LED D7 will illuminate. Remember to set DST (‘Summer Time’) with the DST button. Temperature Display The temperature is also transmitted with the time.
- Page 51 XTERNA Stats menu The Stats menu is accessible only if relevant XTERNA data has been received. From time display, press ADJ to enter the Stats Menu. Six items of data are displayed in sequence, stepped through by pressing the ADJ button sequentially, and finally exiting back to time display.
- Page 52 CONFIGURING THE RGB LED TUBE LIGHTS The clock features a separate and dedicated setup menu for the RGB LED lights, accessed from the ‘DST’ button. All settings are stored to non-volatile memory, so your favourite colours will still be there after even after a long power off. You can set fixed colours and intensities, or program an auto colour cycling effect at your choice of speed.
- Page 53 Colours are displayed live during RGB menu: In the example above, between 11 and 12 hours, the LEDs will be purple (8 blue, 0 green, 8 red) In the example below, between 19 and 20 hours, the LEDs will be blue with a hint of green (8 blue, 2 green and 0 red) Nixie Tube Clock ‘Nixie QTC+’...
- Page 54 10.2 Setting auto colour cycling Setting colour to value 9 has a special meaning: This will enable auto colour cycling for the specified hour. The speed of the cycling will then be governed by the GREEN value: 0 = very slow change 9 = very fast change This auto colour cycling mode is explained in the picture below: Red = 9, therefore Auto Colour Cycling is enabled for 12-13 hours...
-
Page 55: Using A Gps Receiver
11. USING A GPS RECEIVER The clock can receive time from a GPS receiver that transmits information using NMEA-0183 protocol, using the $GPRMC sentence. 11.1 Configuring for GPS Synchronisation. Set parameter 12 to value 4. Set the baud rate in parameter 13. ... - Page 56 12. CONNECTIVITY DIAGRAM FOR TROUBLESHOOTING Please refer to the diagram on the next page. If you have problems with missing digits from the display or no digits displaying at all (even though High voltage is present and the clock makes bleeps when pressing the 'SET' Button) then you should check all connections to the HV5812 IC using the chart below.
- Page 57 Nixie Tube Clock ‘Nixie QTC+’ - 57 - 2 (01 October 2018) www.pvelectronics.co.uk...
- Page 58 12.3 Problems getting the correct High Voltage This is the most common issue. Did you insert IC2? IC2 is needed to generate the HV. If IC2 is in its socket and you don’t get HV, please record the following DC voltages with IC2 out of its socket. 5V test Point Should be 5.6V HV test point...
-
Page 59: Circuit Diagram
13. CIRCUIT DIAGRAM Nixie Tube Clock ‘Nixie QTC+’ - 59 - 2 (01 October 2018) www.pvelectronics.co.uk... - Page 60 Nixie Tube Clock ‘Nixie QTC+’ - 60 - 2 (01 October 2018) www.pvelectronics.co.uk...
- Page 61 Nixie Tube Clock ‘Nixie QTC+’ - 61 - 2 (01 October 2018) www.pvelectronics.co.uk...
Need help?
Do you have a question about the Nixie QTC Plus and is the answer not in the manual?
Questions and answers