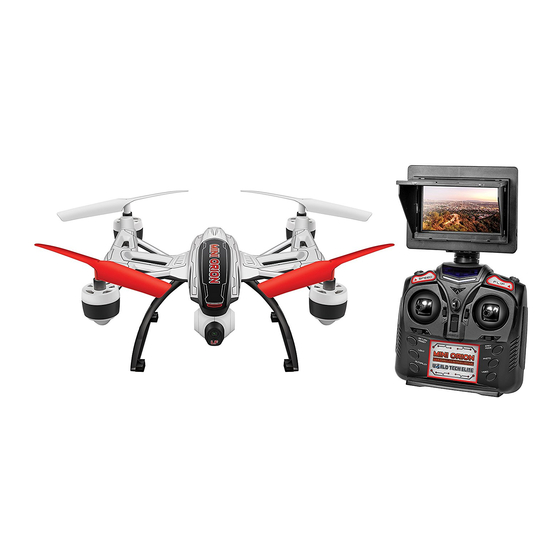
Summary of Contents for WORLD TECH ELITE Mini orion
- Page 1 LIVE FEED PICTURE / VIDEO CAMERA 2 . 4 G H z 4 . 5 C H D R O N E I N S T R U C T I O N M A N U A L...
-
Page 2: Safety And Precautions
I NT RO D U C TI ON Thank you for purchasing this amazing World Tech Toys product. This drone is suitable for indoor and outdoor flight. Please carefully read the entire manual before operating this drone and keep it for reference in the future. -
Page 3: Dr On E D Iag Ram
DR ON E D IAG RAM Rear Rotor Blades Battery Bay LED Lights Landing Skid Live Feed Front Rotor Blades Picture/Video Camera TR AN SMIT TE R D I AGR AM Power Switch Antenna Power Indicator Speed Modes Flip Stunt Mode Throttle Trim Forward/Backward Trim Ascend/Descend... -
Page 4: Installing The Transmitter Batteries
INSTALLING THE TRANSMITTER BATTERIES Battery Cover First remove the screw on the CAUTION: battery cover and remove the 1. Make sure the polarity of the battery cover itself. Then batteries are correctly installed. install 4 AA batteries. Make 2. Do not mix old and new sure they are installed with the batteries. - Page 5 I NSTA L L IN G TH E PHONE C RA D LE Phone Cradle Parts SCREWS Take the Phone Cradle Part A and slide it onto the antenna from the front of the transmitter as shown above. Flip the Transmitter over and slide the Take the 2 screws and firmly screw Phone Cradle Part B onto the Part B into Part A.
- Page 6 DOWNLOAD THE FREE APP The free app is available to download on your Android and Apple devices. 1. Just go to the Google Play or App Store. 2. Search “Mini Orion FPV”. MINI ORION 3. Download and install the app.
- Page 7 “WiFiMiniOrion-*******” (The ****** will be random numbers and letters). 4. Click on the drone’s WiFi signal to connect to it. START SCREEN Once you’ve selected the Mini Orion FPV app on your smart device you will see this screen. You can press the start button to start the...
- Page 8 HOW T O US E T HE LI VE FEE D A P P C O N TIN U ED LIVE FEED SCREEN If you press the START button on the START SCREEN you will be taken to LIVE FEED SCREEN, shown on the left. You should be seeing a live feed view from the drone at this moment.
-
Page 9: Installing The Rotor Guards
INSTALLING THE ROTOR GUARDS The drone comes with 4 rotor guards that snap into place. You do not need to screw the rotor guards down to the drone. The rotor guards need to be installed in a specific way for them to work properly. - Page 10 CAMERA INDICATOR LIGHT The Camera indicator light is located underneath the drone’s camera. The illustration to the right points out where it is located. CAMERA INDICATOR LIGHT • BLUE: Camera Standby Status • BLUE + RED: Recording Video • BLUE + RED FLASHES ONCE: Taking Photo TAKING PHOTOS: Make sure both the remote and drone are on and you’ve gone through the syncing process first.
- Page 11 VIEWING VIDEO/PHOTO FILES ON THE COMPUTER If you want to view your video or photo files from the drone on your computer, you’ll have to transfer them over first. Videos and photos can be viewed using media players. If you are having issues viewing your drone videos, try downloading and viewing the video files with VLC media player.
-
Page 12: Flying The Drone
FLYING THE DRONE Before flying the drone for the first time please read the instructions carefully and make sure you fully understand how to control your drone. AUTOPILOT BUTTON Once you’ve gone through the flight preparation, AUTOPILOT press the AUTOPILOT button once and the drone’s rotor will start to spin. -
Page 13: Emergency Stop
FLYING THE DRONE CONTINUED EMERGENCY STOP If the drone crashes or to avoid a collision you will need to do an EMERGENCY STOP. Push the left joystick to the bottom left and push the right joystick to the bottom right at the same time and hold the position until the drone shuts down. -
Page 14: Adju S Tin G Th E Tr I M
ADJU S TIN G TH E TR I M When drone moves with no directional transmitter input, adjust the trim controls until hovering is stable. If the drone is spinning to the left, push the Left Turn/Right Turn Trim button to the RIGHT until the drone stops spinning. -
Page 15: R Ep La C In G T He R O To Rs
R EP LA C IN G T HE R O TO RS The rotors may become damaged during a collision. The drone comes with 4 spare rotors. Please replace damaged rotors immediately. The drone comes with 2 A rotors and 2 B rotors. The A and B rotors need to installed on specific locations on the drone for it to fly properly. -
Page 16: Post Flight
POST FLIGHT After you are done flying the Drone make sure the battery pack on the drone is disconnected and the transmitter power is turned off. If you are not going to use the drone for a long period of time, please remove the AA batteries to prevent the batteries from draining or leaking.


Need help?
Do you have a question about the Mini orion and is the answer not in the manual?
Questions and answers
Can rotor guards be purchased separately?