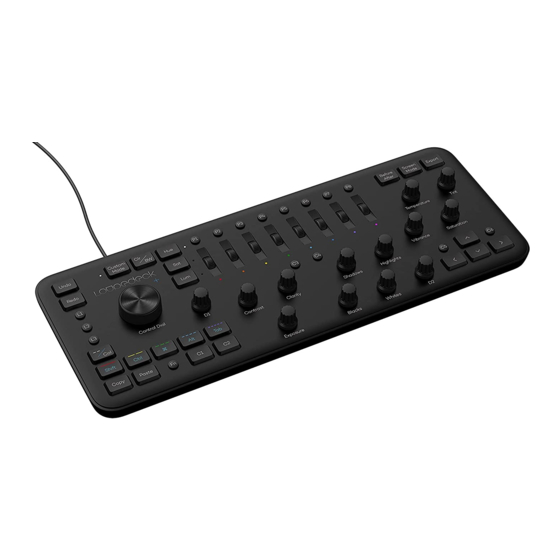
Loupedeck + User Manual
Hide thumbs
Also See for Loupedeck+:
- Manual (32 pages) ,
- User manual (11 pages) ,
- User manual (17 pages)
Table of Contents
Advertisement
Advertisement
Table of Contents

Related Manuals for Loupedeck Loupedeck+


Summary of Contents for Loupedeck Loupedeck+
- Page 1 USER GUIDE 2.5...
-
Page 2: Table Of Contents
UPDATING LOUPEDECK ......................... 25 MORE QUESTIONS?........................25 PRODUCT AND SAFETY INFORMATION ..................27 THIRD PARTY TRADEMARKS AND ITEMS................... 27 WARNINGS AND CAUTIONS ...................... 27 LOUPEDECK LTD ONE YEAR LIMITED WARRANTY ..............28 WAIVER ............................28 Copyright (c) 2017 Loupedeck Ltd. All rights reserved. -
Page 3: Getting To Know Loupedeck
▪ Don’t touch that USB cable just yet We know that you might be impatient to get started and are about to connect Loupedeck+ to your computer. However, before you connect Loupedeck+ to your computer, you must download the Loupedeck software. You need an Internet connection to download the software. -
Page 4: Connecting And Setting Up Loupedeck
How do I power Loupedeck+? At this point you might think, hold on, where’s the power cable? Well, the simple answer is that there is no need for one, as Loupedeck+ is powered from its USB cable. Disconnecting from your computer When you want to disconnect the console from your computer, there’s no need to go through... -
Page 5: Working With Loupedeck
WORKING WITH LOUPEDECK+ Even though it’s really easy to understand what the buttons, dials, and scrolling wheels on Loupedeck+ do, here is a checklist in case you want to check a function. 1. Custom mode for customizing all the dials 2. - Page 6 Lightroom (unless otherwise noted) – but Library and Develop functions can be separately assigned. Loupedeck has integrated dynamic speed control system that accelerates dial speed when dial is turned fast. Slow turning speed allows user to have very precise control on the value adjusting.
- Page 7 Press FN+Rating/Color to activate Keyboard modifier Modifier mode. mode Press FN+Rating/Color again to deactivate Keyboard Modifier mode and return to Rating/Color mode. Shift SHIFT Control CTRL Command (MacOS) or Windows key (Win) Copyright (c) 2017 Loupedeck Ltd. All rights reserved.
-
Page 8: Colors And Lighting
FN+Arrows for fine Navigating in movement. Crop Mode Press C5 (previous image) or C6 (next image) to navigate between images when Crop Mode is activated. Colors and lighting Copyright (c) 2017 Loupedeck Ltd. All rights reserved. - Page 9 Rotate the dial to set a value. contrast Shadows adjustments Highlights Press the dial to return to zero. Blacks Whites Rotate the dial fast to move speedily from end to Contrast end. Clarity Copyright (c) 2017 Loupedeck Ltd. All rights reserved.
-
Page 10: Personalized Functions
Control Dial is for controlling multiple different functions in the editing software modes and specified editing tools like brush and crop tool. Default settings can be assigned separately for Library and Develop modes from the configuration software. Copyright (c) 2017 Loupedeck Ltd. All rights reserved. - Page 11 Press C3 to auto tone image Press C4 to auto white balance Press FN+C3 to show info overlay Press FN+C4 to show clipping (only in develop) Press C5 to zoom in and out (toggle) Copyright (c) 2017 Loupedeck Ltd. All rights reserved.
-
Page 12: Advanced Functions
Aspect ratios can be set from the configuration software. More details in Crop Tool - section. Advanced functions FUNCTIONS BUTTON / DIAL / WHAT CAN YOU DO WITH IT? SCROLLING WHEEL Copyright (c) 2017 Loupedeck Ltd. All rights reserved. - Page 13 Export and FN+Export are customizable. You can assign two export functions with Loupedeck software. Default functions for exporting: Export to open the export dialog. Fn+Export to export a 2048px sized web-photo using Loupedeck’s own export preset. Copyright (c) 2017 Loupedeck Ltd. All rights reserved.
-
Page 14: Crop/Rotate Tool
Press Fn and turn Rotate/Crop to fine-tune the angle of the photo. Press Control Dial for applying changes and exiting the tool. Press FN+Control Dial to reset the crop area. Copyright (c) 2017 Loupedeck Ltd. All rights reserved. - Page 15 Press Arrows for moving the crop area around the image. Press FN+Arrows for crop area fine movement. Navigate between Press C5 to move to the previous image. images Press C6 to move to the next image. Copyright (c) 2017 Loupedeck Ltd. All rights reserved.
-
Page 16: Adjustment Brush -Tool
(Windows: UK/US QWERTY keyboards only) CUSTOM MODE Loupedeck+ has a new Custom Mode where you can modify all the basic dials to your own personal preferences. Control different tools like Sharpening Tool, Tone Curve or Split Toning with Loupedeck’s Custom Mode. The Little LED light next to the Custom Mode button indicates when custom mode has been activated. -
Page 17: Custom Mode Default Tools
Rotate FN+Shadows or FN+Blacks to adjust dark tone split Press the dial to return to zero Rotate the dial fast to move quickly for faster adjustments Split Toning Temperature Rotate Temperature to adjust toning hue in high tones. Copyright (c) 2017 Loupedeck Ltd. All rights reserved. -
Page 18: Configuring Loupedeck
CONFIGURING LOUPEDECK+ In Normal mode, Loupedeck offers you two dials (D1 & D2) and nine buttons (L1 - L3 & C1 - C6) which you can customize to your liking. In addition, you can tune other basic functions to better suit your workflow or requirements. - Page 19 You can launch the Loupedeck Configuration Software from either Lightroom Help -> Plug-in Manager dialog or from the notification area (Windows system tray or Mac menu bar). The icon you need to find is this: From Loupedeck configuration software’s main level you can select which device, application or group of buttons / dials you want to customize.
- Page 20 After selecting a button or dial group, a lit box will appear on top of Loupedeck software, allowing specific button configurations (e.g. selecting L1-L3 & C1-C6 group to be configured): 1. Group of buttons or dials that are assigned (e.g. C1 -button acts as Pick-flag) 2.
- Page 21 Note 2! There are some general Loupedeck functions for buttons and dials that are available on every supported software. SUB MENU BUTTON ITEM WHAT CAN YOU DO WITH IT? Loupedeck Activate: Editing Select Activate: Editing Software to jump back to General (button &...
-
Page 22: Lightroom Help Menu Options
LIGHTROOM HELP MENU OPTIONS Some of Loupedeck’s operations that are related to Lightroom can be accessed and controlled via Lightroom’s. In Lightroom click Help menu and click Plug-in Extras to see different options. -
Page 23: Taskbar Options
Within the Windows taskbar icon or macOS menubar icon you can find more options for Loupedeck. OPTION NAME ITEM WHAT CAN YOU DO WITH IT? Loupedeck Setup Click Loupedeck Setup (Win) or Open Setup… (Mac) to (Win) access Loupedeck configuration software. Open Setup… (Mac) Download Loupedeck Opens Loupedeck’s set-up web page where... - Page 24 Loupedeck’s Support web page, where answers to most commonly asked questions question can be found. Also provided on this page is access to Loupedeck’s support form, which is located at the bottom of the page. Please fill out the support form if you are in need of further technical assistance.
-
Page 25: Updating Loupedeck
A small mark appears on the taskbar icon when a new version is available: In Windows new release is indicated with a red dot In MacOS new release is indicated with a blue arrow Open Taskbar icon and select Download Loupedeck update (Win) or Update Loupedeck (Mac) to open Loupedeck website www.loupedeck.com for downloading software and configuration software updates. - Page 26 Also, what is your operating system? Loupedeck is compatible with Windows® 10 or later and Mac® OS 10.12 or later. Loupedeck software is not specifically developed for Windows 7 or 8, but it might work normally as OS base is very similar.
-
Page 27: Product And Safety Information
PRODUCT AND SAFETY INFORMATION Please read this important safety information before you use the Loupedeck device. It is important that you follow the warning and caution information to prevent injury to yourself or others and to prevent damage to your device. The term “device” refers to the Loupedeck product and the items supplied with the product. -
Page 28: Loupedeck Ltd One Year Limited Warranty
Loupedeck™. Use of the Loupedeck™ product means you agree to all provisions in this Legal Guide and the Loupedeck Ltd Terms and Conditions. If you do not agree and consent to all the provisions in the Legal Guide and Terms and Conditions, please return Loupedeck™ for a refund in accordance with the above- noted instructions. - Page 29 (2) l’utilisateur de l’appareil doit accepter tout brouillage radioélectrique subi, même si le brouillage est susceptible d’en compromettre le fonctionnement.” This Class B digital apparatus complies with Canadian ICES-003. Canada. Cet appareil numérique de la classe B est conforme à la norme NMB-003 du Copyright (c) 2017 Loupedeck Ltd. All rights reserved.
- Page 30 The manufacturer of this product confirms that this product complies with the European Union regulations for safety, health, environmental and consumer protection (ECM = Electromagnetic Compatibility 2014/30/EU). A copy of the EU Declaration of Conformity is available online at Loupedeck Ltd website (www.loupedeck.com/legal). RECYCLE Always return your used electronic products, batteries, and packaging materials to dedicated collection points.
- Page 31 Copyright (c) 2017 Loupedeck Ltd. All rights reserved.
Need help?
Do you have a question about the Loupedeck+ and is the answer not in the manual?
Questions and answers