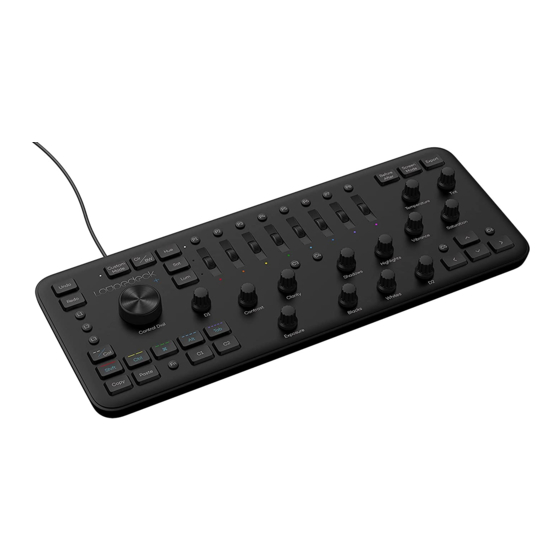
Loupedeck + User Manual
Adobe after effects
Hide thumbs
Also See for Loupedeck+:
- User manual (31 pages) ,
- Manual (32 pages) ,
- User manual (17 pages)
Advertisement
Quick Links
Advertisement

Summary of Contents for Loupedeck Loupedeck+
- Page 1 ADOBE AFTER EFFECTS USER-GUIDE...
-
Page 2: Connecting And Setting Up Loupedeck
Adobe After Effects with more integrations to follow. This user guide will focus on using Adobe After Effects. Within this user guide you will learn how to setup your Loupedeck+ with Adobe After Effects, as well as the basic functions needed to begin the editing process. -
Page 3: Getting Started
COLOR GRADING SUPPORT WITH LUMETRI Loupedeck + can be used to control the Lumetri plugin. User needs to first add the Lumetri effect to the layer from fn+P1. After the layer is added the Lumetri controls can be directly used from Loupedeck+. In the default configuration the Lumetri controls are under Custom Mode ->... - Page 4 We have also added printable cheat-sheets to help guide you through your first steps of using Loupedeck+. For your own settings, please print blank Loupedeck+ layout sheets, located on the last page. Even some of the functions are not clearly marked on the surface of the controller, you will be able to memorize the settings after short learning period.
- Page 5 If editing software is not active, pressing Fn brings editing software to foreground. Delete Press Fn+C6, while selecting layer or transformation you wish to delete. Copy with Property Press Fn + Copy, will copy selection, keeping Links property links Import Press Fn + Export, opens the import window Pressing Fn + C6 cuts selection and saves to clipboard...
- Page 6 Arrows Press up or down arrow to move layer selection up or down. If none of the layers are selected, then pushing up or down arrow will select the most top or lowest layer, respectively. Enabling keyboard mode from Fn and --/col button and pushing shift key down will enable you to move the layer in X and Y direction from arrow keys.
- Page 7 Pen/Mask Feather Pressing L3 toggles on the selection tool tool Paint Pressing Fn+ L1 toggles on the Paint tool (Brush/Clone/Eraser) Puppet tool Pressing Fn+ L2 toggles on the puppet (Pin/Overlap/starch) (Pin/Overlap/starch) tool Text tool Pressing Fn+ L3 toggles on the selection tool Zoom Rotating D1 will zoom into composition.
- Page 8 Control Dial Rotating Control Dial will go forward or back to nearest keyframe of selected layer Fn + Control Dial will extend layer selection to the next/previous layer Customizable buttons P1 – P8 Fn + P1 – P8 are fully customizable and can be modified to fit your needs.
- Page 9 Vibrancy Under Custom Mode + FN - Rotating vibrancy knob will adjust the vibrance of selected Lumetri effect Pressing down will reset Clarity Under Custom Mode + FN - Rotating clarity knob will adjust the cone angle of selected Lumetri effect Pressing down will reset Contrast Under Custom Mode + FN - Rotating Contrast knob...
-
Page 10: Transform Parameters
Cone Angle Under Custom Mode – Rotating Clarity knob will adjust the Cone Angle of the light Cone Feather Under Custom Mode – Rotating Contrast knob will adjust the Cone Feather of the light TRANSFORM Anchor point & Point Depending on the layer type, rotating Saturation, PARAMETERS of Interest Temperature, and Tint dials will edit the Anchor... -
Page 11: Camera Options
Loupedeck+, with the left button pushed down, will drag the mouse horizontally. This can be used to tune sliders that are not mapped to Loupedeck+, or it can be used to select colors from color map. Vertical mouse tool is mapped to Fn+ Vibrance.


Need help?
Do you have a question about the Loupedeck+ and is the answer not in the manual?
Questions and answers