Table of Contents
Advertisement
Quick Links
Advertisement
Table of Contents

Related Manuals for Odys Z11 Image


Summary of Contents for Odys Z11 Image
- Page 2 MP3 player User Manual This player is a new generation, stereo device which supports the following music formats: MP1, MP2, MP3, WMA, WMV, ASF, WAV, etc. The tone quality, reliability and operation of this player have been highly optimized to bring you the best possible product. We are confident that you will enjoy the features of this digital device.
-
Page 3: Table Of Contents
Table of contents I. At a Glance ...........................3 II. Preface ..........................5 III. Getting to Know the Player....................6 IV. Basic Operations ........................8 V. Key Operations........................11 VI. Playback...........................13 VII. Voice Recording ......................16 VIII. Playback of Recorded Files ...................19 IX. Convert Recorded ACT Files to WAV9 Format..............19 X. -
Page 4: At A Glance
I. At a Glance AMV Video Playback JPEG Picture View Picture View for animated GIF Files Integrated Speakers Share your music with your companions and friends. Exquisite Design Small and easy to use! Supports Various Audio Formats Supports the following music formats: MP1, MP2, MP3, WMA, WMV, ASF, WAV etc… Function for Upgrading the Firmware Upgrade the functions your player using the latest firmware version, which can be downloaded from our web site. - Page 5 Removable Disk Function (no additional drivers necessary) If using Windows 2000 or higher, the player will automatically be recognized under my computer as a removable disk (without the use of additional drivers), allowing you to access files stored on your player. Disk Mode and Partitions You can partition the hard drive of this player and encrypt areas of your choice using the tools provided.
-
Page 6: Preface
Sleep Timer Activate the sleep timer to enter the “ Economy-Mode” to save electricity. Full “ Cartoon” menu Intuitive “ cartoon” menu with corresponding text allows for easy to use functions. II. Preface We would like to thank you for purchasing our Digital Stereo MP3 Player! Please read the operators manual carefully before operating your MP3 player. -
Page 7: Getting To Know The Player
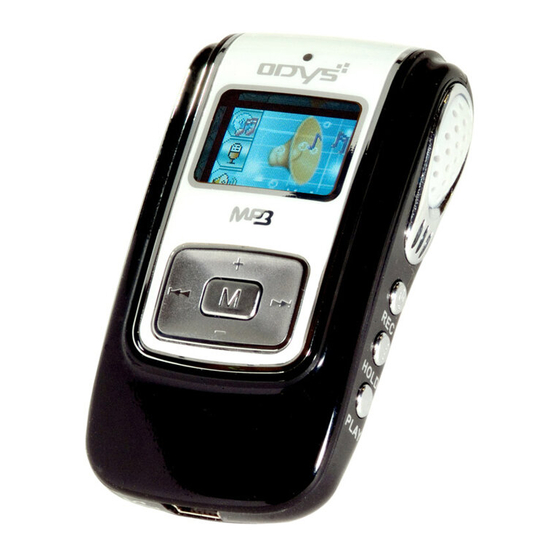
III. Getting to Know the Player Profile and keys REC/A-B POWER VOL+ ON/OFF BACK HOLD FORWARD VOL- MODE PLAY/STOP... - Page 8 Display Bit Rate/File Format Play Back Mode Sound Effect Mode Play format Battery Status Indicator Song Number / Total Current Status of Song being played Number of Songs Title / Interpret Time of play Volume Total length of song Power Indicates that the battery is fully charged (3.7V).
-
Page 9: Basic Operations
Turn off the power when not in use. IV. Basic Operations Entering the Main Menu The “ Mode” toggle is divided into two parts. Press the toggle switch for a longer period of time to enter the main menu and briefly to enter one of the sub modes. Browser Operation Browse to select a song During play Back press either FB or FF. - Page 10 Music Mode Record Mode Voice Mode Album System Settings Phone Book E-Book Video / Movie...
- Page 11 Music Mode: Record Mode: Voice Mode: System Settings: Adjust volume: Decrease the volume by pressing the key VOL-. Increase the volume by pressing the key VOL+. Power ON /Off When switched off, press and hold the “ Play” key to switch the player ON...
-
Page 12: Key Operations
When switched on, press and hold the “ Play” key to switch the player OFF (Check to see if the power has been switched to ON) Press either the “ Play” or “ Stop” key to exit from a submenu. While in the Music Mode, press the “... - Page 13 6. VOL-: Decrease the volume and rewind. 7. FORWARD: Next item, FF. 8. BACK: Previous item, FB. 9. USB: USB Connection. 10. Earphone Jack: Standard earphone jack. 11. HOLD: Lock / Unlock keys. Key Operation (definition) There are four ways to operate the keys: press and release, press hold and release, press and hold, press one time.
-
Page 14: Playback
stop when the key has been released. Example: Fast Forward or Rewind. Press one time: The effect will start immediately upon pressing the key and will stop when the key has been released. VI. Playback Simple Operation 1. Insert the earphone into the earphone jack. 2.... - Page 15 Equalizer Settings 1. Play music. 2. Press the MODE key to enter the submenu. 3. Press the NEXT key to select the Sound Effect Mode. 4. Press the Mode key to enter the equalizer mode. Equalizer Options:...
- Page 16 1. The following Sound effects (EQ) are available: Natural Rock Classical Soft Jazz 2. Press the NEXT key to select the desired effect. Press the Mode key to confirm your decision. Display the Synchronized Lyrics The player supports the lyrics file format *.LRC allowing the song text to be displayed simultaneously during playback.
-
Page 17: Voice Recording
Lyrics file: Du-Siye.lrc Searching for Lyrics when available: Press and hold the Mode Key to switch to the Lyrics mode Select the desired Lyrics Press the Mode key to return to the Music mode Press either the VOL+ or VOL- key to manually scroll through the VII. - Page 18 2. Press the NEXT key to select the RECORD mode. 3. Press the MODE key to enter the RECORD mode. (refer to the figure below) 4. Press the PLAY key to begin recording. “ Space Full” indicates that there is not enough memory space available to continue recording.
- Page 19 Select the Type of Recording 1. Return to the Record mode. 2. Press the MODE key to enter the submenu of the Record mode. 3. Press the NEXT key to select the desired Record Type and the MODE key to enter the options for selected type. 4....
-
Page 20: Playback Of Recorded Files
VIII. Playback of Recorded Files Switch to the main menu Press the NEXT key to select the Voice Mode Press the MODE key to switch to the PLAYBACK Mode. Press the PLAY key to begin playback. Select the desired recording. PRE key: Select the previous recorded file NEXT key: Select the next recorded file Volume Control... - Page 21 1. Run the Sound Converter program and click the Open button to browse files. 2. Select the desired .act files you wish to convert...
-
Page 22: Viewing Jpeg And Gif Images
3. Click the Convert button to begin converting the selected files to .wav format. This tool not only converts .act files to .wav, it also can playback .wav and .mp3 files. X. Viewing JPEG and GIF Images This function serves as a guide for viewing images using the JPEG and the animated GIF format and has been implemented due to popular demand. - Page 23 Viewing the Files The following is an example of what may be seen when switching from the main menu to the Browse Function: The file DSC0014.jpg has been selected from the list of files (This area will remain empty when no files are available) Press the PLAYBACK button to display the file Press the NEXT / LAST button to view the next or last image Press the MODE key to enter the submenu.
- Page 24 change in 1-8 second intervals. Other keys have no function at this time. Image Playback The following will appear after changing to the image playback mode: Press the NEXT / LAST key to display the next or last image. Press the PLAY button to return to the viewing options. Press and hold the MODE key to return to the main menu.
-
Page 25: System Setup
XI. System Setup Changing the System Settings The system parameters will be displayed here. Some options may change after updating the system firmware. 1. Switch to the main menu 2. Press the NEXT key to enter the System Settings 3. Press the MODE key to select a submenu Brief Introduction of Each Parameter (Date and Time) Set the date and time for files... - Page 26 Set the working status under replaying working (Repeat Settings) Options for the internal functions when the (Online Mode) system is in operation Memory information and status (Memory Information) (Firmware Version) Display the player’ s current firmware version (Firmware Upgrade) Special function for upgrading the firmware (Exit) Exit Detailed Instructions...
- Page 27 Press VOL+ to select the desired year (or VOL- to start from the Seconds) the year will begin to blink. Press the NEXT key to increase or the PRE key to decrease the numerical value. Press the MODE key to confirm selection and exit. ○?Screensaver Settings 1.
- Page 28 Press the PRE / NEXT key to move the cursor and the MODE key to return to the previous menu. ○ Language Settings To set the language, refer to the section describing the Sound Effect settings ○ Automatic Off To save power, the player will automatically shut down at the time set when; during the set time (in seconds) no other key has been pressed.
- Page 29 When in the automatic mode, the repeat points A-B can be set automatically (normally used for recordings without music). ○ Contrast Adjustment For this method of operation, please refer to the section Off Settings. ○ Online Mode For this mode of operation, please refer to the Sound Effect settings Some operating systems (before Windows 2000 SP4) do not support USB disks with two disk symbols.
- Page 30 ○ Firmware Upgrade This function is used to upgrade the firmware version of your player. Tips: Press the MODE key after making changes. Press the PLAY Button one time to quickly exit the menu. The PLAY button can be used to quickly exit all menus. Browse through Telephone Information While in the main menu, press the NEXT key to select the telephone book and press the MODE key to open the telephone book menu.
- Page 31 Shown as follows: Press the NEXT key and select Browse TEL. Press the MODE key to open your selection followed by the NEXT key to browse through the list. Press the MODE key to exit. Browse TEL: Browse the Tel book files that have been imported into the player, this could include: names, post boxes, mobile numbers, fax numbers, QQ and telephone numbers (you can only browse these certain areas after data has been imported.
- Page 32 using the tools included. Creating and Editing Telephone Files Creating Telephone Files ※ Before you install Telephone Tool, you need to copy the "Telbook.exe" file to your hard disk from the CD firstly. 1. Start the program “ Telbook.exe” by clicking OPEN. 2.
- Page 33 3. Click the SAVE button to store the newly created data bank. The system will create a file with the name; TelBook. You have now successfully created a new telephone book. Edit the Telephone Book Entries You may edit, add or make corrections to your telephone book by following these few steps: Click the entry you wish to edit;...
- Page 34 Click the Add button once you are finished editing, the following message will appear. Click YES to save changes or NO to cancel. Two entries with the same name will appear in the data bank. Delete the entry no longer being use...
- Page 35 : When attempting to change the name of a data bank entry, a complete new entry will be created. Delete the entry that no longer is to be used. Import and Export Import existing Telephone Books The following guideline should be used to import Telephone Book files from a PC to the player: Use the editing tool TelBook.exe to edit or prepare the telephone book information and save as telbook.bin.
- Page 36 appropriate tools provided. Turn on the player and switch to the telephone book function. Export the telephone information and confirm The exported files will then be exported as telesave.bin to the root directory of the USB drive. The telesave.bin can now be edited. Electronic documentation Switch to the main menu and press the NEXT key to select the electronic documentation.
- Page 37 Press the MODE key again to return to the previous menu. Notes: If the document you wish to open is stored to the root directory, selecting a directory is not necessary. Directory options: Press the NEXT / PRE key to scroll through the directory options: Select file you wish to open and press the MODE key.
- Page 38 Playback of AMV Files Press and hold the PLAY button to switch on the player. Switch to the File Mode and press the PLAY button to start playback. When playing back AMV files, the general properties for playing back music take effect.
-
Page 39: Usb Operation
Press the MODE key shortly to pause the playback of AMV files and to open to the following menu: Refer to Other Settings for more information about this specific operation. XII. USB Operation This player functions as a standard USB drive, which supports the following operating systems: Windows 98 (drivers must be manually installed), Windows 200 or higher (the system will automatically recognize the player without installing additional drivers), Mac OS 10.3 and higher, Linux (Redhat) 8.0 and higher. -
Page 40: Upgrading The Player
When connected to a PC, the player offers three types of display modes: 1. Standby 2. Download 3. Upload XIII. Upgrading the Player You may upgrade or maintain the system firmware for this player using the installed software tool. Switch to the main menu Press the NEXT key and select System Settings Press the MODE key to open System Settings Press the NEXT key and select Firmware Upgrade. - Page 41 Select the new firmware files (this can be found on the installation drive of the player or, visit the manufactures website to download the latest version.
- Page 42 Click the button Begin upgrading to start the process. When successful, the player will display the following:...
- Page 43 The firmware upgrade is used to improve and optimize the performance of the player and does not affect the normal operation when the firmware is not upgraded. Failure to upgrade the firmware properly could result in abnormal operation. Please read the instruction carefully before attempting to upgrade the firmware.
-
Page 44: Other Settings
XIV. Other settings Selecting Different Directories (Creating Subdirectories) Files can be stored in different directories and arranged for playback (Directories can only be created when connected to a PC). The player supports up to nine (9) subdirectories. While in standby, switch to the main root function of desired mode (in the example below, the music mode has been chosen. - Page 45 Press the MODE key again to open the directory options. Press the NEXT key to select desired directory. Press the MODE key to confirm the selected directory. Note: Music Mode, Record Mode and Playback Mode use only independent directories respectively. Sharing directories between these modes is not supported.
- Page 46 While the player is in the standby status, switch to the main root directory for desired mode) Press the MODE key to switch the subdirectory to standby. Press the MODE key and select Delete. Press the NEXT / PRE key to scroll forward or back to select the file you wish to delete.
- Page 47 Select which file(s) you wish to delete and choose Delete or Delete All. Press the Playback key to delete the file(s). Delete All will delete all the files in the current mode of operation (Choosing Delete all while in the music mode will delete all files in the music mode only, the files of other operating modes will not be affected.)
- Page 48 Playback Mode (Subdirectories During Playback) While playing back music or recordings a few options such as Repeat or playing back a Play List are available. The first option in the submenu is the PLAY mode. The selected option will take effect as soon as one of the following rules have been chosen and confirmed.
- Page 49 Playback Speed (Subdirectories During Playback) You may select the different playback speeds (faster or slower). This pertains to MP3 files only; voice recordings can not be altered. Playback desired track. Press the MODE key to enter the PLAYBACK submenu. Press the NEXT key to select the menu item Playback Speed. Press the MODE key to confirm selection.
- Page 50 3. Press the NEXT key to select menu item Replay Mode. 4. Press the MODE key to switch to Replay Mode. Replay mode: The repeat icon will blink waiting for replay point A to be set. 5. Press the NEXT key to set replay point A. The replay icon will blink, waiting for repeat point B to be set.
- Page 51 2. Press the NEXT key to switch to the Voice Recording Attachment Mode. 3. As soon as the symbol for the Replay Points A-B appears , recording can begin. The recording time will be that of replay points A-B. 4. When the recording time (replay point A-B) has expired the original recording will be played back.
- Page 52 original voice recording will playback. 2. Upon completion of the original voice recording the icon will change to and the newly attached voice recording will start to playback. Press the PRE key to return the Voice Recording Attachment Mode. Press the MODE key in each of the three previous modes to exit from the Replay Mode. Replay Time Table (Submenu during Playback) Setting the time for the replay mode will determine the length of playback and when the...
-
Page 53: Disk Encryption
replay mode will end. Replay Interval (Play submenu) The replay interval regulates the paused time (in seconds) between two playback recordings. XV. Disk Encryption Most MP3 player users are not willing to allow others access to their personal information. Before letting some else use the MP3, all sensitive files should be deleted in order to preserve security which requires additional action on the owner’... - Page 54 Note: to allow the system to show two different drives, select under SYSTEM SETTINGS / ONLINE MODE either Single Normal Disk or Single Encrypted Disk Note: You can only encrypt one of the two drives. Files stored to an encrypted drive can only be accessed when using the correct password. Partitioning the Drive: Connect the player to the PC via USB Port Run the MP3 Disk Tool...
- Page 55 Reboot the system when prompted to do so. After the system has rebooted, two new drives should appear (Windows 2000 SP4 and higher) Open the encrypted drive. You will see three files: a normal file and two hidden files. The used memory space will register only 300 kb. Open the normal file and run the RdiskDecrypt.exe.
- Page 56 Enter the User Name and Password in the spaces provided. When the user name and password are correct the drive will open!!! Note: You must reenter the user name and password each time the player is connected to the PC before being able to enter the encrypted drive.
-
Page 57: Software Installation
encrypted drive. In such a case, you will have to delete both partitions in order to create one major partition. XVI. Software Installation Place the CD in the CD-Rom drive . The installation will start automatically. Select the Windows 98 Driver Installation even if you are running a different operating system. -
Page 58: Trouble Shooting
XVII. Trouble Shooting NO Power Replace or recharge the battery Insure that the player has been switched on sound through Insure that the earphones are corrected properly and that the earphones volume is turned up. Insure that the earphones are clean A defective MP3 will produce different types of noises and will not be able to playback music. -
Page 59: Technical Specification
XVII. Technical Specification Dimensions 69.5×41×21.3mm Lattice(96*64)OLED full color USB2.0 (FS) Computer interface 128 MB-1GB Memory capacity power supply Playing time ~10 hours (with earphone) Sampling frequency 8KHz WAV (32K bps) 、 ACT (8K bps) Recording Recording format 35 hours(ACT,128M Flash) Recording time (L) 5mW+(R)5mW (32Ohm)... - Page 60 Temperature Range From -5° C – 40° C Supported Languages English, French, German, Italian, Spanish, Dutch, Portuguese etc. Operating System Windows98/SE/ME/2K/XP, Mac OS 10, Linux 2.4.2 AMV Convert *** Install the drivers from the CD to the PC. When finished, you will find the “ Tool MP3 Player Utilities 3.57 AMV Convert Tool...
Need help?
Do you have a question about the Z11 Image and is the answer not in the manual?
Questions and answers