Table of Contents
Advertisement
Quick Links
Tarot 2-Axis Brushless Gimbal for Gopro User Manual V1.0
1. Introduction
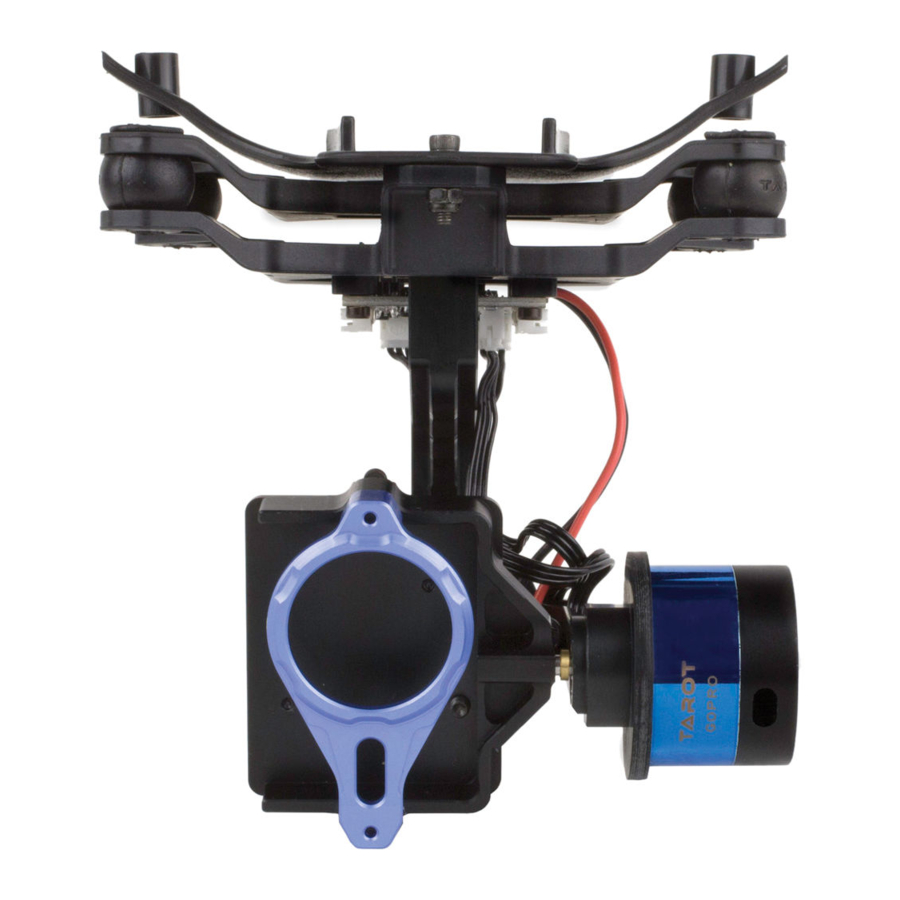
Tarot T-2D gimbal is designed for the Gopro Hero3, which is widely used in film, television
productions, advertising aerial photography, etc. Using 6061T6 aluminum alloy full CNC
precision machining and brushless motor driving, its overall framework is designed with the idea
of compact, easy installation, high precision, lightweight, high stability and many other
characteristics. Even if the aircraft is in high-speed flight, it can still stabilize and control the
Gopro camera precisely with the highest stability, so pictures or videos output can reach the best
quality.
2.
Specifications
1. Support GOPRO Hero3 video output.
2. Support reverse power supply protection and power voltage compensation.
3. Support motor connector short circuit protection.
4. Support tilt initial angle setting.
5. Support adjustable gains and 3D attitude display on PC software.
6. Support stick rate mode and position mode.
7. Supported receiver type: conventional/S-BUS/DSM2/DSMJ/DSMX receiver.
8. Supported RC: PPM/PCM/2.4G.
9. Operating supply: DC 7.4V~14.8V (Li-Po 3S is recommended)
10. Operating current: 200mA-500mA (Depending on power supply voltage and motor power)
11. Operating temperature: -15ºC~65ºC.
12. CPU: Double 32bit ARM
13. Sensor technology: 3-axis MEMS gyro and accelerometer.
14. Max angular rate: 2000 º /sec.
15. Max acceleration: 16g.
16. Control frequency:2000Hz
17. Motor driver frequency: 20KHz (quiet and smooth)
18. Control accuracy: 0.1°
19. Control range: -45º~45º(roll), -135 º~90 º(tilt).
20. Attitude arithmetic: BLDC gimbal dedicated brushless motor decoupled EKF algorithm.
21. Aerial photography equipment: GOPRO Hero3.
3
. Connections
Connections instructions:
WWW.0577MX.COM
Advertisement
Table of Contents

Related Manuals for Tarot T-2D


Summary of Contents for Tarot T-2D
-
Page 1: Specifications
Tarot 2-Axis Brushless Gimbal for Gopro User Manual V1.0 1. Introduction Tarot T-2D gimbal is designed for the Gopro Hero3, which is widely used in film, television productions, advertising aerial photography, etc. Using 6061T6 aluminum alloy full CNC precision machining and brushless motor driving, its overall framework is designed with the idea of compact, easy installation, high precision, lightweight, high stability and many other characteristics. - Page 2 1.Power supply: DC 7.4V~14.8V (Li-Po 3S is Recommended) 2.Gimbal controller connector: Via USB module connected to the computer, used to adjust the gimbal controller parameter and status monitoring. 3.Motor driver connector: Via USB module connected to the computer, used to adjust the motor driver module( motor poles and power), and voltage and current monitoring.
- Page 3 LED indication Y: Yellow,B: Blue,R: Red,G: Green Yellow blink 2 times Initialization successfully Yellow solid Initialization not finished, keep gimbal static Blue blink Receiver connected or PC software connected(normal) Blue LED solid Receiver not connected(normal) Red solid Angle out of band or error occur Green solid Over current,After troubleshooting, reapply power can recover 6.
- Page 4 motor driver processor). Software interface is as follows. A、Gimbal controller software UI instructions Connect USB programmer to gimbal controller port. Open ZYX-BMGC.exe, run ZYX-BMGC software, software interface is as follows. (1) Open port: Select COM port in the software, and click “Open COM Port”. After that, you can power on gimbal.
- Page 5 motion. (4) Receiver type: Connect your receiver’s connection to ZYX-GS’ receiver input port, and select right receiver type in configuration program. When the receiver type changed, you should click “Write Settings to Flash”, and restart ZYX-GS. DSM2/DSMJ/DSMX receiver type: DSM2-1:Transmitter is DX7 etc. (binding by 6 or 7 channels receiver) DSM2-2:Transmitter is DX8, DSX9 etc.
- Page 6 (10) PID parameters adjustment: PID parameters range is [0-500], the basic rule is the total sensitivity can not be 0, speed sensitivity and integration sensitivity can not both be 0. If break these rules the gimbal will turn off the motor, this can protect gimbal and camera. Under the same load condition, if motor power parameter is increased, you should reduce the gimbal gains.
- Page 7 (1)Open COM port: Select COM port in the motor configuration, and click ‘Open COM Port’. After that, you can power on the gimbal. The power supply should make the gimbal work safely. (2)Motor driver module connection status: After motor driver module initialization process, the status bar should show “All parameters updated!”.
- Page 8 Notice: Because this gimbal controller adopts double CPU solution, as main controller CPU and motor driving CPU, there are different upgrade firmware files for these CPUs. Before upgrading firmware, you should make sure the hardware interface connected rightly and choosing corresponding firmware files.
Need help?
Do you have a question about the T-2D and is the answer not in the manual?
Questions and answers