Table of Contents

Related Manuals for Velux KLF 200


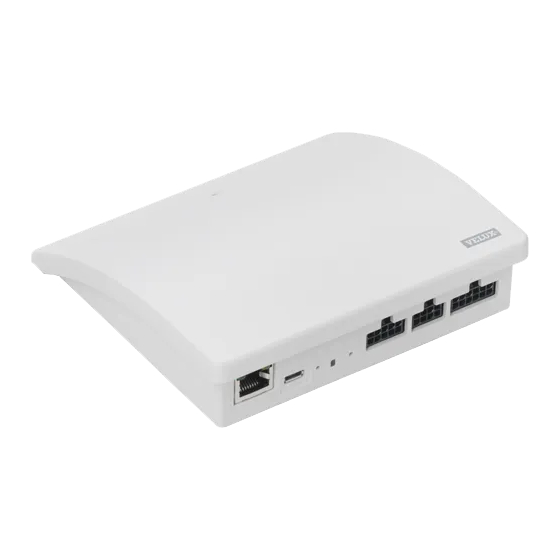
Summary of Contents for Velux KLF 200
- Page 1 VELUX INTEGRA ® KLF 200 VELUX INTEGRA ® ENGLISH: Set-up and user manual ESPAÑOL: Manual del usuario y configuración FRANÇAIS : Manuel d'installation et mode d’emploi 日本語 : 取扱説明書 VAS 454041-2016-10...
- Page 2 ENGLISH 4-27 ESPAÑOL 28-51 FRANÇAIS 52-75 日本語 76-99...
-
Page 3: Table Of Contents
Two instructions are supplied with the interface (A and B). Congratulations on your new VELUX INTEGRA product! ® Thank you for buying this VELUX INTEGRA product. ® The product can be used as an interface or as a repeater. The interface function is used when io-homecontrol... -
Page 4: Contents Of Packaging
6 Outputs 7 Inputs Default settings Inputs (control) An external control signal shorter than 1.5 seconds makes the VELUX product travel to end position. • Even inputs (2, 4, 6, 8) are used for close/down: The product travels to end position •... -
Page 5: Important Information And Warnings
Safety ucts in up to 5 groups. • Interface KLF 200 can be used by persons (aged 8 years and above) with • Cables from the interface input must not exceed 100 m/110 yd. sufficient experience and knowledge if they have been given instruction •... -
Page 6: Functions Of Inputs
. The bottom rows in the INPUT terminals A B C D E 2 3 4 are common ground Thermostatic control of a VELUX skylight by a non io-homecontrol ® compatible thermostat A thermostat can be used for controlling automatic opening and closing of skylights depending on the temperature. - Page 7 A B C D E 2 3 4 5 6 7 8 9 10 If you only have a VELUX INTEGRA ® control keypad KLI 110, you can copy the A change-over contact can also be products operated by this control to the used for running products both up and interface.
- Page 8 Function as interface Function as interface Registration with VELUX INTEGRA control pad KLR 200 Registration with VELUX INTEGRA control pad KLR 200 ® ® The illustrations below show how you copy the contents from control pad KLR 200 to interface KLF 200.
- Page 9 Function as interface Function as interface Registration with VELUX INTEGRA control pad KLR 200 Registration with VELUX INTEGRA control pad KLR 200 ® ® The illustrations below show how you choose products from the control pad and how you assign them to inputs on the interface.
- Page 10 When the light-emitting diode flashes yellow, the interface is ready for configuration. When the white light-emitting diode is on, interface KLF 200 has been 10 sec configured as an interface. The configuration may take up to several minutes.
- Page 11 ® ® 1 sec When the white light-emitting diode is on, interface KLF 200 has been configured as an interface. Press the RESET button on the back of the interface briefly (1 second) Note: If you want to add more products to the interface, repeat steps with a pointed object.
-
Page 12: Function Of Outputs
Resetting The output function is used together with an intelligent building instal- lation (IBI) to get feedback from KLF 200. The output function gives the When resetting, all settings will be deleted and the interface reset to user feedback as to whether an action has been executed, for instance factory settings. -
Page 13: Function As Repeater
Connect the interface to the mains supply. When the light- emitting diode flashes yellow, the interface is ready to be configured. ENGLISH ENGLISH 24 VELUX VELUX ® ®... - Page 14 Product If this image appears, turn off the control pad. You can now operate the new products. When the blue light-emitting diode is on, the interface is configured as a repeater. 9 10 ENGLISH ENGLISH 26 VELUX VELUX ® ®...
- Page 15 ® Las instrucciones complementarias KLF 200 Registro de productos le servirán para configurar la interfaz Registro con el panel de control KLR 200 VELUX INTEGRA 38-42 ® con una tableta, computadora o telé- Wi-Fi Registro con el teclado de control KLI 110 VELUX INTEGRA ®...
- Page 16 Una señal externa del control de más de 1,5 segundo de duración hace desplazar al producto VELUX hasta que se detiene la señal o hasta que el producto alcanza la posición final. Se usa una velocidad estándar para todos los sistemas operadores de los tragaluces, incluidos aquellos que admiten el modo silencioso.
- Page 17 ® • La interfaz KLF 200 puede ser utilizada por personas (a partir de 8 años y nunca • La interfaz tiene 5 entradas dobles, que permite el control de hasta 200 productos por menores de 8 años) con experiencia y conocimiento suficientes, si se han dado en hasta 5 grupos.
- Page 18 A B C D E 2 3 4 corresponden a masa común Control termostático de un tragaluz VELUX por medio de un termos- tato no compatible con io-homecontrol ® Puede usarse un termostato para controlar automáticamente la apertura y el cierre de los tragaluces, según la temperatura.
- Page 19 A B C D E 2 3 4 5 6 7 8 9 10 Si usted tiene únicamente un teclado de control KLI 110 VELUX INTEGRA , puede ® copiar los productos que funcionan con Un contacto conmutador también este control a la interfaz.
- Page 20 Función de interfaz Función de interfaz Registro con el panel de control KLR 200 VELUX INTEGRA Registro con el panel de control KLR 200 VELUX INTEGRA ® ® Las ilustraciones de abajo muestran cómo copiar el contenido desde el panel de control KLR 200 a la interfaz KLF 200.
- Page 21 Función de interfaz Función de interfaz Registro con el panel de control KLR 200 VELUX INTEGRA Registro con el panel de control KLR 200 VELUX INTEGRA ® ® Las ilustraciones de abajo muestran cómo elegir productos del panel de control y como asignarlos a entradas de la interfaz.
- Page 22 Cuando el diodo luminoso parpa- dea en amarillo, la interfaz está lista para su configuración. Cuando el diodo luminoso blanco está encendido, interfaz KLF 200 está 10 sec configurada y lista. La configuración puede llevar varios minutos.
- Page 23 ® ® 1 sec Cuando el diodo luminoso blanco está encendido, interfaz KLF 200 está configurada y lista. Presione brevemente el botón RESET en la parte trasera de la interfaz Nota: Si quiere añadir más productos a la interfaz, repita los pasos 1-4.
- Page 24 Reinicio La función de salida se usa junto con una instalación de edificio inteli- gente (IBI) para obtener información del KLF 200. La función de salida Cuando reinicie, todas las configuraciones se borrarán y se restablecerán informa al usuario si una acción se ha ejecutado, por ejemplo, si se ha los valores de fábrica de la interfaz.
- Page 25 Conecte la interfaz a la corriente eléctrica. Cuando el diodo luminoso parpadea en amarillo, la interfaz está lista para su configuración. ESPAÑOL ESPAÑOL 48 VELUX VELUX ® ®...
- Page 26 Producto Si aparece esta imagen, apague el panel de control. Ahora puede accionar los produc- tos nuevos. Cuando el diodo luminoso azul está encendido, la inter- faz está configurada como repetidora. 9 10 ESPAÑOL ESPAÑOL 50 VELUX VELUX ® ®...
- Page 27 Sommaire Deux instructions sont fournies avec l'interface (A et B). Félicitations pour votre nouveau produit VELUX INTEGRA ® Merci d'avoir acheté ce produit VELUX INTEGRA ® Le produit peut être utilisé comme une interface ou un répéteur. Le mode interface est utilisé quand des produits io-homecontrol doivent Configuración via une commande...
- Page 28 • Les entrées impaires (1, 3, 5, 7) sont utilisées pour ouvrir / monter : Le produit se déplace jusqu'à sa position de fin de course Un signal externe de plus d'1,5 seconde actionne le produit VELUX jusqu’à l'arrêt du signal ou jusqu'à ce que le produit atteigne sa position fin de course.
- Page 29 Sécurité produits dans un maximum de 5 groupes. • L'interface KLF 200 peut être utilisée par des personnes (âges de 8 ans et plus) • Les câbles de l'interface ne doit pas dépasser 100 m / 110 verges. ayant suffisamment d'expériences et de connaissances s'ils ont reçu des instructions •...
- Page 30 . Les rangées inferieures sur les A B C D E 2 3 4 bornes d'entrées sont reliées à une masse commune Contrôle thermostatique d'un puits de lumière VELUX par un ther- mostat non io-homecontrol compatible ® Un thermostat peut être utilisé pour contrôler l'ouverture et la ferme- ture automatique du puits de lumière en fonction de la température.
- Page 31 À noter : Si vous avez à la fois une commande KLR 200 et un bloc numérique KLI 110, vous pouvez copier les produits enregistrés par les deux contrôles en utilisant la commande tactile VELUX INTEGRA ® KLR 200.
- Page 32 Enregistrement avec commande tactile VELUX INTEGRA KLR 200 ® ® Les illustrations ci-dessous montrent comment copier le contenu de la commande tactile KLR 200 a l'interface KLF 200. Appuyer sur "Copier com- Appuyer sur et passer à mande tactile". l'étape 6.
- Page 33 Fonctionnement en mode interface Fonctionnement en mode interface Enregistrement avec commande tactile VELUX INTEGRA KLR 200 Enregistrement avec commande tactile VELUX INTEGRA KLR 200 ® ® Les illustrations ci-dessous montrent comment choisir les produits de la commande tactile et comment les affecter aux entrées de l'interface.
- Page 34 Brancher l'interface au réseau électrique et brancher le faisceau de fils fournis à la borne d'entrée. Lorsque la diode clignote en jaune, l'interface est prête pour la configuration. Lorsque la diode blanche est activée, l'interface KLF 200 est configurée 10 sec en mode interface. La configuration peut prendre plusieurs minutes.
- Page 35 ® ® 1 sec Lorsque la diode blanc est activée, l'interface KLF 200 est configurée en Appuyer brièvement (1 seconde) sur le bouton RESET situe à l'arrière de mode interface. l'interface avec un objet pointu. La diode clignote en blanc.
- Page 36 Lors de la réinitialisation, tous les réglages seront supprimés et l'interface La fonction de sortie peut être utilisée par une installation de bâtiments intelligents (IBI) pour obtenir les retours d'informations de la KLF 200. est réinitialisée aux réglages usines. La fonction de sortie donne le retour aux utilisateurs pour savoir si une action a été...
- Page 37 être envoyés que via un seul répéteur. Brancher l'interface au réseau électrique. Lorsque la diode clignote en jaune, l'interface est prête pour la configura- tion. FRANÇAIS FRANÇAIS 72 VELUX VELUX ® ®...
- Page 38 Les produits sont prêts à être utilisés. Produit Si cette image apparait, éteindre la commande tactile. Les nouveaux produits sont prêts à être utilisés. Quand la diode est en bleu l'interface est configurée en mode répéteur. 9 10 FRANÇAIS FRANÇAIS 74 VELUX VELUX ® ®...
- Page 39 る設定 インター フェース機能は、 io-homecontrol 製品をio-homecontrol 対 ® ® この説明書はVELUX INTEGRA シリ ® VELUX INTEGRA ® 応でない外部制御機器によって制御するときに用います。 KLF 200 ー ズのリモコンを用いたインター フェ 中継器機能は、 システム内のリモコン操作範囲を、 受信した無線コマン ース設定に役立ちます。 この説明書 VELUX INTEGRA ® ドを送信することにより、 拡張したいときに用います。 には次ページの目次に載っている初 期設定および機能が記載されてい ます 。 パッケージの内容 ENGLISH: User manual FRANÇAIS : Notice d'utilisation ESPAÑOL: Manual del usuario...
- Page 40 初期設定 入力 (制御) 1.5 秒未満の外部制御信号によりVELUX 製品は全開または全閉の位置 に移動します。 • 偶数の入力端子 (2, 4, 6, 8) は閉鎖/降下に使用します:製品は全閉の 位置に移動します。 • 奇数の入力端子 (1, 3, 5, 7) は開放/上昇に使用します:製品は全開の 位置に移動します。 1.5 秒超の外部制御信号によりVELUX 製品はその信号が止まるまで、 ま たは製品が全開または全閉の位置に達するまで移動します。 初期設定スピードはサイレント ・モードをサポートする天窓 オペレータ を含むすべての 天窓 オペレータに使用されます。 初期設定では、 通信にはio-homecontrol チャンネル3が使われ、 どのチ ® ャンネルまたは信号もブロックされません。...
- Page 41 のインター フェースはそれぞれの市場地域で、 io-homecontrol ロゴが付いた ® 製品に対応しています。 安全性 • このインター フェースは 5つのダブル入力端子を持っており、 最大 5つのグルー • インター フェース KLF 200 は、 十分な経験と知識を有する者 (8歳以上) であっ プ、 計200台までの製品をコントロールすることができます。 て、 その安全な使用法について説明を受け、 付随する危険性について理解してい • このインター フェース入力端子からのケー ブルは 100 m/110 ydを超えないこと。 る者が使用することができます。 クリーニングおよびユーザー保守は児童が監 • 無線周波数帯:2.4 GHz (io-homecontrol ), 2.4 GHz (WiFi 802.11 b/g/n).
- Page 42 A B C D E 2 3 4 製品の操作または製品グルー プ (合 計 200台の製品まで) の操作が可能 ストップ は 1 と 2 の両方と を接続するこ です。 とによりコントロールします。 ご希望でしたら、 VELUX INTEGRA リ ® 入力端子の上の列は 信号です。 モコン により天窓の操作は常に可 入力端子の下の列は共有のアース A B C D E です。 2 3 4 能です。...
- Page 43 なければなりません。 製品200台まで登録および操作することができ して、 使うことができます。 ます。 短押し: (1 秒未満) : 製品は全開ま A B C D E 2 3 4 5 6 7 8 9 10 たは全閉の位置まで移動します。 VELUX INTEGRA リモコン KLR 200をお持 ® 長押し:製品はキーを離すまで移動 ちの場合、 登録された製品をリモコンから します。 インター フェースにコピーすることができま す。 ページ 86-90 をご参照ください。...
- Page 44 インターフェースとしての機能 インターフェースとしての機能 VELUX INTEGRA リモコン KLR 200による登録 VELUX INTEGRA リモコン KLR 200による登録 ® ® 下図はリモコン KLR 200 からインター フェース KLF 200 にコンテンツをコピーする方法を示し ています。 「リモコンのコピー」 をタップ をタップし、 ステップ 6に します。 進みます。 1 秒 インター フェースを主電源に接続します。 LEDが黄色く点滅したら インター フェースの裏面にある ボタンを先のとがったもので インター フェースは設定準備 OKです。...
- Page 45 インターフェースとしての機能 インターフェースとしての機能 VELUX INTEGRA リモコン KLR 200による登録 VELUX INTEGRA リモコン KLR 200による登録 ® ® 下図はリモコン からの製品の選び方、 それらの製品のインター フェース 入力端子への割り当て方を示しています。 選んだ製品 にチェックマークを 付けます。 をタップします。 「新しい製品」 をタップし KLR 200 の をタップしま ます。 す。 1 秒 付属のワイヤー束を入力端子に接続します。 インター フェースの裏 「ワンウェイリモコンの準 「製品を追加」 をタップし 面にあるRESET ボタンを先のとがったもので短く (1 秒) 押しま...
- Page 46 られます。 つまり1 台の製品を、 すでに設定されているグルー プに追加 する場合、 そのグルー プのすべての製品を追加しなおさなければなりま せん。 インター フェースを主電源に接続し、 付属のワイヤー束を入力端子に接 続します。 LEDが黄色く点滅したらインター フェースは設定準備完了で す。 白いLEDが点灯したとき、 そのインター フェース KLF 200 はインター フェー 10 秒 スとして設定されたこととなります。 設定には数分掛かります。 注:製品をさらにインター フェースに追加する場合はステップ 9 – 15 を 繰り返します。 リモコンの裏側にあるR ボタンを10 秒間押します。 LEDが緑色に点滅 し、 製品が短時間前後に動きます。 LEDが緑色に点滅し、 製品が短時間...
- Page 47 VELUX INTEGRA リモコン KLI 110による登録 VELUX INTEGRA リモコン KLI 110による登録 ® ® 1 秒 白いLEDが点灯したとき、 そのインター フェース KLF 200 はインター フェー スとして設定されたこととなります。 インター フェースの裏面にあるリセッ トボタンを先のとがったもので短く (1 秒) 押します。 LEDが白く点滅します。 ここで、 ステップ 4 は2秒以内 注:製品をさらにインター フェースに追加する場合はステップ 1 – 4 を繰 に実行しなければなりません。 り返します。...
- Page 48 インターフェースとしての機能 インターフェースとしての機能 リセッ ト 出力端子機能 設定の変更 出力端子機能は、 KLF 200 からのフィードバックを受けるため、 インテリ リセット ジェント ・ ビルディング ・インスタレーション (IBI) と共に使われます。 出 リセッ トすると、 すべての設定は削除されインター フェースは工場出荷時 力端子機能は、 例えば、 天窓が閉じられているかどうかなどの、 アクショ 設定にリセッ トされます。 ンが実行されていることについてのフィードバックを、 ユーザーに提供し ます。 フィードバックとして、 内蔵リレーは 2 秒間作動します。 Max 30 V AC/DC Max 50 mA 10 秒...
- Page 49 用できません。 す。 ます。 中継器機能がインター フェースの中でどのように 起動され、 リモコン KLR 200 に登録されるかの例 を示します。 注:ひとつのシステム中、 インター フェース3台まで に中継器機能を設定できます。 複数の中継器を併設しても、 リモコン操作範囲を 同方向へ拡大することはできません。 コマンドは 一つの中継器からしか送信することができない ためです。 「新しい製品を追加」 をタッ をタップします。 プします。 インター フェースを主電源に 接続します。 LEDが黄色に点 滅したら、 インター フェースは 設定準備完了です。 日本語 日本語 96 VELUX VELUX ® ®...
- Page 50 プし, リモコンが製品を見つけた 場合、 A B C D E 2 3 4 5 6 7 8 9 10 Repeater 新しい製品を操作することがで きます。 製品 この画面が現れたらリモコンを切 ります。 これで、 新しい製品を操作するこ とができます。 青いLEDが点灯したら、 イン ター フェースは中継器として 設定されました。 9 10 日本語 日本語 98 VELUX VELUX ® ®...
- Page 51 USA: VELUX America LLC 1-800-88-VELUX CDN: VELUX Canada Inc. 1 800 88-VELUX (888-3589) AUS: VELUX Australia Pty. Ltd 1300 859 856 VELUX New Zealand Ltd. 0800 650 445 日本ベルックス (株) 03(3478)81 45 www.velux.com...
Need help?
Do you have a question about the KLF 200 and is the answer not in the manual?
Questions and answers