Advertisement
Quick Links
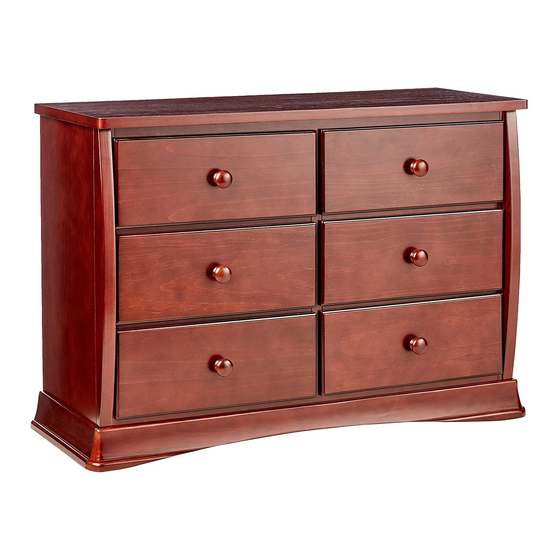
BENTLEY 6 DRAWER DRESSER
THIS PRODUCT IS NOT INTENDED FOR INSTITUTIONAL OR COMMERCIAL USE.
STYLE No: 75106-
When contacting Delta Consumer Care you
will need to reference the above number.
Consumer Care:
www.deltachildrensproducts.com
Delta Children's Products
To register your product for important safety alerts and updates to your product
please visit www.deltachildrensproducts.com and click on Product Registration.
21738-R2, May 26,2011
114 West 26th Street
New York, NY 10001
Tele.212-645-9033
READ ALL INSTRUCTIONS BEFORE
ASSEMBLY AND USE.
KEEP INSTRUCTIONS FOR FUTURE USE.
ADULT ASSEMBLY REQUIRED
DUE TO THE PRESENCE OF SMALL PARTS
DURING ASSEMBLY, KEEP OUT OF REACH OF
CHILDREN UNTIL ASSEMBLY IS COMPLETE.
COLOR
A
REV
FACTORY
©2011 DELTA ENTERPRISE CORP.
Advertisement

Summary of Contents for Delta Childrens Products 75106 Series
- Page 1 READ ALL INSTRUCTIONS BEFORE ASSEMBLY AND USE. KEEP INSTRUCTIONS FOR FUTURE USE. ADULT ASSEMBLY REQUIRED DUE TO THE PRESENCE OF SMALL PARTS DURING ASSEMBLY, KEEP OUT OF REACH OF CHILDREN UNTIL ASSEMBLY IS COMPLETE. BENTLEY 6 DRAWER DRESSER THIS PRODUCT IS NOT INTENDED FOR INSTITUTIONAL OR COMMERCIAL USE. STYLE No: 75106- COLOR FACTORY...
-
Page 2: Phillips Screwdriver
WARNING: Serious or fatal crushing injuries can occur from furniture tip-over. To help prevent tip-over: . Place heaviest items in the lowest drawers. . Unless specifically designed to accommodate, do not set TV’s or other heavy objects on the top of this product. - Page 3 PARTS: MAKE SURE THAT ALL PRE-ASSEMBLED PARTS ARE TIGHT. E. Back Bottom C. Divider Panel x2 D. Top Panel x1 Frame x1 B. Right Side x1 A. Left Side x1 Part# 21726 Part# 21730 Part# 21720 Part# 21719 Part# 21718 F.
- Page 4 HARDWARE SYSTEM - REVIEW BEFORE ASSEMBLY 65mm Bolt Plastic Crescent Washer 1. Install (1) 65mm Bolt into each threaded insert by turning it ONLY (2) FULL TURNS. Install all bolts in one side before continuing. 2. Align the bolt with the hole in the end of the rail, align the dowels in the end of the rail with the with the holes in the post.
- Page 5 STEP 1: L x4 E x2 Install (46) 30mm Wood KK. WOOD DOWEL Dowels as shown. 30mm X46 STEP 2: Attach Top Front Rail (Part F) and Attach Top Back Rail (Part H) to the Divider Frame (Part C) AA. 75mm Bolt x1 using (2) 45mm Bolts (Part DD).
- Page 6 STEP 3: BB. 65mm Bolt x4 MM. Plastic Crescent Washer X4 BB, MM Insert the Bottom Back Panel (Part E) and the (2) Middle Front Rails (Part L) into the Divider Frame. Carefully align all of the dowels (check to confirm they are still installed) with the holes in the Left Side (Part A).
- Page 7 STEP 5: GG. 30mm Screw x14 Attach the Bottom Front Molding (Part K) to the front of the case using (8) 30mm Screws, ensure the screws go into the predrilled holes in the molding. Tighten with a Phillips screwdriver. Next attach the (2) Bottom Side Moldings (Part N) to the case using (3) 30mm screws for each, ensure the screws go into the predrilled holes in the molding.
- Page 8 STEP 7: HH. 15 mm Back Panel Screw x20 Attach (2) Back Panels (Part M) using (20) Back Panel Screws (Part HH). Tighten with a Phillips Screwdriver. STEP 8: LL. Plastic Barrel Nut x24 FF. 40mm Screw x24 NN. 25mm Screw x30 1.
- Page 9 STEP 8: continued Attach (1) Knob (Part PP. Knob x6 JJ. 25mm Knob PP) with (1) Knob Screw x6 Screw (Part JJ). Tighten with the Phillips Screwdriver. Install the drawers. Changing the drawer position may improve operation and alignment. Install Tip-over restraint, see instructions with kit.
- Page 10 Consumer Care: www.deltachildrensproducts.com Delta Children’s Products 114 West 26th Street New York, NY 10001 Tele.212-645-9033 Warranty: This Delta Case is warranted to be free from defects for a period of 90 days from the date of purchase under normal use. This warranty extends only to the original retail purchaser and is valid only when supplied with proof of purchase, or if received as a gift, when the registration is on file with Delta.


Need help?
Do you have a question about the 75106 Series and is the answer not in the manual?
Questions and answers