Table of Contents
Advertisement
Quick Links
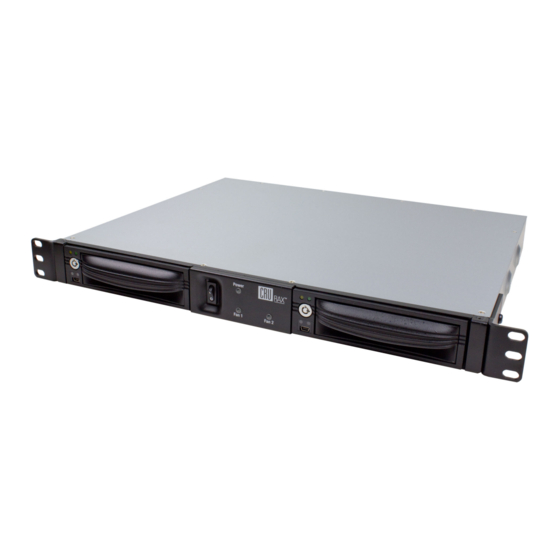
2-BAY RAX™
Covers models RAX210-NJ, RAX210-SJ, RAX210-SV, RAX 210-XJ, RAX211-SV, RAX211-XJ,
RAX212-SV, RAX212-SJ, RAX219-NJ, RAX219-SJ, RAX219-SV, RAX219-XJ
Features
• Variety of bay types available. TrayFree models (RAX210) allow easy insertion
and removal of hard drives. Models with removable carriers (RAX211, RAX212)
enclose and protect hard drives when removed from the RAX.
• Specially-designed drive and carrier interfaces are built to withstand thousands of
insertions
• LED indicators for Power and Drive Activity
• Superior cooling with dual 40mm exhaust fans
• Sturdy metal case provides excellent heat dissipation and rugged durability
U s e r M a n u a l f o r 2 - B a y R AX ( A9-210-0008) REV 1.0
USER MANUAL
(Revised November 9, 2011)
- 1 -
Advertisement
Table of Contents

Summary of Contents for CRU RAX RAX210-SJ
- Page 1 2-BAY RAX™ USER MANUAL (Revised November 9, 2011) Covers models RAX210-NJ, RAX210-SJ, RAX210-SV, RAX 210-XJ, RAX211-SV, RAX211-XJ, RAX212-SV, RAX212-SJ, RAX219-NJ, RAX219-SJ, RAX219-SV, RAX219-XJ Features • Variety of bay types available. TrayFree models (RAX210) allow easy insertion and removal of hard drives. Models with removable carriers (RAX211, RAX212) enclose and protect hard drives when removed from the RAX.
-
Page 2: Table Of Contents
Table of Contents 1. Pre-Installation Steps 1.1 Box Contents 1.2 Identifying Parts 2. Installation Steps 2.1 Installing Hard Drives 2.1.1 HDD Installation for RAX210 2.1.2 HDD Installation for RAX211 and RAX212 2.1.3 Drive, bay, and frame installation for RAX219 and models with one open bay 2.2 Tips for Rack Mounting 2.3 RAX Host Connections 2.4 Connecting and powering RAX... -
Page 3: Pre-Installation Steps
1. Pre-Installation Steps 1.1 Box Contents Check the accessories with your RAX unit. Please contact CRU if any parts are missing or damaged. The box should contain the following items: Accessories Quantity RAX unit Power cord Key set Screw kit... -
Page 4: Installation Steps
Replace the carrier cover and secure the screw on the rear of the carrier. h) Slide the carrier into the RAX. NOTE – A flashing green LED on the bay indicates bay fan failure. Call CRU technical support for assistance. -
Page 5: Rax Host Connections
2.3 RAX Host Connections Connection Model Model Model Model Model Model Model FireWire 800 USB 2.0 eSATA Port-Multiplied eSATA Multi-Lane SAS/SATA 3Gps (SFF-8470) Multi-Lane SAS/SATA 6Gbps (SFF-8088) 2.4 Connecting and Powering RAX Connect the data cables to RAX and your computer. Plug in the power cord to a grounded electrical outlet. -
Page 6: Mounting And Ejecting Volumes
a) Click on the drive in the window to the left (see picture below). b) Click the Erase tab in the window to the right (see picture below). c) Select the format type. Most users prefer Mac OS Extended with Journaling (HFS+), which is required for compatibility with Time Machine (OS 10.5 or newer). -
Page 7: Mounting And Ejecting Volumes
a) Right-click on My Computer, then select Manage. The Computer Management window will open. b) In the left pane of this window, left-click on Disk Management. c) The drive should appear in the list of Disks in the lower middle/right pane (see picture below). You may need to scroll down to see it. -
Page 8: Creating A Boot Drive
For more FAQs and additional information, please visit www.cru-dataport.com. U s e r M a n u a l f o r 2 - B a y R AX ( A9-210-0008) REV 1.0... -
Page 9: Technical Specifications
CRU product or service, even if CRU has been advised of the possibility of such damages.


Need help?
Do you have a question about the RAX RAX210-SJ and is the answer not in the manual?
Questions and answers