Table of Contents
Advertisement
Quick Links
- 1 Smoke Alarm: What to Do When the Alarm Sounds
- 2 Other Alarm Visual and Audible Indications
- 3 Setting up an Rf Interlink Network (Enrollment)
- 4 Operating, Testing and Alarm Characteristics
- 5 Troubleshooting
- 6 Recognising Nuisance Alarms
- 7 Battery
- 8 Permanently Disable Alarm / Discharge Battery
- Download this manual
Smoke Alarm with RF Interlink User Guide
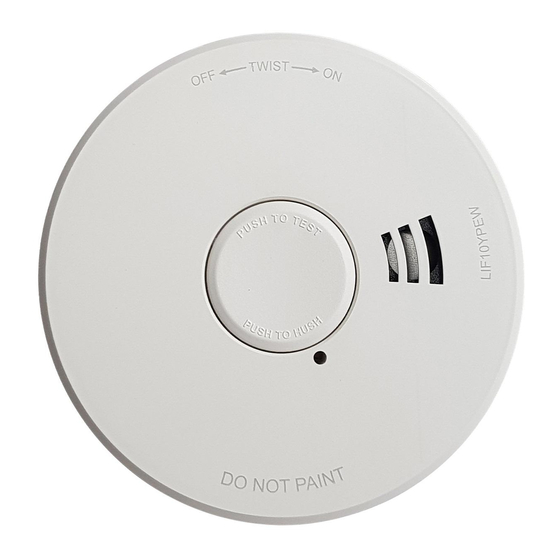
Model LIF10YPEW
Lithium (non-replaceable sealed in)
Battery-Operated Photoelectric Smoke
Alarm with wireless RF Interlink
and HUSH® Control
You do NOT need a home wi-fi system
to use these units. Multiple wireless units
create their own independent wireless RF
interlink network.
Tested & Complies to
Australian Standards
AS3786:2014 Amdt 1
0319-7201-01
Advertisement
Table of Contents

Related Manuals for PSA Products LIF10YPEW


Summary of Contents for PSA Products LIF10YPEW
- Page 1 Smoke Alarm with RF Interlink User Guide Model LIF10YPEW Lithium (non-replaceable sealed in) Battery-Operated Photoelectric Smoke Alarm with wireless RF Interlink and HUSH® Control You do NOT need a home wi-fi system to use these units. Multiple wireless units create their own independent wireless RF interlink network.
- Page 2 Thank You for Purchasing this PSA Lifesaver Smoke Alarm The smoke alarm you have purchased is capable of wirelessly interlinking with other Lifesaver LIF10YPEW smoke alarms and Lifesaver 5800 series mains powered smoke alarm fitted with LIFWMB2 ..wireless base. When one RF interlink unit sounds an alarm, all other compatible RF units in the RF interlink network will alarm.
-
Page 3: Table Of Contents
Contents 1. Smoke Alarm: What To Do When The Alarm Sounds ..............1 2. Other Alarm Visual and Audible Indications ................... 2 3. Introduction, Product Features And Specifications ................2 4. Recommended Locations For Alarms ....................3 5. Locations To Avoid .........................5 6. -
Page 4: Smoke Alarm: What To Do When The Alarm Sounds
1. Smoke Alarm: What To Do When the Alarm Sounds Smoke alarm pattern is three long beeps, a 1.5 second pause, and three long beeps repeating. The red LED flashes every 0.5 seconds during alarm. • Alert small children in the home as well as anyone else that might have difficulty recognizing the impor- tance of the alarm sounding or that might have difficulty leaving the area without help. -
Page 5: Other Alarm Visual And Audible Indications
2. Other Visual And Audible Indications The following tables describes visual and audible indications the unit may emit during normal operation. Audible Mode Indications Indications Note: Standby None None Smoke Alarm Hush Flash every None (smoke alarm silenced) Alarm hush feature silences 10 seconds smoke alarm for approx. -
Page 6: Recommended Locations For Alarms
Check specific State legislation in your area to ensure smoke alarms are correctly located according to local laws. Each State or Territory may differ in building codes and regulations. PSA Products can only recommend the locations. • Locate an alarm for each separate sleeping area in the immediate vicinity of the bedrooms. - Page 7 Location of smoke alarm Apex Of Sloping Ceiling Ceiling / Wall Junction Smoke alarms for minimum protection Smoke alarms for additional protection Typical Multiple Floor Installation Single Floor IMPORANT: incorrect orientation of smoke alarm may decrease operational effectiveness...
-
Page 8: Locations To Avoid
5. Locations To Avoid • Do not locate your alarm in the garage - products of combustion are present when you start your automobile. Use Lifesaver Heat Alarm in this location. • Do not locate your alarm in front of forced air supply ducts used for heating and air conditioning and other high air flow areas. -
Page 9: Activation And Rf Interlink Network
6. Activation and RF Interlink Network This model is capable of interlinking with other PSA LIF10YPEW alarms in domestic residential applications. When one RF interlink unit sounds an alarm, all other compatible RF units in the RF interlink network will alarm. Follow the steps in section 6.1 to interlink up to 24 units in your interlink network. - Page 10 6.2 Adding A Detector To An Existing RF Interlink Network At some point, you might want to add another LIF10YPEW unit to your existing RF interlink network for additional protection, or to replace an old unit. Follow the steps in the following table.
- Page 11 6.3 Resetting A Unit’s RF Interlink Feature (General Reset mode) This section will explain how to perform a general reset of a unit, which starts the unit over as if it were powered up for the first time. It also explains how to remove a unit from a network if needed. Follow the steps in the table below if one of these conditions occurs: * If you have problems or become confused during initial RF Interlink enrolment.
- Page 12 7. Wireless FAQs Answer How does “desk enrolment” work? Rotate first unit onto mounting bracket to power it up. Push button twice to open network. Power up remaining units. Wait for each unit to join. Push button twice to close network. See section 6.1. What happens if units are powered Units will search for a network for 15 minutes after which all units will up for the first time but no buttons...
-
Page 13: Wireless Faqs
Wireless FAQs Answer What happens if the coordinator Nothing within 30min. After 30 min, push button twice, and then push/ drops from the network and comes hold button for approx 4 seconds until two beeps. Unit is reset. Push back online?. button twice to reopen network and rejoin. -
Page 14: Installation Instructions
8. Installation Instructions When mounting When mounting on the ceiling, in a hallway, the align both “A” line should rectangle be parallel with features the hallway. Figure 5 Figure 4 After selecting the proper smoke alarm location as described in Section 4, attach the mounting bracket to the ceiling as shown in Figure 4. - Page 15 Smoke Alarm Tamper Resist Feature This alarm is equipped with a tamper resist feature that helps prevent someone from removing the unit from the mounting bracket. When activated, it can be very effective in preventing smoke alarm removal or tampering. Activate the smoke alarm tamper resist feature by breaking out both small tabs in the square hole in the mounting bracket (see Figure 6).
-
Page 16: Operating, Testing And Alarm Characteristics
(initiating unit) other units will activate. It is possible to identify the initiating smoke alarm using the locate function. For interlinked network of LIF10YPEW only, pressing the HUSH button on any non-initiating smoke alarm will hush all the smoke alarms except the initiating unit for 2 minutes. -
Page 17: Troubleshooting
10. Troubleshooting Audible Mode Indications Indications Note: Low Battery Flash every Chirp every 60 seconds from Push button to silence low 30 seconds low battery unit. battery for 24 hours for up to 7 days. Remove, discharge, dis- pose, replace with new alarm. End of Unit Life (EOL) 2 flashes every 30 seconds Pre-EOL warning is LED only,... -
Page 18: Recognising Nuisance Alarms
11. Recognising Nuisance Alarms Smoke Nuisance HUSH ® : If you know why the alarm is sounding, and you can verify that it is not a life threatening situation, you can push the button to silence the alarm for up to 10 minutes. If the smoke is not too dense, that unit, and all RF interlinked units will silence. -
Page 19: Battery
12. Battery NOTE : This alarm (including the RF module) is powered by a non-replaceable, sealed lithium battery system. No battery installation or replacement is necessary for the life of the alarm. IMPORTANT: Constant exposure to high or low humidity or temperatures may reduce battery life. WARNING! DO NOT ATTEMPT TO OPEN THE ALARM FOR ANY REASON! Do not try to repair the smoke alarm yourself. -
Page 20: Permanently Disable Alarm / Discharge Battery
13. Permanently Disable Alarm / Discharge Battery WARNING! • Discharging the battery is permanent. Once the alarm has been discharged, it cannot be reactivated! • Once discharged , the alarm will NO LONGER DETECT SMOKE. • Once the alarm is discharged the battery will be depleted and the alarm will no longer function. -
Page 21: Cleaning Your Alarm
14. Cleaning Your Alarm YOUR ALARM SHOULD BE CLEANED ONCE A YEAR. If the tamper resist feature has been activated you will need to follow the instructions in Section 8 to remove your alarm for maintenance. To clean your alarm, remove it from the mounting bracket as outlined in Section 8. You can clean the interior of your alarm (sensing chamber) by using compressed air or a vacuum cleaner hose and blowing or vacuuming through the openings around the perimeter of the alarm. -
Page 22: Good Safety Habits
15. Good Safety Habits DEVELOP AND PRACTICE A PLAN OF ESCAPE • Install and maintain Fire extinguishers on every level of the home and in the kitchen, basement and garage. Know how to use a fire extinguisher prior to an emergency. •... -
Page 23: Limitations Of Smoke Alarms
16. Limitations Of Smoke Alarms WARNING: PLEASE READ CAREFULLY AND THOROUGHLY. • Life safety from fire in residential occupancies is based primarily on early notification to occupants of the need to escape, followed by the appropriate actions by those occupants. Fire warning systems for dwelling units are capable of protecting about half of the occupants in potentially fatal fires. -
Page 24: Warranty And Liability
3. To the extent permitted by law, the liability of PSA Products Pty Ltd arising from the sale or under the terms of this limited warranty shall not in any case exceed the cost of replacement and subject to this clause. -
Page 25: Product Warranty Registration
18. Product warranty registration Thank you for purchasing and installing the most trusted brand in fire, security and intercoms. To ensure you receive excellent after-sale product service we encourage you to register your products. There are a few important reasons to register your product: 1. - Page 26 THANK YOU FOR CHOOSING THIS SMOKE ALARM. Tested & Complies to Complies to Australian Standards AS/NZS4268:2017 AS3786:2014 Amdt 1 Another Quality Product By: PSA Products Pty Ltd 17 Millicent Street, Burwood, Victoria 3125 Ph: 1300 PSA PRODUCTS (1300 772 776) Fax: (03) 9888 9993 Email:enquiry@psaproducts.com.au Webite:www.psaproducts.com.au...
Need help?
Do you have a question about the LIF10YPEW and is the answer not in the manual?
Questions and answers