Advertisement
Quick Links
Installation Instructions
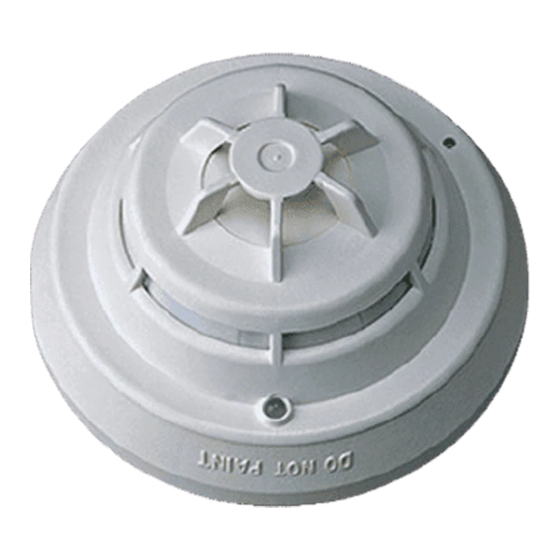
Models FP-11/FPT-11
These instructions are written in accordance with the
installation guidelines of NFPA 72, National Fire Alarm
Code, and CAN/ULC-S524, The Installation of Fire Alarm
Systems.
CAUTION: Detector Device Storage
DO NOT install this detection device until all
construction is completed.
DO NOT store this detection device where it can be
contaminated by dirt, dust, or humidity.
NOTE:
When using this detector with a protective detector
guard such as the DGH-11 from Siemens Industry,
Inc., or the STI 8100IS, be sure to install per the
instructions supplied with the guard and set the ASD
setting to duct detector per the detector programming
instructions located on pages 2-3 of this document.
DETECTOR PLACEMENT FOR FP-11
Although no specific spacings are set for the detectors
used for a clean air application, use 30 foot center spacing
(900 sq ft) from NFPA Standard 72 Chapter 5 and
CAN/ULC-S524, if practical, as a guide or starting point
for a detector installation layout. This spacing, however,
is based on ideal conditions–smooth ceiling, no air
movement, and no physical obstructions. In some
applications, therefore, considerably less area is protected
adequately by each smoke detector. This is why it is
mandatory to closely follow the installation drawings. In
all installations place the detector on the ceiling, a
minimum of 6 inches from a side wall, or on a wall, 4 to 6
inches from the ceiling.
If you have any questions regarding detector placement,
follow the drawings provided or approved by Siemens
Industry, Inc., or by its authorized distributors. This is
+
+
Detector Base:
Model DB-11 or
Model DB-3 with DB-ADPT
To initiating
circuit of
Siemens
Industry, Inc.
5
1a
compatible
6
1b
control unit
Compatible
(See
Control Equip-
ment
below)
–
–
*The relay contacts are shown after System reset, which represents the non-alarm condition.
Siemens Industry, Inc.
Building Technologies Division
Florham Park, NJ
P/N 315-095921-13
+
+
Remote Relay Base:
Model DB-X11RS or
Model DB-3XRS with DB-ADPT
Optional
Remote
Alarm
6
1a
Indicator
Models RLI-1/RLI-2
–
–
Figure 1
Installation and Wiring Diagram
extremely important! The detector placements shown on
these drawings were chosen after a careful evaluation
of the area that is protected. Such factors as air currents,
temperature, humidity, pressure, and the nature of the
load were carefully considered. Especially noted were
the room or area configuration and the type of ceiling
(sloped or flat, smooth or beamed). Siemens Industry,
Inc.'s extensive experience in the design of the system
assures the best detector placement by following these
drawings. Sound engineering judgement by qualified
personnel must be followed.
Fire Print detectors and nuisance alarms:
The neural network within each Model FP-11 FirePrint
detector is optimized to reject the most common nuisance
alarms for its selected FirePrint Application; e.g. Parking
Garage or Health Care. If the detector is exposed to an
excess level of smoke or aerosol for an extended period
of time, the detector is programmed to make the "safe
decision" and signal an alarm condition. Because the
amplitude and duration of deceptive phenomena are
unbounded, the rule of thumb is to keep detectors as far
as practical from sources that can produce an unusually
large quantity of smoke for about a minute. This effort
during placement of detectors within a FirePrint
Application enhances the ability of FirePrint's deceptive
phenomena rejection. Avoid close proximity of detectors
to smoke sources such as oil burners, electric heaters,
kitchens, garages, and areas of high relative humidity
where condensation may occur.
Air Currents
Before a detector can sense a fire, the products of com-
bustion or smoke must travel from the fire to the detector.
This travel is especially influenced by air currents;
therefore, consider air movement when designing the
system. While combustion products tend to rise, drafts
from hallways, air diffusers, fans, etc., may help or hinder
the travel of combustion products to the detector. When
positioning a detector at a particular location, give
5+
Relay*
NO
Contacts
C
6–
3A, 120 VAC
NC
3A, 30 VDC
Siemens Canada Limited
Building Technologies Division
2 Kenview Boulevard
Brampton, Ontario L6T 5E4 Canada
+
To Next Base
+
5
1a
5+
NO
6
1b
C
6–
NC
–
–
To Next Base
Do Not
+
Use an
End of
Line
Device
Do Not
Use an
End of
–
Line
Device
Advertisement

Related Manuals for Siemens FPT-11


Summary of Contents for Siemens FPT-11
- Page 1 Especially noted were CAUTION: Detector Device Storage the room or area configuration and the type of ceiling (sloped or flat, smooth or beamed). Siemens Industry, DO NOT install this detection device until all Inc.'s extensive experience in the design of the system construction is completed.
- Page 2 DETECTOR PLACEMENT FOR FPT-11 DETECTOR MOUNTING Locate the FPT-11 on the ceiling, at least 4 inches from To ensure proper installation of the detector head into the side walls. For an ideal, smooth ceiling condition, place...
- Page 3 The FP-11/FPT-11 can be programmed to optimize environmental response using Application Specific The FP-11/FPT-11 detectors can also be tested using: a) Detection (ASD). All parameters, such as Sensitivity, Pre- FPI-32 Programmer/Tester, firmware version 3.0 or greater Alarm and Advanced Environmental Algorithms are (refer to the OPERATIONS MANUAL, P/N 315-090077), downloaded to the detector from the MXL control panel.
- Page 4 (See removal section.) System/Detector Compatibility Using a small blade screwdriver, remove the cover The FP-11 and FPT-11 can be programmed to replace from the rest of the detector by releasing the 2 cover older model detectors in older version MXL Systems. The tabs located on the outside of the cover.
Need help?
Do you have a question about the FPT-11 and is the answer not in the manual?
Questions and answers