Philips SP9860 Manual
Hide thumbs
Also See for SP9860:
- User manual (74 pages) ,
- Manual (68 pages) ,
- Instructions manual (189 pages)
Table of Contents
Advertisement
Advertisement
Table of Contents

Related Manuals for Philips SP9860


Summary of Contents for Philips SP9860
- Page 1 SP9860 www.philips.com/support/ifu-lux...
-
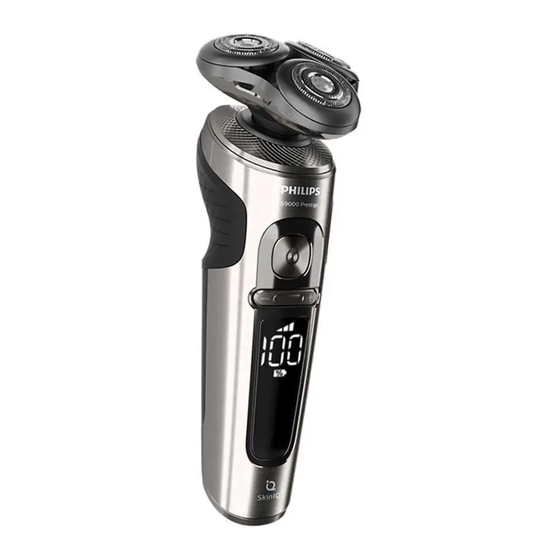
Page 3: General Description (Fig. 1)
English Introduction Congratulations on your purchase and welcome to Philips! To fully benefit from the support that Philips offers, register your product at www.philips.com/welcome. Please read this user manual, as it contains information about the features of this shaver as well as some tips to make shaving easier and more enjoyable. - Page 4 English Danger - Keep the supply unit dry. Warning - The appliance is a Class III construction. - To charge the battery, only use the detachable supply unit and charging pad (supply unit, type HQ87. Charging pad, type HQ8509 or HQ8510) provided with the appliance.
- Page 5 English - Always check the appliance and its attachments before you use it. Do not use the appliance or its attachments if it is damaged, as this may cause injury. Always replace a damaged part with one of the original type. - Do not open the appliance to replace the rechargeable battery.
- Page 6 English - For safety reasons, do not use the shaver while you drive a car. - For hygienic reasons, the appliance should only be used by one person. - Never use compressed air, scouring pads, abrasive cleaning agents or aggressive liquids such as petrol or acetone to clean the appliance.
- Page 7 Electromagnetic fields (EMF) This Philips appliance complies with all applicable standards and regulations regarding exposure to electromagnetic fields. General - This shaver is waterproof. It is suitable for use in the bath or shower and for cleaning under the tap.
-
Page 8: Battery Fully Charged
English Charging When the shaver is charging, the ring on the pad lights up and the battery charge indicator on the shaver flashes white. The battery charge is indicated by the battery charge percentage flashing on the display, which is shown when the shaver is moved. -
Page 9: Personal Comfort Settings
English Personal comfort settings The shaver has a feature that allows you to personalize your settings. Depending on your personal shaving needs, choose between three settings, from low to high: comfort, dynamic or efficiency. When you press the button on the left or right of the display, the segment of the personal comfort settings bar lights up to indicate the selected setting. - Page 10 English on/off button for 7 seconds. If you do not reset the replacement reminder, the shaver resets automatically after 9 shaves. Notification symbol Overheating If the shaver overheats during charging, the notification symbol flashes. When this happens, the shaver stops charging automatically. Charging continues once the temperature of the shaver has decreased to the normal level after approx.
-
Page 11: Quick Charge
English Charging Charge the shaver before you use it for the first time and when the display indicates that the battery is almost empty. Charging takes approx. 3 hours. A fully charged shaver has a shaving time of up to 60 minutes. Note: You cannot use the shaver while it is charging. -
Page 12: Using The Shaver
English - The Qi charging pad beeps and the ring on the pad lights up when the shaver is correctly placed and connected for charging. - When the shaver is charging, the ring on the pad lights up and the battery charge indicator on the shaver flashes white. -
Page 13: Switching The Shaver On And Off
English Switching the shaver on and off 1 To switch on the shaver, press the on/off button once. The battery charge percentage lights up for a few seconds. 2 To switch off the shaver, press the on/off button once. The battery charge percentage lights up for a few seconds and shows the remaining battery charge. - Page 14 English 2 Move the shaving heads over your skin in circular movements to catch all hairs growing in different directions. Make sure each shaving head is fully in contact with the skin. Exert gentle pressure for a close, comfortable shave. Note: Do not press too hard, this can cause skin irritation.
-
Page 15: Using Click-On Attachments
English 5 Move the shaving heads over your skin in circular movements to catch all hairs growing in different directions. Make sure each shaving head is fully in contact with the skin. Exert gentle pressure for a close, comfortable shave. Note: Do not press too hard, this can cause skin irritation. -
Page 16: Travel Lock
English 1 Attach the attachment to the appliance (‘click’). 2 Switch on the appliance. 3 Hold the precision trimmer perpendicular to the skin and move it downwards while exerting gentle pressure. 4 Switch off the appliance and clean the attachment after use (see 'Deactivating the travel lock'). -
Page 17: Cleaning And Maintenance
English Cleaning and maintenance Regular cleaning guarantees better shaving results. Never clean, remove or replace the shaving unit while the shaver is switched on. Do not apply pressure to shaving head guards. Do not touch shaving heads with hard objects as this may dent or damage the precision- made slotted guards. -
Page 18: Thorough Cleaning
English 3 Switch off the shaver. Pull the shaving head holder off the bottom part of the shaving unit. 4 Rinse the hair chamber and shaving head holder under the tap. While rinsing the shaving unit, water may drip out of the bottom of the shaver. This is a normal occurrence. - Page 19 English 2 Pull the shaving head holder off the bottom part of the shaving unit. 3 Rinse the hair chamber and shaving head holder under the tap. 4 Turn the retaining ring anticlockwise and lift it off the shaving head. Repeat this process for the other retaining rings.
-
Page 20: Cleaning The Trimmer Attachment
English 9 Place the shaving heads in the shaving head holder. 10 Place the retaining ring on the shaving head. 11 Align the arrows on the retaining ring with the projections in the shaving head holder. Turn the ring clockwise until it clicks to indicate that the ring is fixed. -
Page 21: Replacing The Shaving Heads
Replace damaged shaving heads immediately. Always replace the shaving heads with original 2yrs Philips shaving heads (see 'Ordering accessories'). Replacement reminder The replacement reminder indicates that the shaving heads need to be replaced. The shaving... -
Page 22: Ordering Accessories
Ordering accessories To buy accessories or spare parts, visit www.shop.philips.com/service or go to your Philips dealer. You can also contact the Philips Consumer Care Center in your country (see the international warranty leaflet for contact details). The following accessories and spare parts are... -
Page 23: Removing The Rechargeable Shaver Battery
English - RQ563 Philips cleansing brush attachment 3-pack - HQ87 USB supply unit - HQ8509, HQ8510 Qi charging pad Note: The availability of the accessories may differ by country. Disposal - This product contains a rechargeable lithium- ion battery which must be disposed of properly. - Page 24 English 1 Remove the click-on attachment from the appliance. 2 On top of the appliance insert a screwdriver between the black cylinder and silver ring. Force the silver ring up off the appliance and remove the top panel. 3 Unscrew the two screws and remove the frame. 4 Remove the two back black covers and slide the front housing off the appliance.
-
Page 25: Warranty And Support
Philips Consumer Lifestyle will repair or replace the product at its expense. - Philips Consumer Lifestyle will only pay for repair or replacement if convincing proof is provided, for instance by means of a receipt, that the day on which service is claimed is within the guarantee period. -
Page 26: Troubleshooting
This chapter summarizes the most common problems you could encounter with the appliance. If you are unable to solve the problem with the information below, visit www.philips.com/support for a list of frequently asked questions or contact the Consumer Care Center in your country. - Page 27 English Problem Possible cause Solution The appliance do The shaving heads Replace the shaving es not shave as are damaged or heads (see well as it used to. worn. 'Replacement'). Hairs or dirt obstruct Clean the shaving heads the shaving heads. in the regular way or clean them thoroughly.
- Page 28 English Problem Possible cause Solution Water is leaking During cleaning, This is normal and not from the bottom water may collect dangerous because all of the appliance. between the inner electronics are enclosed body and the outer in a sealed power unit shell of the inside the appliance.
Need help?
Do you have a question about the SP9860 and is the answer not in the manual?
Questions and answers