Table of Contents
Advertisement
Quick Links
Advertisement
Table of Contents

Subscribe to Our Youtube Channel
Related Manuals for Beta Ultra Dottie II


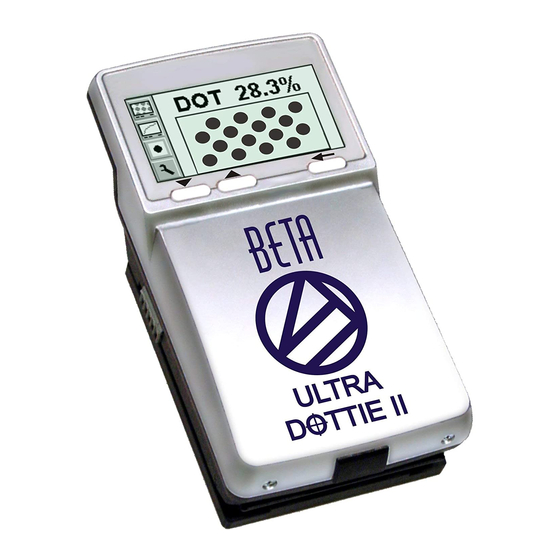
Summary of Contents for Beta Ultra Dottie II
- Page 1 CTP Calibrator Operating Manual THE QUALITY CONTROL COMPANY Version 1.03...
- Page 2 1/40...
- Page 3 The Quality Control Company ULTRA DOTTIE II CTP Calibrator/Plate Reader Instruction Manual Version 1.03 2/40...
-
Page 4: Table Of Contents
1 TABLE OF CONTENTS 2 GENERAL 2.1 INTRODUCTION 2.2 SAFETY 2.2.1 Warning 2.2.2 General safety tips 2.3 PACKAGING AND TRANSPORT 2.4 BASIC EQUIPMENT AND ACCESSORIES 2.5 ACCESSORIES 2.5.1 BetaTab software 2.5.2 BetaTarget(Optional) 3 OPERATION 3.1 FUNCTIONAL ELEMENTS 3.2 FIRST STEPS FOR USE 3.2.1 Power-saving mode 3.2.2 Toolbar 3.2.3 Identifying the symbols... -
Page 5: General
3.5.5 Measuring film 3.5.6 Measuring paper 3.5.7 Measurement values 3.6 VISUALLY CHECKING THE DOT 3.7 MEASURING A PLATE CHARACTERISTIC CURVE 3.8 Ultra Dottie II MAINTENANCE AND CARE Upgrading Your Ultra Dottie 2 (Upgrade Codes) 3.8.1 RESET 3.8.2 Replacing the batteries 4 APPENDIX 4.1 TECHNICAL DATA... - Page 6 2 General 2.1 INTRODUCTION 2.2 SAFETY 2.2.1 Warning 2.2.2 General safety tips 2.3 PACKAGING AND TRANSPORT 2.4 BASIC EQUIPMENT AND ACCESSORIES 2.5 ACCESSORIES 2.5.1 BetaTab software 2.5.2 BetaTarget(Optional) 5/40...
-
Page 7: Introduction
This can be done with the Ultra Dottie II at a resolution of 12,700 ppi (pixels per inch) or 6,350 ppi as a matter of choice. To avoid having to check each individual... -
Page 8: Safety
• Ultra Dottie II may not be used in an area with strong electromagnetic fields. • Use the Ultra Dottie II in ambient temperatures between 10°C (50°º F) and 40°C (104°F), and do not expose the Ultra Dottie II to direct sun light. -
Page 9: Packaging And Transport
• Use original Beta Industries spare parts and accessories only. • Use the original packaging exclusively when transporting the device. • The Ultra Dottie II case can be cleaned with a cloth moistened with soapy water 2.3 Packaging and transport Always transport Ultra Dottie II in the original device case to avoid damage. -
Page 10: Accessories
This software is an ideal tool for documenting measurement results. 2.5.2 Beta Target (Optional) The BetaTarget is a long-term stable absolute reference. You can use the BetaTarget to test the device for its accuracy, to carry out an upgrade and if necessary to calibrate it. -
Page 11: Operation
Dot size: 120µm The reference plate used by Beta Industries is an extremely precise glass substrate that is metal vaporized and, as is used in semiconductor manufacturing, etched out. It is embedded in gray plastic. The reference plate has a lifetime of two years. The expiration date and the serial number are printed on the label. - Page 12 3.5.6 Measuring paper 3.5.7 Measurement values 3.6 VISUALLY CHECKING THE DOT 3.7 MEASURING A PLATE CHARACTERISTIC CURVE 3.8 Ultra Dottie II MAINTENANCE AND CARE 3.8.1 RESET 3.8.2 Replacing the batteries Table of 11/40...
-
Page 13: First Steps For Use
Operation : Functional Elements <RESET> on bottom LCD Display <ENTER> <UP> button <DOWN> button Positioning Aid Locking button RS232 Interface 0° Positioning 3.2 First steps for use 12/40... - Page 14 If you have technical questions, please communicate this information to the manufacturer. The device’s factory settings have been selected to enable you to begin measuring plates immediately. The Ultra Dottie II is configured as follows: MODEL TYPES: 1) BASIC: AM (Standard Screening) for Metal Plates 2) BASIC PLUS: AM/FM (Stochastic) for Metal &...
-
Page 15: Power-Saving Mode
3.2.1 Power-saving mode The Ultra Dottie II changes over automatically to power-saving mode after approximately 30 seconds. This is announced by displaying the ‘Sleep’ symbol. The display will then fade out. Tapping any button on the device will reproduce the last display. - Page 16 cursor simply tap the <UP> or <DOWN> button. 3.2.3 Meaning of the symbols 3.2.3.1 Change display mode Next display Previous display Change to image display for a visual dot inspection Increase representation resolution to 12,700 ppi Reduce representation resolution to 6,350 ppi Change to characteristic curve display Device Settings 3.2.3.2 Move the sub-cursor...
- Page 17 3.2.3.3 Device Settings Standard plate Polyester plate Paper Film Screen ruling in (lines/cm) Screen ruling in (lines/inch) Regular screening (AM) Stochastic screening (FM). Illumination for plate measurement R (Red LED), G (Green LED), B (Blue LED) Color for paper measurement C (Cyan LED), M (Green LED), Y (Blue LED), K (Green LED) Automatic CMY color recognition during paper measurement Positive dot % Negative dot %...
- Page 18 3.2.3.4 Other functions Transfer current record (binary image or characteristic curve) to the host PC Device is calculating (during measurement and data transfer) Device is changing over to power-saving mode Add reference value Delete reference value Restart and delete all previous settings 3.2.3.5 Symbols for measurement results Screen ruling in lines/cm or lines/inch Dot diameter in mm (based on a circular dot of the same surface area)
- Page 19 3.2.3.6 Status information Standard plate Polyester plate Paper Film Batteries need to be exchanged Positive dot % Negative dot % AM Regular screening FM Stochastic screening Red illumination for plate measurement Green illumination for plate measurement 18/40...
-
Page 20: Adjusting Device Settings
3.3 Adjusting device settings After unpacking or after pressing the <RESET> button, you can use Ultra Dottie II to begin measuring standard plates using the factory settings, or change the display of the device settings by selecting the ‘Next display’ symbol Important: In normal circumstances the reference value... -
Page 21: Inputting A Reference Curve
3.4 Inputting a reference curve The user can switch to ‘Input a reference curve’ by selecting the function in the settings window (see section 3.3). You will find the toolbar on the left side of the LCD. An XY diagram of the defined sample points for the current reference curve is shown on the LCD. - Page 22 • The default value for this sample point corresponds to the nominal value. Now select the function to increment or to decrement and press the <ENTER> button. If the reference curve is altered at least once, the Ultra Dottie II will create a sample point for the reference 21/40...
-
Page 23: Measuring
curve in this position and save this. The vertical gray line at this location in the diagram is adjusted simultaneously when the reference value is changed. • Select the function and execute this function repeatedly until the nominal value is equal to 10% (press <ENTER> button 5 times). •... - Page 24 The visual coverage is a ‘density’ measurement, which is not compatible with any current standard and can only be used for comparative analysis. For density measurement, we recommend using a Beta Industries densitometer conforming to standards. Only the dot area is usually determined in stochastic screens. However,...
-
Page 25: Calibration
Please use the Vip Target to check the accuracy of the device (see chapter 2.5.2). As the Ultra Dottie II calibration is done automatically, no calibration or “zeroing” on the plate is needed. After inputting the appropriate settings... -
Page 26: Measuring Standard Plates
This zeroing is done by a measurement on the medium (e.g. plate ground). To check the absolute accuracy of the Ultra Dottie II, Beta Industries offers the Ultra Dottie II Target. With the help of this tool, the device can be checked and calibrated (see section 2.5.2). -
Page 27: Measuring Film
For measurements on black, the color (K) must always be selected manually. The Ultra Dottie II is equipped with a video camera, which measures the geometric dot size, relevant for plate readings. For prints, the densitometric dot size needs to be measured, as this measurement corresponds to the visual impression. -
Page 28: Measurement Values
3.5.7 Measurement Values 3.5.7.1 Dot area This value represents the area coverage of the measured patch. With the image analysis algorithm, dust and image errors are eliminated. 3.5.7.2 Screen ruling Depending on the settings, the screen ruling is displayed either in Lines/inch or Lines/cm. - Page 29 Hold the Ultra Dottie II parallel to the edge of the plate to get a correct value of the screen angle in degrees. Important: The screen angle is not shown for FM screening and for middle tones, especially for chain dots in AM screening. In a regular screen, the screen angle will always be shown if the dot area has closed dots (highlights and shadows).
-
Page 30: Visually Checking The Dot
3.6 Visually checking the dot After a measurement the picture will be held in the device’s memory until the next measurement and can be displayed or transferred to a host computer at any time by selecting the function As usual you will find the toolbar on the left side of the LCD with the following functions. -
Page 31: Measuring A Plate Characteristic Curve
Transferring the binary image to a host makes it possible to document the dot quality. As an option Beta Industries offers the BetaTab software, which can accept the binary image and copy it into any application that supports the clipboard. - Page 32 The following information is shown in the LCD: • Reference curve: this is drawn in light gray. The sample points (patches being measured) are indicated by vertical lines at the corresponding locations. • Plate characteristic curve: this is drawn in black, with the curve being plotted accordingly after each measurement.
- Page 33 • Select the function with the <UP> or <DOWN> button and execute this using the <ENTER> button. All reference values are reset. The nominal value 5% and the reference value 5% are shown. • Measure the 5% patch. The measured value is shown at the top edge of the Y axis and the 5% reference value is shown below it.
-
Page 34: Ultra Dottie Ii Maintenance And Care
Upgrading your Ultra Dottie II When your plate measuring needs change, you can upgrade your Ultra Dottie II to take advantage of stochastic, color print, and other advanced features. After contacting our office we will fax or email an UPGRADE CODE number to you. - Page 35 The opening screen will be displayed with the word “Basic” at the bottom. 2. Press and hold the red RESET button. Press and hold the LEFT button. 3. Release the RESET button then release the left button. 4. The display will clear and show 0000 with the underscore blinking under the left digit.
- Page 36 Upgrade Types: A) BASIC to BASIC PLUS: On the SETUP screen an additional icon for stochastic (FM) screening should now be present underneath the icon for standard AM screening. B) BASIC or BASIC PLUS to ADVANCED: All of the advanced features such as PAPER, STOCHASTIC, LED COLOR, and CURVE PLOT will now be available on the SETUP screen.
-
Page 37: Replacing The Batteries
Important: The batteries must typically be replaced after 30,000 measurements. Always replace both batteries at the The Ultra Dottie II monitors the battery voltage and shows an ‘empty same time. If you are not using the device for a batteries’ symbol when the batteries need to be replaced soon. -
Page 38: Technical Data
4 Appendix 4.1 Technical data Functions Dot area % Screen ruling in lines/cm or lines/inch Dot diameter Screen angle Visual coverage Binary image display 6,350 ppi and 12,700 ppi Plate characteristic curve 100 measurements References 100 references Test measurements Standard plates Polyester plates Film Paper... -
Page 39: Serial Interface
-20°C to 70°C Relative humidity 10% to 90% non-condensing 4.2 Serial interface* The Ultra Dottie II is equipped with an RS232 interface. To obtain access to the serial interface socket, remove the black cover on the rear of the measuring head. 38/40... -
Page 40: Declaration Of Conformity
4.3 Declaration of conformity CE-DECLARATION OF CONFORMITY The undersigned, representing the following manufacturer Beta Industries herewith declares that the product: Ultra Dottie II Plate Measuring Device is in conformity with the provisions of the following CE directive(s) (including all applicable amendments): 73/23/EEC... - Page 41 40/40...
Need help?
Do you have a question about the Ultra Dottie II and is the answer not in the manual?
Questions and answers