Advertisement
9-Piece Dining Set
ITM. / ART. 1119053
Model # CSC9PD-4
IMPORTANT,
RETAIN
FOR
FUTURE
REFERENCE: READ CAREFULLY
If you have any questions regarding assembly or if parts are missing, DO NOT return this item to the
store where it was purchased. Please call our toll-free customer service number and have your
instructions and parts list ready to provide the model name, part name or factory number:
1-877-494-2536 (English, French and Spanish)
Pacific Standard Time: 8:30 a.m. - 4:30 p.m., Monday to Friday
(In U.S. and Canada only)
Or visit our website www.baysidefurnishings.com
For customer service outside of North America, please e-mail your request to
parts@baysidefurnishings.com
Date 2018-02-01 Rev. 0001-A Factory: ZHIVIE
Advertisement
Table of Contents

Related Manuals for Bayside Furnishings 9-Piece Dining Set


Summary of Contents for Bayside Furnishings 9-Piece Dining Set
- Page 1 9-Piece Dining Set ITM. / ART. 1119053 Model # CSC9PD-4 ASSEMBLY INSTRUCTIONS IMPORTANT, RETAIN FUTURE REFERENCE: READ CAREFULLY If you have any questions regarding assembly or if parts are missing, DO NOT return this item to the store where it was purchased. Please call our toll-free customer service number and have your...
- Page 2 G E N E R A L I N F O R M A T I O N A N D T I P S 1. This product is for indoor domestic use only. 2. Please read the Assembly Instructions prior to assembling this product. 3.
- Page 3 Parts and Hardware List PART # PART DESCRIPTION PART FIGURE QUANTITY Table Top Removable Leaf Stretcher Metal Bar...
- Page 4 Parts and Hardware List PART # PART DESCRIPTION PART FIGURE QUANTITY Threaded Rod 4+1 extra Bolt 10+1 extra Bolt 4+1 extra Hex Nut 4+1 extra Lock Washer 16+1 extra Flat Washer 16+1 extra Wood Dowel 4+1 extra Hex Wrench Open Wrench Touch-up Pen Tools required: Hex wrench and open wrench (included) and Phillips screwdriver (not included).
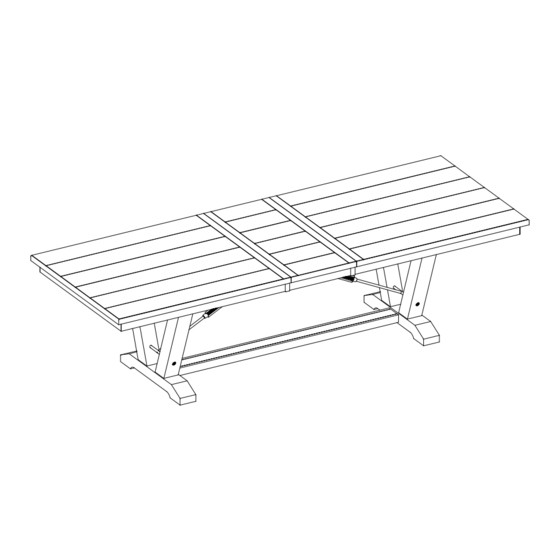
- Page 5 Assembly Instructions 1. Insert four wood dowels (GG) into the end holes on the stretcher (D). 2. Attach the stretcher (D) between two legs (C) with four bolts (BB) and four washers (EE and FF). 3. Flip around the assembled base and screw four threaded rods (AA) into the threaded inserts on the top of both legs (C) with 35 mm threads stand out as shown.
- Page 6 Assembly Instructions 4. Position the tabletop (A) upside down on a smooth and protective surface. 5. Flip the assembled base upside down and align the installed threaded rods (AA) on the legs (C) with the through holes on the mounting boards on the table top (A). Secure the legs to the mounting boards with four bolts (BB) and four washers (EE and FF).
- Page 7 Assembly Instructions 8. Use a Phillips screwdriver to remove the additional metal brackets which hold the wood slides into place. So that you can pull the table top wide open and take out the leaf inner box. These are used for shipping purposes only.
- Page 8 Assembly Instructions 11. To add the leaf extension, unlock the sash locks underneath the table top (A) by rotating the lock handle all the way to the “OFF” marking on the sash locks and then pull the table top wide open equally from both ends.
- Page 9 Assembly Instructions 15. To store the leaf extension when not in use, unlock the sash locks underneath the table top (A) by rotating the lock handle all the way to the “OFF” marking on the sash locks and then pull the table top wide open equally from both ends.
-
Page 10: Care And Maintenance
Should this product be defective in workmanship or materials or fail under normal use, we will repair or ® replace it for up to one (1) year from date of purchase. Every Bayside Furnishings product is designed to meet your highest expectations. We guarantee that you will immediately see the value of our fine furniture.
Need help?
Do you have a question about the 9-Piece Dining Set and is the answer not in the manual?
Questions and answers