Lennox ComfortSense 7000 Series Quick Start Installation Manual
Touch screen programmable thermostat
Hide thumbs
Also See for ComfortSense 7000 Series:
- Homeowner's manual (15 pages) ,
- User manual (8 pages) ,
- Programming and application manual (28 pages)
Table of Contents
Advertisement
Quick Links
E2009 Lennox Industries Inc.
Dallas, Texas, USA
05/09
*P506227-01*
Install base in desired location
UNPACKAGE THE THERMOSTAT AND
OPEN THE CASE WITH A FLAT−BLADE
SCREWDRIVER. PLACE BETWEEN BASE
AND UNIT AND TWIST TO SEPARATE
UNIT FROM BASE.
DRILL TWO 3/16" HOLES AT EITHER HOR-
IZONTALLY OR VERTICALLY MARKED
LOCATIONS ON WALL FOR ANCHORS
Connect wiring, seal hole, and setup thermostat
1. Connect wiring between thermostat, indoor unit, and outdoor unit
similar to that shown below. See unit-specific wiring diagrams on
back page.
2. Connect the outdoor sensor (if used) to the 'T' connections on the
thermostat (wire run should not exceed 300' [91m]).
Before beginning installation, note the type of equipment, number of stages, and any accessories being
installed. The ComfortSense
wire to the thermostat to operate. Observe the specifications and the DO's and DO NOT's that follow:
Use 18 gauge thermostat wire or larger.
Maximum load 1 Amp or less.
Shut off all power to system before installing
Read this entire document, noting which in-
structions pertain to your equipment and sys-
tem requirements.
Make sure that all wiring conforms to local
and national building and electrical codes and
ordinances.
Use thermostat wire between the thermostat
and the optional outdoor temperature sensor
(may be separate wire pair or two wires of a
506227−01
multi−wire cable). No shielded or twisted−wire
pair is needed.
Consult the ComfortSense
gramming and Application Guide 506228−01.
PULL ABOUT 3" OF THERMO-
STAT WIRE THROUGH OPENING
AND REMOVE OUTER THERMO-
CUT OR DRILL
STAT WIRE JACKET.
A SMALL HOLE
FOR THERMO-
THIS WILL
STAT WIRING
HELP IN
ROUTING
THE THER-
MOSTAT WIR-
1/2"
ING TO THE
PROPER
THERMOSTAT
1/2"
TERMINALS
1
2
INSERT WALL
ANCHORS IN
HOLES.
6
OUTDOOR
INDOOR
UNIT
Quick−Start Installation Instructions
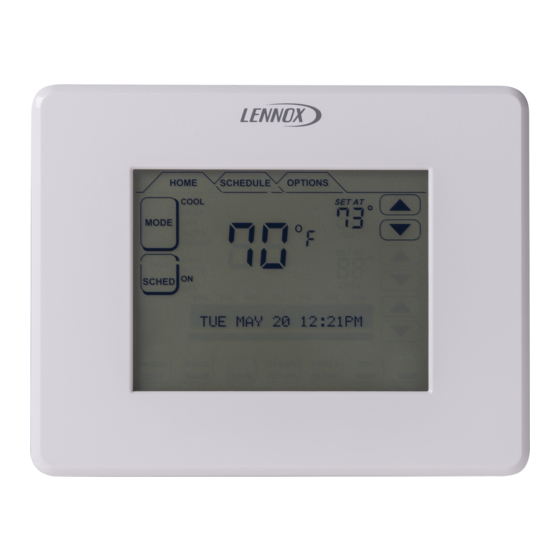
ComfortSense
Touch Screen Programmable Thermostat
IMPORTANT! READ THIS FIRST!
®
L7742U thermostat is a 24VAC low−voltage thermostat and requires a common
DO
®
7000 Series Pro-
3
TAP DOWN THE AN-
CHORS UNTIL FLUSH
WITH WALL.
7
8
3. Seal the hole in the wall with a suitable material to prevent drafts
from entering the thermostat case.
4. Configure thermostat and equipment for system type, program
the thermostat, and test system (see minimum configuration
guide on back page or Programming and Application Guide).
®
COMFORTSENSE
UNIT
7000
OUTDOOR
SENSOR
®
7000 Series Model No. L7742U
Maximum wire run length 300' (one way).
DO NOT
Install on voltages higher than 30VAC.
Short (jumper) across terminals on the gas
valve or at the system control to test installa-
tion. This will damage the thermostat and
void the warranty. Instead, use testing func-
tion in the thermostat shown on back
page.
Install on outside walls or in direct sunlight
Install for commercial applications unless
used with approved split-system matches,
and all wiring and load criteria is been met.
USE THE UNIT BASE AS A TEMPLATE
AND A LEVEL TO MARK TWO MOUNTING
TRIM 1/4"
HOLE LOCATIONS ON WALL. USE EITHER
INSULATION
VERTICAL OR HORIZONTAL HOLES.
FROM END
OF EACH
WIRE
VERTICAL
1/4"
4
(USE A LEVEL)
ALIGN BASE
OVER PLASTIC
ANCHORS;
SECURE TO WALL
USING PROVIDED
SCREWS.
TERMINAL DESIGNATIONS
T −
Outdoor Temp. Sensor Connection 1 (Opt.)
T −
Outdoor Temp. Sensor Connection 2 (Opt.)
C −
Common 24 Vac
Y2 − 2nd stage heating or cooling
Y1 − 1st stage heating or cooling
B −
Heat active reversing valve
D −
Dehumidification relay (to DS terminal)
H −
Humidification relay (to Humidifier)
L −
System check (HVAC Fault Detected?)
O −
Cool active reversing valve
W1 − 1st stage heating (non−heat pump or emergency
heat) or 3rd stage heating (heat pump)
W2 − 2nd stage heating (non−heat pump) or 4th stage
(heat pump)
G −
Fan relay
R −
24 Vac power
HORIZON-
TAL
5
9
Advertisement
Table of Contents

Related Manuals for Lennox ComfortSense 7000 Series


Summary of Contents for Lennox ComfortSense 7000 Series
- Page 1 Quick−Start Installation Instructions ® ComfortSense 7000 Series Model No. L7742U Touch Screen Programmable Thermostat E2009 Lennox Industries Inc. Dallas, Texas, USA IMPORTANT! READ THIS FIRST! Before beginning installation, note the type of equipment, number of stages, and any accessories being ®...
-
Page 2: Wiring Diagrams
Wiring Diagrams Configure and test thermostat Press OPTIONS tab, then use the down arrow to select INSTALLER SET- SYSTEM TEST MODES Press OPTIONS tab, go to INSTALLER SETTINGS, TINGS. Press ENTER; a note states MUST BE SET BY QUALIFIED PER- then press up arrow twice to select SYSTEM TEST MODES.
Need help?
Do you have a question about the ComfortSense 7000 Series and is the answer not in the manual?
Questions and answers