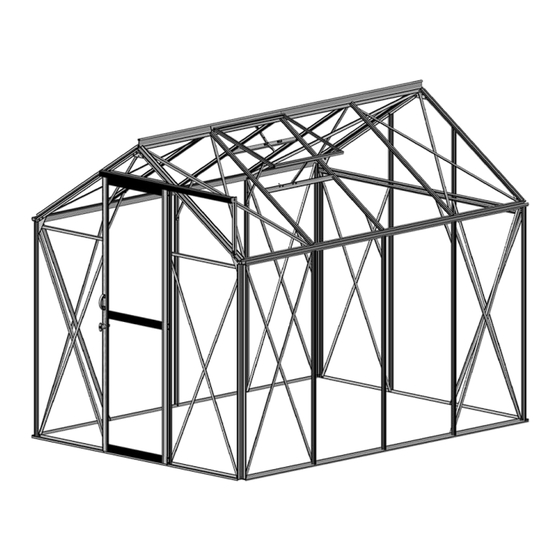
Summary of Contents for Hunkin Garden Titan 79 EB
- Page 1 Titan 79 EB Greenhouse Assembly Instructions Hunkin Garden Products Ltd Model Titan 79 EB sales@hunkin.co.nz www.hunkin.co.nz Ph 0800 14 48 65...
- Page 2 We endeavour to supply a quality product, however should you encounter a problem please contact Hunkin Garden Products Ltd either by email hunkin-garden@xnet.co.nz or by free phone 0800 14 48 65. To help identify the problem please refer to the assembly instructions and the list of compo-...
- Page 3 Caution Peel back approximately 2 inches (50mm) of film from both sides before installing. Remove all film immediately after the construction is completed. Mark the sheets with permanent felt tip pen to indicate the correct side to the The UV-protected side of the sheet is printed and must face towards the sun.
- Page 4 The base is powder coated green. This protects the base from ground salts and makes it far more Base durable when in ground contact. Dig a hole a minimum depth of 300mm or until you reach hard clay with a spade and give it some undercut before concreting the base pegs in.
- Page 5 Front gable (view from inside looking out) Package No.1 2038 1535 1198 1198 1995 1995 1634 1623 M6x10 Preload two bolts into each 661 before assem- bly. Used to fasten 712 and 723.
- Page 6 Rear gable (view from inside looking out) Package No.2 2038 1535 1198 1198 2009 2009 2036 1634 1623 M6x10 M6x15 Preload 663 and 664 with two bolts . These are used to fasten horizontal braces. a1/a2 a3/a2...
- Page 7 Side wall Package No.3 2802 1535 2802 1674 1674 M6x10 Titan 709 Preload an extra bolt into 666 before assembly. Used for eave braces later.
- Page 8 Roof Package No.4 All 682 profiles should be preloaded with 2 bolts ie: all 682 profiles should have 2 free bolts once the eave and ridge have been attached. These bolts will be used to connect the eave brace. Vent parts 521 also need these bolts.
- Page 9 Vent (Build the vent around polycarbonate sheet B7. B7 is inserted into the Package No.6 rebated vent frame. No glue required) 678 M6x10 M6 M4x8 M4 Φ4.2x9.5 a1/a2 Vent No. Notes on vent assembly No silicone is used on the vent poly- carbonate.
- Page 10 Door Package No.5 (Tip: Grease the self-tapping screws before you screw them in) Size 1235 1967 1967 P4 has slots. When attaching p4 leave it flush with 591 & 592 until you have put the door on the top runner 592. P4 is used to hold the bottom of the door in position (next M6 Φ3.5x19 Φ3.5x25 M4 Size...
- Page 11 Use grease on the self tapping screws so they go in easier Door No silicone glue is required on the door polycarbonate Package No.5 Slide the door rollers into the top rail 571, fig7. To get past the frame upright 664 gently pull the bottom of the door out so it clears it.
- Page 12 Base The frame, once completed and prior to glazing with polycarbonate, can now be lifted onto the base. Only do this if the concrete has set. With a helper on each corner the greenhouse can be easily lifted into place. Secure the frame immediately to the base while the helpers hold the greenhouse frame.
- Page 13 Polycarbonate sheets s-585,f-3 Before you start to mount the poly- carbonate make sure the frame is square. All the criss-cross braces should be tight so adjust the frame until they are. It is easiest to fit the polycarbonate to the roof first be- cause you can put a leg of a ladder through the unclad sides for extra stability if required.
- Page 14 Installing the polycarbonate sheet (see page 16 for extra information) Titan 79 PVC capping bars (U shaped) are put over 677x1553/1991 the ends of the sheet (top and bottom) to stop 609x2002/2200/2002 moisture and bugs from getting into the twin 609x4/204/4 wall portions of the polycarbonate.
- Page 15 Polycarbonate sheet PVC Locking strip Step6 Step1 Step4 Step3 Step2 Step5 Step6 Step1 Step4 Step3 Step2 Step5 PVC Locking strip Note: PVC locking strips are pushed into place from the top and the bottom in a diagonal direction, bit by bit, so the PVC locking strips are fitted evenly. If you fully insert the PVC locking strips from one side only, the polycarbonate panel may move sideways making it very difficult to insert the PVC locking strip to the other side.
- Page 16 Installing the polycarbonate sheet Inserting PVC locking strips. W clips and PVC locking strips are supplied with the greenhouse. PVC locking strips are far superior to W clips in the wind so we recommend you use them. W clips have just been left in the kits to be used in case you are short shipped PVC locking strips.


Need help?
Do you have a question about the Titan 79 EB and is the answer not in the manual?
Questions and answers