
Related Manuals for Kingspan TMS300 MULTI-TANK CS


Summary of Contents for Kingspan TMS300 MULTI-TANK CS
- Page 1 GLOBAL TELEMETRY SOLUTIONS GLOBAL TELEMETRY SOLUTIONS POWERED BY KINGSPAN SENSOR POWERED BY KINGSPAN SENSOR TMS300 MULTI-TANK CS User and Installation Manual WE PUT OUR TELEMETRY SOLUTIONS TO WORK FOR YOU Page 1...
-
Page 2: Table Of Contents
GLOBAL TELEMETRY SOLUTIONS POWERED BY KINGSPAN SENSOR CONTENTS Page 3 SPECIFICATION Page 5 SAFETY PRECAUTIONS Page 6 MOUNTING Page 8 ELECTRICAL CONNECTION Page 8 BATTERY Page 9 TMS300 OPERATION M< A NUAL Page 14 WEB SERVER CONNECTION Page 18 WEB SERVER OPERATING MANUAL/CHANNEL WIzARD... -
Page 3: Relay Outputs
GLOBAL TELEMETRY SOLUTIONS POWERED BY KINGSPAN SENSOR SPECIFICATION 1. DIMENSIONS Note: The information supplied in this manual is for guidance only – no part of this may be used for any agreement, whether express or implied, or to form any contract. - Page 4 GLOBAL TELEMETRY SOLUTIONS POWERED BY KINGSPAN SENSOR 6. CONNECTIVITY Embedded Web Server Connect Sensor ❱ ❱ ❱ ❱ direct connection via ethernet cable GSM 2G/3G — ❱ — ❱ internet (port forwarding required) local network ❱ — ❱ — ❱...
-
Page 5: Safety Precautions
GLOBAL TELEMETRY SOLUTIONS POWERED BY KINGSPAN SENSOR INSTALLATION SAFETY PRECAUTIONS Note: This installation The following safety precautions are strongly recommended: procedure is for guidance only, and its suitability should be Before attempting to install and operate the unit, read the instruction and installation ❱... -
Page 6: Wall Mount
GLOBAL TELEMETRY SOLUTIONS POWERED BY KINGSPAN SENSOR MOUNTING WALL MOUNT Drill four holes in the wall, according to the template and insert the wall plugs ❱ ❱ Remove the Front Lid by unscrewing two screws ❱ ❱ Disconnect the modules ❱... -
Page 7: Panel Mount
GLOBAL TELEMETRY SOLUTIONS POWERED BY KINGSPAN SENSOR 296 mm Area required to be cut out for Panel mount 169 mm Template, page 29 50 mm 50 mm Panel mount Fixing Panel mount Fixing screw screw Panel mount fixing Panel mount fixing... -
Page 8: Electrical Connection
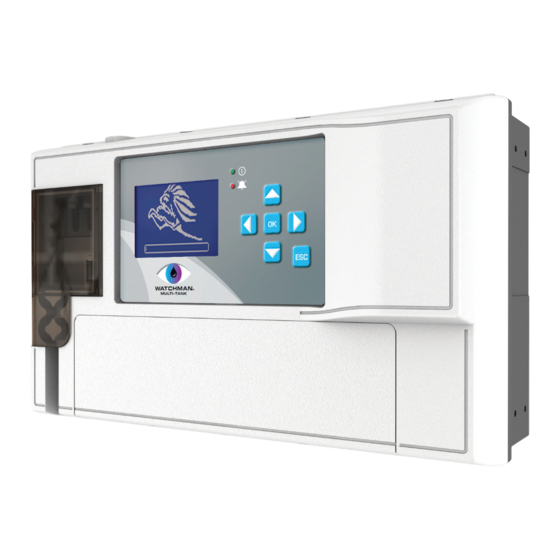
GLOBAL TELEMETRY SOLUTIONS POWERED BY KINGSPAN SENSOR ELECTRICAL CONNECTION Note: This device should be properly earthed. Flexible wires simplify connection to the terminals. All connections should be secure and adequately tightened. It is good practice to keep mains cables away from sensor cables and other low voltage signal cables. - Page 9 GLOBAL TELEMETRY SOLUTIONS POWERED BY KINGSPAN SENSOR TMS300 MULTI-TANK CS OPERATION In order to fully understand the operation of the unit, this section should be read carefully. Power ON/OFF indicator Alarm Triggered Indicator Max. Volume Alarm Hard Max. Volume Alarm Soft (blinking icon) Min.
-
Page 10: Main Menu
GLOBAL TELEMETRY SOLUTIONS POWERED BY KINGSPAN SENSOR MAIN MENU This screen allows user to choose any options available. To back to MAIN MENU press the 1. TANKS These screens allow user to view all the sensor status for each channel, e.g. - Page 11 GLOBAL TELEMETRY SOLUTIONS POWERED BY KINGSPAN SENSOR 2. NETWORK This screen allows user to set up the Network connection. User can choose DHCP option or manually enter the IP address. To set Automatic Network Configuration, use the key to select DHCP and use key to select or deselect this option.
- Page 12 GLOBAL TELEMETRY SOLUTIONS POWERED BY KINGSPAN SENSOR 4. LCD BACKLIGHT ON/OFF This screen allows user to switch ON/OFF ‘AUTO BACKLIGHT’ option. to choose the option and press the key to confirm. - Backlight will stay ON all the time - Backlight will switch OFF automatically in approx. 2 minutes if no key has been pressed 5.
- Page 13 GLOBAL TELEMETRY SOLUTIONS POWERED BY KINGSPAN SENSOR 6. WEBSERVER PASSWORD This screen allows user to reset the webserver ‘admin’ account password. to choose the password and press key to confirm. * To change the password, user will need to confirm the old one.
-
Page 14: Web Server Connection
GLOBAL TELEMETRY SOLUTIONS POWERED BY KINGSPAN SENSOR WEBSERVER CONNECTION To connect with unit’s embedded Web Server, connect unit to the network (switch, hub, router etc.) using Ethernet CAT-5 cable or directly to the network adapter on your computer and open a web browser - Windows Internet Explorer (version 8.0 or higher) or Firefox. - Page 15 GLOBAL TELEMETRY SOLUTIONS THX Datalogger POWERED BY KINGSPAN SENSOR 2. DIRECT CONNECTION Check the MTMS network settings. ❱ ❱ Use the keypad and navigate to the appropriate screen MAIN MENU->NETWORK Note: The network setting may vary between devices. Laptop Connect MTMS to the computer using Ethernet cable.
- Page 16 GLOBAL TELEMETRY SOLUTIONS POWERED BY KINGSPAN SENSOR Note: The last octet of the computer’s IP address (“60” in this example) should be different than the last octet of the MTMS IP address (“57” in this example). The subnet mask and default gateway should be identical.
- Page 17 GLOBAL TELEMETRY SOLUTIONS POWERED BY KINGSPAN SENSOR 3. Wi-Fi CONNECTION (USB Wi-Fi ADAPTER REQUIRED) The USB Wi-Fi adaptor lets you create a WiFi network from a unit ❱ to allow connection with webserver on all of your wireless devices including tablets, laptops / Ultrabooks and smartphones.
- Page 18 GLOBAL TELEMETRY SOLUTIONS POWERED BY KINGSPAN SENSOR CONFIGURING SENSOR AND TANK DETAILS 1. CHANNEL WIZARD This screen allows user to configure sensor and tank details. STEP 1 Choose the channel, set name and click NEXT STEP 2 Choose the sensor, fill in the required informations and click NEXT...
- Page 19 GLOBAL TELEMETRY SOLUTIONS POWERED BY KINGSPAN SENSOR - 4-20mA Pressure Sensor -4-20mA Waveguide (Watchmansonic) Enter the Sonic Height. Sonic Height - distance between the base of sensor to bottom of the tank -4-20mA utrasonic sensor -Watchmansonic (only with RF module) Enter the Sonic Height.
- Page 20 GLOBAL TELEMETRY SOLUTIONS POWERED BY KINGSPAN SENSOR STEP 3 Choose the tank shape and fill in dimensions. Click ‘Calculate’ to obtain tank capacity or type in manually. *To add the strapping table, choose Irregular tank and click ‘Next’ Fill in the table or upload file with existing strapping table.
- Page 21 GLOBAL TELEMETRY SOLUTIONS POWERED BY KINGSPAN SENSOR STEP 4 Set the alarm thresholds. STEP 5 Check the actual reading from sensor and click ‘FINISH’ to apply settings. 2. CONNECTIVITY WIZARD This screen allows user to connect to remote server. Page 21...
- Page 22 POWERED BY KINGSPAN SENSOR - GSM - KINGSPAN SIM CARD For connection using SIM CARD supplied by Kingspan For SIM CARD activation please contact Customer Service. Please wait for GPRS reg: OK and then click TEST button. Test results will be displayed in few minutes.
- Page 23 GLOBAL TELEMETRY SOLUTIONS POWERED BY KINGSPAN SENSOR - INTERNET (port forwarding required, please contact with your Network Administrator) Clik TEST button. Test results will be displayed in few minutes. If Success, click Finish. Do not proceed if the test has failed as this will not allow to register on Connect Sensor.
- Page 24 GLOBAL TELEMETRY SOLUTIONS POWERED BY KINGSPAN SENSOR 3. RELAYS This screen allows user to associate any channel with a number of relay outputs, (i.e. alarm relays) e.g. if channel 1 goes into alarm mode, each alarm associated with channel 1 will be triggered...
- Page 25 GLOBAL TELEMETRY SOLUTIONS POWERED BY KINGSPAN SENSOR 4. SETUP SUMMARY This screen allows user to view all the settings for each channel, e.g. tank details, relays etc. 5. REAL-TIME DATA This screen allows user to view all the data from the channels.
- Page 26 GLOBAL TELEMETRY SOLUTIONS POWERED BY KINGSPAN SENSOR 7. UPDATE This screen allows user to update the software via WebServer. See page 21 for Software Update via USB cable Visit www.sensor-systems.com to check for latest software. Page 26...
-
Page 27: Software Upgrade
GLOBAL TELEMETRY SOLUTIONS POWERED BY KINGSPAN SENSOR TMS300 SOFTWARE UPGRADE BY USB CABLE STEP 1 Switch OFF the power supply. STEP 2 Take off the front lid and switch the battery backup off Fuse Battery switch Mains STEP 3 Press and hold the “OK” button. - Page 28 GLOBAL TELEMETRY SOLUTIONS POWERED BY KINGSPAN SENSOR STEP 5 Wait few seconds and release the button. STEP 6 The unit should enumerate as a “BOOTLOADER” USB Mass Storage STEP 7 Open the “BOOTLOADER” folder and drag-n-drop the s19 file. STEP 8 After copying file has been completed, disconnect the cable.
- Page 29 GLOBAL TELEMETRY SOLUTIONS POWERED BY KINGSPAN SENSOR Page 24...
Need help?
Do you have a question about the TMS300 MULTI-TANK CS and is the answer not in the manual?
Questions and answers