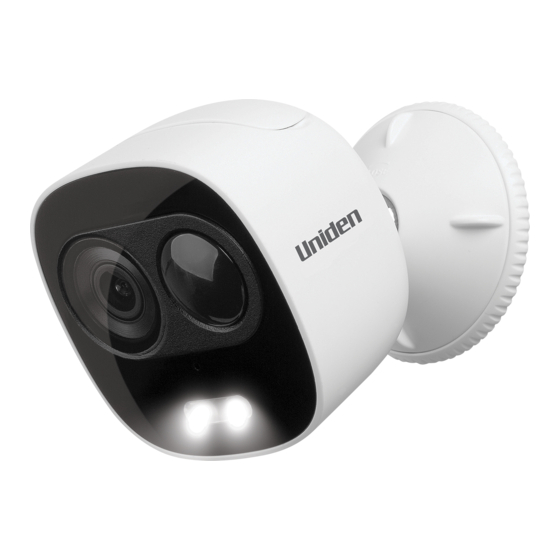
Uniden App Cam XLight Quick Start Manual

Uniden App Cam XLight Quick Start Manual

Wireless ip camera

Advertisement

Quick-Start Guide
App Cam XLight/X55/X56
Use this Quick-Start Guide to connect the camera to the network
and for basic installation and setup procedure. For more detailed
instructions refer to the online Owner's Manual on the Uniden
website www.uniden.com.au. This quick start guide is for reference
only. Slight difference may be found in user interface.

In the Box

Model
QSG
Power Adapter
Power Cable
Mounting Screw
Kit
Installation
Position Map
Mounting plate
Pry Bar
If any item is missing or damaged, contact your place of purchase
immediately. Never use damaged products!
Need help? Get answers at our website:
www.uniden.com.au for Australian model
Wireless IP Camera
App Cam XLight
1
1
-
1
1
-
1
App Cam X55
1
1
-
1
1
-
-
App Cam X56
1
1
1
1
1
1
-
1

Advertisement

Table of Contents
loading

Summary of Contents for Uniden App Cam XLight

  • Page 1 Use this Quick-Start Guide to connect the camera to the network and for basic installation and setup procedure. For more detailed instructions refer to the online Owner’s Manual on the Uniden website www.uniden.com.au. This quick start guide is for reference only.
  • Page 2: Important Safety Instructions

    Important Safety Instructions 1. Do not drop, puncture or disassemble the camera. 2. DO NOT expose the camera to excessive water or moisture. 3. Never tug on the power cable to unplug from the power outlet. Always grasp the AC adapter when unplugging. 4.
  • Page 3 Getting to know your App Cam XLight Note: The top cap can be opened with the pry bar included in the kit. Press the Reset/WPS button to enable WPS. Press and hold the Reset/WPS button for 10 seconds to reset the camera.
  • Page 4 Getting to know your App Cam X55 Note: Press the Reset/WPS button to enable WPS. Press and hold the Reset/WPS button for 10 seconds to reset the camera. App Cam X55 Installation Step 1: Mark and drill holes on the installation surface (wall or ceiling).
  • Page 5 Getting to know your App Cam X56 Built-in Speaker Micro SD Card Slo t Ethernet Por t Power Port Reset/WPS Butto n Note: Press the Reset/WPS button to enable WPS. Press and hold the Reset/WPS button for 10 seconds to reset the camera. App Cam X56 Installation Mounting Surface Step 1: Mark and drill holes on the Positioning Map...
  • Page 6 Light Indicators For App Cam XLight/X56 LED Indicator status Device status Powered off/LED switched off. Solid red light Booting/Device malfunction/Fail to boot up. Green light flashing Booting completed/ Waiting network configuration. Solid green light Network connection succeeded, operating normally. Red light flashing Network connection failure or disconnection after network connection.
  • Page 7: Before You Start

    Set Up the Camera Before You Start: • Your router must support WPA2 security and it must be turned on. • You must have an available WiFi-enabled mobile device (Android or iOS smartphone/tablet). • The camera and your mobile device must connect to the same network router for setup.
  • Page 8 5. Tap the ‘+’ icon at the top right corner to add the camera to the app. The Add Device screen displays. 6. Scan the Device ID QR code or enter the serial number of the camera manually. 7. If you already use the WPS button or an ethernet cable to connect the camera to the router, skip this step.
  • Page 9 You can now view video from your cameras on your smartphone. Edit System Settings Return GXVR 558800 Share Device to another user Change stream mode Pause/Play Video Stream Enter Full Screen Mode Enable/Disable Volume Change split screen layout View Recorded Video Timel Tap to talk.
  • Page 10: Reset The Camera

    Reset the Camera To reset the App Cam XLight/X55/X56, press and hold the WPS/Reset button for 10 seconds until the light indicator is off, then only release the ‘Reset’ button. Refer to page 6 for light indication meaning. Troubleshooting If...
  • Page 11 App Cam XLight/X55/X56 Important: Satisfactory evidence of the original purchase is required for warranty service. Please refer to our Uniden website for any details or warranty durations offered in addition to those contained below. Warrantor: The warrantor is Uniden Australia Pty Limited ABN 58 001 865 498 (“Uniden Aust”).
  • Page 12 Product does not conform with this warranty, you should deliver the Product, together with satisfactory evidence of your original purchase (such as a legible copy of the sales docket) to Uniden at the address shown below. You should contact Uniden regarding any compensation that may be payable for your expenses incurred in making a warranty claim.
  • Page 13 Guardian 365 Pro App Guide For more exciting new products please visit our website: Australia: www.uniden.com.au OWNER’S MANUAL...
  • Page 14: About This Manual

    Privacy Protection Notice As the device user or data controller, you might collect personal data of others' such as face, fingerprints, car plate number, Email address, phone number, GPS and so on. You need to be in compliance with the local privacy protection laws and regulations to protect the legitimate rights and interests of other people by implementing measures include but not limited to: providing clear and visible identification to inform data subject the existence of surveillance area, providing data subject with proper access to their personal data and providing related...
  • Page 15: Basic Operations

    Basic Operations The Manual introduces the operations of Guardian 365 Pro App, and some functions might associate with the operations on the device. Logging in Guardian 365 Pro Open the Guardian 365 Pro App on your smartphone. The Login interface is displayed.
  • Page 16 For the first time using Guardian 365 Pro App App, tap Sign up. The Sign up interface is displayed. In the country/region list, select country or region where you are located, and then tap Next. The account setting interface is displayed.
  • Page 17 Enter the email address for the account name and set the password, read Uniden Privacy Policy and tap I have read and agreed, and then tap Verification code. The verification code entering interface is displayed. Get the verification code from your email box, enter the verification code, and then tap The Login interface is displayed and the system automatically logins Guardian 365 Pro App.
  • Page 18 Adding a Device You can add App Cam X series cameras and GXVR55 series to the Guardian 365 Pro App. 1.2.1 Adding an IP Camera You can add App Cam X cameras to Guardian 365 Pro App through Wi-Fi connection or wired connection (if applicable).
  • Page 19 Tap Next till the password entering interface is displayed. Enter the Wi-Fi password and then tap Next. The network configuring interface is displayed. After the connection succeeded, the password setting interface is displayed.
  • Page 20 The system starts adding device to your Guardian 365 Pro account. After the device is added, the connected status interface is displayed. Configure the time zone, DST, and default settings according to your requirement, and then tap Next. The live view interface is displayed. The settings of time zone and DST will affect some functions uses of Guardian 365 Pro App.
  • Page 21: Live View

    Live View The live view provides you a real-time video display. You can perform the operations such as pause, window splitting, and mute.
  • Page 22 Icon Function Plays or pauses the video. Switches between single-window view and four-window view. Switches between standard definition and high definition. Mutes or unmutes the video. Displays video in landscape mode. Tap to exit the landscape display mode. In landscape display mode, tap to lock the screen from auto switching to normal display mode by gravity.
  • Page 23 Playing Back the Recorded Video On the live view interface in normal display mode, click View record history. On the live view interface in landscape display mode, click The Record History interface is displayed. Record history (normal display mode) Record history (landscape display mode)
  • Page 24 Record history interface Icon Function Plays or pauses the recorded video. Mutes or unmutes the video. Displays video in landscape mode. Tap to exit landscape mode. Tap this icon to take a snapshot. Tap this icon to start instant recording. The icon switches to in normal display mode and in landscape display mode.
  • Page 25 Using Cloud Storage Service The Guardian 365 Pro App provides you the Cloud service to extend your storage capability. To use this service, do the following: On the Device interface, tap Tap the check box of the service type that you want to buy, tap Buy, and then follow the onscreen instructions to complete the purchasing.
  • Page 26 Parameter Function Displays device information such as device name, model name, and Device name SN. You can also reset device password from here. If the Smart Track function is enabled, when there is an object Smart Track appears, the camera automatically follows its moving track till it is out of the view.
  • Page 27 Alert List You can view the alerts on the Alert List interface. Alert List All notification that relates to your device will be shown here. Tap the video to enter the calendar interface. Tap the date that you want to view the recorded videos, and the videos satisfying requirement display.
  • Page 28 Settings To modify account settings. Table 1-1 Account information Parameter Function My Device Enters the device information interface. View the orders of Cloud storage plan such as unpaid order, paid Order History order, and cancelled order. Security To modify Guardian 365 Pro account information. If This Then That (IFTTT) is a free web-based service to create chains of simple conditional statements which are called applets.
  • Page 29 Using IFTTT Function To introduce IFTTT function, the Manual takes activating alarm mode when you leave home as an example. This operation links your smartphone GPS to the alarm mode of your camera. On the Me interface, tap IFTTT. The IFTTT main interface is displayed. Tap When I have home, toggle camera alarm mode.
  • Page 30 Tap Save password. Now the password setting from your email box has been completed. You can return to your Guardian 365 Pro App. On the Guardian 365 Pro App, tap Connect Location. The interface indicating your location and IFTTT account are now connected is displayed.
  • Page 31 © 2018 Uniden Australia Pty Limited. Version 1.0...

This manual is also suitable for:

App cam x55App cam x56

Table of Contents