Table of Contents
Advertisement
Advertisement
Table of Contents

Related Manuals for Terasic D8M-GPIO


Summary of Contents for Terasic D8M-GPIO
- Page 1 Terasic Inc. September 26, 2018 D8M-GPIO User Manual...
-
Page 2: Table Of Contents
3.5 Camera Configuration ................14 Chapter 4 RTL Example Codes ............16 4.1 Using LINE- BUFFER ................16 4.2 Using FRAME - BUFFER ..............21 Chapter 5 NIOS Based Example Codes ..........24 www.terasic.com Terasic Inc. September 26, 2018 D8M-GPIO User Manual... - Page 3 5.1 DE1_SOC and DE2-115 D8M_VIP Demonstration ........ 24 5.2 DE1_SOC_D8Mx2_VIP Demonstration ..........28 5.3 C5G_D8M_VIP Demonstration .............. 34 Chapter 6 Appendix ................38 6.1 Revision History ..................38 6.2 Copyright Statement ................38 www.terasic.com Terasic Inc. September 26, 2018 D8M-GPIO User Manual...
-
Page 4: D8M Development Kit
D8M on his/her own application. 1.1 Package Contents Figure 1-1 The D8M package contents The D8M package includes: ⚫ Product Box www.terasic.com Terasic Inc. September 26, 2018 D8M-GPIO User Manual... -
Page 5: D8M System Cd
CD from the link: http://d8m.terasic.com/cd. 1.3 Assemble the Camera Terasic D8M is able to connect on to any FPGA development kit that is equiped with a 2x20 Pin GPIO connector. The pictures below show the connections allowing the D8M to connect to 3 different Terasic FPGA Boards: Figure 1-2 Connect the D8M to DE2-115 board’s expansion port... -
Page 6: Getting Help
Here are the addresses where you can get help if you encounter any problems: Terasic Technologies 9F., No.176, Sec.2, Gongdao 5th Rd, East Dist, Hsinchu City, 30070. Taiwan Email: support@terasic.com Tel.: +886-3-575-0880 Website: http://d8m.terasic.com www.terasic.com Terasic Inc. September 26, 2018 D8M-GPIO User Manual... -
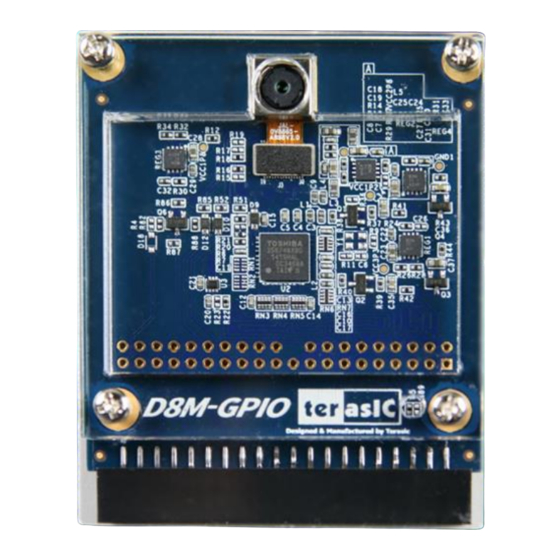
Page 7: Chapter 2 Introduction Of The D8M Board
◼ Frame Rate:8-Mega Pixels @30fps ◼ Support Focus Control ◼ Programmable controls for frame rate, mirror and flip, cropping, and windowing ⚫ MIPI Decoder: ◼ Chip P/N:TC358748XBG ◼ MIPI CSI-2 Compliant www.terasic.com Terasic Inc. September 26, 2018 D8M-GPIO User Manual... -
Page 8: Block Diagram Of The D8M Board
Lanes MIPI interface image data, which can be converted to Parallel data by passing through the MIPI Decoder IC to the GPIO interface. Both MIPI Camera Module and MIPI Decoder can be controlled by FPGA I2C interface. Figure 2-2 Block diagram of D8M Board www.terasic.com Terasic Inc. September 26, 2018 D8M-GPIO User Manual... -
Page 9: Using The D8M Board
Decoder and GPIO connector on the D8M board. 3.1 MIPI Camera Module Terasic D8M board equips with an 8M pixel MIPI camera module named OV8865 (See Figure 3-1). The OV8865 color image sensor is a high performance, 8 megapixel RAW image sensor that delivers 3264x2448. - Page 10 Auto Focus (AF) feature. Terasic also provides an AF demonstration and IP in the System CD. See section 4.x for details. The datasheet of this VMC driver IC named VM149C VCM Driver IC.pdf also can be found in the System CD.
-
Page 11: Mipi Decoder
3.2 MIPI Decoder The MIPI camera module output interface is MIPI interface, which cannot directly connect to the Terasic FPGA board; therefore, a MIPI Decoder (TC358748XBG) is added to convert MIPI interface to a parallel port interface (See Figure 3-3). Decoder users can quickly obtain the image data and process it. -
Page 12: Gpio Connector
3.3V MIPI_PIXEL_D[9] Parallel Port Data Output 3.3V MIPI_PIXEL_D[10] Reserve Output 3.3V MIPI_PIXEL_D[11] Reserve Output 3.3V MIPI_PIXEL_D[12] Reserve Output 3.3V MIPI_PIXEL_D[13] Reserve Output 3.3V MIPI_RESET_n Master Reset signal for MIPI Input 3.3V www.terasic.com Terasic Inc. September 26, 2018 D8M-GPIO User Manual... - Page 13 Table 3-2 DC Electrical Specification Parameter Symbol Min. Max. Unit Input voltage, High level input 2.31 Input voltage, Low level input 0.99 Output voltage High level 2.64 Output voltage Low level 0.66 www.terasic.com Terasic Inc. September 26, 2018 D8M-GPIO User Manual...
-
Page 14: Clock Tree
To get a better image quality, the following register settings are strongly recommended. These settings are all applied in the CD demo code. For detail information about the registers, please refer the OV8865 datasheet included in the System CD. www.terasic.com Terasic Inc. September 26, 2018 D8M-GPIO User Manual... - Page 15 Increase the analog gain a bit to compensate for the BLC offset. 0x5000 0x16 Turn off the LENC (lens correction) compensation. This setting creates a very even light distribution across the screen. www.terasic.com Terasic Inc. September 26, 2018 D8M-GPIO User Manual...
-
Page 16: Rtl Example Codes
I2C buses. MIPI_I2C bus is used to write MIPI decoder IC (I2C Slave Address = 0x1c.), CAMERA_I2C bus is used to write Camera Sensor (IC Slave Address = 0x6c). www.terasic.com Terasic Inc. September 26, 2018 D8M-GPIO User Manual... - Page 17 Once you set SW3 to a value (0 or 1) and press KEY3 one time, the automatic focus operation will be performed in the selected area. ⚫ FpsMonitor: This module will count D8M MIPI_PIXEL_VS signal pulses in 1 www.terasic.com Terasic Inc. September 26, 2018 D8M-GPIO User Manual...
- Page 18 Figure 4-2 Figure 4-2 DE1-SoC demo hardware setting up ◼ Design Tools ⚫ Quartus II v15.0 ◼ Demonstration Source Code ⚫ Quartus project directory: DE1_SOC_D8M_LB_RTL ⚫ Nios II Eclipse project workspace: DE1_SOC_D8M_LB_RTL.sof www.terasic.com Terasic Inc. September 26, 2018 D8M-GPIO User Manual...
- Page 19 HEX1-0 Display FRAME RATE in two decimal number KEY0 SYSTEM RESET KEY3 Image auto focus(area based on SW3 selection) 0: No yellow box (focus on whole screen area) 1: There is a yellow box(focus on yellow box) www.terasic.com Terasic Inc. September 26, 2018 D8M-GPIO User Manual...
- Page 20 Connect the DE2-115 board (J9) to the host PC with a USB cable and install the USB-Blaster II driver if necessary. ⚫ Plug D8M onto DE2-115 JP5 (GPIO), connect VGA monitor to J13 (VGA) see Figure 4-3. ⚫ Plug the 12V adapter to DE2-115 Board. www.terasic.com Terasic Inc. September 26, 2018 D8M-GPIO User Manual...
-
Page 21: Using Frame - Buffer
Frame image), and how to extract Frame-Buffer address data to convert RAW data to VGA data, and output the VGA data to VGA monitor with 640x480@60 Hz VGA timing. ◼ Function Block Diagram www.terasic.com Terasic Inc. September 26, 2018 D8M-GPIO User Manual... - Page 22 640x480@60Hz too. The demonstration setting up methods are the same with section 4.1.Please see following instructions for details. DE1-SoC Demonstration: ◼ Design Tools ⚫ Quartus II v15.0 ◼ Demonstration Source Code www.terasic.com Terasic Inc. September 26, 2018 D8M-GPIO User Manual...
- Page 23 Plug the 12V adapter to DE2-115 Board. ⚫ Power on the DE2-115 board. ⚫ Execute the demo batch file “test.bat” from the directory\ DE2_115_D8M_RTL\demo_batch. ⚫ Below operations are the same with section 4.1 DE2_115 Line-Buffer Dem www.terasic.com Terasic Inc. September 26, 2018 D8M-GPIO User Manual...
-
Page 24: Chapter 5 Nios Based Example Codes
The Frame Buffer from VIP is used for buffering image data in DDR3 and matching the frame rate from the Terasic camera IP to the Clock Video Output of VIP. It displays the final 640x480 RGB frame image on the VGA Monitor. The auto-focus IP by Terasic can be used to get a better image quality by finding the optimized focus setting. - Page 25 TC358748XBG. Note: The focus driver IC (VM149C) in the camera module is also configured by the Terasic auto-focus IP through its own I2C master controller. Users must make sure there is only one I2C master used one at a time.
- Page 26 ⚫ Press KEY1/2 to trigger the manual focus adjustment. ⚫ Press KEY3 to trigger the ZOOM function. ⚫ Table 5-1 summarizes the functional keys. Figure 5-2 Setup Connection of DE1_SOC_D8M_VIP demonstration www.terasic.com Terasic Inc. September 26, 2018 D8M-GPIO User Manual...
- Page 27 Connect the DE2-115 board (J9) to the host PC with a USB cable and install the USB-Blaster II driver if necessary. ⚫ Plug the D8M onto the DE2-115 JP5 (GPIO), and connect the VGA monitor to J13 (VGA). www.terasic.com Terasic Inc. September 26, 2018 D8M-GPIO User Manual...
-
Page 28: De1_Soc_D8Mx2_Vip Demonstration
Altera VIP (Video Image Processing) suite and finally displays images on the VGA monitor. ◼ Function Block Diagram Figure 5-4 shows the Function block diagram of DE1_SOC_D8MX2_VIP demonstration. www.terasic.com Terasic Inc. September 26, 2018 D8M-GPIO User Manual... - Page 29 FPGA. Insside the FPGA, image data will enter the Terasic Camera IP, Cliper, Terasic AutoFocus and Scaller blocks sequentially. After that, 10bit RAW data will be converted to 24-bit RGB data (in 640x480 resolution) and stored into the SDRAM as a cache via the Frame Buffer block.
- Page 30 Terasic auto-focus IP through its own I2C master controller. Users must make sure there is only one I2C master used a time. ◼ KEY IP Descriptions In this demonstration, the default camera settings are: ⚫ Terasic Camera IP implements RAW to RGB and avalon-ST streaming package conversion.
- Page 31 ⚫ Connect the two D8M modules to GPIO0 (JP1) and GPIO1 (JP2) on DE1-SOC board (See Figure 5-5). ⚫ Connect the VGA output of the DE1-SOC board to a VGA monitor. www.terasic.com Terasic Inc. September 26, 2018 D8M-GPIO User Manual...
- Page 32 Figure 5-6 Four display modes in Mixer function. ⚫ Press KEY1/2 to scale camera video to left/right position (See Figure 5-7) or upper left / lower right position (See Figure 5-8). www.terasic.com Terasic Inc. September 26, 2018 D8M-GPIO User Manual...
- Page 33 Press KEY3 to trigger Stop/Run camera0 (SW0 in low position) or camera1 (SW0 in high position) function. ⚫ Note : Put SW0 to high position to configure camera1, put SW0 to low position to configure camera0. Table 5-3 summarizes the functional keys. www.terasic.com Terasic Inc. September 26, 2018 D8M-GPIO User Manual...
-
Page 34: C5G_D8M_Vip Demonstration
Nios II processor is used to configure the I2C devices. There is a Camera IP from Terasic in Qsys, which translates the Bayer pattern from camera to the RGB video steam format, and feeds it to Altera VIP. The other IP developed by Terasic for auto-focus is used to find the optimized focus settings of user-defined image area. - Page 35 Frame Buffer from the VIP is used for buffering image data in DDR3 and matching the frame rate from the Terasic camera IP to the Clock Video Output of the VIP. It displays the final 640x480 RGB frame image on the HDMI monitor. The auto-focus IP by Terasic can be used to get a better image quality by finding the optimized focus setting.
- Page 36 Terasic auto-focus IP through its own I2C master controller. Users must make sure there is only one I2C master used at a time. ◼ The default camera settings In this demonstration, the default camera settings are: ⚫ Resolution: 1920x1080 ⚫...
- Page 37 The functional keys of the digital camera demonstration Component Function Description KEY0 Trigger AutoFocus KEY1 Trigger Manual focus - KEY2 Trigger Manual focus + KEY3 Trigger ZOOM function HEX[1:0] fps (frames per sencond) www.terasic.com Terasic Inc. September 26, 2018 D8M-GPIO User Manual...
-
Page 38: Appendix
Modify Support information and page21 V1.1.0 Add recommend register setting for camera V1.1.1 Modify Figure 4-4 V1.1.2 Modify VCM149C to VM149C 6.2 Copyright Statement Copyright © 2018 Terasic Inc. All rights reserved. www.terasic.com Terasic Inc. September 26, 2018 D8M-GPIO User Manual... - Page 39 Mouser Electronics Authorized Distributor Click to View Pricing, Inventory, Delivery & Lifecycle Information: Terasic P0447...
Need help?
Do you have a question about the D8M-GPIO and is the answer not in the manual?
Questions and answers