Table of Contents
Advertisement
Quick Links
Technical data
Dimensions Hx W x D (mm)
Weight g (approx.)
Main voltage
Protection class
talento 471/472 pro, talento 881/882 pro
Power consumption
talento 791/792 pro
Switching capacity
– Ohmic load (VDE, IEC)
– Inductive load cos φ 0.6
EN
Operating manual
– Incandescent-/Halogen lamp load
– Fluorescent lamp
– Rated load AC1 / AC15
Switching contacts
Ambient temperature
Accuracy
Shortest switching interval
1 6 12 18 24
Switching state display
15 : 26
Sealable
1 OFF
ON 2
MENU
1
2
Installation and mounting
WARNING
Mounting on DIN rail
Put the device slightly inclined on top
of the rail. Then push it backwards
until it engages.
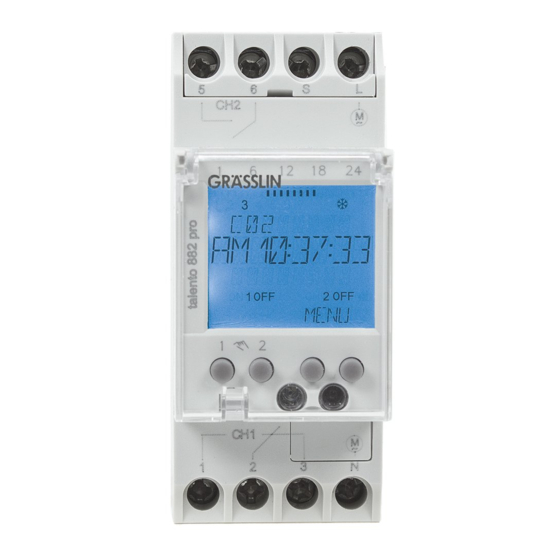
Connection diagram
CH1 = channel 1
CH2 = channel 2
S = external input
A momentary action push-button can
be assigned to remotely operate one
of the channels. See separate section
headed EXT I/P.
Operation and configuration
Display and function keys
• Switch-off commands have a higher priority than switch-on
commands.
• The central line of the display, in which the adjusted values and
selected menu items are displayed, is displayed larger.
Safety Instructions
• Flashing means that an entry is required. If you do not enter anything
within two minutes, the timer switches back to automatic operation.
Danger! Risk of electric shock!
• "MAINSOFF" appears on the display when the device is not supplied
with power.
Installation must be carried out by a
Z
Z
• "LOW BATT" appears on the display when a battery change is
WARNING
professional electrician!
required within the next two weeks.
• The programs are retained after a reset, although you will need to
• To avoid injuries, the device must be installed by a skilled
readjust date and time. Press all 4 buttons at the same time to reset
electrician only!
the device.
• Before changing the battery, the device must be disconnected
from the power supply!
Display
• Please observe the national regulations and safety instructions.
A Function displays of the two
• Interferences and changes to the device will invalidate the
left keys
warranty and guaranty rights.
B Switching state displays (ON/
2
• Minimum diameter of the flexible lines for the terminals: 1 mm
.
OFF/OVR/FIX)
2
Maximum diameter: 4 mm
.
C 3 display lines
D Weekdays
Read and observe these instructions to guarantee a perfect function
The assignment can be
of the device and a safe operation.
changed in the DATETIME
menu, for example to
1 = Sunday.
Default setting 1 = Monday
E Programmed switching times
F Radio antenna
G Display of summer/winter time
Information about the device
H Function displays of the two
right keys
Description of the device
Universal digital timer
Function displays of the two left keys:
• 100 or 400 memory locations
1)
Scroll upwards in the menu
• Date-based programming
Scroll downwards in the menu
• Pulse, cycle program
Accept selection/proposal
• P C-assisted program generation
+ Brief key press = +1 / long key press (about 2 sec) = fast forward
• Weekly program / annual program
1)
/ holiday program /
- Brief key press = -1 / long key press (about 2 sec) = fast forward
astro program
1)
Function displays of the two right keys:
Designated use
MENU Leaves Automatic mode and enters Programming mode
• The timer is used for
ESC Brief key press = one step backward
– lighting in private homes and commerce
Long key press (about 2 sec) = Back to Automatic mode
– advertising / street lighting / shop window lighting
OK Make a selection and accept
– controlling devices, motors and pumps
EDT Change programs in "Read mode"
– controlling shutters and blinds
NO Do not execute command
– Presence simulation
YES Execute command
• Mounting only on DIN rail.
DEL Delete
• Suitable for use in dry rooms only!
• Do not install in the vicinity of devices having inductive
1)
Function not available for all products.
discharges (motors, transformers, etc.)
Menu structure
45 x 35 x 60
MENU
220
See rating plate
PROGRAM
||
1 VA
NEW
ANNUAL
1)
WEEKLY
16 A / 250 V AC
HOLIDAY
10 A / 250 V AC
1)
ASTRO
2600 W
DELETE
1000 W
REVIEW
3700 W / 750 W
RANDOM
Change-over contact
-10°C ... + 55°C
Type ± 0,3 sec./day at +20°C
1 sec..
DATETIME
Yes
Yes
Select menu language
When delivered, the timer is in automatic
mode with preset time, date (CET) and
menu in English.
Danger! Risk of electric shock!
Press the Menu button to make settings.
Then select the desired setting.
Z
Z
Installation must be carried out by a
professional electrician!
5
6
S
L
CH2
M ~
Set date and time
MENU
1)
DATETIME
OK
CH1
M ~
1
2
3
N
YEAR
MONTH
DAY
DAY
3)
Switchover summertime/wintertime
MENU
OK
DAYLIGHT
AUTO
NO
CALIBR 1
CALIBR 2
CALIBR 1 (AUTO)
1 6 12 18 24
E
Manual Programming. The programmed summer/winter time will be
D
F
recalculated automatically for each year.
C
G
15:26
– The change-over always takes place on the first Sunday of the
FIX
OVR
B
selected month, if the entered date lies between 1. and 15.
1 OFF
ON 2
– The change-over always takes place on the last Sunday of the
ESC OK
A
selected month, if the entered date lies between 16. and 31.
H
1
2
I
– The time change-over (summertime/wintertime) occurs on the
J
respective Sunday at 1 o'clock UTC (Coordinated Universal
K
Time).
Keys/Interfaces
I
Right keys
CALIBR 2 (FIX)
J Infrared interface
Manual Programming.
K Left keys with manual
The change-over takes place every year always on the same date.
switch function in
Automatic mode
Create weekly program
MENU
OK
PROGRAM
NEW
WEEKLY
CYCLE
ONOFF
PULSE
2)
Available only if individual days have been selected for the ON
command.
3)
Set the weekday in accordance with the current date.
4)
Only appears when the Astro-settings are not set.
A
ON/OFF programming
OK
ON/OFF
SELECT CHL
OK
1)
DAYLIGHT
CONFIG
DAY CHL ON
OK
AUTO
TAXIMODE
OK
HOUR CHL ON
NO
LIGHT
CALIBR 1
PIN
CALIBR 2
H COUNTER
EXT I/P
ASTRO
1)
12H 24H
LANGUAGE
1. Confirm ON/OFF by pressing OK.
AM PM
ENGLISH
Free memory locations are briefly displayed.
Z
Z
24H
DEUTSCH
2. When prompted, select channels and confirm by pressing .
...
OK
Z
Z
The weekday display is flashing.
ON command:
3. Select the desired days and confirm by pressing
4. Enter hour (+/-)
OK
5. Enter minutes (+/-)
OK
MENU
OFF command:
6. When prompted, select desired days and confirm by pressing
LANGUAGE
OK
OK
OK
ENGLISH
7. Enter hour (+/-)
OK
8. Enter minutes (+/-)
OK
The program is saved.
Z
Z
B
Pulse programming
start time
duration
OK
HOUR
OK
MINUTE
OK
OK
TIMEZONE
OK
15.00 h
OK
A pulse switching command consists of:
OK
• Start time
• Duration = ON switching duration
shortest ON switching duration = 1 sec.
longest ON switching duration = 59 min., 59 sec.
Example:
ON command for channel 1 daily from Monday to Friday at 3.00 pm.
ON switching duration 15 minutes.
OK
The following settings are
PULSE
MIN CHL ON
possible:
SELECT CHL
OK
1)
DAY CHL ON
OK
AUTO
OK
HOUR CHL ON
In-factory default setting as
specified by law (USA or EU). It will
be recalculated every year.
NO
No changeover.
1. Confirm PULSE by pressing OK.
Z
Z
Free memory locations are briefly displayed.
2. When prompted, select channels and confirm by pressing .
OK
Z
Z
The weekday display is flashing.
ON command:
3. Select the desired days and confirm by pressing
4. Enter hour (+/-)
OK
5. Enter minutes (+/-)
OK
Duration:
6. Enter minutes or seconds (+/-) and confirm by pressing OK.
The program is saved.
Z
Z
Cycle programming
C
period
start time
duration
pause
9.00 h
duration of the cycle
OK
channel ON
channel OFF
OK
C
The cycle duration must not be less than the period.
A
No nesting of cycle programs is allowed.
B
A cycle switching command consists of:
• Start time
• Duration
= ON switching duration
• Period
= ON switching duration + pause
• Cycle duration
= time between channel
ON and channel OFF
• Stop time
Example:
Channel 1 is switched on every 30 minutes for 10 minutes, starting on
Monday 9.00 am.
OK
MIN CHL ON
The stop time is Friday 7.00 pm.
OK
DAY CHL OFF
2)
OK
HOUR CHL OFF
Start time Monday
09.00 am
MIN CHL OFF
OK
Duration
10 min.
Period
40 min.
Stop time Friday
07.00 pm
SAVED
OK
CYCLE
DURATION DAY
OK
SELECT CHL
1)
DURATION HOUR
OK
DAY CHL ON
DURATION MIN
OK
HOUR CHL ON
DURATION SEC
MIN CHL ON
OK
DAY CHL OFF
OK
PERIOD DAY
OK
PERIOD HOURS
OK
PERIOD MIN
OK
OK
PERIOD SEC
1. Confirm CYCLE by pressing OK.
Free memory locations are briefly displayed.
Z
Z
2. When prompted, select channels and confirm by pressing .
OK
Z
Z
The weekday display is flashing.
ON command:
3. Select the desired days and confirm by pressing
4. Enter hour (+/-)
OK
5. Enter minutes (+/-)
OK
Period:
6. Enter days, hours, minutes or seconds (+/-) and confirm by
pressing OK.
Duration:
7. Enter days, hours, minutes or seconds (+/-) and confirm by
pressing OK.
OFF command:
8. When prompted, select desired days and confirm by pressing
OK
9. Enter hour (+/-)
OK
10. Enter minutes (+/-)
OK
The program is saved.
Z
Z
OK
Create annual program
1)
OK
MIN DURATION
NO REPEAT
A
MENU
OK
SEC DURATION
Switching once.
Start and stop date (year,
PROGRAM
OK
month, day,) are set by you.
SAVED
NEW
OK
REPEAT
OK
B
ANNUAL
Recurring program.
REPEAT
B
This is done each year at
NO REPEAT
A
the same time until you
OK
remove the program in the
menu under Program
CYCLE
Delete.
ONOFF
PULSE
OK
A
NO REPEAT - ON/OFF programming
OK
ON/OFF
HOUR CHL ON
SELECT CHL
1)
OK
MIN CHL ON
OK
DAY CHL ON
DAY CHL OFF
OK
YEAR START
HOUR CHL OFF
MONTH START
OK
DAY START
OK
MIN CHL OFF
YEAR END
OK
OK
MONTH END
DAY END
OK
stop time
19.00 h
1. Confirm ON/OFF by pressing OK.
Free memory locations are briefly displayed.
Z
Z
2. When prompted, select channels and confirm by pressing .
OK
The weekday display is flashing.
Z
Z
ON command:
3. Select the desired days and confirm by pressing
4. Enter start date (year, month and day) in the relevant box (+/-)
OK
5. Enter stop date (year, month and day) in
the relevant box (+/-)
OK
6. Enter hour (+/-)
OK
7. Enter minutes (+/-)
OK
OFF command:
8. When prompted, select desired days and confirm by pressing
OK
9. Enter hour (+/-)
OK
10. Enter minutes (+/-)
OK
The program is saved.
Z
Z
For CYCLE and PULSE, you also have to set the duration and/
or period. The procedure is the same as for creating a weekly
program.
OK
OK
OK
B
REPEAT - ON/OFF programming
OK
OK
2)
OK
ON/OFF
HOUR CHL OFF
OK
OK
HOUR CHL ON
SELECT CHL
OK
1)
OK
MIN CHL OFF
MIN CHL ON
OK
DAY CHL ON
DAY CHL OFF
2)
MONTH START
OK
HOUR CHL OFF
SAVED
DAY START
OK
MIN CHL OFF
MONTH END
OK
OK
DAY END
SAVED
1. Confirm ON/OFF by pressing OK.
Z
Z
Free memory locations are briefly displayed.
2. When prompted, select channels and confirm by pressing .
OK
OK
Z
Z
The weekday display is flashing.
ON command:
3. Select the desired days and confirm by pressing
4. Enter start date (month and day) in the relevant box (+/-)
5. Enter stop date (month and day) in the relevant box (+/-)
6. Enter hour (+/-)
OK
7. Enter minutes (+/-)
OK
OFF command:
8. When prompted, select desired days and confirm by pressing
OK
9. Enter hour (+/-)
OK
10. Enter minutes (+/-)
OK
Z
Z
The program is saved.
For CYCLE and PULSE, you also have to set the duration and/
or period. The procedure is the same as for creating a weekly
program.
OK
OK
OK
2)
OK
OK
SAVED
OK
OK
OK
OK
OK
OK
OK
OK
Advertisement
Table of Contents

Related Manuals for Grasslin talento 881 pro


Summary of Contents for Grasslin talento 881 pro
- Page 1 Technical data Menu structure ON/OFF programming Example: OFF command: Dimensions Hx W x D (mm) 45 x 35 x 60 Channel 1 is switched on every 30 minutes for 10 minutes, starting on 8. When prompted, select desired days and confirm by pressing MENU Weight g (approx.) 220 Monday 9.00 am. ON/OFF MIN CHL ON Main voltage See rating plate The stop time is Friday 7.00 pm. 9. Enter hour (+/-) SELECT CHL PROGRAM DAYLIGHT CONFIG DAY CHL OFF Protection class 10. Enter minutes (+/-) ...
- Page 2 Creating an ASTRO program 11. Select CHANNEL ON: YES or NO Random switching program LIGHT – Background illumination Automatic/Manual mode Select YES to set the time period (hours and minutes) during The programmed switching command is delayed by a variable (random) • Select FIX ON to set • Manual switch: Duration ON / Duration OFF / OVR / Automatic mode MENU which the time switch should switch on again. period of 0-30 minutes.. the background lighting LIGHT • Left button = channel 1 / Right button = channel 2 permanently. FIX ON 23 h Sunrise MENU 1 6 12 18 24 Press 1x = FIX ON = Duration ON PROGRAM • Select 2 MIN if you want the...
Need help?
Do you have a question about the talento 881 pro and is the answer not in the manual?
Questions and answers